配置Bean意思就是如何在xml里面设置相应<bean>元素的属性,有以下这些属性:

最简单的配置就是给Java Bean配置id和class或者name和class。id和name的用法差不多。
下面演示一下
先导入Spring本身的四个包和一个第三方依赖包到WebContent下的WEB-INF下的lib目录,然后右键build path->add to build Path:
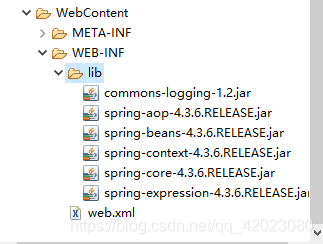
commons-logging-1.2.jar
spring-aop-4.3.6.RELEASE.jar
spring-beans-4.3.6.RELEASE.jar
spring-context-4.3.6.RELEASE.jar
spring-core-4.3.6.RELEASE.jar
spring-expression-4.3.6.RELEASE.jar
下列代码前四行固定,是官方给的;
第五行是声明自己当前所用的Spring版本;
第五行就是对Bean的配置,将com.itheima.instance.constructor.Bean1的id设置为bean1,当在程序中需要获得该类的对象时,通过向Spring容器的方法getBean()传入该类的id,该方法就会返回该类的一个对象。
<?xml version="1.0" encoding="UTF-8"?>
<beans xmlns="http://www.springframework.org/schema/beans"
    xmlns:xsi="http://www.w3.org/2001/XMLSchema-instance"
    xsi:schemaLocation="http://www.springframework.org/schema/beans
    http://www.springframework.org/schema/beans/spring-beans-4.3.xsd">
    <bean id="bean1" class="com.itheima.instance.constructor.Bean1"></bean>
</beans>
如下:
package com.itheima.instance.constructor;

import org.springframework.context.ApplicationContext;
import org.springframework.context.support.ClassPathXmlApplicationContext;

public class InstanceTest1 {

	public static void main(String[] args) {
//		定义配置文件的路径
		String xmlPath = "com/itheima/instance/constructor/beans1.xml";
//		ApplicationContext在加载配置文件时,对Bean进行实例化
		ApplicationContext applicationContext = new
				ClassPathXmlApplicationContext(xmlPath);
		Bean1 bean = (Bean1) applicationContext.getBean("bean1");
		System.out.println(bean);

	}

}
这里的Bean1随意创建就好,只为测试我这里的Bean1没有任何内容。
运行InstanceTest1结果如下:

