1.Introduction
Here you’ll learn about your Raspberry Pi, what things you need to use it, and how to set it up.
2.What you will need
Raspberry Pi 4 Model B
Raspberry Pi 4 comes with either 1GB, 2GB, or 4GB of RAM. For most educational purposes and many hobbyist projects, 1GB is enough; for use as a desktop computer, we recommend 2GB.
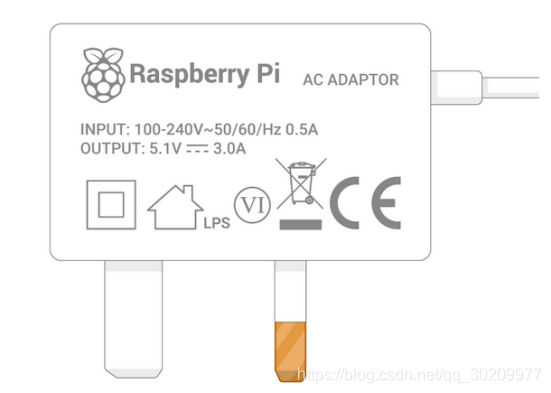
A power supply
To connect to a power socket, all Raspberry Pi models have a USB port (the same found on many mobile phones): USB-C for Raspberry Pi 4.
You need a power supply that provides:
At least 3.0 amps for Raspberry Pi 4
A microSD card
Your Raspberry Pi needs an SD card to store all its files and the Raspbian operating system.
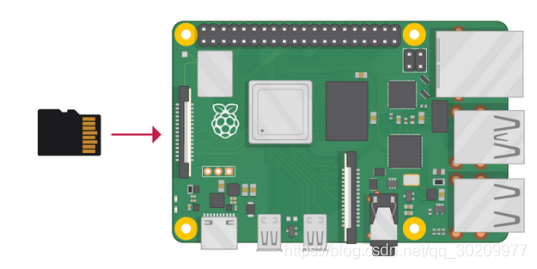
You need a microSD card with a capacity of at least 8 GB.
A keyboard and a mouse
To start using your Raspberry Pi, you need a USB keyboard and a USB mouse.
Once you’ve set your Pi up, you can use a Bluetooth keyboard and mouse, but you’ll need a USB keyboard and mouse for the first setup.
A TV or computer screen
To view the Raspbian desktop environment, you need a screen, and a cable to link the screen and the Pi. The screen can be a TV or a computer monitor. If the screen has built-in speakers, the Pi is able to use these to play sound.
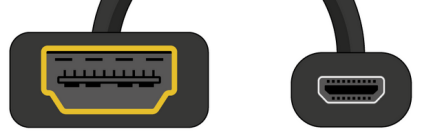
HDMI
The Raspberry Pi 4 has two HDMI output port that is compatible with the HDMI port of most modern TVs and computer monitors. Many computer monitors may also have HDMI or VGA ports.
Raspberry Pi 4 has two micro HDMI ports, allowing you to connect two separate monitors, by full-size HDMI to micro HDMI cable.
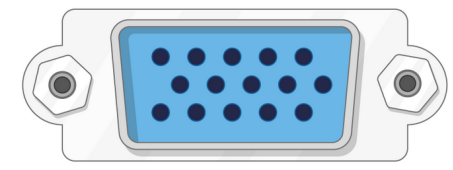
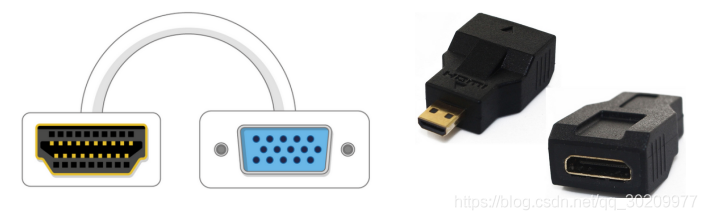
VGA
Some screens only have a VGA port.
To connect your Pi to such a screen, you can use HDMI to VGA and full-size HDMI to micro HDMI adapter.
Optional extras
A case
You may want to put your Raspberry Pi in a case. This is not essential, but it will provide protection for your Raspberry Pi. If you’d like, you can use the official case for Raspberry Pi 4
Headphones or speakers
The large Raspberry Pi models have a standard audio port like the one on your smart phone or MP3 player. If you want to, you can connect your headphones or speakers so that your Raspberry Pi can play sound. If the screen you’re connecting your Raspberry Pi to has built-in speakers, Raspberry Pi can play sound through these.
An Ethernet cable
The large Raspberry Pi models have a standard Ethernet port to connect them to the internet.
3. Set up your SD card
If you have an SD card that doesn’t have the Raspbian operating system on it yet, or if you want to reset your Raspberry Pi, you can easily install Raspbian yourself. To do so, you need a computer that has an SD card port — most laptop and desktop computers have one, or a SD card reader.
Download the image
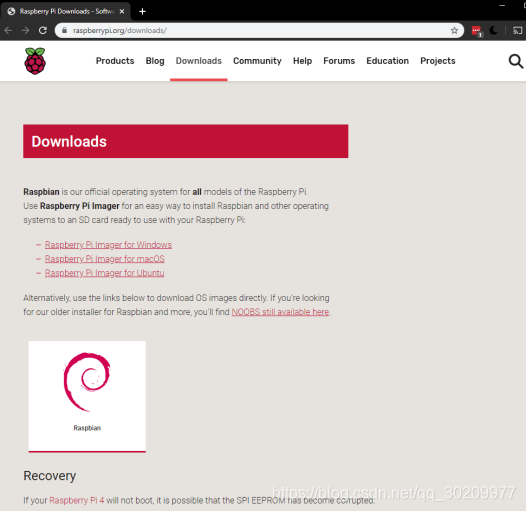
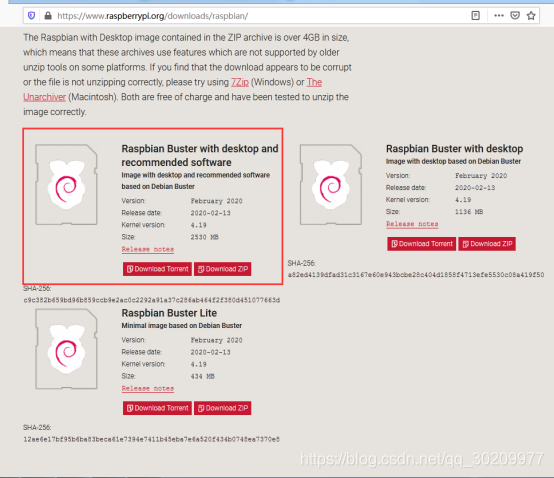
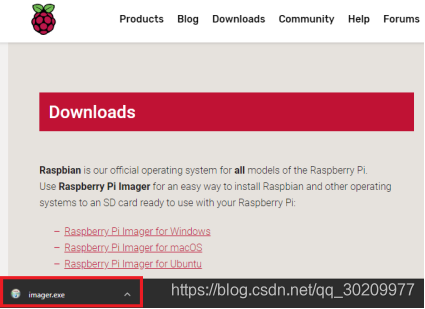
Official images for recommended operating systems are available to download from the Raspberry Pi website downloads page
Click on the link for the Raspberry Pi Imager that matches your operating system(Here we select raspdebian).
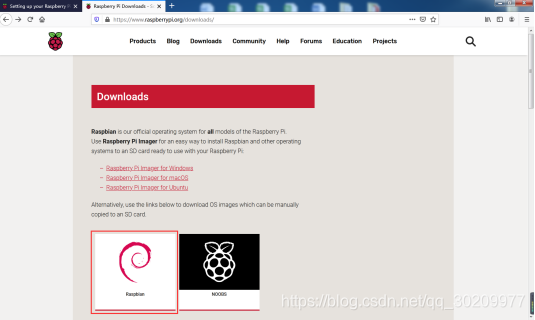
The Raspbian operating system via the Raspberry Pi Imager
Note: more advanced users looking to install a particular operating system should use this guide to installing operating system images
.
Download and launch the Raspberry Pi Imager
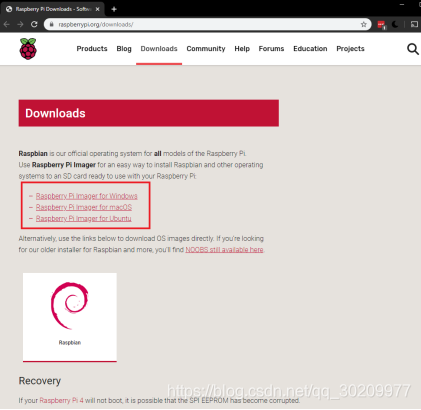
Use Raspberry Pi Imager for an easy way to install Raspbian and other operating systems to an SD card ready to use with your Raspberry Pi.
Visit the Raspberry Pi downloads page
.
Click on the link for the Raspberry Pi Imager that matches your operating system.
When the download finishes, click it to launch the installer.
Using the Raspberry Pi Imager
Anything that’s stored on the SD card will be overwritten during formatting. So if the SD card on which you want to install Raspbian currently has any files on it, e.g. from an older version of Raspbian, you may wish to back these files up first to not lose them permanently.
When you launch the installer, your operating system may try to block you from running it. For example on Windows I get the following:
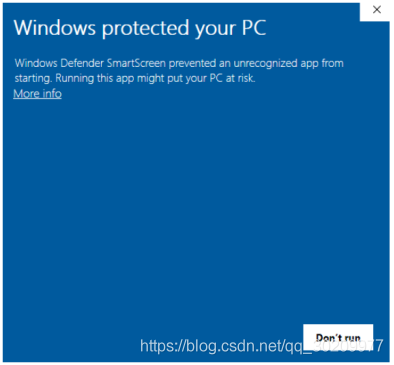
.If you get this, click on More info and Run anyway then .
.Follow the instructions to install and run the Raspberry Pi Imager.
.Insert your SD card into the computer or laptop’s SD card slot.
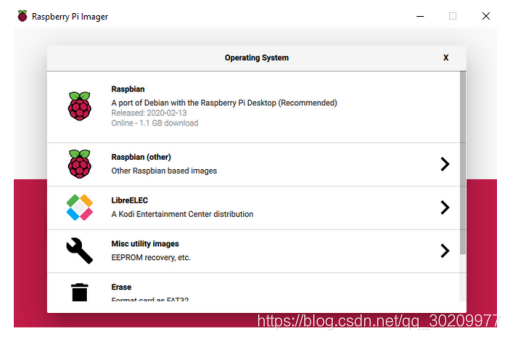
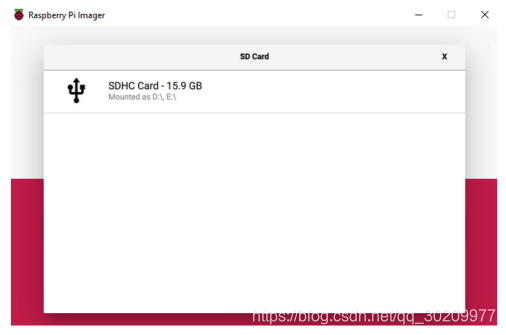
.In the Raspberry Pi Imager, select the OS that you want to install and the SD card you would like to install it on.
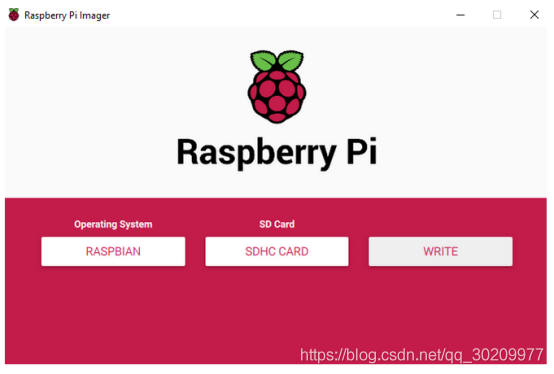
.Then simply click the WRITE button.
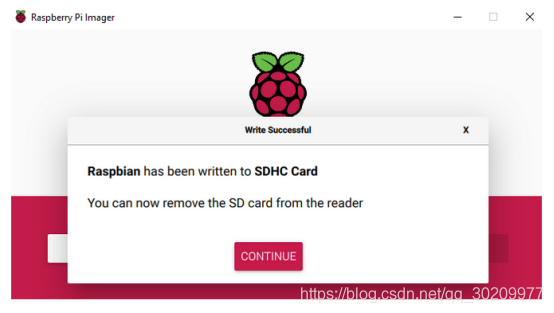
.Wait for the Raspberry Pi Imager to finsh writing.
.Once you get the following message, you can eject your SD card.
4. Connect your Raspberry Pi
Now get everything connected to your Raspberry Pi. It’s important to do this in the right order, so that all your components are safe.
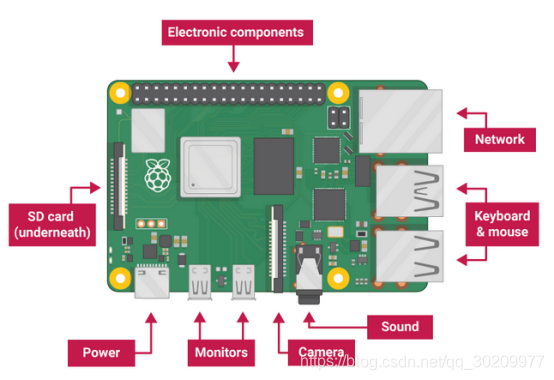
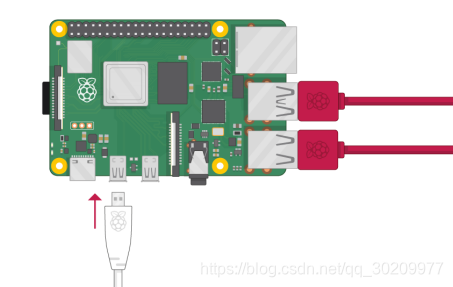
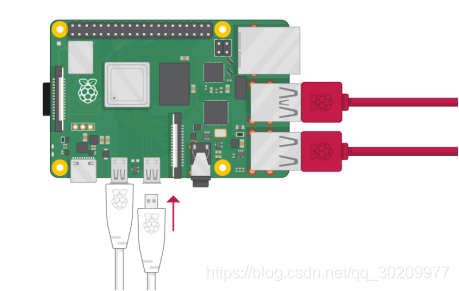
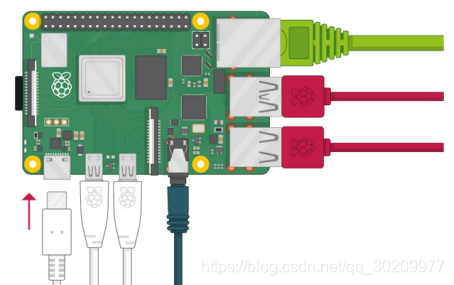
Insert the SD card you’ve set up with Raspbian (via NOOBS) into the microSD card slot on the underside of your Raspberry Pi.
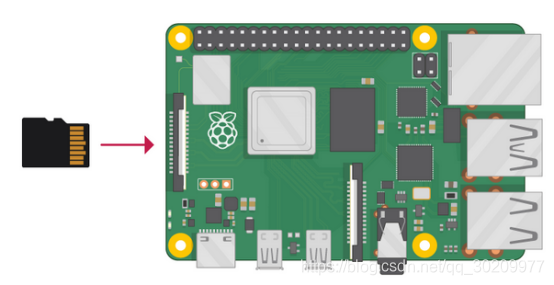
Note: Many microSD cards come inside a larger adapter — you can slide the smaller card out using the lip at the bottom.

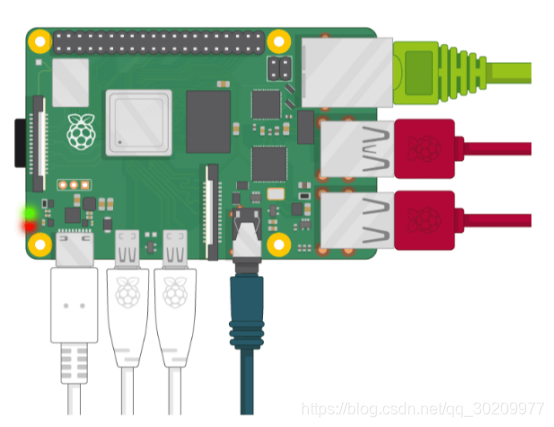
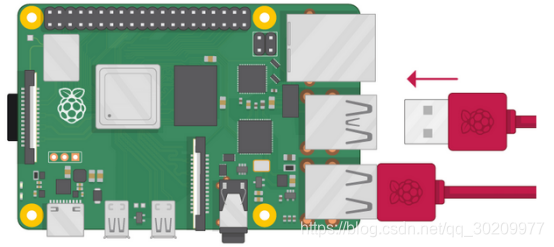
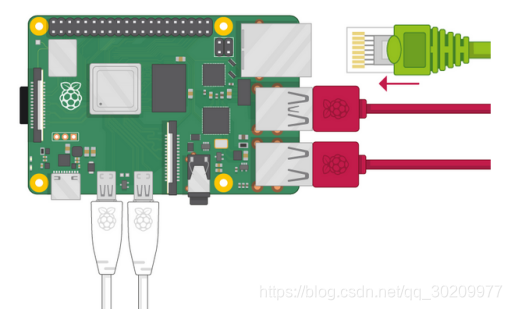
Find the USB connector end of your mouse’s cable, and connect the mouse to a USB port on Raspberry Pi (it doesn’t matter which port you use).
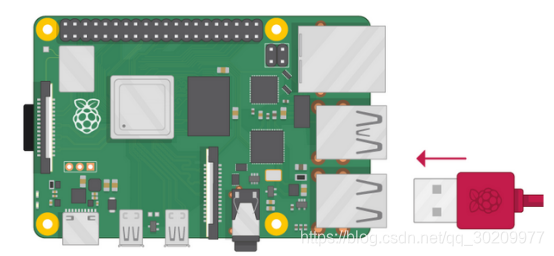
Connect the keyboard in the same way.
Make sure your screen is plugged into a wall socket and switched on.
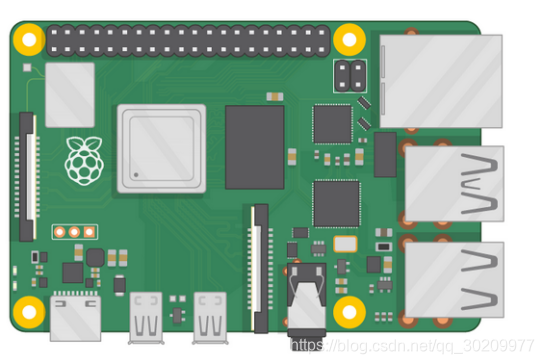
Look at the HDMI port(s) on the Raspberry Pi — notice that they have a flat side on top.
Use a cable to connect the screen to Raspberry Pi’s HDMI port — use an adapter if necessary.
Raspberry Pi 4
Connect your screen to the first of Raspberry Pi 4’s HDMI ports, labelled HDMI0.
You can connect an optional second screen in the same way.
Note: nothing will display on the screen, because your Raspberry Pi is not running yet.
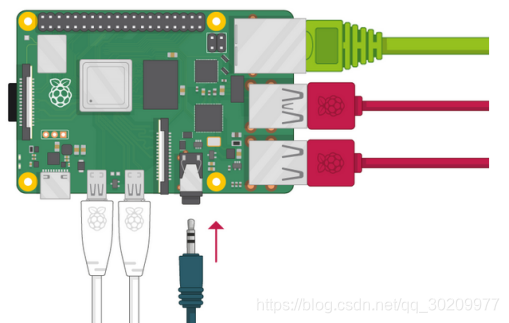
If you want to connect your Raspberry Pi to the internet via Ethernet, use an Ethernet cable to connect the Ethernet port on Raspberry Pi to an Ethernet socket on the wall or on your internet router. You don’t need to do this if you want to use wireless connectivity, or if you don’t want to connect to the internet.
If the screen you are using has speakers, sound will play through those. Alternatively, connect headphones or speakers to the audio port if you prefer.
5.Start up your Raspberry Pi
Your Raspberry Pi doesn’t have a power switch: as soon as you connect it to a power outlet, it will turn on.
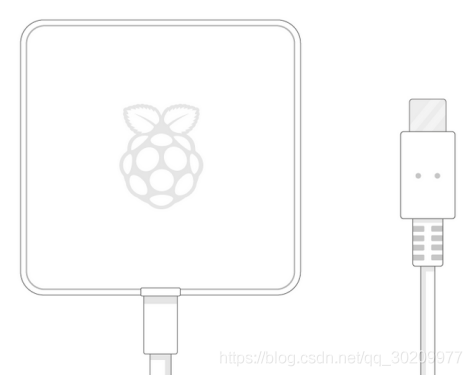
Plug the USB power supply into a socket and connect it to your Raspberry Pi’s power port.
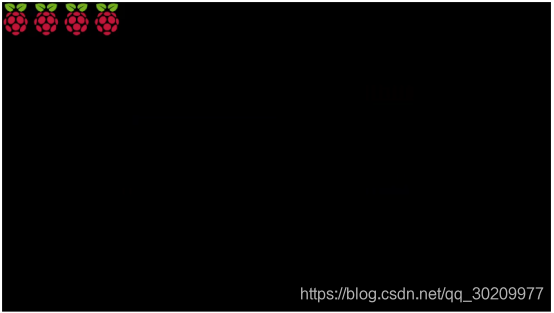
You should see a red LED light up on the Raspberry Pi, which indicates that Raspberry Pi is connected to power. As it starts up (this is also called booting), you will see raspberries appear in the top left-hand corner of your screen.
After a few seconds the Raspbian Desktop will appear.
6.Finish the setup
When you start your Raspberry Pi for the first time, the Welcome to Raspberry Pi application will pop up and guide you through the initial setup.
Click Next to start the setup.
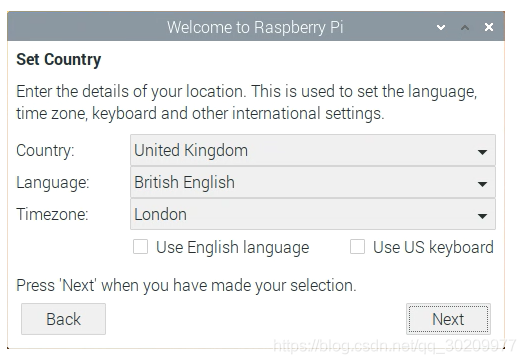
Set your Country, Language, and Timezone, then click Next again.
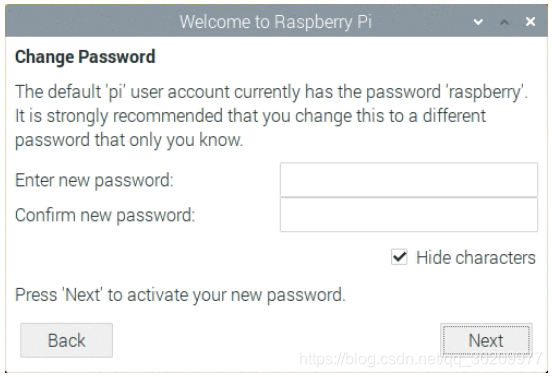
Enter a new password for your Raspberry Pi and click Next.

Connect to your WiFi network by selecting its name, entering the password, and clicking Next.
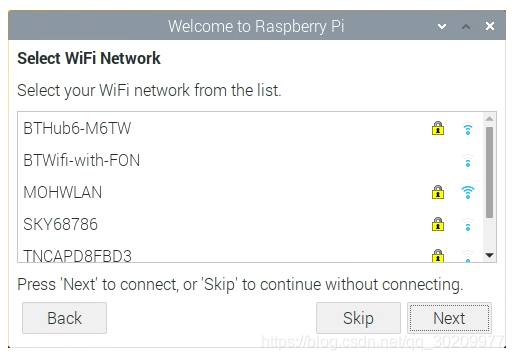
Note: if your Raspberry Pi model doesn’t have wireless connectivity, you won’t see this screen.
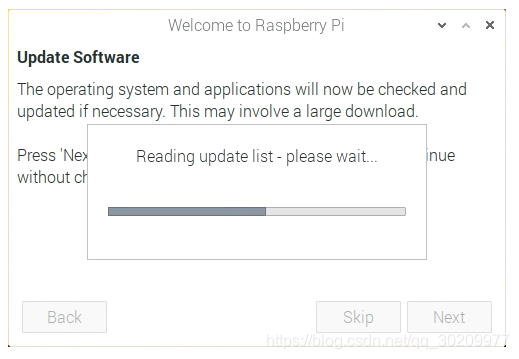
Click Next let the wizard check for updates to Raspbian and install them (this might take a little while).
Click Done or Reboot to finish the setup.
Note: you will only need to reboot if that’s necessary to complete an update.

7.Where to find help
https://projects.raspberrypi.org/en/projects/raspberry-pi-setting-up/6
End !
有空再翻译成中文哈^^!
