SpringSecurity官网介绍:
1 Spring Security是一个功能强大且高度可定制的身份验证和访问控制框架。它是用于保护基于Spring的应用程序的实际标准。
2
3 Spring Security是一个框架,致力于为Java应用程序提供身份验证和授权。与所有Spring项目一样,Spring Security的真正强大之处在于可以轻松扩展以满足自定义要求
看了上面的介绍,可以知道SpringSecurity的主要功能就是:身份验证 和 权限控制
下面带大家进一步了解SpringSecurity的使用以及实现的过程
1、构建初始SpringBoot项目
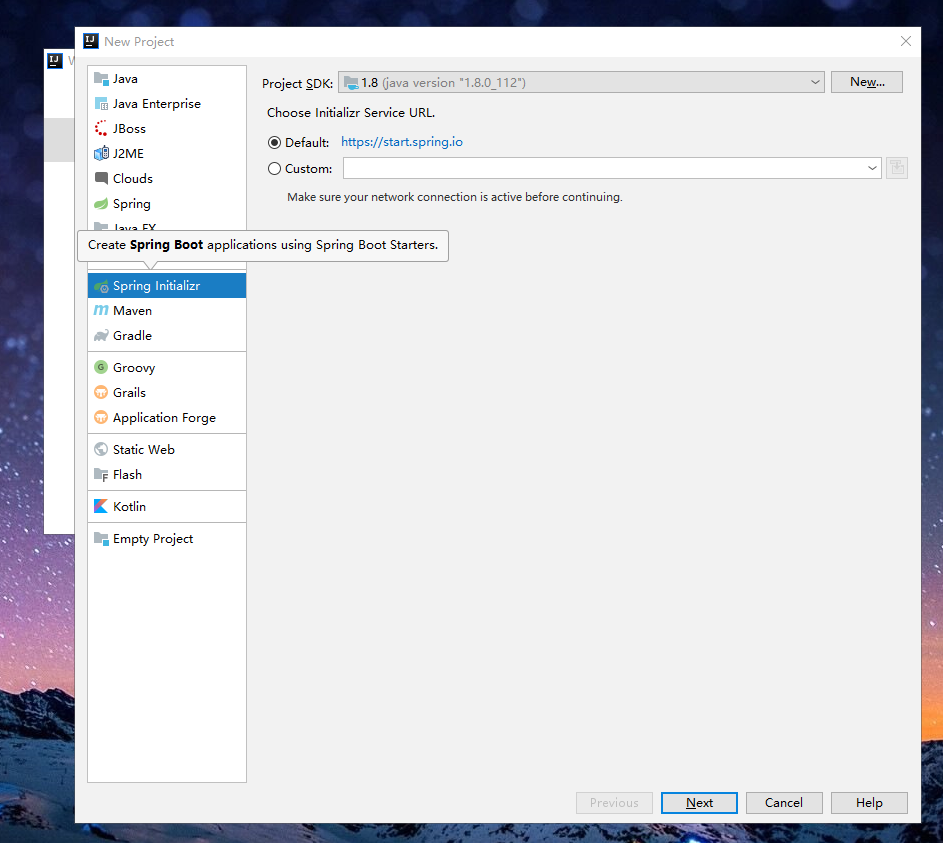
1.1创建空项目
1.1.1选择SpringBoot项目
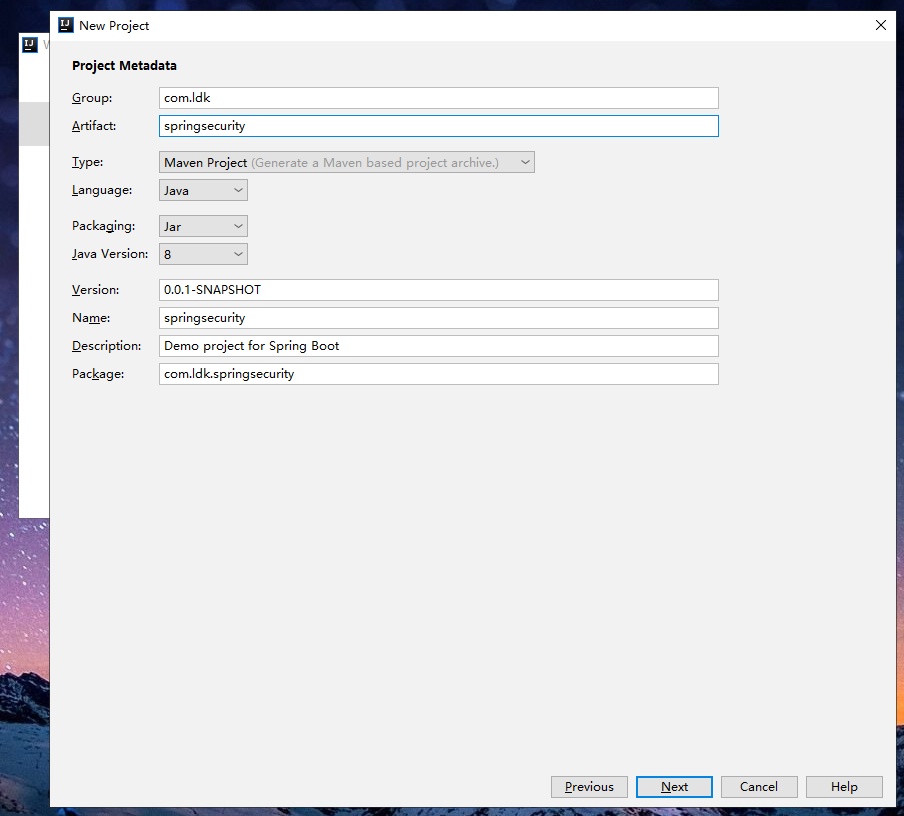
1.1.2项目命名
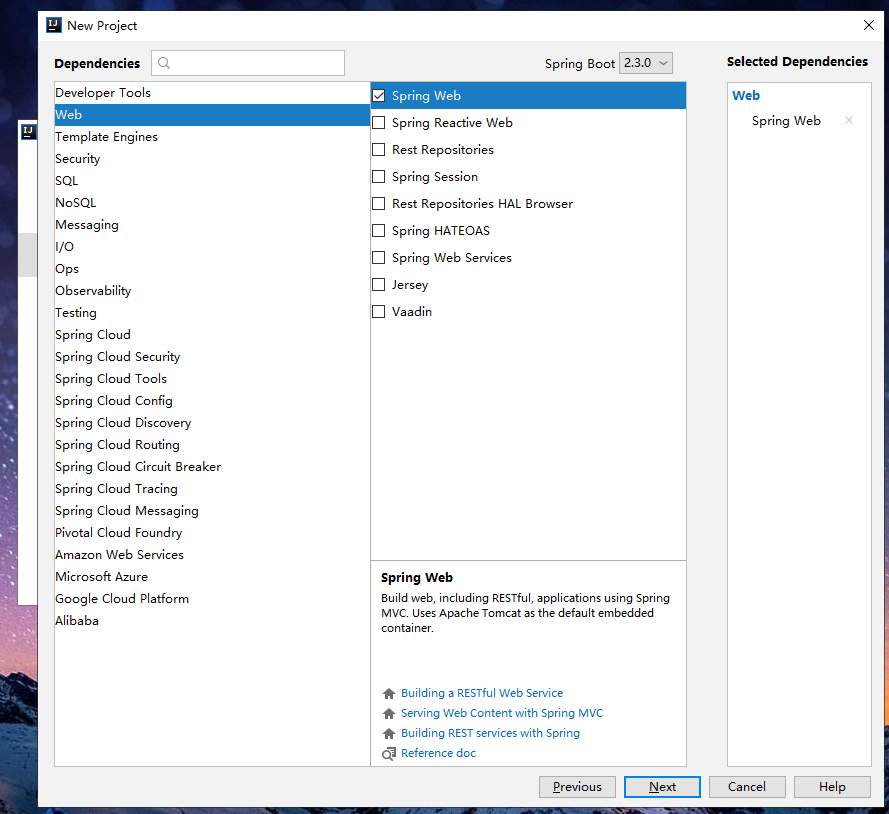
自动配置我们只选择Spring Web,其余的依赖自己来,为了方便控制
导入依赖
 1         <!--thymeleaf整合security-->
 2         <dependency>
 3             <groupId>org.thymeleaf.extras</groupId>
 4             <artifactId>thymeleaf-extras-springsecurity4</artifactId>
 5             <version>3.0.4.RELEASE</version>
 6         </dependency>
 7         <!--security -->
 8         <dependency>
 9             <groupId>org.springframework.boot</groupId>
10             <artifactId>spring-boot-starter-security</artifactId>
11         </dependency>
12         <!--thymeleaf-->
13         <dependency>
14             <groupId>org.thymeleaf</groupId>
15             <artifactId>thymeleaf-spring5</artifactId>
16         </dependency>
17         <dependency>
18             <groupId>org.thymeleaf.extras</groupId>
19             <artifactId>thymeleaf-extras-java8time</artifactId>
20         </dependency>
21         <!--以下为系统系统自动导入,无需再次导入-->
22         <dependency>
23             <groupId>org.springframework.boot</groupId>
24             <artifactId>spring-boot-starter-web</artifactId>
25         </dependency>
好啦,现在总算把一个空项目新建完成了,接下来导入静态资源,这里我们提供一个网盘链接:
https://pan.baidu.com/s/1GlTmHAf2mmOuZc53Uf6jTQ
提取码:ypxc
大家可以自取,都是一些简单的页面和项目所需的css,js
新建一个Controller自测一下:
 1 package com.ldk.controller;
 2
 3 import org.springframework.stereotype.Controller;
 4 import org.springframework.web.bind.annotation.RequestMapping;
 5 import org.springframework.web.bind.annotation.ResponseBody;
 6
 7 /**
 8  * @Author: ldk
 9  * @Date: 2020/5/19 21:44
10  * @Describe:
11  */
12 @Controller
13 public class testController {
14
15     @RequestMapping("/hello")
16     @ResponseBody
17     public String hello(){
18         return "hello SpringSecurity";
19     }
20 }
项目总体结构如图:

启动项目,访问:http://localhost:8080/hello,又看到熟悉的:
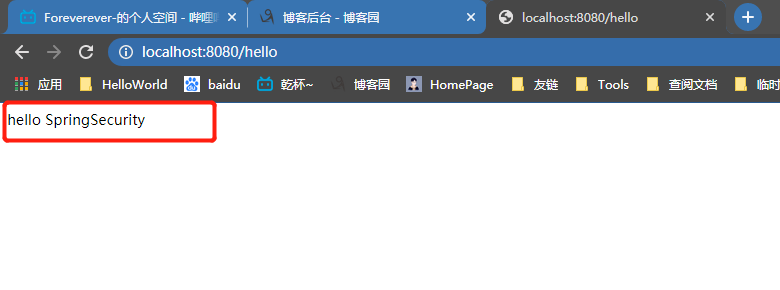
这证明这个简单的Web项目可以跑通。
3、新建路由Controller
 1 package com.ldk.Controller;
 2
 3 import org.springframework.stereotype.Controller;
 4 import org.springframework.web.bind.annotation.PathVariable;
 5 import org.springframework.web.bind.annotation.RequestMapping;
 6
 7 /**
 8  * @Author: ldk
 9  * @Date: 2020/5/19 12:55
10  * @Describe:
11  */
12 @Controller
13 public class RouterController {
14
15     @RequestMapping({"/","/index"})
16     public String index21(){
17         return "index";
18     }
19     @RequestMapping("/toLogin")
20     public String ind1ex(){
21         return "views/login";
22     }
23
24     @RequestMapping("/level1/{id}")
25     public String ind1ex1(@PathVariable("id")int id){
26         return "views/level1/"+id;
27     }
28     @RequestMapping("/level2/{id}")
29     public String ind1ex2(@PathVariable("id")int id){
30         return "views/level2/"+id;
31     }
32     @RequestMapping("/level3/{id}")
33     public String ind1ex3(@PathVariable("id")int id){
34         return "views/level3/"+id;
35     }
36
37 }
4、上主菜(配置SecurityConfig)
我们都知道,无论SpringBoot或者SpringCloud与其他框架集成,都必须先导包,在创建Config类进行配置,然后加一个类似于@Enablexxx的注解,即可使用,SpringBoot集成SpringSecurity也不例外,这一步我们先创建一个空的SecurityConfig类 并集成 WebSecurityConfigurerAdapter 类,并重写他里面的两个方法,这里我们解释一下:WebSecurityConfigurerAdapter 类是个适配器, 在配置的时候,需要我们自己写个配置类去继承他,然后编写自己所特殊需要的配置,我们重写一下它的 认证 和 授权 方法,来实现自己的定制化个性服务。
在SpringSecurityApplication同级目录下新建config文件夹,并新建SecurityConfig配置类:
 1 package com.ldk.config;
 2
 3 import org.springframework.security.config.annotation.authentication.builders.AuthenticationManagerBuilder;
 4 import org.springframework.security.config.annotation.web.builders.HttpSecurity;
 5 import org.springframework.security.config.annotation.web.configuration.EnableWebSecurity;
 6 import org.springframework.security.config.annotation.web.configuration.WebSecurityConfigurerAdapter;
 7
 8 /**
 9  * @Author: ldk
10  * @Date: 2020/5/19 13:38
11  * @Describe:
12  */
13
14 @EnableWebSecurity
15 public class SecurityConfig extends WebSecurityConfigurerAdapter {
16
17     //授权
18     @Override
19     protected void configure(HttpSecurity http) throws Exception {
20     }
21
22     //认证
23     @Override
24     protected void configure(AuthenticationManagerBuilder auth) throws Exception {
25     }
26
27 }
。现在访问以下http://localhost:8080/ 顺利跳转首页,这个时候,首页的level1,level2,level3页面均可以有权限访问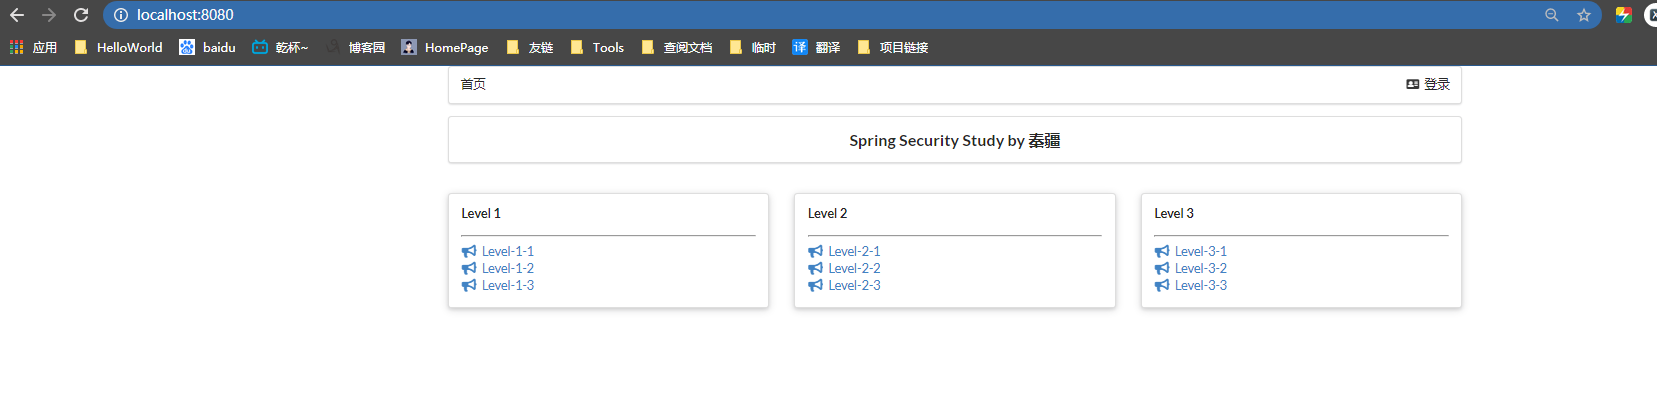
下面我们通过操作SecurityConfig配置类,来做一些定制化需求实现
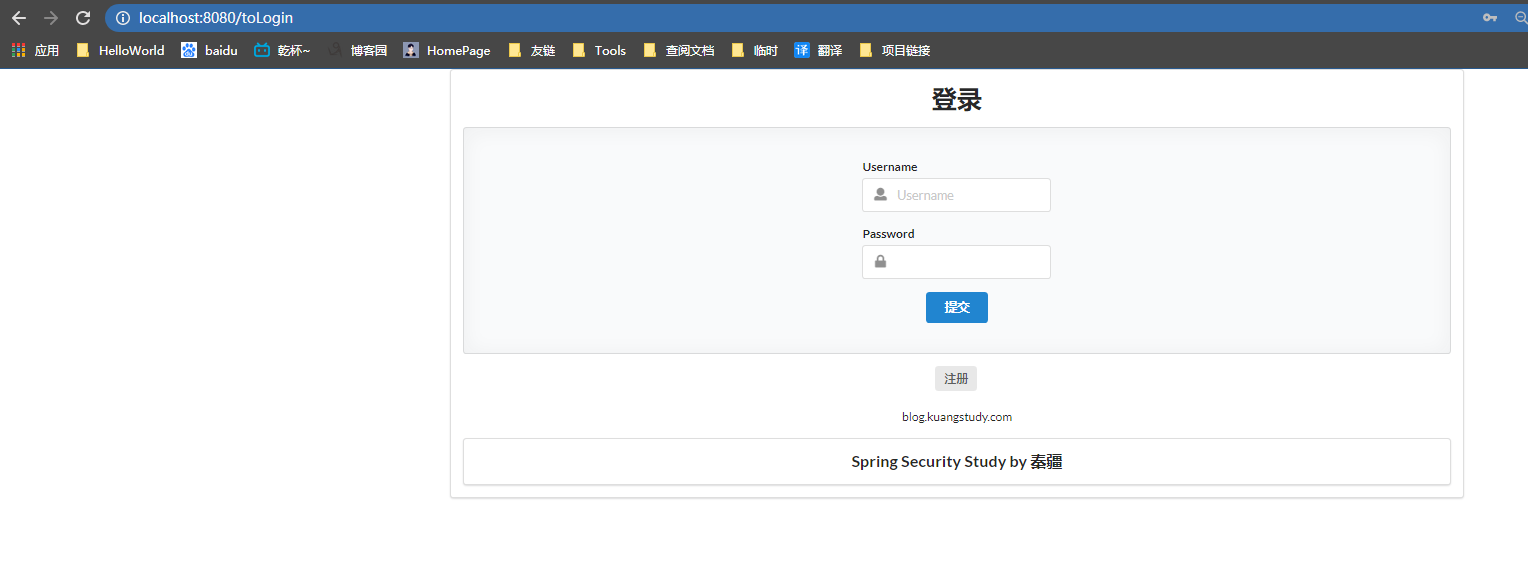
1、首页我都允许访问,但是level1、level2、level3页面均需要获取对应的vip1,vip2,vip3权限后才可以访问,没有权限跳转定制的登录页面
在授权方法加入授权规则:
    //授权
    @Override
    protected void configure(HttpSecurity http) throws Exception {
        //首页所有人可以访问,但是里面的功能页,只有对应有权限的人才能访问
        //链式编程
        //请求授权的规则
        http.authorizeRequests().antMatchers("/").permitAll().
                antMatchers("/level1/**").hasRole("vip1").
                antMatchers("/level2/**").hasRole("vip2").
                antMatchers("/level3/**").hasRole("vip3");
        //没有权限 跳转登录页,需要开启登录页面
        //定制登录页
        http.formLogin().loginPage("/toLogin");
        //这里我们也可以只写http.formLogin();这样他就会跳转到/login,这个页面时SprignSecurity为我们准备好的登录页面
    }
现在重启项目,发现只有首页能访问,其他页面都会自动跳转到我们自己编写的登录页面:
我们只是做了一些简单的配置工作,SpringSecurity在底层已经为我们做好了一切,框架就是这样,拿来就用,如果自己想明白原理,可以点进去源码研究一下。
接下来我们要实现指定用户能访问某些页面,就要修改身份认证的配置方法,这里的用户名密码需要从数据库查询,我们就用几组死数据代表了:
    //认证
    //密码编码 passwordEncoder
    //在SpringSecurity 5.x中  新增了很多加密方法
    @Override
    protected void configure(AuthenticationManagerBuilder auth) throws Exception {
        //正常这些数据应该从数据库读取
        auth.inMemoryAuthentication().passwordEncoder(new BCryptPasswordEncoder())
                .withUser("kuangshen").password(new BCryptPasswordEncoder().encode("123456")).roles("vip2","vip3")
                .and().withUser("root").password(new BCryptPasswordEncoder().encode("123456")).roles("vip1","vip2","vip3")
                .and()
                .withUser("guest").password(new BCryptPasswordEncoder().encode("123456")).roles("vip1");
    }
需要注意的是我们在密码外面包裹了一层 BCryptPasswordEncoder.encod方法,这是SprignSecurity的一个密码校验,现在重启项目,在登录页面输入我们设定的账号密码,神奇的发现,页面确实进行了授权。
注销及权限控制:
想实现注销按钮,首先在首页添加一个注销按钮:
修改授权配置类,开启注销功能:
    //授权
    @Override
    protected void configure(HttpSecurity http) throws Exception {
        //首页所有人可以访问,但是里面的功能页,只有对应有权限的人才能访问
        //链式编程
        //请求授权的规则
        http.authorizeRequests().antMatchers("/").permitAll().
                antMatchers("/level1/**").hasRole("vip1").
                antMatchers("/level2/**").hasRole("vip2").
                antMatchers("/level3/**").hasRole("vip3");
        //没有权限 跳转登录页,需要开启登录页面
        //定制登录页
//        http.formLogin().loginPage("/toLogin");
        http.formLogin();
        //这里我们也可以只写http.formLogin();这样他就会跳转到/login,这个页面时SprignSecurity为我们准备好的登录页面
        //开启注销功能
        //防止网站攻击   csrf 防止
        // 跨站攻击(代码是配置死的)
        http.csrf().disable();
        http.logout().logoutSuccessUrl("/");
    }
下面进行权限的控制,我们想让用户登录成功之后只可以看到自己可以看到的页面,自己没有权限的页面看不到,这个需要在前端index页面做手脚即可,我们一开始已经集成了 thymeleaf整合security 的包,直接判断用户是否登陆,就可以校验出用户是否有权限。
<!DOCTYPE html>
<html lang="en" xmlns:th="http://www.thymeleaf.org"
      xmlns:sec="http://www.thymeleaf.org/thymeleaf-extras-springsecurity4">
<head>
    <meta charset="UTF-8">
    <meta name="viewport" content="width=device-width, initial-scale=1, maximum-scale=1">
    <title>首页</title>
    <!--semantic-ui-->
    <link href="https://cdn.bootcss.com/semantic-ui/2.4.1/semantic.min.css" rel="stylesheet">
    <link th:href="@{/qinjiang/css/qinstyle.css}" rel="stylesheet">
</head>
<body>

<!--主容器-->
<div class="ui container">

    <div class="ui segment" id="index-header-nav" th:fragment="nav-menu">
        <div class="ui secondary menu">
            <a class="item" th:href="@{/index}">首页</a>

            <!--登录注销-->
            <div class="right menu">


                <!--未登录 显示登录按钮-->
                <div sec:authorize="!isAuthenticated()">
                    <a class="item" th:href="@{/toLogin}">
                        <i class="address card icon"></i> 登录
                    </a>
                </div>


                <!--已登录 显示注销按钮 和用户名-->
                <div sec:authorize="isAuthenticated()">
                    <a class="item">
                        用户名:<span sec:authentication="name"></span>
                    </a>
                </div>
                <div sec:authorize="isAuthenticated()">
                    <a class="item" th:href="@{/logout}">
                        <i class="sign-out card icon"></i> 注销
                    </a>
                </div>

                <!--已登录
                <a th:href="@{/usr/toUserCenter}">
                    <i class="address card icon"></i> admin
                </a>
                -->
            </div>
        </div>
    </div>

    <div class="ui segment" style="text-align: center">
        <h3>Spring Security Study by DK</h3>
    </div>

    <div>
        <br>
        <div class="ui three column stackable grid">
            <!--菜单根据用户角色进行显示-->
            <div class="column" sec:authorize="hasRole('vip1')">
                <div class="ui raised segment">
                    <div class="ui">
                        <div class="content">
                            <h5 class="content">Level 1</h5>
                            <hr>
                            <div><a th:href="@{/level1/1}"><i class="bullhorn icon"></i> Level-1-1</a></div>
                            <div><a th:href="@{/level1/2}"><i class="bullhorn icon"></i> Level-1-2</a></div>
                            <div><a th:href="@{/level1/3}"><i class="bullhorn icon"></i> Level-1-3</a></div>
                        </div>
                    </div>
                </div>
            </div>
        </div>
        <div class="column" sec:authorize="hasRole('vip2')">
            <div class="ui raised segment">
                <div class="ui">
                    <div class="content">
                        <h5 class="content">Level 2</h5>
                        <hr>
                        <div><a th:href="@{/level2/1}"><i class="bullhorn icon"></i> Level-2-1</a></div>
                        <div><a th:href="@{/level2/2}"><i class="bullhorn icon"></i> Level-2-2</a></div>
                        <div><a th:href="@{/level2/3}"><i class="bullhorn icon"></i> Level-2-3</a></div>
                    </div>
                </div>
            </div>
        </div>
        <div class="column" sec:authorize="hasRole('vip3')">
            <div class="ui raised segment">
                <div class="ui">
                    <div class="content">
                        <h5 class="content">Level 3</h5>
                        <hr>
                        <div><a th:href="@{/level3/1}"><i class="bullhorn icon"></i> Level-3-1</a></div>
                        <div><a th:href="@{/level3/2}"><i class="bullhorn icon"></i> Level-3-2</a></div>
                        <div><a th:href="@{/level3/3}"><i class="bullhorn icon"></i> Level-3-3</a></div>
                    </div>
                </div>
            </div>
        </div>

    </div>
</div>

</div>


<script th:src="@{/qinjiang/js/jquery-3.1.1.min.js}"></script>
<script th:src="@{/qinjiang/js/semantic.min.js}"></script>

</body>
</html>
主要是添加了 thymeleaf的空间域名,写代码的时候 会有提示,并且保证语法不报错
现在访问页面,发现首页的菜单已经很好的被控制住了,只能显示经过我们授权后的菜单链接。
以上代码均来自于狂神,bilibili链接:https://space.bilibili.com/95256449,大家可以去网站找到对应的教学视频。再一次感谢狂神。