当我们在使用依赖注入的时候,通常有三种方式:
1.通过构造器来注入;
2.通过setter方法来注入;
3.通过filed变量来注入;
Constructor
@Controller
@RequestMapping("/app")
public class APPController {

    private AppService appService;

    public APPController(AppService appService) {
        this.appService = appService;
    }

    @RequestMapping("/out")
    public void out(){
        appService.printf();
    }
}
构造器的隐式注入,在构造器上面无需使用@Autowire注解
Setter
@Controller
@RequestMapping("/app")
public class APPController {

    private AppService appService;

    @Autowired
    public void setAppService(AppService appService) {
        this.appService = appService;
    }

    @RequestMapping("/out")
    public void out(){
        appService.printf();
    }
}
这里在构造器上面必须使用 @Autowired注解
Field
@Controller
@RequestMapping("/app")
public class APPController {

	@Autowired
    private AppService appService;

    @RequestMapping("/out")
    public void out(){
        appService.printf();
    }
}
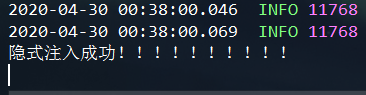
测试注入
总结
区别:
1.基于constructor的注入,会固定依赖注入的顺序;该方式不允许我们创建bean对象之间的循环依赖关系,这种限制其实是一种利用构造器来注入的益处 - 当你甚至没有注意到使用setter注入的时候,Spring能解决循环依赖的问题;
2.基于setter的注入,只有当对象是需要被注入的时候它才会帮助我们注入依赖,而不是在初始化的时候就注入;另一方面如果你使用基于constructor注入,CGLIB不能创建一个代理,迫使你使用基于接口的代理或虚拟的无参数构造函数。
3.相信很多同学都选择使用直接在成员变量上写上注解来注入,正如我们所见,这种方式看起来非常好,精短,可读性高,不需要多余的代码,也方便维护;
缺点:
1.当我们利用constructor来注入的时候,比较明显的一个缺点就是:假如我们需要注入的对象特别多的时候,我们的构造器就会显得非常的冗余、不好看,非常影响美观和可读性,维护起来也较为困难;
2.当我们选择setter方法来注入的时候,我们不能将对象设为final的;
3.当我们在field变量上来实现注入的时候
a.这样不符合JavaBean的规范,而且很有可能引起空指针;

b.同时也不能将对象标为final的;
c.类与DI容器高度耦合,我们不能在外部使用它;
d.类不通过反射不能被实例化(例如单元测试中),你需要用DI容器去实例化它,这更像集成测试;
注解@Configuration
在 Configuration注解的类,里面可以使用接口名直接注入,不需要@Autowire注解
@Configuration
public class AppConfig {

    @Bean
    public Object setService(AppService appService){
        appService.configuration();
        return new Object();
    }
}
AppService是接口类,启动项目,容器加载Bean,看是否打印调用:
