SpringBoot源码分析 + 自定义Starter
注:这里我先讲源码~其实讲完源码,你就懂了为什么可以自定义Starter
源码分析
@SpringBootApplication注解------->组合注解
由以下注解组成:
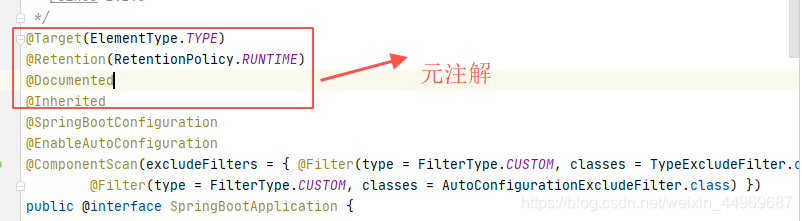
其中@Targer 、@Retention、@Document、@Inherited四个注解为元注解
@Inherited:父类有标注这个注解,那么子类不需要明确写出来就相当于标注了这个注解。相当于继承。
@SpringBootConfiguration:也是一个组合注解。从源码里可以看到他是由三个元注解+@Configuration组成的一个组合注解。所以其实 它和@Configuration是一个意思,是springboot自己的注解配置
@ComponentScan:扫描~没有指定的情况下,从当前类所在包的开始扫描,也就是扫描当前包及子孙包。如果包太多,可以通过下面两个方法来指定包括或者忽略哪些包,过滤器的作用。
//包括
Filter[] includeFilters() default {};
//忽略
Filter[] excludeFilters() default {};
重点:ComponentScan它不做配置扫描的工作,具体的配置扫描由@EnableAutoConfiguration来做。
@EnableAutoConfiguration:自动加载配置,不论是springboot本身的还是我们自己定义的,都自动加载好
@Target(ElementType.TYPE)
@Retention(RetentionPolicy.RUNTIME)
@Documented
@Inherited
@AutoConfigurationPackage  //它是用来扫描自定义的
@Import(AutoConfigurationImportSelector.class)
public @interface EnableAutoConfiguration {
其实我们自己配置的类,也需要将其扔给spring容器管理,具体怎么做呢,就是我们EnableAutoConfiguration负责找到这些类,将其再扔给spring容器就可以了,spring使用反射,生成实例管理。
什么是自动配置呢?举个例子,比如以前我们需要自己在spring框架中配置好redis。但是现在我们在springboot是不是已经可以使用封装好redisTemplate,配置文件中直接配置端口ip等信息就可以了。
我们来看在EnableAutoConfiguration类中Import的AutoConfigurationImportSelector的getCandidateConfigurations()方法,从它的注解中,我们可以看到,这个方法的含义是,返回所有能想到的配置类的名称(class names)
/**
	 * Return the auto-configuration class names that should be considered. By default
	 * this method will load candidates using {@link SpringFactoriesLoader} with
	 * {@link #getSpringFactoriesLoaderFactoryClass()}.
	 * @param metadata the source metadata
	 * @param attributes the {@link #getAttributes(AnnotationMetadata) annotation
	 * attributes}
	 * @return a list of candidate configurations
	 */
	protected List<String> getCandidateConfigurations(AnnotationMetadata metadata, AnnotationAttributes attributes) {
		List<String> configurations = SpringFactoriesLoader.loadFactoryNames(getSpringFactoriesLoaderFactoryClass(),
				getBeanClassLoader());
		Assert.notEmpty(configurations, "No auto configuration classes found in META-INF/spring.factories. If you "
				+ "are using a custom packaging, make sure that file is correct.");
		return configurations;
	}
其中我们可以看到一行代码SpringFactoriesLoader.loadFactoryNames(getSpringFactoriesLoaderFactoryClass(),getBeanClassLoader());
我们跟着源码接着向下查,查找过程如下图:

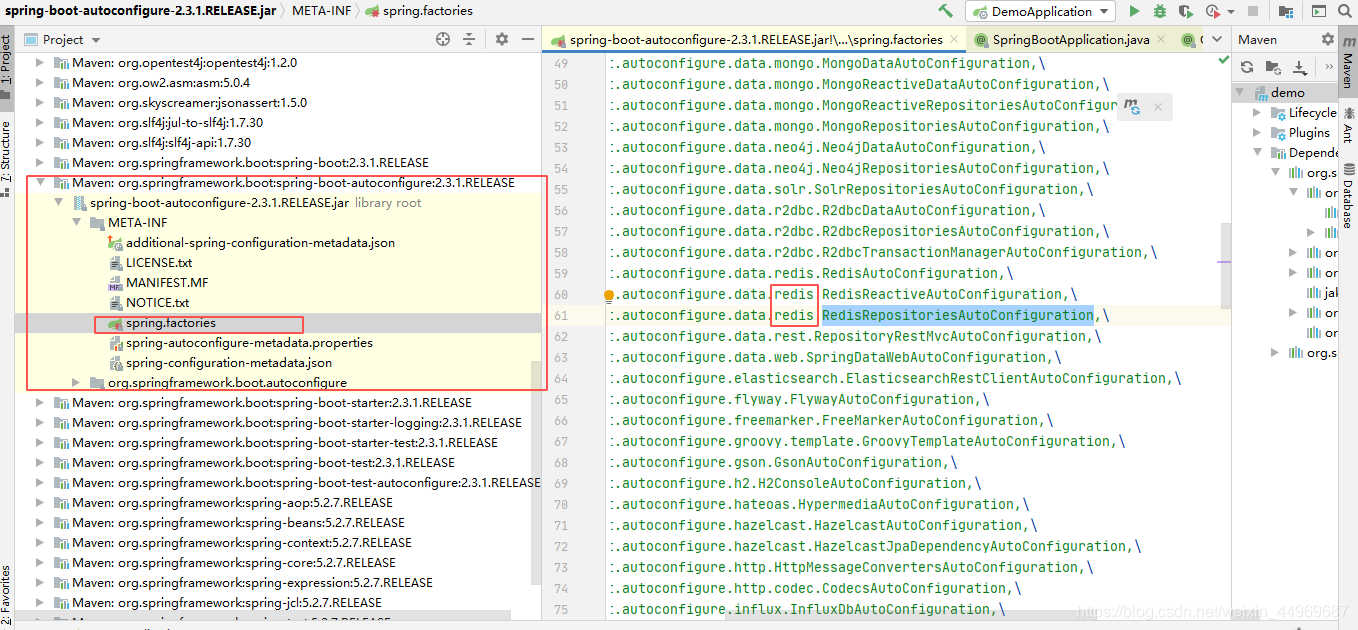
在这里,我们找到了使用classLoader加载的这个常量,这个常量我们来看一下是什么路径
public static final String FACTORIES_RESOURCE_LOCATION = "META-INF/spring.factories";
到这里,我们我找到了一个路径,那么这个配置文件在哪里呢,我们去看我们所导入的依赖
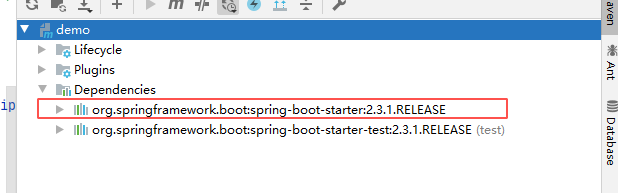
这两个依赖,我们很自然的就可以联想到,肯定与是第一个依赖相关。第二个是test。
现在,我们就找到这个配置文件,如下图:在图中,我们可以看到我们常用redis,mongo的自动配置
我们已经将自动配置的原理大概跟踪结束了,下面我们来看配置文件yml/properties文件的读取加载
首先我们从run方法开始跟踪,一堆run方法,继续向下,过程有监听,分发广播,监听使用configFileApplicationListener,一直向下后,我们找到了loader方法,继续向下几个loader方法后,我们在最终的loader方法中找到了PropertySourceLoader
源码如下:
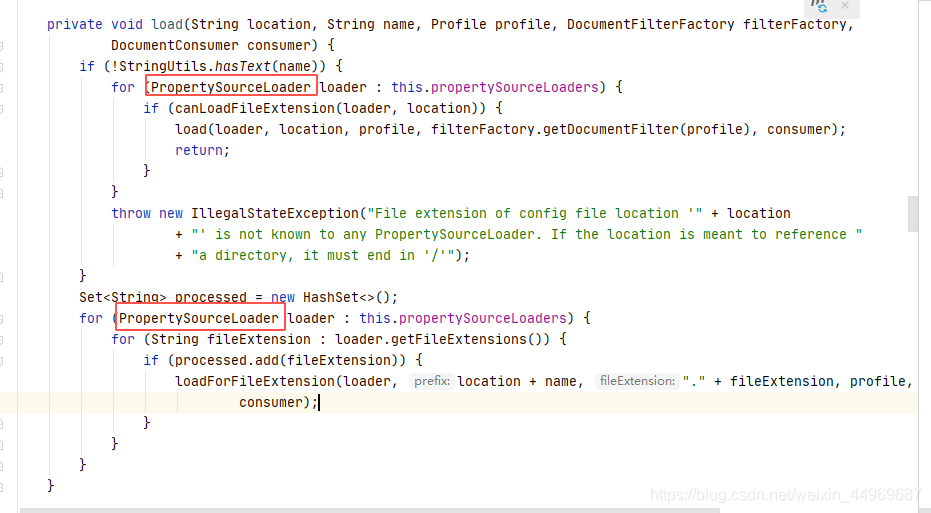
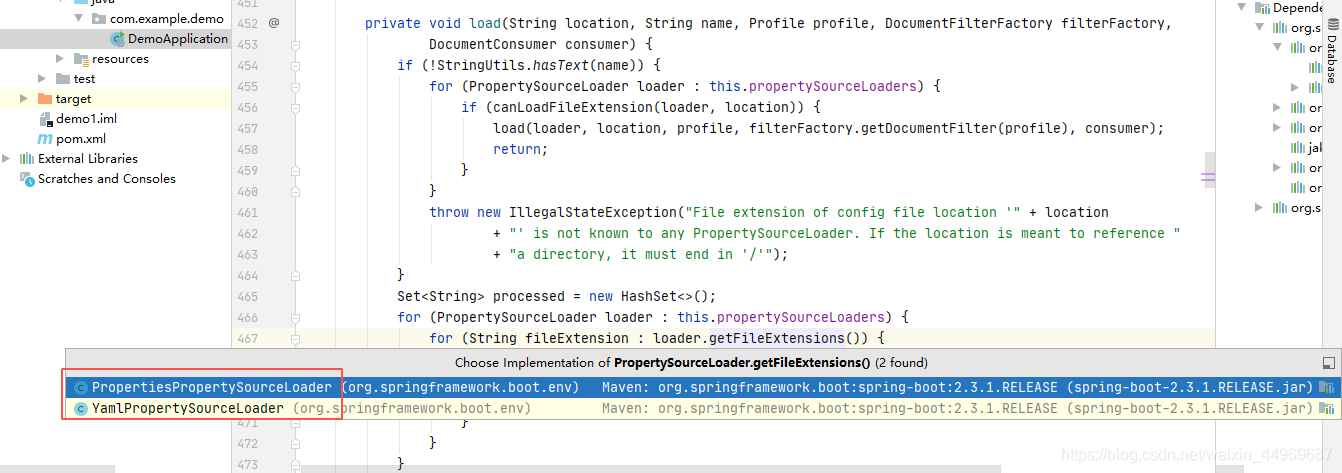
找到了这个类,我们类名大概就知道了这个类的作用,配置文件的加载类。
当然还有yml文件的加载类
自定义Starter
首先我们来看一下官方的starter大概是怎么处理的。下面我们以redis举例
1.redis的springboot官方starter
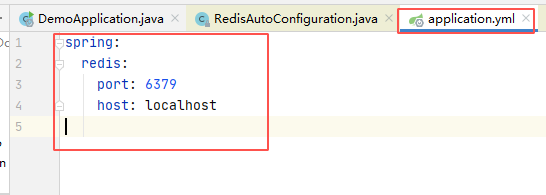
在springboot的yml文件中,我们可以简化配置成如下图所示
在上面的源码分析中,我们在meta-info下的spring.factories中有找到,redis的自动配置类名称,下面我们来看一下这个类的源码
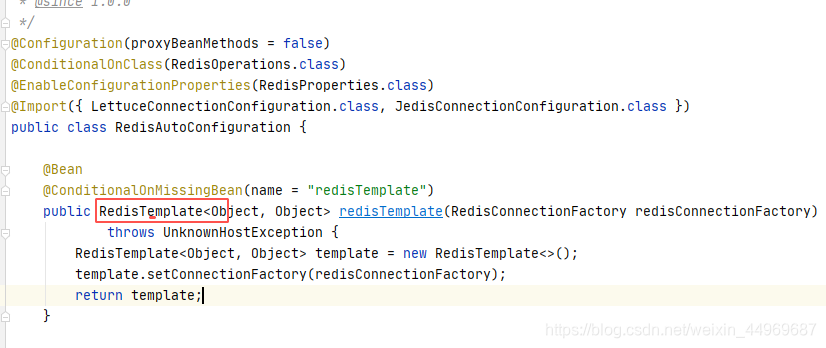
进入自动配置注解导入的RedisProperties类
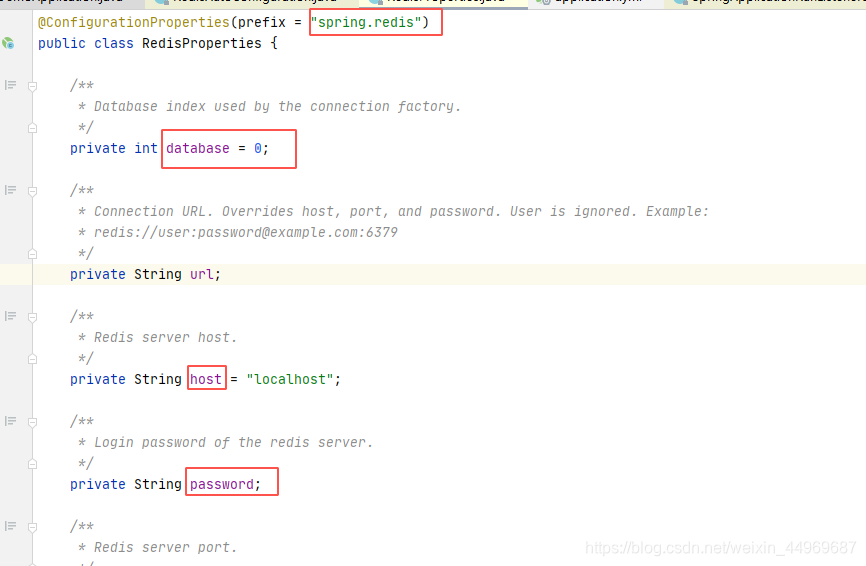
这个类里,就是我们很熟悉的内容了,我们在yml文件中配置的属性,原来都是这个类中封装的属性
我们可以看到,redis的starter命名是 spring-boot-data-redis-starter。mybatis的starter命名为mybatis-spring-boot-starter。我们可以这样子记,springboot在前面的是官方的starter,springboot在后面的是第三方自定义的starter
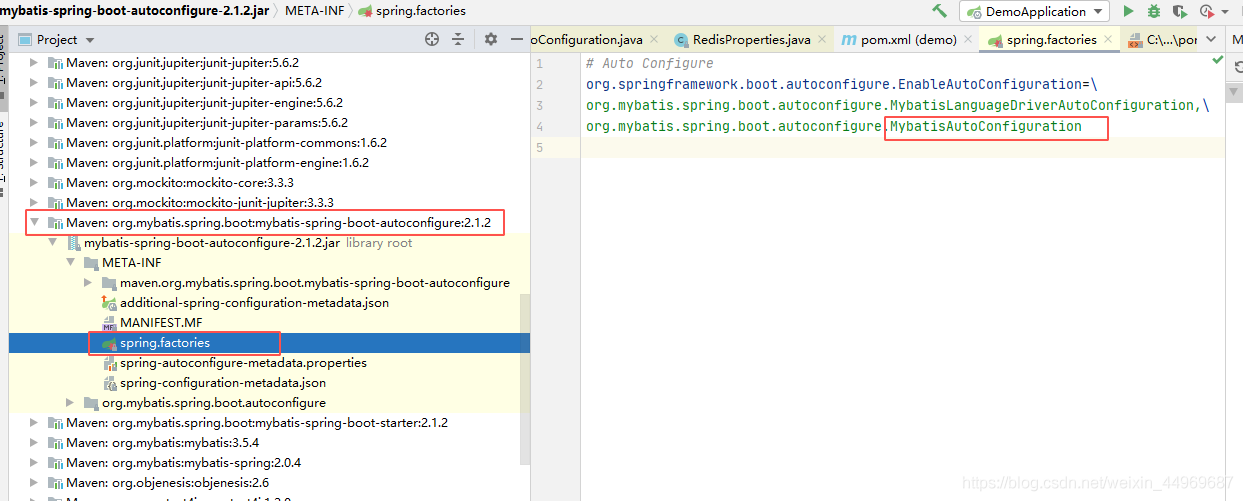
2.mybatis的第三方starter
mybatis的配置类存在的位置:
3.自定义Starter
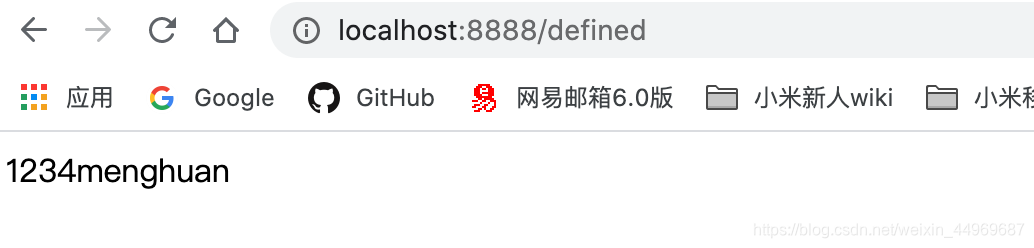
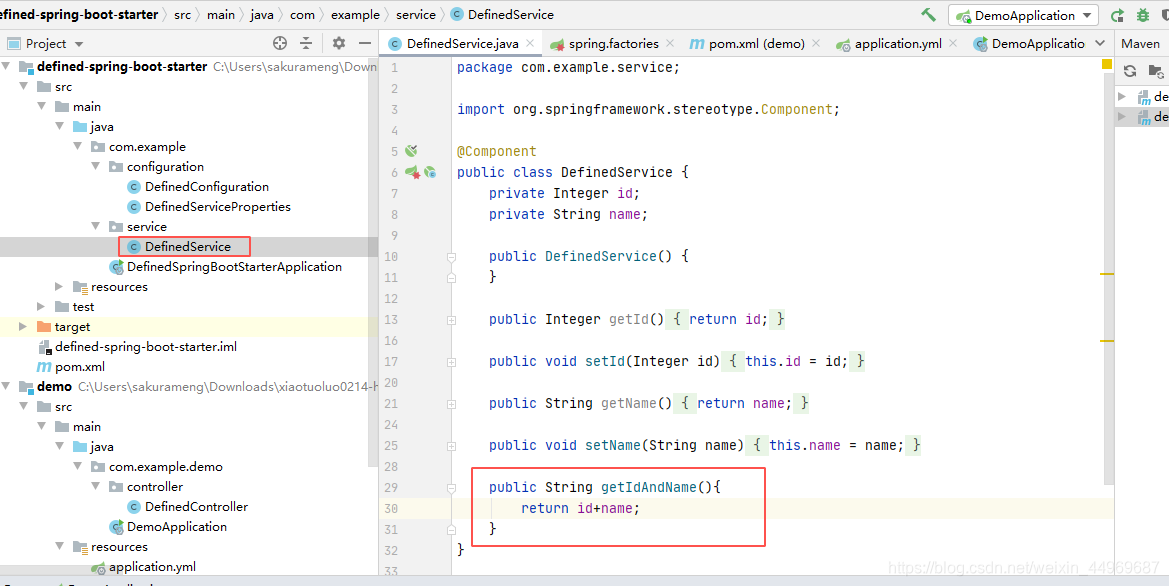
实现:返回配置文件配置的id+name
starter-模块
1.定义空的工程,定义service类
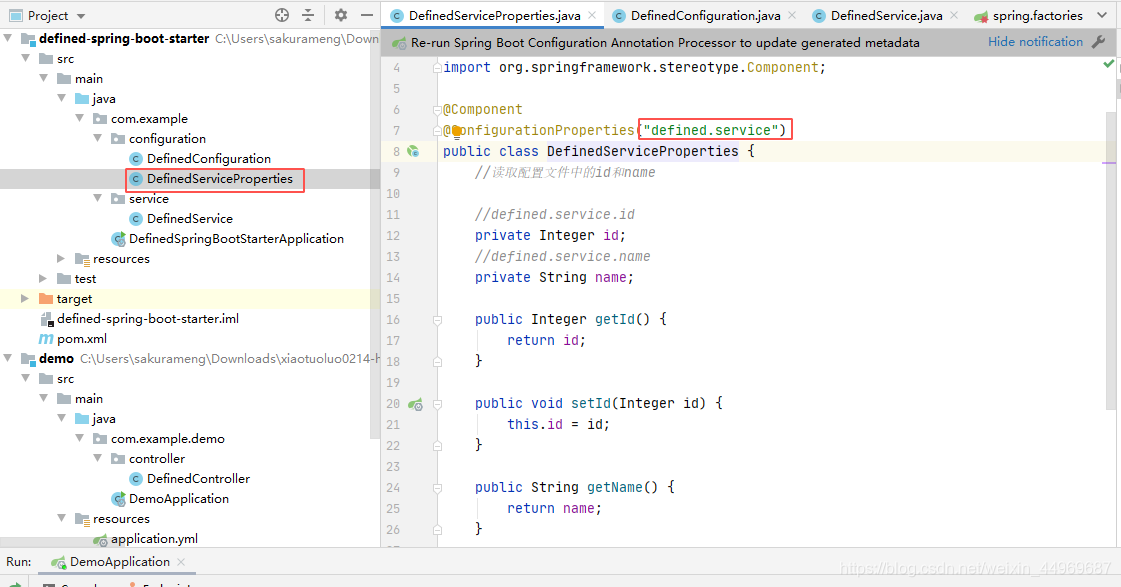
2.定义properties文件的pojo类
3.定义config类
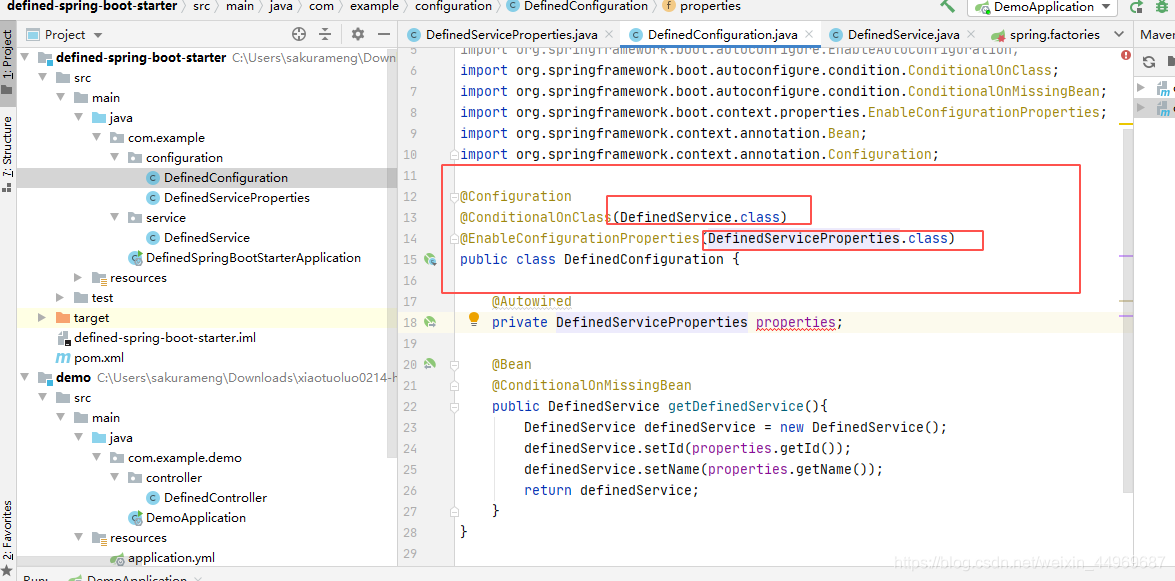
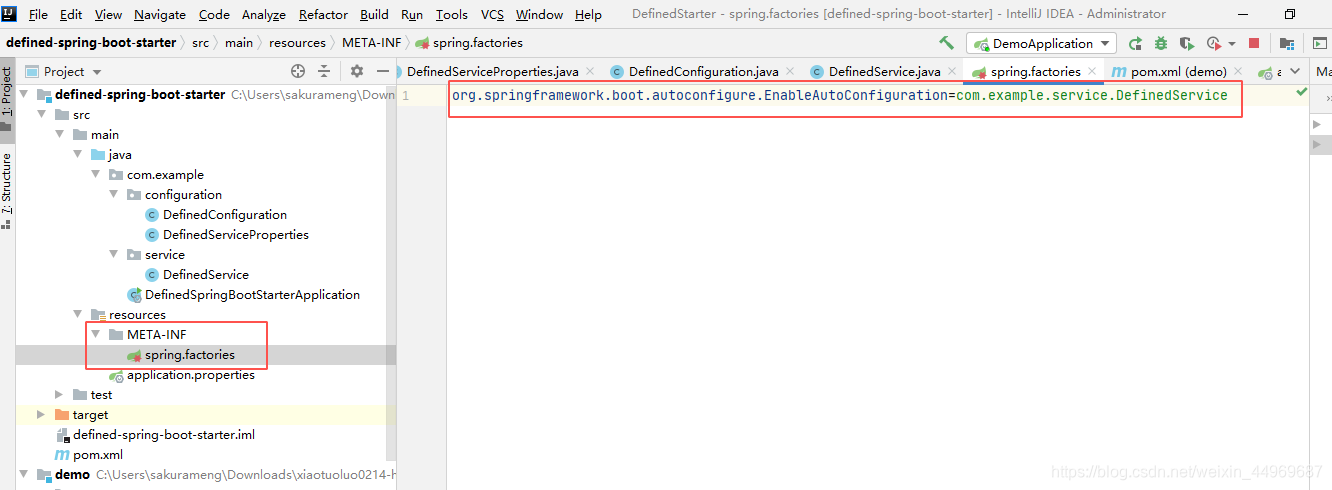
4.添加meta-inf目录及配置文件spring.factories
—以上就做好了自定义的starter—
测试自定义Starter
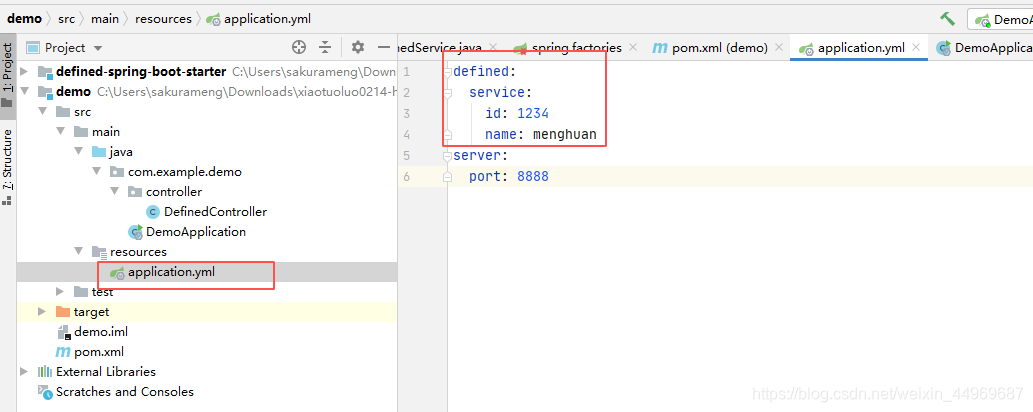
1.测试工程中yml文件配置
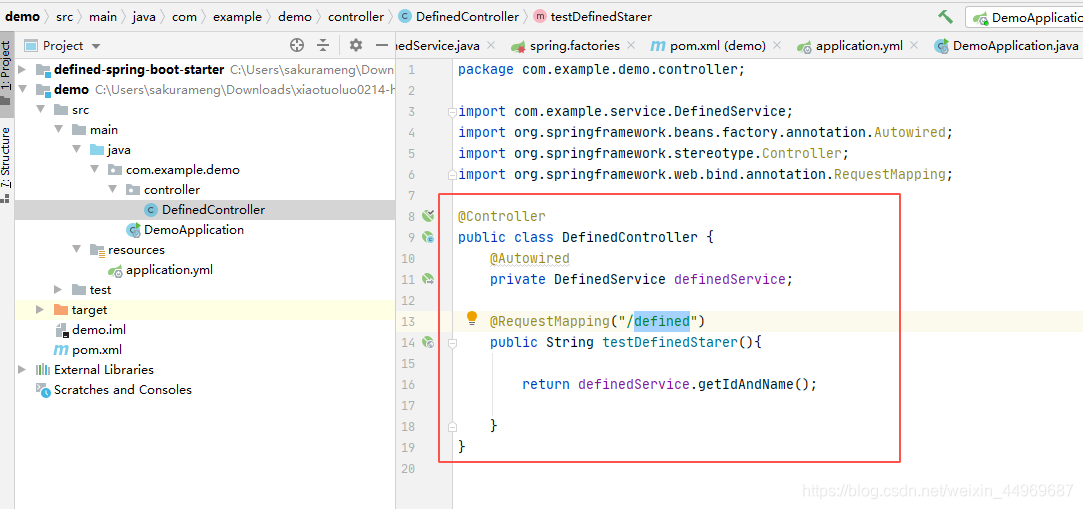
2.controller配置
配置文件spring.factories
最后效果截图如下