SpringCloud实战之路 | 应用篇(四)服务熔断器Hystrix Dashboard及 Hystrix Turbine聚合监控
文章内容输出来源:拉勾教育Java高薪训练营;
Hystrix Dashboard断路监控仪表盘
1.新建一个监控服务工程引入依赖
<!--hystrix-->
<dependency>
 <groupId>org.springframework.cloud</groupId>
 <artifactId>spring-cloud-starter-netflix-hystrix</artifactId>
</dependency>
<!--hystrix 仪表盘-->
<dependency>
 <groupId>org.springframework.cloud</groupId>
 <artifactId>spring-cloud-starter-netflix-hystrix-dashboard</artifactId>
</dependency>
<dependency>
 <groupId>org.springframework.cloud</groupId>
 <artifactId>spring-cloud-starter-netflix-eureka-client</artifactId>
</dependency>
2.启动类添加@EnableHystrixDashboard激活仪表盘
import org.springframework.boot.SpringApplication;
import org.springframework.boot.autoconfigure.SpringBootApplication;
import org.springframework.cloud.netflix.hystrix.dashboard.EnableHystrixDashboard;

@SpringBootApplication
@EnableHystrixDashboard // 开启hystrix dashboard
public class HystrixDashboardApplication9000 {
   public static void main(String[] args) {
 	  SpringApplication.run(HystrixDashboardApplication.class, args);
   }
}
server:
  port: 9000
spring:
  application:
    name: cloud-hystrix-dashboard
eureka:
  client:
    serviceUrl: # eureka server的路径
      defaultZone: http://EurekaServerA:8761/eureka/,http://EurekaServerB:8762/eureka/ #把 eureka 集群中的所有 url 都填写了进来,也可以只写一台,因为各个 eureka server 可以同步注册表
  instance:
    #使用ip注册,否则会使用主机名注册了(此处考虑到对老版本的兼容,新版本经过实验都是ip)
    prefer-ip-address: true
    #自定义实例显示格式,加上版本号,便于多版本管理,注意是ip-address,早期版本是ipAddress
    instance-id: ${spring.cloud.client.ip-address}:${spring.application.name}:${server.port}:@project.version@
3.在被监测的微服务中注册监控servlet
/**
     * 在被监控的微服务中注册一个serlvet,后期我们就是通过访问这个servlet来获取该服务的Hystrix监控数据的
     * 前提:被监控的微服务需要引入springboot的actuator功能
     * @return
     */
    @Bean
    public ServletRegistrationBean getServlet(){
        HystrixMetricsStreamServlet streamServlet = new HystrixMetricsStreamServlet();
        ServletRegistrationBean registrationBean = new ServletRegistrationBean(streamServlet);
        registrationBean.setLoadOnStartup(1);
        registrationBean.addUrlMappings("/actuator/hystrix.stream");
        registrationBean.setName("HystrixMetricsStreamServlet");
        return registrationBean;
    }
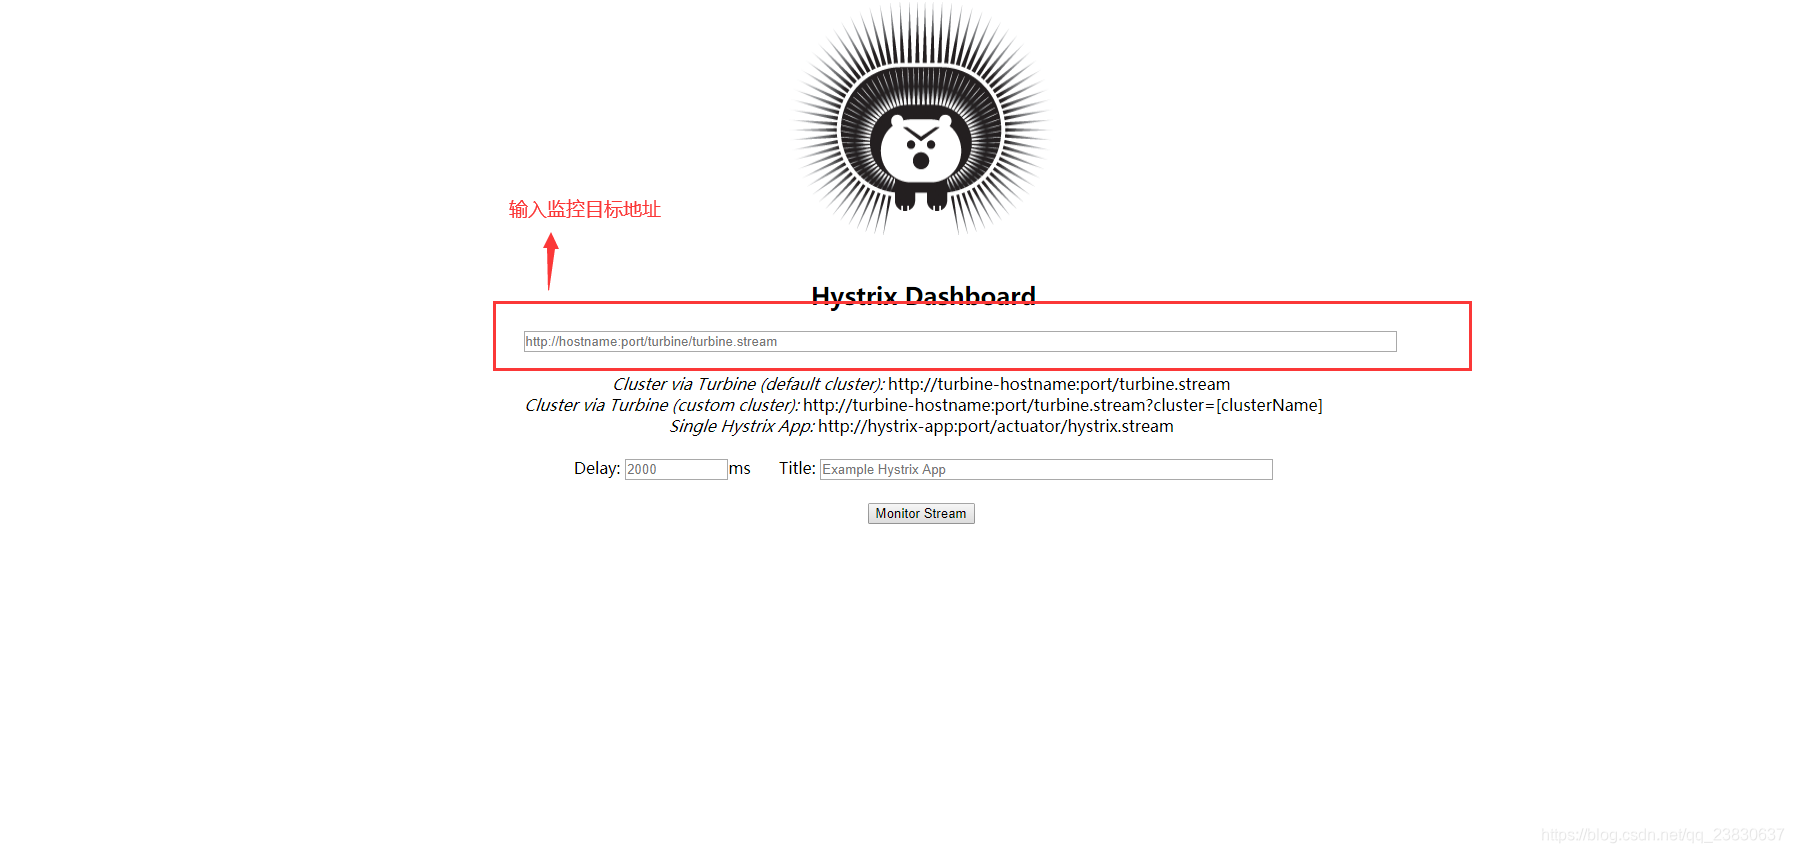
访问http://localhost:9000/hystrix
输入监控的微服务地址http://localhost:8090/actuator/hystrix.stream
Hystrix Turbine聚合监控
Hystrix Dashboard是针对一个微服务实例的Hystrix数据查询分析,在微服务架构下,一个微服务的实例往往是多个,我们可用通过Hystrix Turbine实现聚合监控
1.Turbine服务搭建引入依赖
<dependencies>
  <!--hystrix turbine聚合监控-->
  <dependency>
    <groupId>org.springframework.cloud</groupId>
    <artifactId>spring-cloud-starter-netflix-turbine</artifactId>
  </dependency>
  <dependency>
    <groupId>org.springframework.cloud</groupId>
    <artifactId>spring-cloud-starter-netflix-eurekaclient</artifactId>
  </dependency>
 </dependencies>
server:
  port: 9001
Spring:
  application:
    name: cloud-hystrix-turbine
eureka:
  client:
    serviceUrl: # eureka server的路径
      defaultZone: http://EurekaServerA:8761/eureka/,http://EurekaServerB:8762/eureka/ #把 eureka 集群中的所有 url 都填写了进来,也可以只写一台,因为各个 eureka server 可以同步注册表
  instance:
    #使用ip注册,否则会使用主机名注册了(此处考虑到对老版本的兼容,新版本经过实验都是ip)
    prefer-ip-address: true
    #自定义实例显示格式,加上版本号,便于多版本管理,注意是ip-address,早期版本是ipAddress
    instance-id: ${spring.cloud.client.ip-address}:${spring.application.name}:${server.port}:@project.version@
#turbine配置
turbine:
  # appCofing配置需要聚合的服务名称,比如这里聚合自动投递微服务的hystrix监控数据
  # 如果要聚合多个微服务的监控数据,那么可以使用英文逗号拼接,比如 a,b,c
  appConfig: cloud-service-user
  clusterNameExpression: "'default'"   # 集群默认名称
2.启动类添加@EnableTurbine 开启Turbine聚合功能
import org.springframework.boot.SpringApplication;
import org.springframework.boot.autoconfigure.SpringBootApplication;
import org.springframework.cloud.client.discovery.EnableDiscoveryClient;
import org.springframework.cloud.netflix.turbine.EnableTurbine;


@SpringBootApplication
@EnableDiscoveryClient
@EnableTurbine  // 开启Turbine聚合功能
public class HystrixTurbineApplication9001 {
    public static void main(String[] args) {
        SpringApplication.run(HystrixTurbineApplication9001.class,args);
    }
}
访问http://localhost:9000/hystrix
输入聚合监控的地址http://localhost:9001/turbine.stream就可以看到数据了