前言:
生产上使用splunk进行日志搜集,服务端已经安装完成,客户端有几十台需要部署,现用ansible批量安装。
环境说明:
| 主机名 | 操作系统版本 | ip | ansible version | 备注 |
|---|---|---|---|---|
| ansible-awx | Centos 7.6.1810 | 172.27.34.51 | 2.9.9 | ansible管理服务器 |
| client | Centos 7.6.1810 | 172.27.34.85 | / | splukn客户端 |
一、客户端安装步骤
- 获取安装包并解压
- 新建或修改配置文件inputs.conf和props.conf
- 注册客户端到服务端
- 启动服务并设置为开机自启动
客服端安装分为4步,第一步是上传压缩包,然后解压;第二步是进入到对应目录,然后新建(修改)配置文件;第三步是执行‘splunk add forward-server’命令,将客户端注册到服务端,此时会有交互窗口,会让输入用户名密码信息;第四步是运行程序并设置为开机自启动。
本文使用ansible方式进行客户端批量安装,调用各对应模块模拟以上4步。
二、准备工作
1.python的pexpect模块安装
由于会使用到ansible的expect模块,该模块运行时需要调用python的pexpect模块,先安装python的pexpect模块
[root@ansible-awx yaml]# more install_pexpect.yaml
---
- hosts: "{{ hostlist }}"
  tasks:
  - name: Unarchive ptyprocess
    unarchive:
      src: /tmp/splunk/ptyprocess-0.6.0.tar.gz
      dest: /root
      mode: 0755
      owner: root
      group: root
  - name: install ptyprocess
    shell: "cd /root/ptyprocess-0.6.0;python ./setup.py install"
  - name: Unarchive pexpect
    unarchive:
      src: /tmp/splunk/pexpect-4.8.0.tar.gz
      dest: /root
      mode: 0755
      owner: root
      group: root
  - name: install pexpect
    shell: "cd /root/pexpect-4.8.0;python ./setup.py install"
[root@ansible-awx yaml]# ansible-playbook install_pexpect.yaml -e hostlist=test85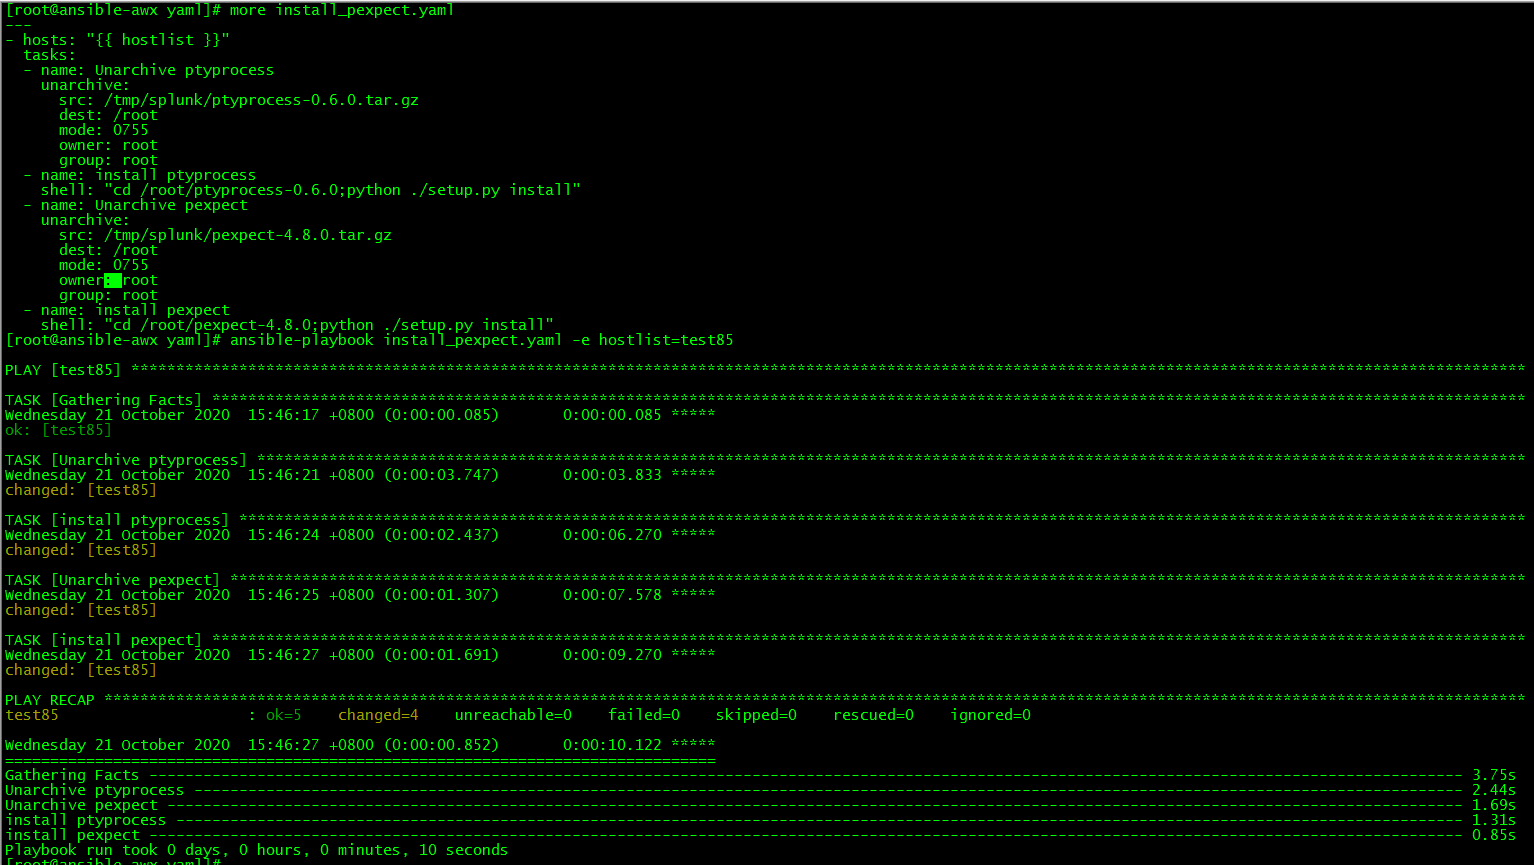
执行逻辑:将ansible服务器的两个安装包通过unarchive模块解压并传到splunk客户端,然后使用shell模块运行python命令安装。
2.pexpect模块验证
[root@client ~]# python
Python 2.7.5 (default, Oct 30 2018, 23:45:53)
[GCC 4.8.5 20150623 (Red Hat 4.8.5-36)] on linux2
Type "help", "copyright", "credits" or "license" for more information.
>>> import pexpect
>>>
>>> exit()
在splunk客户端运行导入命令,如能正确导入pexpect模块,则代表安装成功。
三 、role总览
1.初始化role
[root@ansible-awx roles]# ansible-galaxy init splunk
- Role splunk was created successfully
role名为splunk
2.执行文件
[root@ansible-awx ansible]# more splunk.yaml
---
- hosts: "{{ hostlist }}"
  roles:
  - role: splunk
hosts列表需执行的时候指定。
3.task文件
[root@ansible-awx tasks]# more main.yml
---
# tasks file for splunk client install
# author: loong576

- name: Unarchive client install file
  unarchive:
    src: /tmp/splunk/splunkforwarder-8.0.5-a1a6394cc5ae-Linux-x86_64.tgz
    dest: /opt
    mode: 0755
    owner: root
    group: root

- name: copy template file
  copy:
    src: /etc/ansible/roles/splunk/templates/props.conf
    dest: /opt/splunkforwarder/etc/system/local
    owner: root
    group: root

- name: modify template file
  template:
    src: /etc/ansible/roles/splunk/templates/inputs.conf
    dest: /opt/splunkforwarder/etc/system/local/inputs.conf

- name: use expect add forward-server
  expect:
    command: /opt/splunkforwarder/bin/splunk add forward-server xx.xx.xx.xx:9997   --accept-license
    responses:
      Do you agree with this license? [y/n]: "y"
      Please enter an administrator username: "admin"
      Please enter a new password: "splunk@123!"
      Please confirm new password: "splunk@123!"

- name: start the client and enable the process
  shell: "/opt/splunkforwarder/bin/splunk start;/opt/splunkforwarder/bin/splunk enable boot-start"
xx.xx.xx.xx:9997为splunk服务端ip和端口,根据实际情况修改。
4.交互式安装
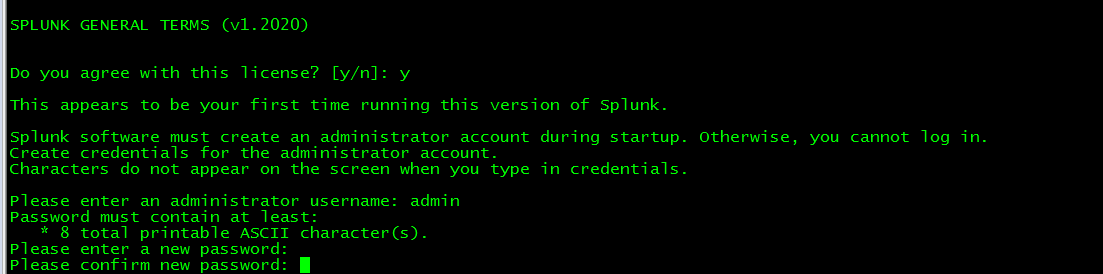
如果手动安装,会有交互式界面产生,如图,需输入确认信息和用户名密码信息。
5.task文件执行逻辑
- 使用unarchive模块将ansible主机的客户端安装文件上传到splunk客户端;
- 使用copy模块分发配置文件props.conf;
- 使用template模块分发配置文件inputs.conf;
- 使用expect模块进行交互式安装
6.templates文件
[root@ansible-awx ansible]# cd /etc/ansible/roles/splunk/templates/
[root@ansible-awx templates]# ll
总用量 8
-rw-r--r-- 1 root root 127 10月 21 16:14 inputs.conf
-rw-r--r-- 1 root root  25 10月 21 16:14 props.conf
[root@ansible-awx templates]# more inputs.conf
[default]
index = callcent
host = {{ ansible_default_ipv4.address }}
sourcetype = messageslog
[monitor:///var/log/messages]
[root@ansible-awx templates]# more props.conf
[callcent]
CHARSET=UTF-8
配置文件inputs.con的host参数对应客户端主机ip,通过ansible_default_ipv4.address获取;props.conf为固定文件,无需定制修改。
四、运行role
1.执行role
[root@ansible-awx ansible]# ansible-playbook splunk.yaml -e hostlist=test85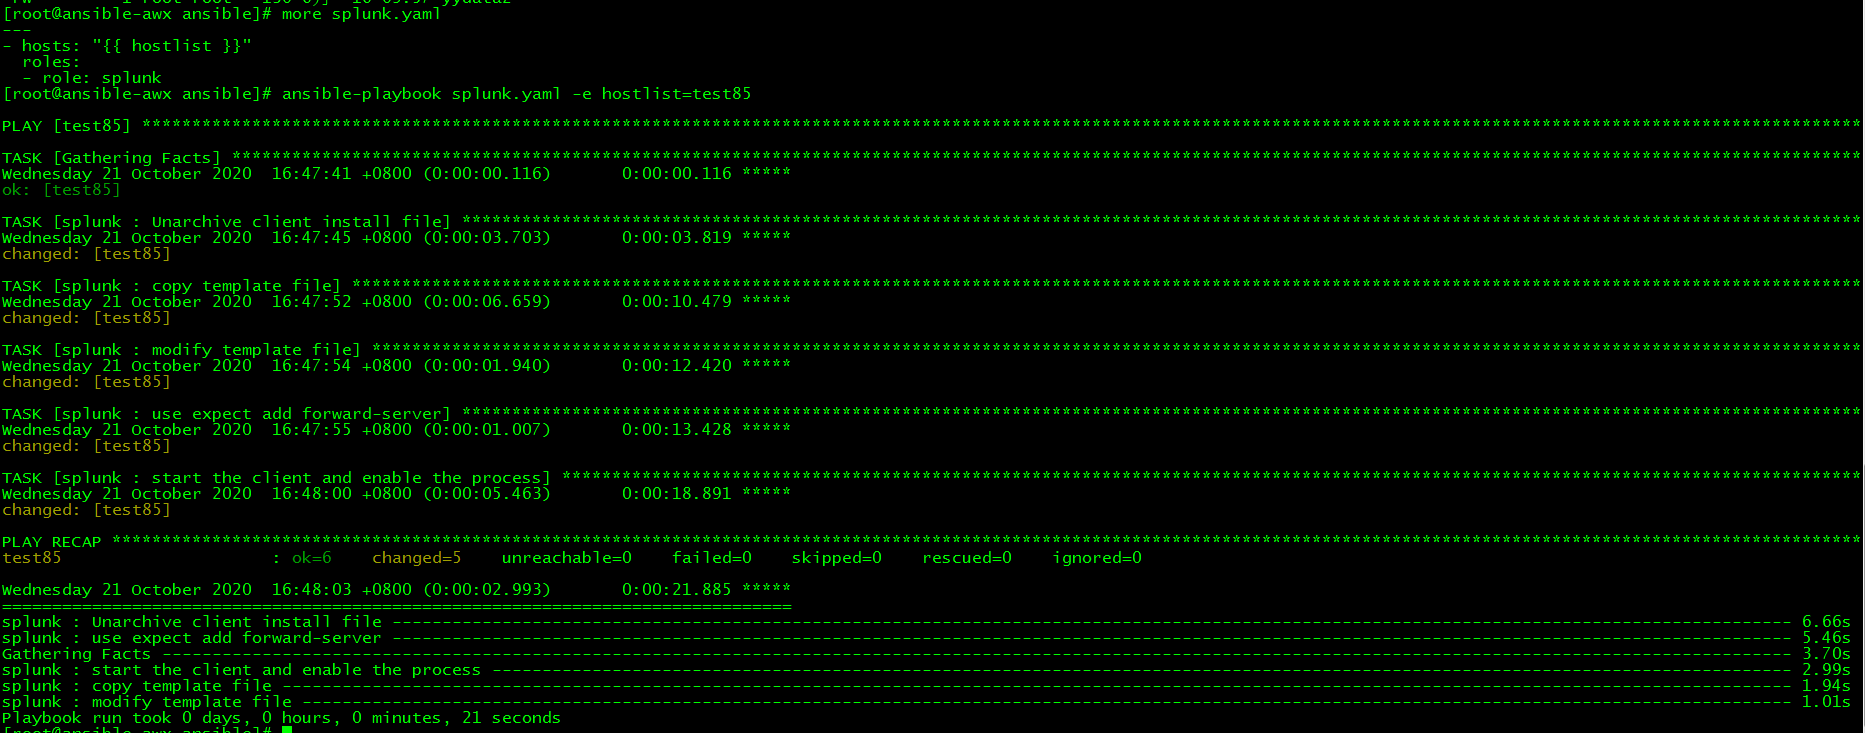
执行对象为test85
2.验证
[root@client ~]# netstat -anlp|grep 8089
tcp        0      0 0.0.0.0:8089            0.0.0.0:*               LISTEN      17488/splunkd
[root@client ~]# ps -ef|grep splunk |grep -v grep
root     17488     1  0 16:48 ?        00:00:01 splunkd -p 8089 start
root     17496 17488  0 16:48 ?        00:00:00 [splunkd pid=17488] splunkd -p 8089 start [process-runner]
登录到客户端,可以查看到8089端口处于监听状态,进程已拉起;也可以登录到splunk服务端通过web查看日志搜集情况。
结果符合预期
本文所有脚本和配置文件已上传github:ansible-production-practice-5
更多请点击:ansible系列文章