概述
我们将设计一个地震报告应用 (Quake Report),目的是让用户能够更好地获取身边或全世界有关地震活动的咨询。
有好的目标才能做出好的应用,那么体现出好目标的最好方式就是构建一个简单易用、目的明确的用户界面。
USGS 网站
探索 USGS 站点,并了解如何请求应用所需要的数据。同时了解数据以何种结构返回给我们,并建立一个方案,在代码中以编程方式将数据提取出来。
以用户身份浏览
打开 USGS 站点,在 Spreadsheet Format 页面中我们可以看到 CSV 格式的地震数据,这是一种看起来类似表格的数据格式。
用户可以从该页面下载到 地震数据的 CSV 文件,下载之后可以使用 Excel(工作表)来打开并查看,数据的的结构确实如表格一样清晰,易于查看。

以开发者身份浏览
而在 GeoJSON Summary Format 页面中 USGS 为开发者提供了一个具有特殊格式的数据,叫做 JSON。开发者可以通过 USGS 规定的格式来请求需要的数据(请求方法可查看文档 API Documentation - Earthquake Catalog)。
比如在浏览器中访问 这个地址 将会得到下图所示的响应:

导入项目
当某位 Android 专业开发者加入新项目时,通常,团队可能已经有了一个可继续处理的应用。 最好知道如何读取现有代码库,因为通常不需要从头创建新应用。
我已经在 GitHub 创建好了一个 Quake Report 应用 的初始版本,使用 Git 命令克隆该项目:
git clone -b starting-point https://github.com/HEY-BLOOD/QuakeReport.git
然后按以下说明将 Quake Report 项目导入计算机上的 Android Studio 中:
- 打开 Android Studio。
- 选择“文件”(File) >“导入项目”(Import Project),然后选择 “Quake Report” 文件夹。 导入项目需要一些时间。
- 成功导入该应用后,在 Android 设备(手机、平板电脑或模拟器)上运行该应用。其外观类似于 以下屏幕截图。

在 Android Studio 中,浏览代码库找到 Quake Report 应用,并熟悉项目文件。
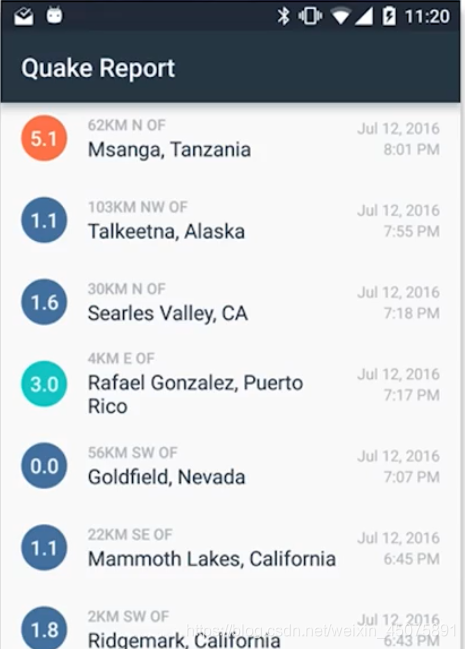
可以看出在 Quake Report 应用的初始版本只有一个页面,该页面只显示了地震位置信息(place)的类别,接下来更改项目使这个页面的列表中每一项都显示一次地震的 震级(magnitude)、位置(place)、时间(time)。
这需要使用到 ListView 和 自定义适配器的知识,我在 安卓学习日志 Day03 — Custom Adapter 已经说明过了,更改后的 Quake Report 应用应该和下方的截图相似。(更改前后的代码对比可以在 此链接 查看)

JSON
Json 文本的键和值以冒号分隔,同时每个键/值对以逗号分隔。 JSON 支持可在大多数编程语言中找到的基本数据类型, 如,数字、字符串、布尔值、数组和对象。
要处理 JSON 格式的数据需要使用到 Java 中的 JSON 对象,具体方法请参考链接 Android JSON Parsing with Examples - Tutlane
JSON 处理
那么接下来,试着对真实的地震数据(JSON 格式)进行处理,并显示到 QuakeReport 应用当中。这里我借助了 QueryUtils.java 类 的代码,使用该类 只需更改 文件顶部的 SAMPLE_JSON_RESPONSE String 常量中定义的 JSON 字符串(暂时采用硬编码的方法获取 JSON 字符串) 以及 QueryUtils.extractEarthquakes() 方法中剩下的 TODO 部分即可,以下是 需要执行的一些伪代码:
 将 SAMPLE_JSON_RESPONSE String 转换为 JSONObject
 提取 "features" JSONArray
 依次循环数组中的每个特征
 获取 i 位置的 earthquake JSON 对象
 获取 "properties" JSON 对象
 针对震级提取 "mag"
 针对位置提取 "place"
 针对时间提取 "time"
 通过震级、位置和时间创建 Earthquake java 对象
 将地震添加到地震列表
改 EarthquakeActivity 调用 QueryUtils.extractEarthquakes() 从 JSON 响应获取 Earthquake 对象的列表。
在 EarthquakeActivity 中,不再创建伪地震列表,而是替换为以下代码:
ArrayList<Earthquake> earthquakes = QueryUtils.extractEarthquakes();
然后更改 QueryUtils.extractEarthquakes() 方法中剩下的 TODO 部分如下:
    /**
     * Return a list of {@link Earthquake} objects that has been built up from
     * parsing a JSON response.
     */
    public static ArrayList<Earthquake> extractEarthquakes() {


        // Create an empty ArrayList that we can start adding earthquakes to
        ArrayList<Earthquake> earthquakes = new ArrayList<>();

        // Try to parse the SAMPLE_JSON_RESPONSE. If there's a problem with the way the JSON
        // is formatted, a JSONException exception object will be thrown.
        // Catch the exception so the app doesn't crash, and print the error message to the logs.
        try {


            // TODO: Parse the response given by the SAMPLE_JSON_RESPONSE string and
            // build up a list of Earthquake objects with the corresponding data.
            JSONObject rootJsonObj = new JSONObject(SAMPLE_JSON_RESPONSE);
            JSONArray featuresArray = rootJsonObj.getJSONArray("features");
            for (int i = 0; i < featuresArray.length(); i++) {


                JSONObject feature = featuresArray.getJSONObject(i);
                JSONObject properties = feature.getJSONObject("properties");
                String earthquakeMag = properties.getDouble("mag") + "";
                String earthquakePlace = properties.getString("place");
                String earthquakeTime = properties.getLong("time") + "";

                Earthquake earthquake = new Earthquake(earthquakeMag, earthquakePlace, earthquakeTime);

                earthquakes.add(earthquake);
            }
        } catch (JSONException e) {


            // If an error is thrown when executing any of the above statements in the "try" block,
            // catch the exception here, so the app doesn't crash. Print a log message
            // with the message from the exception.
            Log.e("QueryUtils", "Problem parsing the earthquake JSON results", e);
        }

        // Return the list of earthquakes
        return earthquakes;
    }
更改完成后试着运行一下应用,这时 地震信息的列表 应该如下图类似(更改前后的代码对比参考 此链接):

Unix 时间
首先来更新 发生地震时显示相关信息的方式。以应用目前的状态,可以 轻松看到每次地震的震级和位置,但时间 则是一长串数字。第一次地震的时间是 1454124312220,这种格式称为 Unix 时间,此格式对我们没有帮助。
Unix 时间,将时间描述为 从英国 1970 年 1 月 1 日 0 时 0 分 0 秒起至现在的总毫秒数 (更技术性的叫法为协调世界时间)。
我们想要显示的时间信息 应包含具体的年月日,所以需要将此 Unix 时间转换成更易懂的日期 和时间,但这将是一个非常复杂的命题。我们可能希望 按照用户的本地时区显示时间,但时区极为复杂,另外,根据用户在 世界所处的位置,日期的书写方式也会有所不同。
日期格式设置
很庆幸,我们无需自己处理日期格式。Java 中有 一个很奇妙的名为 SimpleDateFormat 的类,知晓所有关于时区的信息, 以及知晓如何按照世界的不同地区书写日期,它会 处理这些难题。
接下来,使用 SimpleDateFormat 的类将 QuakeReport 应用中 的时间格式更改为 人类可读的 日期时间格式(如,Jan 3, 2020)。
由于 SimpleDateFormat.format() 方法需要一个Date 对象,而该对象需要长整型数据作为输入,因此我们应从 JSON 响应将地震时间提取为长整型 (long) 数据类型(而不是 String)。长整型是 Java 中的 8 个原始数据类型之一。
将 QueryUtils.extractEarthquakes() 方法修改为 从 JSON 响应中将地震时间提取为 “long” 数据类型。
// Extract the value for the key called "time"
long time = properties.getLong("time");
这会引发错误,因为 Earthquake 构造函数不 接受长整型数据类型作为第三输入参数。因此,我们需要 对 Earthquake 类进行一些更改。
更改全局变量的数据类型,对其进行重命名,以使名称 更能描述其中所存储的信息。
在 Earthquake.java 中:
    /** Time of the earthquake */
    private long timeInMilliseconds;
修改 Earthquake 构造函数,使其采用长整型数据类型表示时间 并更新 Javadoc 注释。
在 Earthquake.java 中:
    /**
     * 构造一个新的 {@link Earthquake} 对象。
     *
     * @param mag   表示地震的震级(大小)
     * @param place 表示地震的城市位置
     * @param timeInMilliseconds  表示地震发生时以毫秒(根据 Epoch)计的时间
     */
    public Earthquake(String mag, String place, long timeInMilliseconds) {


        this.mag = mag;
        this.place = place;
        this.timeInMilliseconds = timeInMilliseconds;
    }
更新公共 getter 方法,以便返回长整型数据类型。
在 Earthquake.java 中:
    /**
     * 返回地震的时间。
     */
    public long getTimeInMilliseconds() {


        return timeInMilliseconds;
    }
当 EarthquakeAdapter 创建每次地震的列表项时, 适配器必须将以毫秒为单位的时间转换为相应 格式的日期和时间。现在,有 2 个 TextView 来分别显示日期 和时间,因此我们需要修改 earthquake_item.xml 布局以添加另外一个 TextView 并为其提供一个合适的视图 ID,并将地震发生的 日期 和 时间 纵向排列。
更改 earthquake_item.xml 文件:
<?xml version="1.0" encoding="utf-8"?>
<LinearLayout xmlns:android="http://schemas.android.com/apk/res/android"
    xmlns:tools="http://schemas.android.com/tools"
    android:layout_width="match_parent"
    android:layout_height="wrap_content"
    android:orientation="horizontal"
    android:padding="@dimen/dp_16">

    <TextView
        android:id="@+id/mag_text"
        android:layout_width="0dp"
        android:layout_height="wrap_content"
        android:layout_gravity="center_vertical"
        android:layout_weight="1"
        tools:text="8.0" />

    <TextView
        android:id="@+id/place_text"
        android:layout_width="0dp"
        android:layout_height="wrap_content"
        android:layout_gravity="center_vertical"
        android:layout_weight="3"
        tools:text="Wenchuan Sichuan" />

    <LinearLayout
        android:layout_width="0dp"
        android:layout_height="wrap_content"
        android:layout_weight="2"
        android:orientation="vertical">

        <TextView
            android:id="@+id/date_text"
            android:layout_width="match_parent"
            android:layout_height="0dp"
            android:layout_weight="1"
            android:gravity="right"
            tools:text="May 12, 2008" />

        <TextView
            android:id="@+id/time_text"
            android:layout_width="match_parent"
            android:layout_height="0dp"
            android:layout_weight="1"
            android:gravity="right"
            android:textAllCaps="true"
            tools:text="3:00 PM" />

    </LinearLayout>

</LinearLayout>
在 EarthquakeAdapter 中,修改 getView() 方法, 使其生成要在相应的 TextView 中显示的 格式化字符串。使用 currentEarthquake.getTimeInMilliseconds() 从当前的 Earthquake 对象中获取时间,并将其传递到 Date 构造函数中,以形成一个新的 Date 对象。
在 EarthquakeAdapter.java 中:
public View getView(int position, @Nullable View convertView, @NonNull ViewGroup parent) {


        // 检查是否已经有可以重用的列表项视图(称为 convertView),
        // 否则,如果 convertView 为 null,则 inflate 一个新列表项布局。
        View itemView = convertView;
        if (itemView == null) {


            itemView = LayoutInflater.from(getContext()).inflate(
                    R.layout.earthquake_item, parent, false);
        }

        // 在地震列表中的给定位置找到地震
        Earthquake currentEarthquake = getItem(position);

        // 找到视图 ID 为 magnitude 的 TextView
        TextView magnitudeView = (TextView) itemView.findViewById(R.id.mag_text);
        // 在该 TextView 中显示目前地震的震级
        magnitudeView.setText(currentEarthquake.getMag());

        // 找到视图 ID 为 location 的 TextView
        TextView locationView = (TextView) itemView.findViewById(R.id.place_text);
        // 在该 TextView 中显示目前地震的位置
        locationView.setText(currentEarthquake.getPlace());

        // 根据地震时间(以毫秒为单位)创建一个新的 Date 对象
        Date dateObject = new Date(currentEarthquake.getTimeInMilliseconds());

        // 找到视图 ID 为 date 的 TextView
        TextView dateView = (TextView) itemView.findViewById(R.id.date_text);
        // 设置日期字符串的格式(即 "Mar 3, 1984")
        String formattedDate = formatDate(dateObject);
        // 在该 TextView 中显示目前地震的日期
        dateView.setText(formattedDate);

        // 找到视图 ID 为 time 的 TextView
        TextView timeView = (TextView) itemView.findViewById(R.id.time_text);
        // 设置时间字符串的格式(即 "4:30PM")
        String formattedTime = formatTime(dateObject);
        // 在该 TextView 中显示目前地震的时间
        timeView.setText(formattedTime);

        // 返回目前显示适当数据的列表项视图
        return itemView;
    }
以上代码包含两个辅助方法,formatDate() 和 formatTime(),创建这两个方法来接收 Date 对象 并使用 SimpleDateFormat 返回一个格式正确的日期字符串。
    /**
     * 从 Date 对象返回格式化的日期字符串(即 "Mar 3, 1984")。
     */
    private String formatDate(Date dateObject) {


        SimpleDateFormat dateFormat = new SimpleDateFormat("LLL dd, yyyy");
        return dateFormat.format(dateObject);
    }

    /**
     * 从 Date 对象返回格式化的时间字符串(即 "4:30 PM")。
     */
    private String formatTime(Date dateObject) {


        SimpleDateFormat timeFormat = new SimpleDateFormat("h:mm a");
        return timeFormat.format(dateObject);
    }
更改代码的前后对比参考 此链接 。
最后运行一下应用,查看效果

位置信息拆分
如果查看从 USGS 数据集收到的 JSON 响应, 会发现 “place” 键的字符串值有两种形式: “74km NW of Rumoi, Japan”、“Pacific-Antarctic Ridge”
目标是将一个位置字符串分成两个字符串, 使它们能够在两个不同的 TextView 中显示由于 某些位置可能不会提供与位置之间的公里距离详细信息, 可以使用 "Near the" 来替代。 "74km NW of Rumoi, Japan" --> "74km NW of" 和 "Rumoi, Japan","Pacific-Antarctic Ridge" --> "Near the" 和 "Pacific-Antarctic Ridge"
为了方便引用这些单独的字符串, 可以将一个字符串称作主要位置(即 "Rumoi, Japan" 或 "Pacific-Antarctic Ridge"),将另一字符串称作 位置偏移("74km NW of" 或 "Near the")。
下面 在 getView() 方法中对 位置信息进行拆分处理并显示到各自的 TextView 当中。
要完成模拟UI的效果,应该在列表项布局中加入另一个TextView, 两个位置TextView的ID分别为 “@+id/primary_place” 和 “@+id/place_offset”。
在 earthquake_item.xml 中:
<?xml version="1.0" encoding="utf-8"?>
<LinearLayout xmlns:android="http://schemas.android.com/apk/res/android"
    xmlns:tools="http://schemas.android.com/tools"
    android:layout_width="match_parent"
    android:layout_height="wrap_content"
    android:orientation="horizontal"
    android:padding="@dimen/dp_16">

    <TextView
        android:id="@+id/mag_text"
        android:layout_width="0dp"
        android:layout_height="wrap_content"
        android:layout_gravity="center_vertical"
        android:layout_weight="1"
        tools:text="8.0" />

    <TextView
        android:id="@+id/place_offset_text"
        android:layout_width="0dp"
        android:layout_height="wrap_content"
        android:layout_gravity="center_vertical"
        android:layout_weight="2"
        tools:text="30km S of" />

    <TextView
        android:id="@+id/primary_place_text"
        android:layout_width="0dp"
        android:layout_height="wrap_content"
        android:layout_gravity="center_vertical"
        android:layout_weight="2"
        tools:text="San Francisco, CA" />

    <LinearLayout
        android:layout_width="0dp"
        android:layout_height="wrap_content"
        android:layout_weight="2"
        android:orientation="vertical">

        <TextView
            android:id="@+id/date_text"
            android:layout_width="match_parent"
            android:layout_height="0dp"
            android:layout_weight="1"
            android:gravity="right"
            tools:text="May 12, 2008" />

        <TextView
            android:id="@+id/time_text"
            android:layout_width="match_parent"
            android:layout_height="0dp"
            android:layout_weight="1"
            android:gravity="right"
            android:textAllCaps="true"
            tools:text="3:00 PM" />

    </LinearLayout>

</LinearLayout>
需要做出的另外一个改动是为那些 没有位置偏移(以公里为单位)的位置添加 “Near the” 作为字符串资源。原始 JSON 响应中没有该字符串,添加该字符串的目的 是满足应用程序 UI 设计。我们在 res/values/strings.xml 资源文件中添加该字符串,所以不必将英文字符串 硬编码转换为 Java 代码。
在 res/values/strings.xml 中添加:
 <!-- Default text to show with the earthquake location ("Near the Pacific-Antarctic Ridge")
  if no specific kilometer distance from the primary location is given [CHAR LIMIT=30] -->
 <string name="near_the">Near the</string>
接下来,需要修改 EarthquakeAdapter getView() 方法。在 此解决方案的底部,有指向完整 EarthquakeAdapter 类 的链接。如之前所提到的,即使你的实现方法与我们并不完全相同, 也没有任何问题。下面是创建所需字符串的 一种方法。
首先,从 Earthquake 对象获取原始位置字符串 并将其存储在一个变量中。
在 EarthquakeAdapter.getView()中:
String originalPlace = currentEarthquake.getPlace();
同时创建新变量(主要位置和位置偏移) 来存储拆分后的两个字符串。
String primaryPlace;
String placeOffset;
使用 String 类中的 split(String string) 方法 将原始字符串在 " of " 文本处拆分 开来。结果将为两个字符串,分别包含 " of " 之前的字符和 " of " 之后的字符。由于需要频繁引用 " of " 文本, 我们可以在 EarthquakeAdapter 类的顶部定义一个 static final String 常量(全局变量)。
在 EarthquakeAdapter 中:
private static final String LOCATION_SEPARATOR = " of ";
如果原始位置 字符串为 "74km NW of Rumoi, Japan",并且使用 LOCATION_SEPARATOR 拆分字符串,那么会得到一个 String 数组作为返回值。在 String 数组中,第 0 个数组元素为 "74km NW",第一个数组元素为 "Rumoi, Japan"。然后,也会将 " of " 文本重新添加到数组的第 0 个元素中, 因此 placeOffset 会显示 "74km NW of "。
还有一个问题就是某些位置字符串没有 位置偏移。因此在决定使用 LOCATION_SEPARATOR 拆分字符串之前, 应先检查原始位置字符串 是否包含该分隔符。如果原始位置字符串中 没有 LOCATION_SEPARATOR,那么可以 假定应将 "Near the" 文本用作位置偏移, 并将原始位置字符串用作 主要位置。下面代码的实现:
在 EarthquakeAdapter getView() 中:
        String originalPlace = currentEarthquake.getPlace();
        if (originalPlace.contains(LOCATION_SEPARATOR)) {


            String[] parts = originalPlace.split(LOCATION_SEPARATOR);
            placeOffset = parts[0] + LOCATION_SEPARATOR;
            primaryPlace = parts[1];
        } else {


            placeOffset = getContext().getString(R.string.near_the);
            primaryPlace = originalPlace;
        }
获得两个单独的字符串之后,可以在 列表项布局的两个 TextView 中显示这两个字符串。
        // 找到 place 位置信息 的两个 TextView
        TextView placeOffsetView = (TextView) itemView.findViewById(R.id.place_offset_text);
        TextView primaryPlaceView = (TextView) itemView.findViewById(R.id.primary_place_text);
        // 在该 TextView 中显示目前地震的位置
        placeOffsetView.setText(placeOffset);
        primaryPlaceView.setText(primaryPlace);
更改完成后运行应用,QuakeReport 应该和下面的截图类似(更改前后的代码差异参考 此链接):

震级信息
震级显示一位小数
如果已看到服务器返回的 JSON 响应中的震级值, 就会注意到震级有时带有一位或者两位小数, 如 “7.2” 或 “7.29”。但是根据 设计模拟,最好以带有一位小数的字符串形式 显示地震震级(即 “7.2”),以便震级值可以居中显示在 颜色漂亮的圆圈中。
Java 中有一个类可以帮到我们!这个类叫做 DecimalFormat 类。顺便还有 NumberFormat 类可用于处理所有 类型的数字的格式,但这是一个抽象类, 而 DecimalFormat 是一个具体类,可以与之交互。
如:
 DecimalFormat formatter = new DecimalFormat("0.00");
 String output = formatter.format(2.3234);
顺便一提,DecimalFormat format() 方法 以双精度值作为输入。
下面在 QuakeReport 应用中针对 震级信息进行操作。
首先需要将震级存储为 double 数据类型。 开始时需要在解析 JSON 响应时以 double 形式 提取震级值。
在 QueryUtils extractEarthquakes() 中:
                // 提取名为 "mag" 的键的值
                double earthquakeMag = properties.getDouble("mag");
这会在应用的其他部分造成连锁反应,需要 更新 Earthquake 类,例如为了处理 double 值形式的震级的存储问题。同时在 EarthquakeAdapter 中, 当尝试显示震级时,需要使用 DecimalFormat 类 对震级进行格式化,以只显示一位小数。
Android Studio 会显示一条错误,因为不能将 double 值传递到 Earthquake 构造函数中,因此需要 更新 Earthquake 类。在 Earthquake 类中: magnitude 全局变量应该是 double, 构造函数应当接受 double 值作为输入 , 并且 magnitude getter 方法应该返回一个 double。
在Earthquake.java 中:
public class Earthquake {


    /** 地震震级 */
    private double mag;

    …………

    public double getMag() {


        return mag;
    }

    …………

    /**
     * 构造一个新的 {@link Earthquake} 对象。
     *
     * @param mag   表示地震的震级(大小)
     * @param place 表示地震的城市位置
     * @param timeInMilliseconds  表示地震发生时以毫秒(根据 Epoch)计的时间
     */
    public Earthquake(double mag, String place, long timeInMilliseconds) {


        this.mag = mag;
        this.place = place;
        this.timeInMilliseconds = timeInMilliseconds;
    }
}
在 EarthquakeAdapter 中,将数值格式化为 UI 所需的形式。在这里,仅需要显示 一位小数。为此创建了一个名为 formatMagnitude() 的辅助方法, 该方法接收 double 值作为输入,并返回格式化后的字符串。 该帮助方法使用模式字符串 "0.0" 初始化 DecimalFormat 对象实例。然后在适配器的 getView() 方法中, 我们可以从当前的 Earthquake 对象中读取震级值, 将数值格式化为字符串,并更新 TextView 以显示这个值。
在 EarthquakeAdapter.java 中:
import java.text.DecimalFormat;

…………

    @NonNull
    @Override
    public View getView(int position, @Nullable View convertView, @NonNull ViewGroup parent) {


		…………

        // 使用视图 ID magnitude 找到 TextView
        TextView magnitudeView = (TextView) itemView.findViewById(R.id.mag_text);
        // 格式化震级使其显示一位小数
        String formattedMagnitude = formatMagnitude(currentEarthquake.getMag());
        // 在该 TextView 中显示目前地震的震级
        magnitudeView.setText(formattedMagnitude);

        …………
    }

    /**
     * 从十进制震级值返回格式化后的仅显示一位小数的震级字符串
     * (如“3.2”)。
     */
    private String formatMagnitude(double magnitude) {


        DecimalFormat magnitudeFormat = new DecimalFormat("0.0");
        return magnitudeFormat.format(magnitude);
    }


…………
在 QueryUtils.java 更改假数据,方便用于测试:
    /**
     * Sample JSON response for a USGS query
     */
    private static final String SAMPLE_JSON_RESPONSE = "{\"type\":\"FeatureCollection\",\"metadata\":{\"generated\":1462295443000,\"url\":\"http://earthquake.usgs.gov/fdsnws/event/1/query?format=geojson&starttime=2016-01-01&endtime=2016-01-31&minmag=6&limit=10\",\"title\":\"USGS Earthquakes\",\"status\":200,\"api\":\"1.5.2\",\"limit\":10,\"offset\":1,\"count\":10},\"features\":[{\"type\":\"Feature\",\"properties\":{\"mag\":7.2,\"place\":\"88km N of Yelizovo, Russia\",\"time\":1454124312220,\"updated\":1460674294040,\"tz\":720,\"url\":\"http://earthquake.usgs.gov/earthquakes/eventpage/us20004vvx\",\"detail\":\"http://earthquake.usgs.gov/fdsnws/event/1/query?eventid=us20004vvx&format=geojson\",\"felt\":2,\"cdi\":3.4,\"mmi\":5.82,\"alert\":\"green\",\"status\":\"reviewed\",\"tsunami\":1,\"sig\":798,\"net\":\"us\",\"code\":\"20004vvx\",\"ids\":\",at00o1qxho,pt16030050,us20004vvx,gcmt20160130032510,\",\"sources\":\",at,pt,us,gcmt,\",\"types\":\",cap,dyfi,finite-fault,general-link,general-text,geoserve,impact-link,impact-text,losspager,moment-tensor,nearby-cities,origin,phase-data,shakemap,tectonic-summary,\",\"nst\":null,\"dmin\":0.958,\"rms\":1.19,\"gap\":17,\"magType\":\"mww\",\"type\":\"earthquake\",\"title\":\"M 7.2 - 88km N of Yelizovo, Russia\"},\"geometry\":{\"type\":\"Point\",\"coordinates\":[158.5463,53.9776,177]},\"id\":\"us20004vvx\"},\n" +
            "{\"type\":\"Feature\",\"properties\":{\"mag\":6.23,\"place\":\"94km SSE of Taron, Papua New Guinea\",\"time\":1453777820750,\"updated\":1460156775040,\"tz\":600,\"url\":\"http://earthquake.usgs.gov/earthquakes/eventpage/us20004uks\",\"detail\":\"http://earthquake.usgs.gov/fdsnws/event/1/query?eventid=us20004uks&format=geojson\",\"felt\":null,\"cdi\":null,\"mmi\":4.1,\"alert\":\"green\",\"status\":\"reviewed\",\"tsunami\":1,\"sig\":572,\"net\":\"us\",\"code\":\"20004uks\",\"ids\":\",us20004uks,gcmt20160126031023,\",\"sources\":\",us,gcmt,\",\"types\":\",cap,geoserve,losspager,moment-tensor,nearby-cities,origin,phase-data,shakemap,tectonic-summary,\",\"nst\":null,\"dmin\":1.537,\"rms\":0.74,\"gap\":25,\"magType\":\"mww\",\"type\":\"earthquake\",\"title\":\"M 6.1 - 94km SSE of Taron, Papua New Guinea\"},\"geometry\":{\"type\":\"Point\",\"coordinates\":[153.2454,-5.2952,26]},\"id\":\"us20004uks\"},\n" +
            "{\"type\":\"Feature\",\"properties\":{\"mag\":6.3,\"place\":\"50km NNE of Al Hoceima, Morocco\",\"time\":1453695722730,\"updated\":1460156773040,\"tz\":0,\"url\":\"http://earthquake.usgs.gov/earthquakes/eventpage/us10004gy9\",\"detail\":\"http://earthquake.usgs.gov/fdsnws/event/1/query?eventid=us10004gy9&format=geojson\",\"felt\":117,\"cdi\":7.2,\"mmi\":5.28,\"alert\":\"green\",\"status\":\"reviewed\",\"tsunami\":0,\"sig\":695,\"net\":\"us\",\"code\":\"10004gy9\",\"ids\":\",us10004gy9,gcmt20160125042203,\",\"sources\":\",us,gcmt,\",\"types\":\",cap,dyfi,geoserve,impact-text,losspager,moment-tensor,nearby-cities,origin,phase-data,shakemap,tectonic-summary,\",\"nst\":null,\"dmin\":2.201,\"rms\":0.92,\"gap\":20,\"magType\":\"mww\",\"type\":\"earthquake\",\"title\":\"M 6.3 - 50km NNE of Al Hoceima, Morocco\"},\"geometry\":{\"type\":\"Point\",\"coordinates\":[-3.6818,35.6493,12]},\"id\":\"us10004gy9\"},\n" +
            "{\"type\":\"Feature\",\"properties\":{\"mag\":7.1,\"place\":\"86km E of Old Iliamna, Alaska\",\"time\":1453631430230,\"updated\":1460156770040,\"tz\":-540,\"url\":\"http://earthquake.usgs.gov/earthquakes/eventpage/us10004gqp\",\"detail\":\"http://earthquake.usgs.gov/fdsnws/event/1/query?eventid=us10004gqp&format=geojson\",\"felt\":1816,\"cdi\":7.2,\"mmi\":6.6,\"alert\":\"green\",\"status\":\"reviewed\",\"tsunami\":1,\"sig\":1496,\"net\":\"us\",\"code\":\"10004gqp\",\"ids\":\",at00o1gd6r,us10004gqp,ak12496371,gcmt20160124103030,\",\"sources\":\",at,us,ak,gcmt,\",\"types\":\",cap,dyfi,finite-fault,general-link,general-text,geoserve,impact-link,impact-text,losspager,moment-tensor,nearby-cities,origin,phase-data,shakemap,tectonic-summary,trump-origin,\",\"nst\":null,\"dmin\":0.72,\"rms\":2.11,\"gap\":19,\"magType\":\"mww\",\"type\":\"earthquake\",\"title\":\"M 7.1 - 86km E of Old Iliamna, Alaska\"},\"geometry\":{\"type\":\"Point\",\"coordinates\":[-153.4051,59.6363,129]},\"id\":\"us10004gqp\"},\n" +
            "{\"type\":\"Feature\",\"properties\":{\"mag\":6.6,\"place\":\"215km SW of Tomatlan, Mexico\",\"time\":1453399617650,\"updated\":1459963829040,\"tz\":-420,\"url\":\"http://earthquake.usgs.gov/earthquakes/eventpage/us10004g4l\",\"detail\":\"http://earthquake.usgs.gov/fdsnws/event/1/query?eventid=us10004g4l&format=geojson\",\"felt\":11,\"cdi\":2.7,\"mmi\":3.92,\"alert\":\"green\",\"status\":\"reviewed\",\"tsunami\":1,\"sig\":673,\"net\":\"us\",\"code\":\"10004g4l\",\"ids\":\",at00o1bebo,pt16021050,us10004g4l,gcmt20160121180659,\",\"sources\":\",at,pt,us,gcmt,\",\"types\":\",cap,dyfi,geoserve,impact-link,impact-text,losspager,moment-tensor,nearby-cities,origin,phase-data,shakemap,tectonic-summary,\",\"nst\":null,\"dmin\":2.413,\"rms\":0.98,\"gap\":74,\"magType\":\"mww\",\"type\":\"earthquake\",\"title\":\"M 6.6 - 215km SW of Tomatlan, Mexico\"},\"geometry\":{\"type\":\"Point\",\"coordinates\":[-106.9337,18.8239,10]},\"id\":\"us10004g4l\"},\n" +
            "{\"type\":\"Feature\",\"properties\":{\"mag\":6.7,\"place\":\"52km SE of Shizunai, Japan\",\"time\":1452741933640,\"updated\":1459304879040,\"tz\":540,\"url\":\"http://earthquake.usgs.gov/earthquakes/eventpage/us10004ebx\",\"detail\":\"http://earthquake.usgs.gov/fdsnws/event/1/query?eventid=us10004ebx&format=geojson\",\"felt\":51,\"cdi\":5.8,\"mmi\":6.45,\"alert\":\"green\",\"status\":\"reviewed\",\"tsunami\":1,\"sig\":720,\"net\":\"us\",\"code\":\"10004ebx\",\"ids\":\",us10004ebx,pt16014050,at00o0xauk,gcmt20160114032534,\",\"sources\":\",us,pt,at,gcmt,\",\"types\":\",associate,cap,dyfi,geoserve,impact-link,impact-text,losspager,moment-tensor,nearby-cities,origin,phase-data,shakemap,\",\"nst\":null,\"dmin\":0.281,\"rms\":0.98,\"gap\":22,\"magType\":\"mww\",\"type\":\"earthquake\",\"title\":\"M 6.7 - 52km SE of Shizunai, Japan\"},\"geometry\":{\"type\":\"Point\",\"coordinates\":[142.781,41.9723,46]},\"id\":\"us10004ebx\"},\n" +
            "{\"type\":\"Feature\",\"properties\":{\"mag\":6.1,\"place\":\"12km WNW of Charagua, Bolivia\",\"time\":1452741928270,\"updated\":1459304879040,\"tz\":-240,\"url\":\"http://earthquake.usgs.gov/earthquakes/eventpage/us10004ebw\",\"detail\":\"http://earthquake.usgs.gov/fdsnws/event/1/query?eventid=us10004ebw&format=geojson\",\"felt\":3,\"cdi\":2.2,\"mmi\":2.21,\"alert\":\"green\",\"status\":\"reviewed\",\"tsunami\":0,\"sig\":573,\"net\":\"us\",\"code\":\"10004ebw\",\"ids\":\",us10004ebw,gcmt20160114032528,\",\"sources\":\",us,gcmt,\",\"types\":\",cap,dyfi,geoserve,impact-text,losspager,moment-tensor,nearby-cities,origin,phase-data,shakemap,tectonic-summary,\",\"nst\":null,\"dmin\":5.492,\"rms\":1.04,\"gap\":16,\"magType\":\"mww\",\"type\":\"earthquake\",\"title\":\"M 6.1 - 12km WNW of Charagua, Bolivia\"},\"geometry\":{\"type\":\"Point\",\"coordinates\":[-63.3288,-19.7597,582.56]},\"id\":\"us10004ebw\"},\n" +
            "{\"type\":\"Feature\",\"properties\":{\"mag\":6.2,\"place\":\"74km NW of Rumoi, Japan\",\"time\":1452532083920,\"updated\":1459304875040,\"tz\":540,\"url\":\"http://earthquake.usgs.gov/earthquakes/eventpage/us10004djn\",\"detail\":\"http://earthquake.usgs.gov/fdsnws/event/1/query?eventid=us10004djn&format=geojson\",\"felt\":8,\"cdi\":3.4,\"mmi\":3.74,\"alert\":\"green\",\"status\":\"reviewed\",\"tsunami\":0,\"sig\":594,\"net\":\"us\",\"code\":\"10004djn\",\"ids\":\",us10004djn,gcmt20160111170803,\",\"sources\":\",us,gcmt,\",\"types\":\",cap,dyfi,geoserve,impact-text,losspager,moment-tensor,nearby-cities,origin,phase-data,shakemap,tectonic-summary,\",\"nst\":null,\"dmin\":1.139,\"rms\":0.96,\"gap\":33,\"magType\":\"mww\",\"type\":\"earthquake\",\"title\":\"M 6.2 - 74km NW of Rumoi, Japan\"},\"geometry\":{\"type\":\"Point\",\"coordinates\":[141.0867,44.4761,238.81]},\"id\":\"us10004djn\"},\n" +
            "{\"type\":\"Feature\",\"properties\":{\"mag\":6.5,\"place\":\"227km SE of Sarangani, Philippines\",\"time\":1452530285900,\"updated\":1459304874040,\"tz\":480,\"url\":\"http://earthquake.usgs.gov/earthquakes/eventpage/us10004dj5\",\"detail\":\"http://earthquake.usgs.gov/fdsnws/event/1/query?eventid=us10004dj5&format=geojson\",\"felt\":1,\"cdi\":2.7,\"mmi\":7.5,\"alert\":\"green\",\"status\":\"reviewed\",\"tsunami\":1,\"sig\":650,\"net\":\"us\",\"code\":\"10004dj5\",\"ids\":\",at00o0srjp,pt16011050,us10004dj5,gcmt20160111163807,\",\"sources\":\",at,pt,us,gcmt,\",\"types\":\",cap,dyfi,geoserve,impact-link,impact-text,losspager,moment-tensor,nearby-cities,origin,phase-data,shakemap,tectonic-summary,\",\"nst\":null,\"dmin\":3.144,\"rms\":0.72,\"gap\":22,\"magType\":\"mww\",\"type\":\"earthquake\",\"title\":\"M 6.5 - 227km SE of Sarangani, Philippines\"},\"geometry\":{\"type\":\"Point\",\"coordinates\":[126.8621,3.8965,13]},\"id\":\"us10004dj5\"},\n" +
            "{\"type\":\"Feature\",\"properties\":{\"mag\":6,\"place\":\"Pacific-Antarctic Ridge\",\"time\":1451986454620,\"updated\":1459202978040,\"tz\":-540,\"url\":\"http://earthquake.usgs.gov/earthquakes/eventpage/us10004bgk\",\"detail\":\"http://earthquake.usgs.gov/fdsnws/event/1/query?eventid=us10004bgk&format=geojson\",\"felt\":0,\"cdi\":1,\"mmi\":0,\"alert\":\"green\",\"status\":\"reviewed\",\"tsunami\":0,\"sig\":554,\"net\":\"us\",\"code\":\"10004bgk\",\"ids\":\",us10004bgk,gcmt20160105093415,\",\"sources\":\",us,gcmt,\",\"types\":\",cap,dyfi,geoserve,losspager,moment-tensor,nearby-cities,origin,phase-data,shakemap,\",\"nst\":null,\"dmin\":30.75,\"rms\":0.67,\"gap\":71,\"magType\":\"mww\",\"type\":\"earthquake\",\"title\":\"M 6.0 - Pacific-Antarctic Ridge\"},\"geometry\":{\"type\":\"Point\",\"coordinates\":[-136.2603,-54.2906,10]},\"id\":\"us10004bgk\"}],\"bbox\":[-153.4051,-54.2906,10,158.5463,59.6363,582.56]}";
然后运行应用,运行结果应该如下所示(与之前无明显变化),更改前后的代码差异参考 此链接:

震级的圆圈背景
在最终的设计中,每个列表项的震级值后边 均有一个带颜色的圆圈。
这些颜色从蓝色(低震级值)到红色(高 震级值)。大于 10 级的地震一概使用 最深的红色 (#C03823)。9 级和 10 级之间的地震 使用稍微浅一些的红色 (#D93218),8 级和 9 级 之间的地震使用更浅一些的红色 (#E13A20),以此类推。每个级别都有不同的颜色。2 级以下的地震 一概使用蓝色 (#4A7BA7)。以下提供了 特定的十六进制值。
将这些颜色添加到 res/values/colors.xml 文件。在设置列表项布局时,需要 稍后引用 EarthquakeAdapter 中的 这些颜色资源 ID。
<!-- Color for magnitude 0 and 2 -->
    <color name="magnitude1">#4A7BA7</color>
    <!-- Magnitude circle color for magnitude between 2 and 3 -->
    <color name="magnitude2">#04B4B3</color>
    <!-- Magnitude circle color for magnitude between 3 and 4 -->
    <color name="magnitude3">#10CAC9</color>
    <!-- Magnitude circle color for magnitude between 4 and 5 -->
    <color name="magnitude4">#F5A623</color>
    <!-- Magnitude circle color for magnitude between 5 and 6 -->
    <color name="magnitude5">#FF7D50</color>
    <!-- Magnitude circle color for magnitude between 6 and 7 -->
    <color name="magnitude6">#FC6644</color>
    <!-- Magnitude circle color for magnitude between 7 and 8 -->
    <color name="magnitude7">#E75F40</color>
    <!-- Magnitude circle color for magnitude between 8 and 9 -->
    <color name="magnitude8">#E13A20</color>
    <!-- Magnitude circle color for magnitude between 9 and 10 -->
    <color name="magnitude9">#D93218</color>
    <!-- Magnitude circle color for magnitude over 10 -->
    <color name="magnitude10plus">#C03823</color>
为有色圆圈定义一个新的 drawable。在 Android Studio 的 项目目录面板中,右键单击 res/drawable 文件夹 以添加新的 drawable 资源 XML 文件。将文件命名为 magnitude_circle。
将 res/drawable/magnitude_circle.xml 文件的内容 替换为下面的 XML。
在 magnitude_circle.xml 中:
<?xml version="1.0" encoding="utf-8"?>
 <!-- Background circle for the magnitude value -->
 <shape
    xmlns:android="http://schemas.android.com/apk/res/android"
    android:shape="oval">
    <solid android:color="@color/magnitude1" />
    <size
        android:width="36dp"
        android:height="36dp" />
    <corners android:radius="18dp" />
 </shape>
通过在 XML 中定义圆圈形状,创建了一个灵活的资源, 该资源可以在各种设备中使用,而不用从设计器中 包含多个图像资源。我们也可以在 Java 代码中对颜色进行操纵, 以进一步减少所需的资源数量。项目中图像文件越少 意味着应用越小,这对于最终用户来说 是好事!
现在,修改列表项布局,使震级 TextView 的 背景属性引用我们刚刚定义的新 drawable 资源 (android:background="@drawable/magnitude_circle")。也可以对 TextView 的外观进行其他改动,例如字体大小和颜色, 使其与设计模拟相符。
在 earthquake_item.xml 中:
 <TextView
    android:id="@+id/magnitude"
    android:layout_width="36dp"
    android:layout_height="36dp"
    android:layout_gravity="center_vertical"
    android:background="@drawable/magnitude_circle"
    android:fontFamily="sans-serif-medium"
    android:gravity="center"
    android:textColor="@android:color/white"
    android:textSize="16sp"
    tools:text="8.9" />
可以在位置偏移 TextView 上添加 16dp 的 左侧边距,使位置 TextView 和震级 TextView 之间 具有一定的空白。
在 earthquake_item.xml 中:
    <TextView
        android:id="@+id/place_offset_text"
        android:layout_width="0dp"
        android:layout_height="wrap_content"
        android:layout_gravity="center_vertical"
        android:layout_marginLeft="16dp"
        android:layout_weight="2"
        tools:text="30km S of" />
最后,需要修改 EarthquakeAdapter,以将 每个列表项的背景圆圈设置为正确的颜色。此代码段 假设 magnitudeView 是列表项布局中 R.id.mag_text TextView 的参考。你还需要导入 GradientDrawable 类。
在 EarthquakeAdapter.java 中:
import android.graphics.drawable.GradientDrawable;
在 EarthquakeAdapter.getView() 中:
        // 为震级圆圈设置正确的背景颜色。
        // 从 TextView 获取背景,该背景是一个 GradientDrawable。
        GradientDrawable magnitudeCircle = (GradientDrawable) magnitudeView.getBackground();
        // 根据当前的地震震级获取相应的背景颜色
        int magnitudeColor = getMagnitudeColor(currentEarthquake.getMag());
        // 设置震级圆圈的颜色
        magnitudeCircle.setColor(magnitudeColor);
这会在 Android Studio 中看到一个错误, 表示应用无法识别 getMagnitudeColor() 方法,我们可以通过定义名为 getMagnitudeColor(double magnitude) 的专用辅助方法,基于 当前的地震震级值返回正确的颜色值来实现此设计更改。 (使用 switch 语句实现)
关于颜色值的注意事项:在 Java 代码中,可以参考 使用颜色资源 ID(如 R.color.magnitude1、R.color.magnitude2) 在 colors.xml 文件中定义的颜色。尽管仍需将颜色 资源 ID 转换为颜色整数值。示例:
int magnitude1Color = ContextCompat.getColor(getContext(), R.color.magnitude1);
EarthquakeAdapter 类中的辅助方法 getMagnitudeColor(double magnitude) 定义如下:
/**
     * 根据 震级的级别 返回不同的 震级圆圈颜色
     */
    private int getMagnitudeColor(double magnitude) {


        int magnitudeColorResourceId;
        // 返回颜色整数 值。对于正 小数,可以将其看作截去小数点后的 数字部分。
        int magnitudeFloor = (int) Math.floor(magnitude);
        switch (magnitudeFloor) {


            case 0:
            case 1:
                magnitudeColorResourceId = R.color.magnitude1;
                break;
            case 2:
                magnitudeColorResourceId = R.color.magnitude2;
                break;
            case 3:
                magnitudeColorResourceId = R.color.magnitude3;
                break;
            case 4:
                magnitudeColorResourceId = R.color.magnitude4;
                break;
            case 5:
                magnitudeColorResourceId = R.color.magnitude5;
                break;
            case 6:
                magnitudeColorResourceId = R.color.magnitude6;
                break;
            case 7:
                magnitudeColorResourceId = R.color.magnitude7;
                break;
            case 8:
                magnitudeColorResourceId = R.color.magnitude8;
                break;
            case 9:
                magnitudeColorResourceId = R.color.magnitude9;
                break;
            default:
                magnitudeColorResourceId = R.color.magnitude10plus;
                break;
        }
        // 将颜色资源 ID 转换为 实际整数颜色值,并将结果作为 返回值。
        return ContextCompat.getColor(getContext(), magnitudeColorResourceId);
    }
更改完成后运行一下应用,结果和预期的一样 ,不同的震级有着不同颜色的背景圆圈,Nice。(更改前后的代码对比参考 此链接)

改进界面
新颜色
1.将这些新颜色添加到 res/values/colors.xml 文件。稍后将在 我们为你提供的 earthquake_item 布局中引用这些颜色
+    <!-- Text color for the details of the earthquake in the list item -->
+    <color name="textColorEarthquakeDetails">#B4BAC0</color>
+    <!-- Text color for the primary location of the earthquake in the list item -->
+    <color name="textColorEarthquakePlace">#2B3D4D</color>
列表项布局
2.使用提供的布局更新 earthquake_item.xml 文件。
<LinearLayout xmlns:android="http://schemas.android.com/apk/res/android"
    xmlns:tools="http://schemas.android.com/tools"
    android:layout_width="match_parent"
    android:layout_height="?android:attr/listPreferredItemHeight"
    android:orientation="horizontal"
    android:paddingStart="16dp"
    android:paddingLeft="16dp"
    android:paddingEnd="16dp"
    android:paddingRight="16dp">

    <TextView
        android:id="@+id/mag_text"
        android:layout_width="36dp"
        android:layout_height="36dp"
        android:layout_gravity="center_vertical"
        android:background="@drawable/magnitude_circle"
        android:fontFamily="sans-serif-medium"
        android:gravity="center"
        android:textColor="@android:color/white"
        android:textSize="16sp"
        tools:text="8.9" />

    <LinearLayout
        android:layout_width="0dp"
        android:layout_height="wrap_content"
        android:layout_gravity="center_vertical"
        android:layout_marginStart="16dp"
        android:layout_marginLeft="16dp"
        android:layout_weight="1"
        android:orientation="vertical">

        <TextView
            android:id="@+id/place_offset_text"
            android:layout_width="wrap_content"
            android:layout_height="wrap_content"
            android:ellipsize="end"
            android:fontFamily="sans-serif-medium"
            android:maxLines="1"
            android:textAllCaps="true"
            android:textColor="@color/textColorEarthquakeDetails"
            android:textSize="12sp"
            tools:text="30km S of" />

        <TextView
            android:id="@+id/primary_place_text"
            android:layout_width="wrap_content"
            android:layout_height="wrap_content"
            android:ellipsize="end"
            android:maxLines="2"
            android:textColor="@color/textColorEarthquakePlace"
            android:textSize="16sp"
            tools:text="Long placeholder location that should wrap to more than 2 lines of text" />

    </LinearLayout>

    <LinearLayout
        android:layout_width="wrap_content"
        android:layout_height="wrap_content"
        android:layout_gravity="center_vertical"
        android:layout_marginStart="16dp"
        android:layout_marginLeft="16dp"
        android:orientation="vertical">

        <TextView
            android:id="@+id/date_text"
            android:layout_width="wrap_content"
            android:layout_height="wrap_content"
            android:layout_gravity="end"
            android:textColor="@color/textColorEarthquakeDetails"
            android:textSize="12sp"
            tools:text="Mar 6, 2010" />

        <TextView
            android:id="@+id/time_text"
            android:layout_width="wrap_content"
            android:layout_height="wrap_content"
            android:layout_gravity="end"
            android:textColor="@color/textColorEarthquakeDetails"
            android:textSize="12sp"
            tools:text="3:00 PM" />

    </LinearLayout>
</LinearLayout>
隐藏列表项间的分隔线
3.要隐藏列表项间的分隔线, 可在 earthquake_activity.xml 文件中的 ListView XML 元素上设置 两个属性。我们希望将 android:divider 设置为 “@null” 并将 android:dividerHeight 设置为 “0dp”。
<ListView     xmlns:android="http://schemas.android.com/apk/res/android"
     android:id="@+id/list"
     android:orientation="vertical"
     android:layout_width="match_parent"
     android:layout_height="match_parent"
     android:divider="@null"
     android:dividerHeight="0dp"/>
结果
完成以上所有代码更改后,应用应如下所示(代码更改前后差异参考 此链接)

添加地震Intent
现在距离完成列表 UI 布局只剩下 一件事。设置 Quake Report,以便当用户单击特定列表 项时,会将其发送到 USGS 网页以查看有关该地震的 其他详细信息。
来自服务器的 JSON 包含该地震的网站 URL。我们需要 提取该字段并将其存储在应用中。
在检测到用户已单击某个列表项之后,需要打开 正确的网页。因为不必关心网页是由设备上的哪一个 Web 浏览器应用 打开的,因此可以创建并发送包含网站 URL 的 隐式 Intent。
提取网站 URL
JSON 响应在 “url” 键下包含每个地震的 网站 URL。在解析期间,我们需要提取其他地震数据 旁边的此值。然后,我们会将该 url 传递到 Earthquake 对象中。
在 QueryUtils.extractEarthquake() 中:
// 提取名为 "url" 的键的值
String earthquakeUrl = properties.getString("url");

// 使用震级、地点、时间和来自 JSON 响应的 url,
// 创建一个新的 {@link Earthquake} 对象。
Earthquake earthquake = new Earthquake(earthquakeMag, earthquakePlace, earthquakeTime, earthquakeUrl);
存储网站 URL
上述更改也需要更新 Earthquake 类。 需要:
- 修改构造函数以接受 URL 的字符串输入参数
- 添加私有全局变量来存储 URL
- 提供公共 getter 方法,以便其他类可以访问该变量。
在 Earthquake.java 中:
public class Earthquake {


	…………

    /**
     * 地震的网站 URL
     */
    private String url;

	……………

    /**
     * 返回用于查找关于地震的更多信息的网站 URL。
     */
    public String getUrl() {


        return url;
    }

    /**
     * 构造一个新的 {@link Earthquake} 对象。
     *
     * @param mag                表示地震的震级(大小)
     * @param place              表示地震的城市位置
     * @param timeInMilliseconds 表示地震发生时以毫秒(根据 Epoch)计的时间
     * @param url                表示用于查找关于地震的更多详细信息的网站 URL
     */
    public Earthquake(double mag, String place, long timeInMilliseconds, String url) {


        this.mag = mag;
        this.place = place;
        this.timeInMilliseconds = timeInMilliseconds;
        this.url = url;
    }
}
处理列表项单击
将地震 URL 正确存储于 Earthquake 对象中后, 单击列表项时可访问该 URL。但是, 如何打开网站?如果用户安装了多个 web 浏览器该怎么办?哪个应用将打开地震网站? 最好使用用户已经选择的默认值, 或为其提供选项。可通过创建隐式 Intent 来实现 Intent。例如,如果 URI 表示一个 位置,Android 将打开一个地图应用。在此情况下,该 资源是一个 HTTP URL,因此 Android 通常会打开一个浏览器。
我们想要使用的 Intent 构造函数需要一个 Uri 对象, 因此我们需要将字符串形式的 URL 转换为 URI。 我们知道地震 URL 是一种形式更具体的 URI,因此 可以使用 Uri.parse 方法。
接下来需要在 ListView 上声明一个 OnItemClickListener。 OnItemClickListener 是一个接口,其中包含一个单一的方法 onItemClick()。通过声明一个实现此界面的匿名类, 并为 onItemClick() 方法中应发生的内容 提供自定义逻辑。(必须在 EarthquakeAdapter 本地变量上 添加 final 修饰符,以便可以访问 OnItemClickListener 中的适配器变量。)
在 EarthquakeActivity.onCreate() 中:
// Create a new {@link ArrayAdapter} of earthquakes
        final EarthquakeAdapter adapter = new EarthquakeAdapter(this, earthquakes);

        // Set the adapter on the {@link ListView}
        // so the list can be populated in the user interface
        earthquakeListView.setAdapter(adapter);

        earthquakeListView.setOnItemClickListener(new AdapterView.OnItemClickListener() {


            @Override
            public void onItemClick(AdapterView<?> adapterView, View view, int position, long l) {


                // 查找单击的当前地震
                Earthquake currentEarthquake = adapter.getItem(position);

                // 将字符串 URL 转换为 URI 对象(以传递至 Intent 中 constructor)
                Uri earthquakeUri = Uri.parse(currentEarthquake.getUrl());

                // 创建一个新的 Intent 以查看地震 URI
                Intent websiteIntent = new Intent(Intent.ACTION_VIEW, earthquakeUri);

                // 发送 Intent 以启动新活动
                startActivity(websiteIntent);
            }
        });
更改结束后运行应用,(代码更改前后对比参考 此链接)
QuakeReport — 应用测试
总结
通过对 QuakeReport 应用的学习,学习对 JSON 数据的解析方法,以及对解析后的数据按需求进行预处理,并利用 隐式 Intent 使用户能够跳转到 每条地震详情的 WEB 页面从而了解更多。
但这还远远不够,比如 JSON 数据是以硬编码的形式定义,这意味着用户无法从 应用中 查看最新的地震信息(应该没人会整天浏览已经发生很久了的信息吧),这会在之后学习中解决。
没想到这么点东西竟花了两天时间才完成(今天一整天都在路途中)
参考
org.json.JSONObject - Android Developers