Make sure you have an Internet connection on your Ubuntu Server and it is up-to-date as well. Run the following commands to update/upgrade the list of available packages.
sudo apt update && sudo apt upgrade1 选择您Zabbix服务器的平台
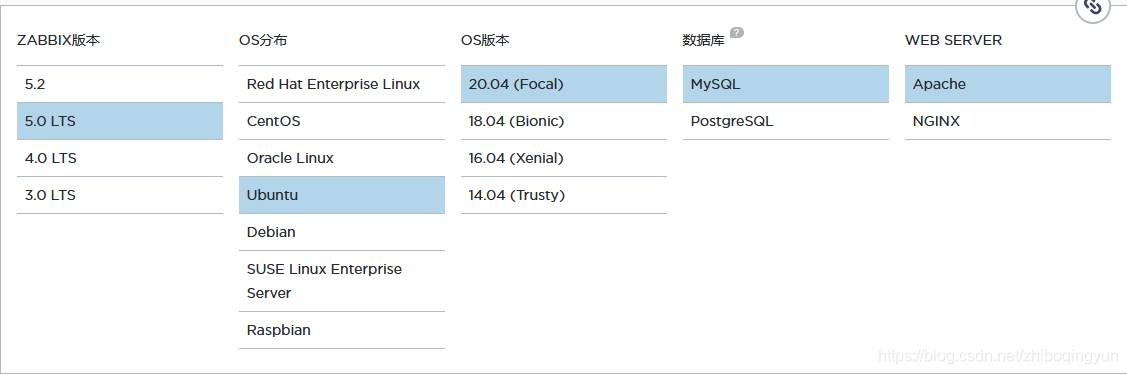
2 选择您Zabbix服务器的平台
-
a. 安装 数据库
# wget https://repo.zabbix.com/zabbix/5.0/ubuntu/pool/main/z/zabbix-release/zabbix-release_5.0-1+focal_all.deb
# dpkg -i zabbix-release_5.0-1+focal_all.deb
# sudo apt update && sudo apt upgrade-
b. 安装Zabbix server,Web前端,agent
# sudo apt install -y zabbix-server-mysql zabbix-frontend-php zabbix-apache-conf zabbix-agent mysql-server3. Check Versions
Check all the software versions you have installed. Here you can check the supported versions
-
MySQL server version
sudo mysql -V-
Apache version(因架构architecture 'i386'不同官方支持的focal,异常处理)
sudo apache2 -VN: Skipping acquire of configured file 'main/binary-i386/Packages' as repository 'http://repo.zabbix.com/zabbix/5.0/ubuntu focal InRelease' doesn't support architecture 'i386'
更改zabbix.list文件,在deb后面添加【arch=amd64】
cd /etc/apt/sources.list.d
vim zabbix.list 
-
PHP Version
sudo php --version4. 创建初始数据库 Configure MySQL Server
# mysql -uroot -p
password
mysql> create database zabbix character set utf8 collate utf8_bin;
mysql> create user zabbix@localhost identified by 'password';
mysql> grant all privileges on zabbix.* to zabbix@localhost;
mysql> quit;
5.导入初始架构和数据,系统将提示您输入新创建的密码
# zcat /usr/share/doc/zabbix-server-mysql*/create.sql.gz | mysql -uzabbix -p zabbix Verify the schema is imported successfully to database zabbix.
- In order to do that, we have to log in to MySQL server with MySQL user root and provide the password when prompted
sudo mysql -u root -p- Use database zabbix, where we imported initial schema and data
use zabbix;- So we are now in database zabbix. Let’s see the tables
show tables;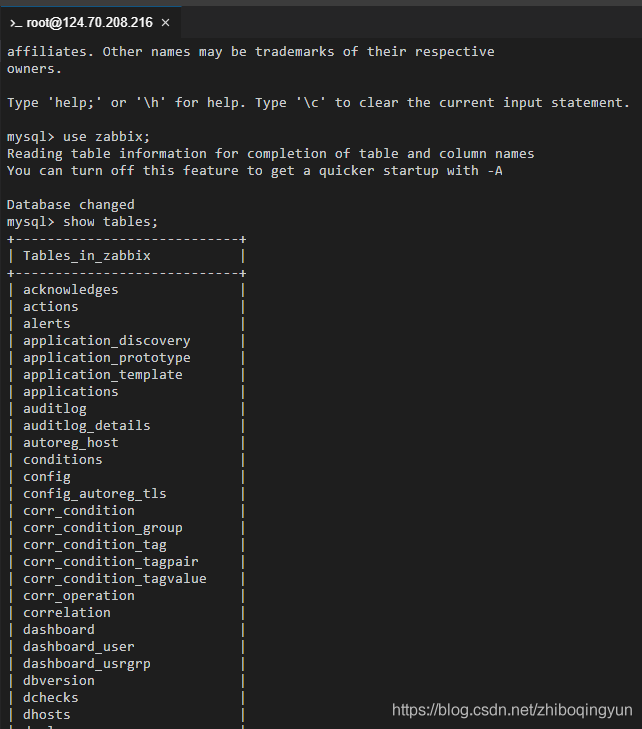
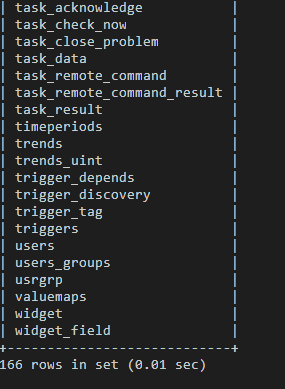
- You should see the tables on the screen. Let’s get out of MySQL server
quit;6. 为Zabbix server配置数据库
编辑配置文件 /etc/zabbix/zabbix_server.conf
vi /etc/zabbix/zabbix_server.conf
DBPassword=password
7.为Zabbix前端配置PHP(变更时区)
编辑配置文件 /etc/zabbix/apache.conf, uncomment and set the right timezone for you.
# php_value date.timezone Europe/Riga 替换为
# php_value date.timezone Asia/Shanghai8.启动Zabbix server和agent进程
启动Zabbix server和agent进程,并为它们设置开机自启
# systemctl restart zabbix-server zabbix-agent apache2
# systemctl enable zabbix-server zabbix-agent apache2
9.登录配置Zabbix前端
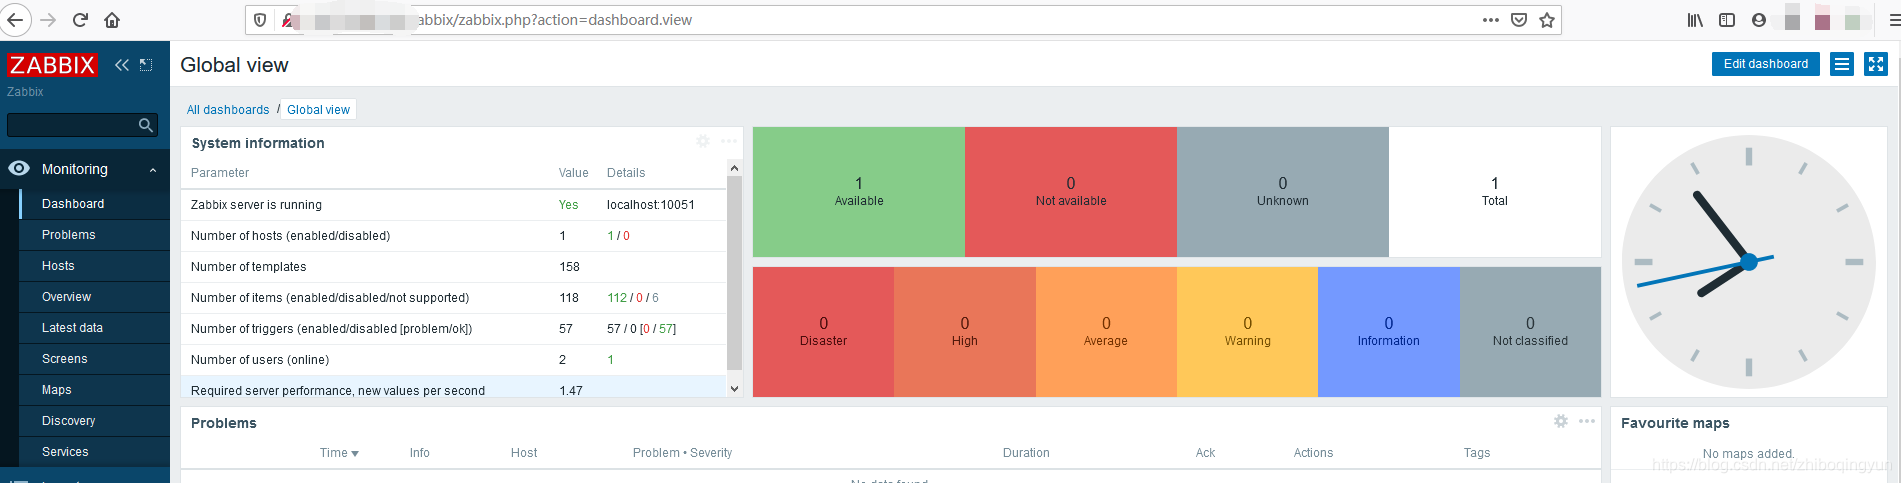
连接到新安装的Zabbix前端: http://server_ip_or_name/zabbix
The default credentials are as follows:
Username: Admin
Password: zabbix
参考链接
https://blog.masteringmdm.com/zabbix-installation-on-ubuntu-server/