Introduction
Spring Cloud Data Flow is a cloud-native programming and operating model for composable data microservices.
With Spring Cloud Data Flow, developers can create and orchestrate data pipelines for common use cases such as data ingest, real-time analytics, and data import/export.
This data pipelines come in two flavors, streaming and batch data pipelines.
In the first case, an unbounded amount of data is consumed or produced via messaging middleware. While in the second case the short-lived task processes a finite set of data and then terminate.
This article will focus on streaming processing.
Architectural Overview
The key components these type of architecture are Applications, the Data Flow Server, and the target runtime.
Also in addition to these key components, we also usually have a Data Flow Shell and a message broker within the architecture.
Let’s see all these components in more detail.
Applications
Typically, a streaming data pipeline includes consuming events from external systems, data processing, and polyglot persistence. These phases are commonly referred to as Source, Processor, and Sink in Spring Cloud terminology:
- Source: is the application that consumes events
- Processor: consumes data from the Source, does some
processing on it, and emits the processed data to the next application in the pipeline - Sink: either consumes from a Source or Processor and writes the data to the desired persistence layer
These applications can be packaged in two ways:
- Spring Boot uber-jar that is hosted in a maven repository, file, http
or any other Spring resource implementation (this method will be used
in this article) - Docker
Many sources, processor, and sink applications for common use-cases (e.g. jdbc, hdfs, http, router) are already provided and ready to use by the Spring Cloud Data Flow team.
Runtime
Also, a runtime is needed for these applications to execute. The supported runtimes are:
- Cloud Foundry
- Apache YARN
- Kubernetes
- Apache Mesos
- Local Server for development (wich will be used in this article)
Data Flow Server
The component that is responsible for deploying applications to a runtime is the Data Flow Server. There is a Data Flow Server executable jar provided for each of the target runtimes.
The Data Flow Server is responsible for interpreting:
- A stream DSL that describes the logical flow of data through multiple
applications. - A deployment manifest that describes the mapping of applications onto
the runtime.
Data Flow Shell
The Data Flow Shell is a client for the Data Flow Server. The shell allows us to perform the DSL command needed to interact with the server.
As an example, the DSL to describe the flow of data from an http source to a jdbc sink would be written as “http | jdbc”. These names in the DSL are registered with the Data Flow Server and map onto application artifacts that can be hosted in Maven or Docker repositories.
Spring also offer a graphical interface, named Flo, for creating and monitoring streaming data pipelines. However, its use is outside the discussion of this article.
Message Broker
As we’ve seen in the example of the previous section, we have used the pipe symbol into the definition of the flow of data. The pipe symbol represents the communication between the two applications via messaging middleware.
This means that we need a message broker up and running in the target environment.
The two messaging middleware brokers that are supported are:
- Apache Kafka
- RabbitMQ
And so, now that we have an overview of the architectural components – it’s time to build our first stream processing pipeline.
Install a Message Broker
As we have seen, the applications in the pipeline need a messaging middleware to communicate. For the purpose of this article, we’ll go with RabbitMQ.
For the full details of the installation, you can follow the instruction on the official site.
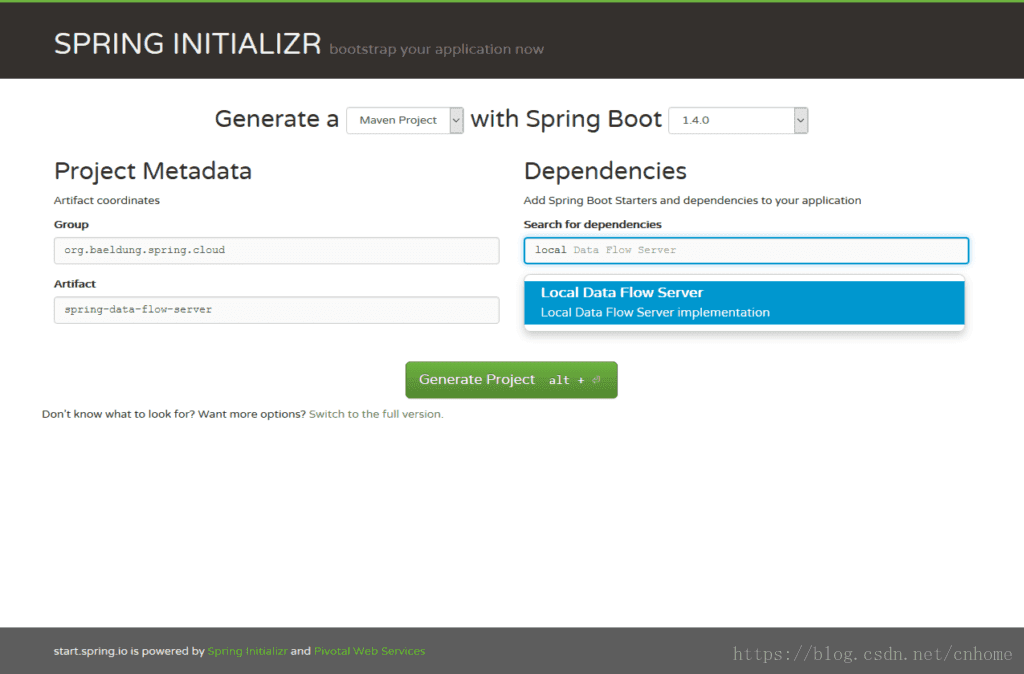
The Local Data Flow Server
To make short work of generating our applications, we’ll use Spring Initilizr; with its help, we can obtain our Spring Boot applications in few minutes.
After reaching the website, simply choose a Group, an Artifact name and select Local Data Flow Server from the dependencies search box.
Once this is done, click on the button Generate Project to start the download of the Maven artifact.
After the download is completed, unzip the project and import it as a maven project in your IDE of choice.
Now we need to annotate the Spring Boot main class with @EnableDataFlowServer annotation:
@EnableDataFlowServer
@SpringBootApplication
public class SpringDataFlowServerApplication {

    public static void main(String[] args) {
        SpringApplication.run(
          SpringDataFlowServerApplication.class, args);
    }
}
That’s all. Our Local Data Flow Server is ready to be executed:
mvn spring-boot:runThe application will boot up on port 9393.
The Data Flow Shell
Again, go to the Spring Initializr and choose a Group, an Artifact name and select Data Flow Shell from the dependencies search box.
Once downloaded and imported the project, we need to add the @EnableDataFlowShell annotation to the Spring Boot main class:
@EnableDataFlowShell
@SpringBootApplication
public class SpringDataFlowShellApplication {

    public static void main(String[] args) {
        SpringApplication.run(SpringDataFlowShellApplication.class, args);
    }
}
We can now run the shell:
mvn spring-boot:runAfter the shell is running, we can type the help command in the prompt to see a complete list of command that we can perform.
The Source Application
Similarly, on Initializr, we’ll now create a simple application with a Stream Rabbit dependency.
We’ll then add the @EnableBinding(Source.class) annotation to the Spring Boot main class:
@EnableBinding(Source.class)
@SpringBootApplication
public class SpringDataFlowTimeSourceApplication {

    public static void main(String[] args) {
        SpringApplication.run(
          SpringDataFlowTimeSourceApplication.class, args);
    }
}
Now we need to define the source of the data that must be processed. This source could be any potentially endless workload (internet-of-things sensor data, 24/7 event processing, online transaction data ingest).
In our sample application, we produce one event (for simplicity a new timestamp) every 10 seconds with a Poller.
The @InboundChannelAdapter annotation sends a message to the source’s output channel, using the return value as the payload of the message:
@Bean
@InboundChannelAdapter(
  value = Source.OUTPUT,
  poller = @Poller(fixedDelay = "10000", maxMessagesPerPoll = "1")
)
public MessageSource<Long> timeMessageSource() {
    return () -> MessageBuilder.withPayload(new Date().getTime()).build();
}
Our data source is ready.
The Processor Application
Next- we’ll create an application with a Stream Rabbit dependency.
We’ll then add the @EnableBinding(Processor.class) annotation to the Spring Boot main class:
@EnableBinding(Processor.class)
@SpringBootApplication
public class SpringDataFlowTimeProcessorApplication {

    public static void main(String[] args) {
        SpringApplication.run(
          SpringDataFlowTimeProcessorApplication.class, args);
    }
}
Next, we need to define a method to process the data that coming from the source application.
To define a transformer, we need to annotate this method with @Transformer annotation:
@Transformer(inputChannel = Processor.INPUT,
  outputChannel = Processor.OUTPUT)
public Object transform(Long timestamp) {

    DateFormat dateFormat = new SimpleDateFormat("yyyy/MM/dd hh:mm:yy");
    String date = dateFormat.format(timestamp);
    return date;
}
It converts a timestamp from the ‘input’ channel to a formatted date which will be sent to the ‘output’ channel.
The Sink Application
The last application to create is the Sink application.
Again, go to the Spring Initializr and choose a Group, an Artifact name and select Stream Rabbit from the dependencies search box.
Then add the @EnableBinding(Sink.class) annotation to the Spring Boot main class:
@EnableBinding(Sink.class)
@SpringBootApplication
public class SpringDataFlowLoggingSinkApplication {

    public static void main(String[] args) {
    SpringApplication.run(
          SpringDataFlowLoggingSinkApplication.class, args);
    }
}
Now we need a method to intercept the messages coming from the processor application.
To do this, we need to add the @StreamListener(Sink.INPUT) annotation to our method:
@StreamListener(Sink.INPUT)
public void loggerSink(String date) {
    logger.info("Received: " + date);
}
The method simply prints the timestamp transformed in a formatted date to a log file.
Register a Stream App
The Spring Cloud Data Flow Shell allow us to Register a Stream App with the App Registry using the app register command.
We must provide a unique name, application type, and a URI that can be resolved to the app artifact. For the type, specify “source“, “processor“, or “sink“.
When providing a URI with the maven scheme, the format should conform to the following:
maven://<groupId>:<artifactId>[:<extension>[:<classifier>]]:<version>To register the Source, Processor and Sink applications previously created, go to the Spring Cloud Data Flow Shell and issue the following commands from the prompt:
app register --name time-source --type source
  --uri maven://org.baeldung.spring.cloud:spring-data-flow-time-source:jar:0.0.1-SNAPSHOT

app register --name time-processor --type processor
  --uri maven://org.baeldung.spring.cloud:spring-data-flow-time-processor:jar:0.0.1-SNAPSHOT

app register --name logging-sink --type sink
  --uri maven://org.baeldung.spring.cloud:spring-data-flow-logging-sink:jar:0.0.1-SNAPSHOT
Create and Deploy the Stream
To create a new stream definitions go to the Spring Cloud Data Flow Shell and execute the following shell command:
stream create --name time-to-log
  --definition 'time-source | time-processor | logging-sink'
This defines a stream named time-to-log based on the DSL expression ‘time-source | time-processor | logging-sink’.
Then to deploy the stream execute the following shell command:
stream deploy --name time-to-logThe Data Flow Server resolves time-source, time-processor, and logging-sink to maven coordinates and uses those to launch the time-source, time-processor and logging-sink applications of the stream.
If the stream is correctly deployed you’ll see in the Data Flow Server logs that the modules have been started and tied together:
2016-08-24 12:29:10.516  INFO 8096 --- [io-9393-exec-10] o.s.c.d.spi.local.LocalAppDeployer: deploying app time-to-log.logging-sink instance 0
   Logs will be in PATH_TO_LOG/spring-cloud-dataflow-1276836171391672089/time-to-log-1472034549734/time-to-log.logging-sink
2016-08-24 12:29:17.600  INFO 8096 --- [io-9393-exec-10] o.s.c.d.spi.local.LocalAppDeployer       : deploying app time-to-log.time-processor instance 0
   Logs will be in PATH_TO_LOG/spring-cloud-dataflow-1276836171391672089/time-to-log-1472034556862/time-to-log.time-processor
2016-08-24 12:29:23.280  INFO 8096 --- [io-9393-exec-10] o.s.c.d.spi.local.LocalAppDeployer       : deploying app time-to-log.time-source instance 0
   Logs will be in PATH_TO_LOG/spring-cloud-dataflow-1276836171391672089/time-to-log-1472034562861/time-to-log.time-source
Reviewing the Result
In this example, the source simply sends the current timestamp as a message each second, the processor format it and the log sink outputs the formatted timestamp using the logging framework.
The log files are located within the directory displayed in the Data Flow Server’s log output, as shown above. To see the result, we can tail the log:
tail -f PATH_TO_LOG/spring-cloud-dataflow-1276836171391672089/time-to-log-1472034549734/time-to-log.logging-sink/stdout_0.log
2016-08-24 12:40:42.029  INFO 9488 --- [r.time-to-log-1] s.c.SpringDataFlowLoggingSinkApplication : Received: 2016/08/24 11:40:01
2016-08-24 12:40:52.035  INFO 9488 --- [r.time-to-log-1] s.c.SpringDataFlowLoggingSinkApplication : Received: 2016/08/24 11:40:11
2016-08-24 12:41:02.030  INFO 9488 --- [r.time-to-log-1] s.c.SpringDataFlowLoggingSinkApplication : Received: 2016/08/24 11:40:21
Conclusion
In this article, we have seen how to build a data pipeline for stream processing through the use of Spring Cloud Data Flow.
Also, we saw the role of Source, Processor and Sink applications inside the stream and how to plug and tie this module inside a Data Flow Server through the use of Data Flow Shell.
The example code can be found in the GitHub project.