文章目录
CocoaPods管理第三方库
1、pod init自动生成Podfile:
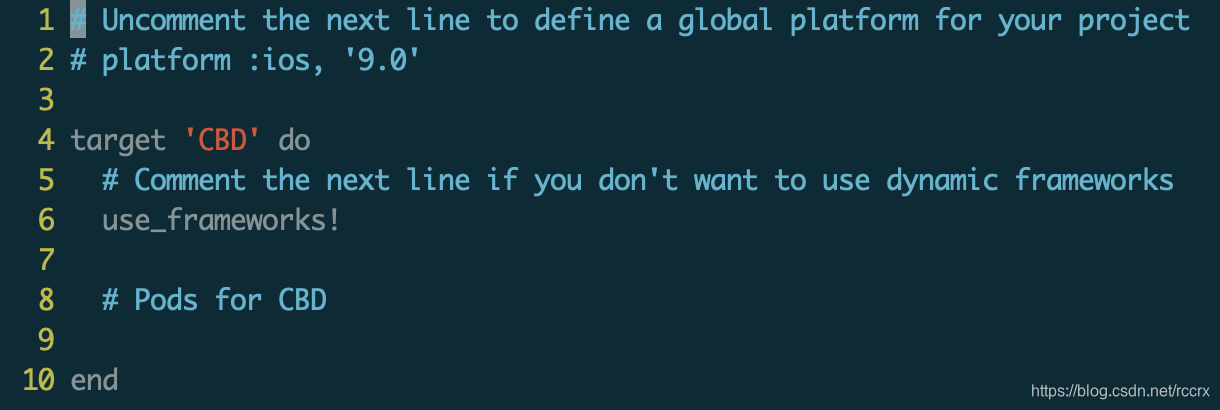
2、vim Podfile,取消platform的注释,注释use_frameworks!使用静态库,添加pod 'AFNetworking', '~> 3.2.1':
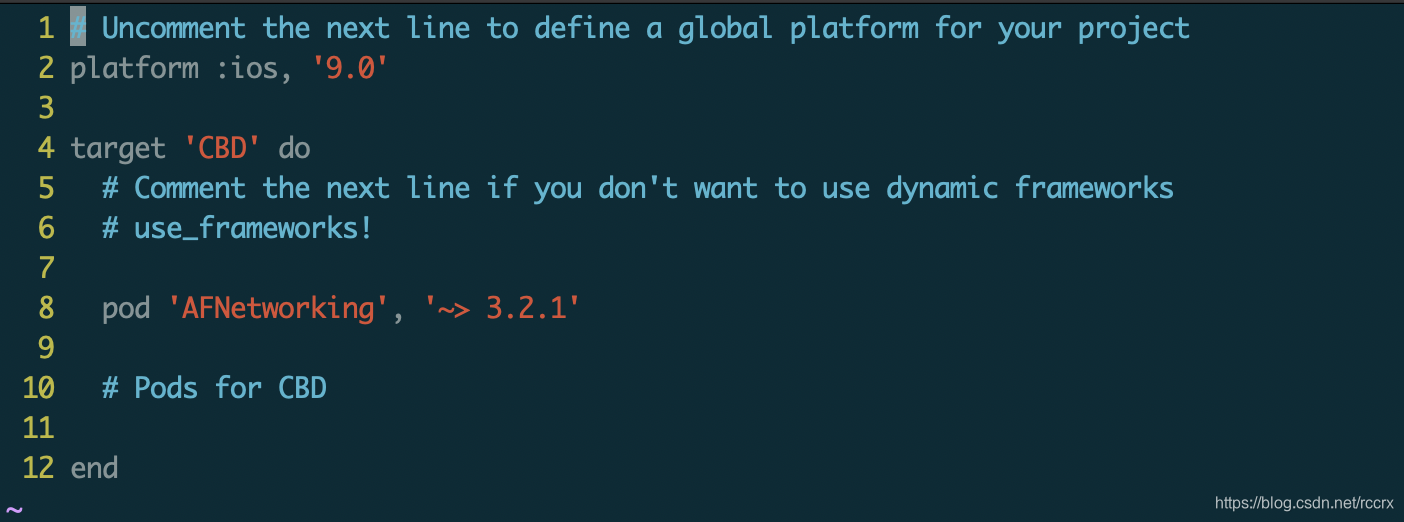
- 2.1、不使用use_frameworks!则在Pods项目(前面为蓝色图标)的Products下生成.a文件;使用use_frameworks!则生成.framework文件。
3、执行pod install生成CBD.xcworkspace文件。
CocoaPods创建自己的库
创建复合项目和Framework
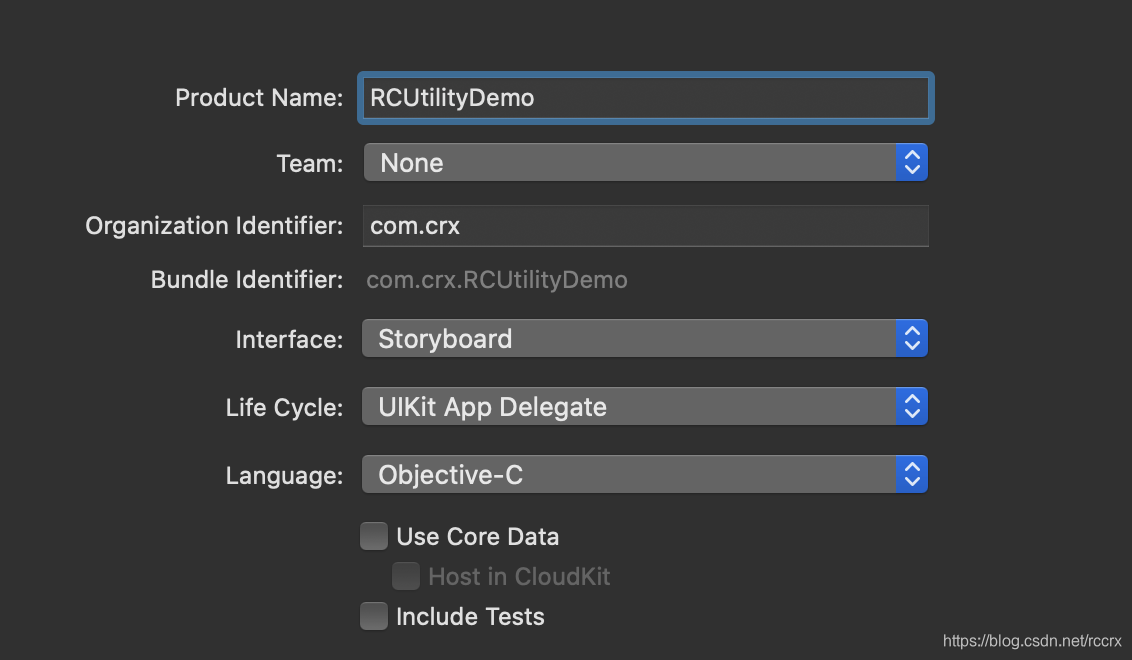
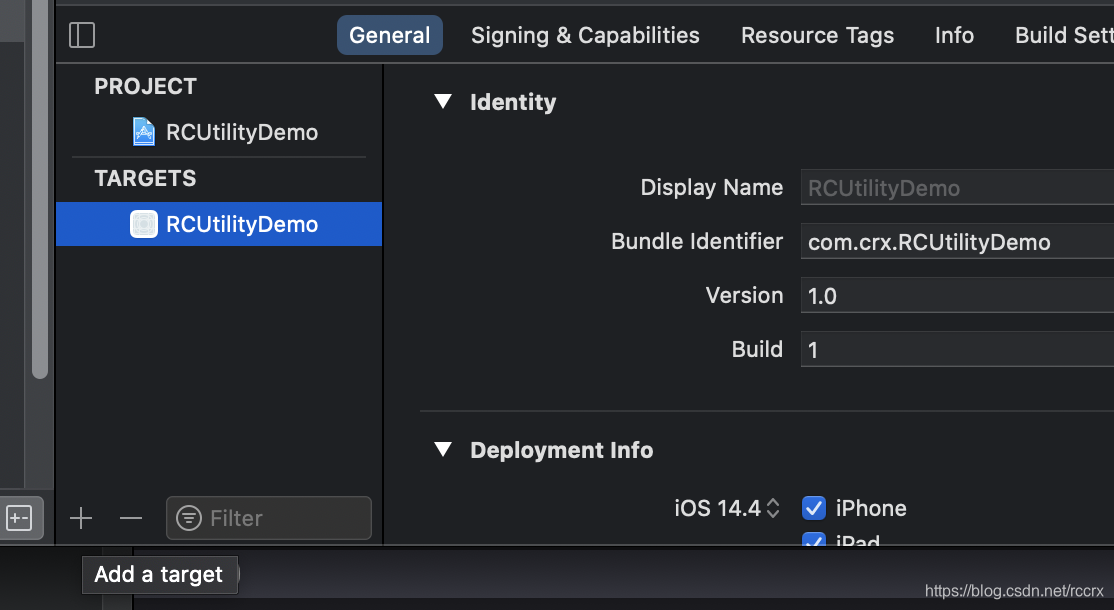
1、创建普通的项目:
2、点击TARGETS左下角的“+”号,添加一个Target,选择“iOS”->“Framework & Library”->“Framework”。
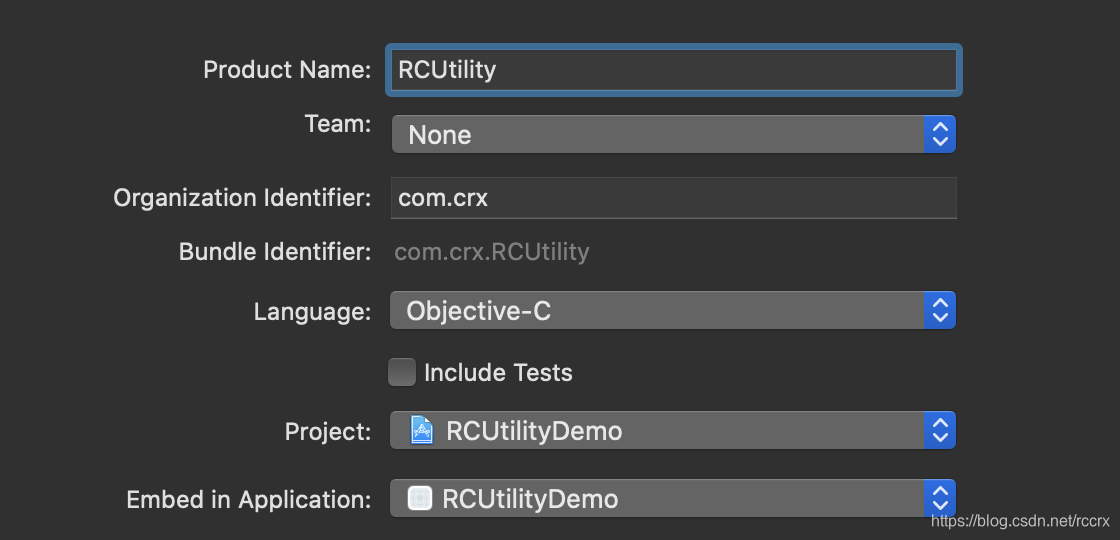
创建Framework之后,左侧导航面板会多一个“RCUtility”目录,中间面板TARGETS也会多一个“RCUtility”。
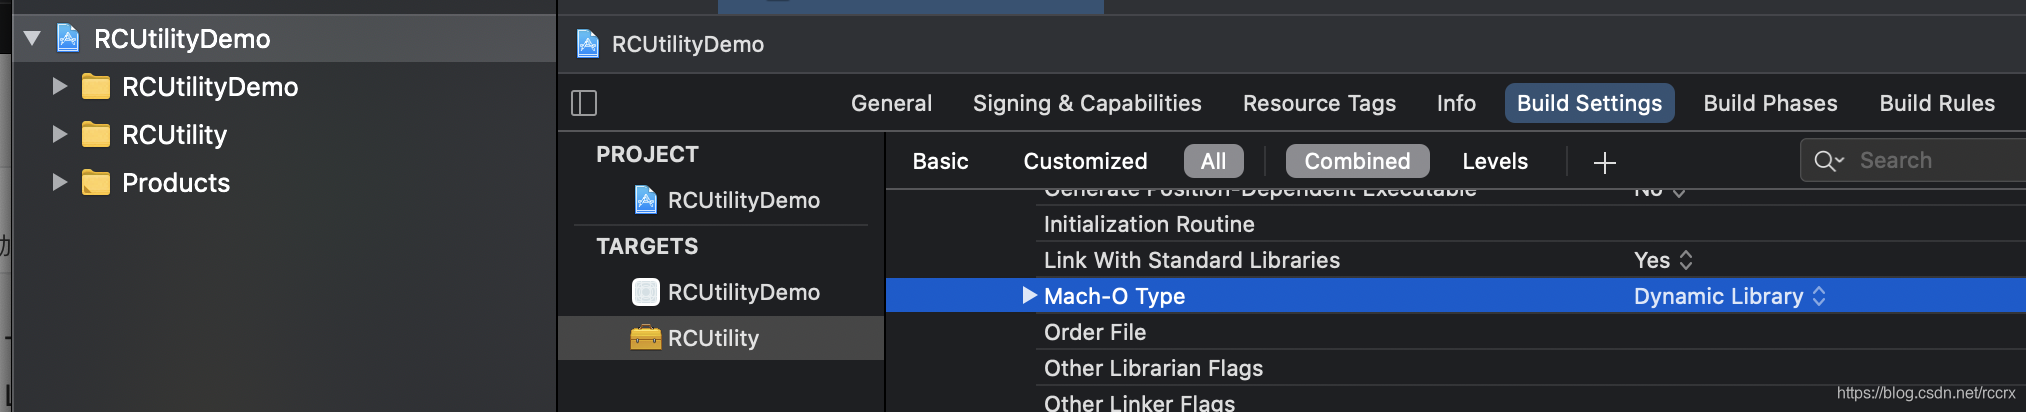
TARGETS选中RCUtility,Build Settings中Mach-O Type为“Dynamic Library”(这里选择动态库,并不影响其他项目比如CBD使用这个库时选择静态链接还是动态链接,这里的设置只影响本项目的编译设置)(Framework是一种打包方式,包含.a二进制文件+bundle资源文件+.h头文件,不一定是动态链接库,也可以使用静态链接的方式。)。
3、Framework的设置:
- 设置前缀:选中左侧“Project Navigator”面板中的“RCUtilityDemo”项目(左侧图标是蓝色而不是黄色),在打开的右侧“File Inspector”面板下的“Project Document”->“Class Prefix”填入前缀如RC,这样新建的class都自动以RC开头命名。
- 设置scheme:Stop按钮右侧(左侧是Build and then Run按钮)选中“RCUtility”(不是RCUtilityDemo),再次点击选择“Edit Scheme…”,在弹出的面板中选中"Run",在左侧“Info”->“Build Configuration”改为“Release”。
- 设置Build Settings:TARGETS选中RCUtility,Build Settings下的“Build Active Architchture Only”->“Release”设置为NO(Debug可不修改)。
4、Framework中创建类 和 主项目中使用Framework:
-
4.1、导航面板中选中“RCUtility”目录(注意不是RCUtilityDemo目录),新建一个类,将这个类.h文件加到“Build Phases”->“Headers”->“Public”(默认在Project中,右键该文件选择“Move to Public Group”)。
-
4.2、主项目中使用Framework:
- 4.2.1、TARGETS->“RCUtilityDemo”->“Link Binary With Libraries”加入RCUtility.framework(默认已经加入)。
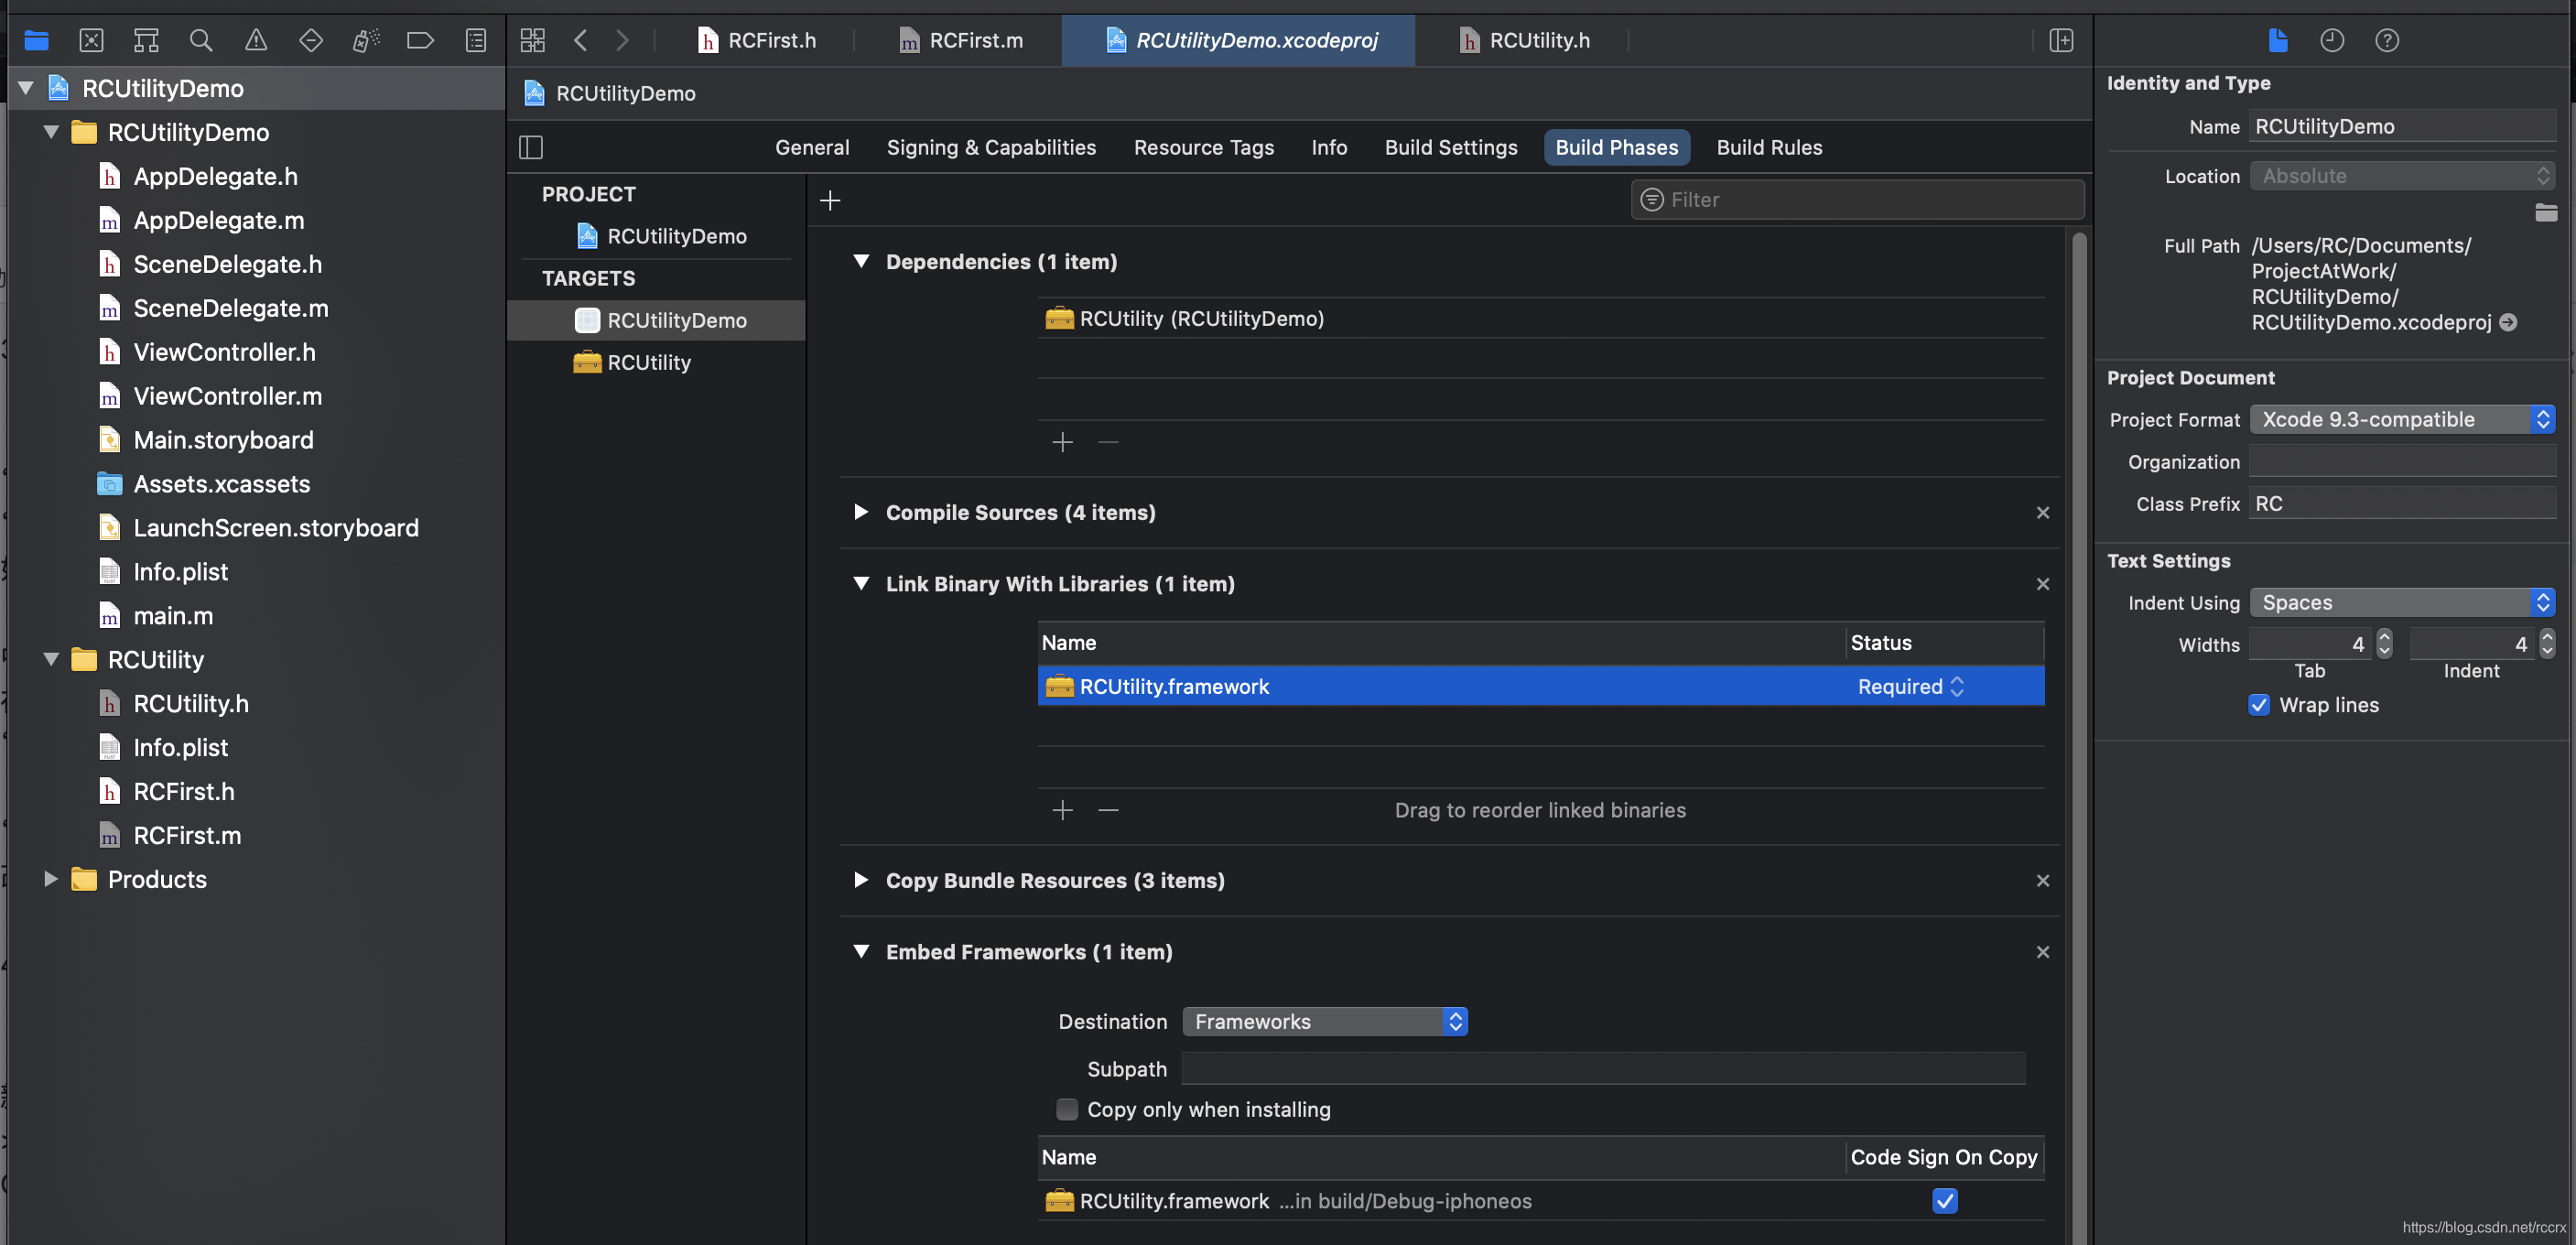
- 4.2.2、在主项目的类.m文件中import自己创建的Framework的某个类的头文件.h,即可使用这个类的方法。
- 4.2.1、TARGETS->“RCUtilityDemo”->“Link Binary With Libraries”加入RCUtility.framework(默认已经加入)。
GitHub托管代码
1、本地仓库:
- 1.1、在终端cd到RCUtilityDemo目录(里面包含RCUtility、RCUtilityDemo和RCUtilityDemo.xcodeproj),执行
git init。 - 1.2、创建.gitignore(在Sourcetree中添加本地仓库,可以看到哪些文件被修改,哪些文件应该加到.gitignore),然后commit全部文件。
2、远程仓库:
- 2.1、GitHub上新建仓库,名字填RCUtility,选择Public,不勾选README这些文件,创建一个空白仓库。
- 2.2、关联远程仓库:
git remote add origin https://github.com/rccrx/RCUtility.git,git push -u origin master。
发布到CocoaPods
1、cd到RCUtilityDemo目录,执行pod spec create RCUtility创建文件RCUtility.podspec(生成的文件的注释里面会有各个参数的说明,虽然最后需要删除这些注释)。
2、修改文件RCUtility.podspec如下:
Pod::Spec.new do |spec|

  spec.name         = "RCUtility"
  spec.version      = "0.0.1"
  spec.summary      = "A short description of RCUtility."
  spec.homepage     = "https://github.com/rccrx/RCUtility"
  spec.license      = "MIT"
  spec.author             = {

     "rccrx" => "[email protected]" }
  spec.platform     = :ios, "9.0"
  spec.source       = {

     :git => "https://github.com/rccrx/RCUtility.git", :tag => spec.version }
  spec.source_files  = "RCUtility"
  spec.requires_arc = true

end
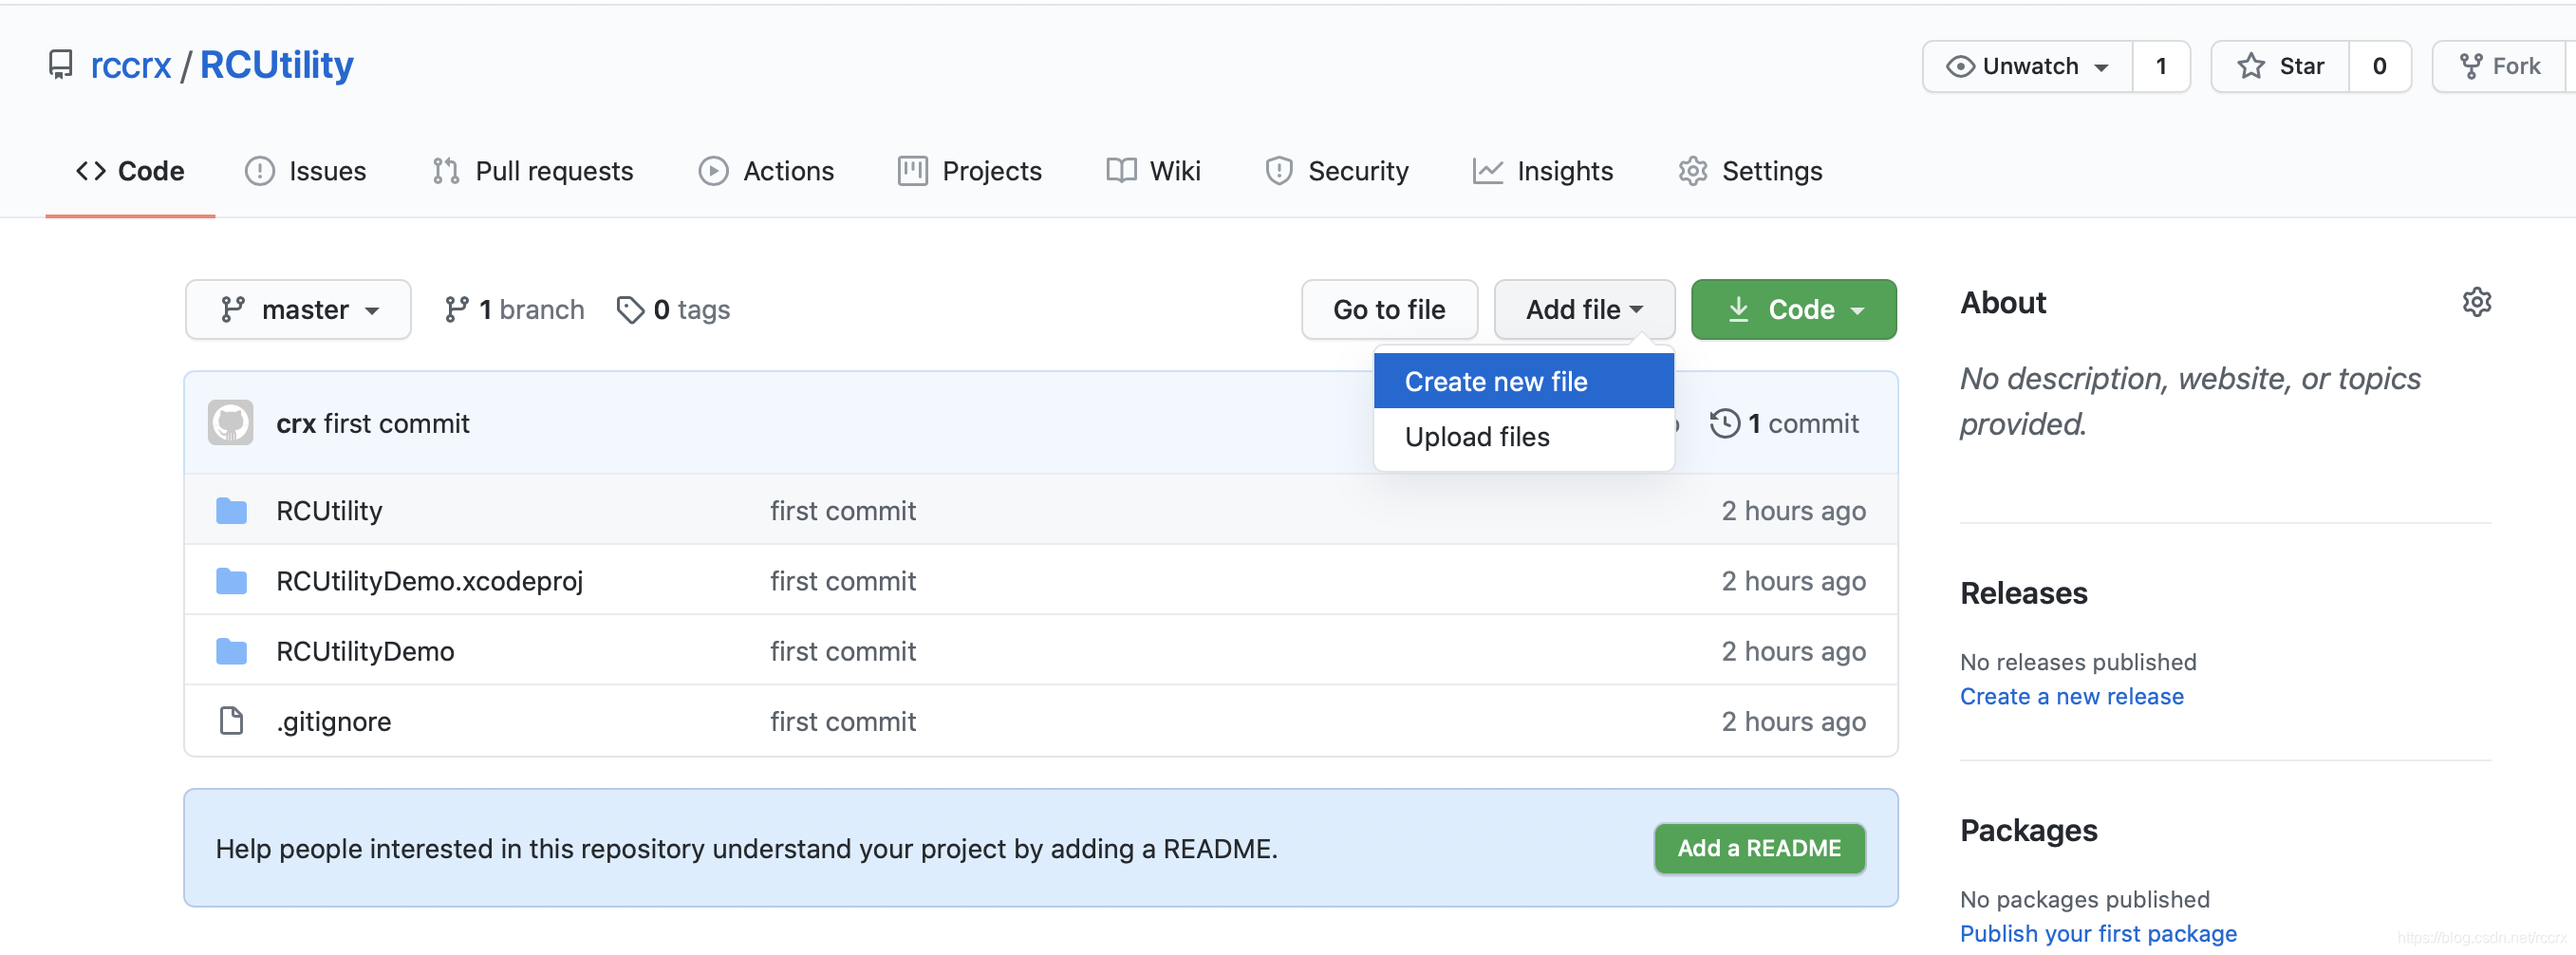
3、添加LICENSE文件:
- 3.1、在GitHub上点击“Add file”->“Create new file”。
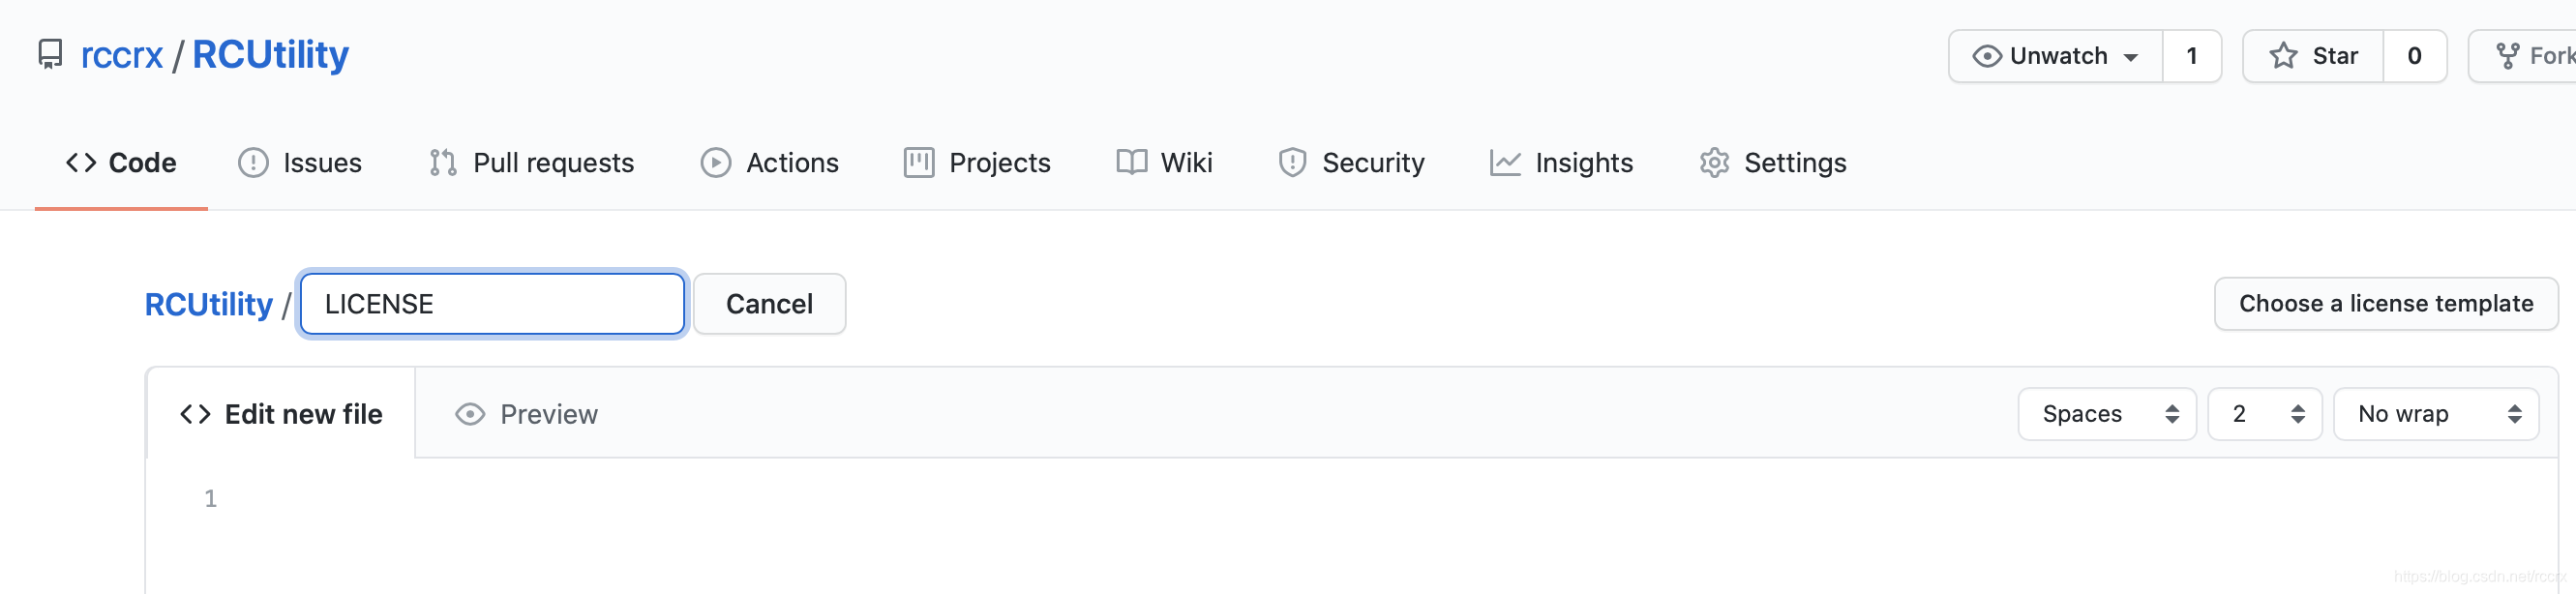
- 3.2、填入LICENSE,右边会出现“Choose a license template”按钮,点击跳转页面。
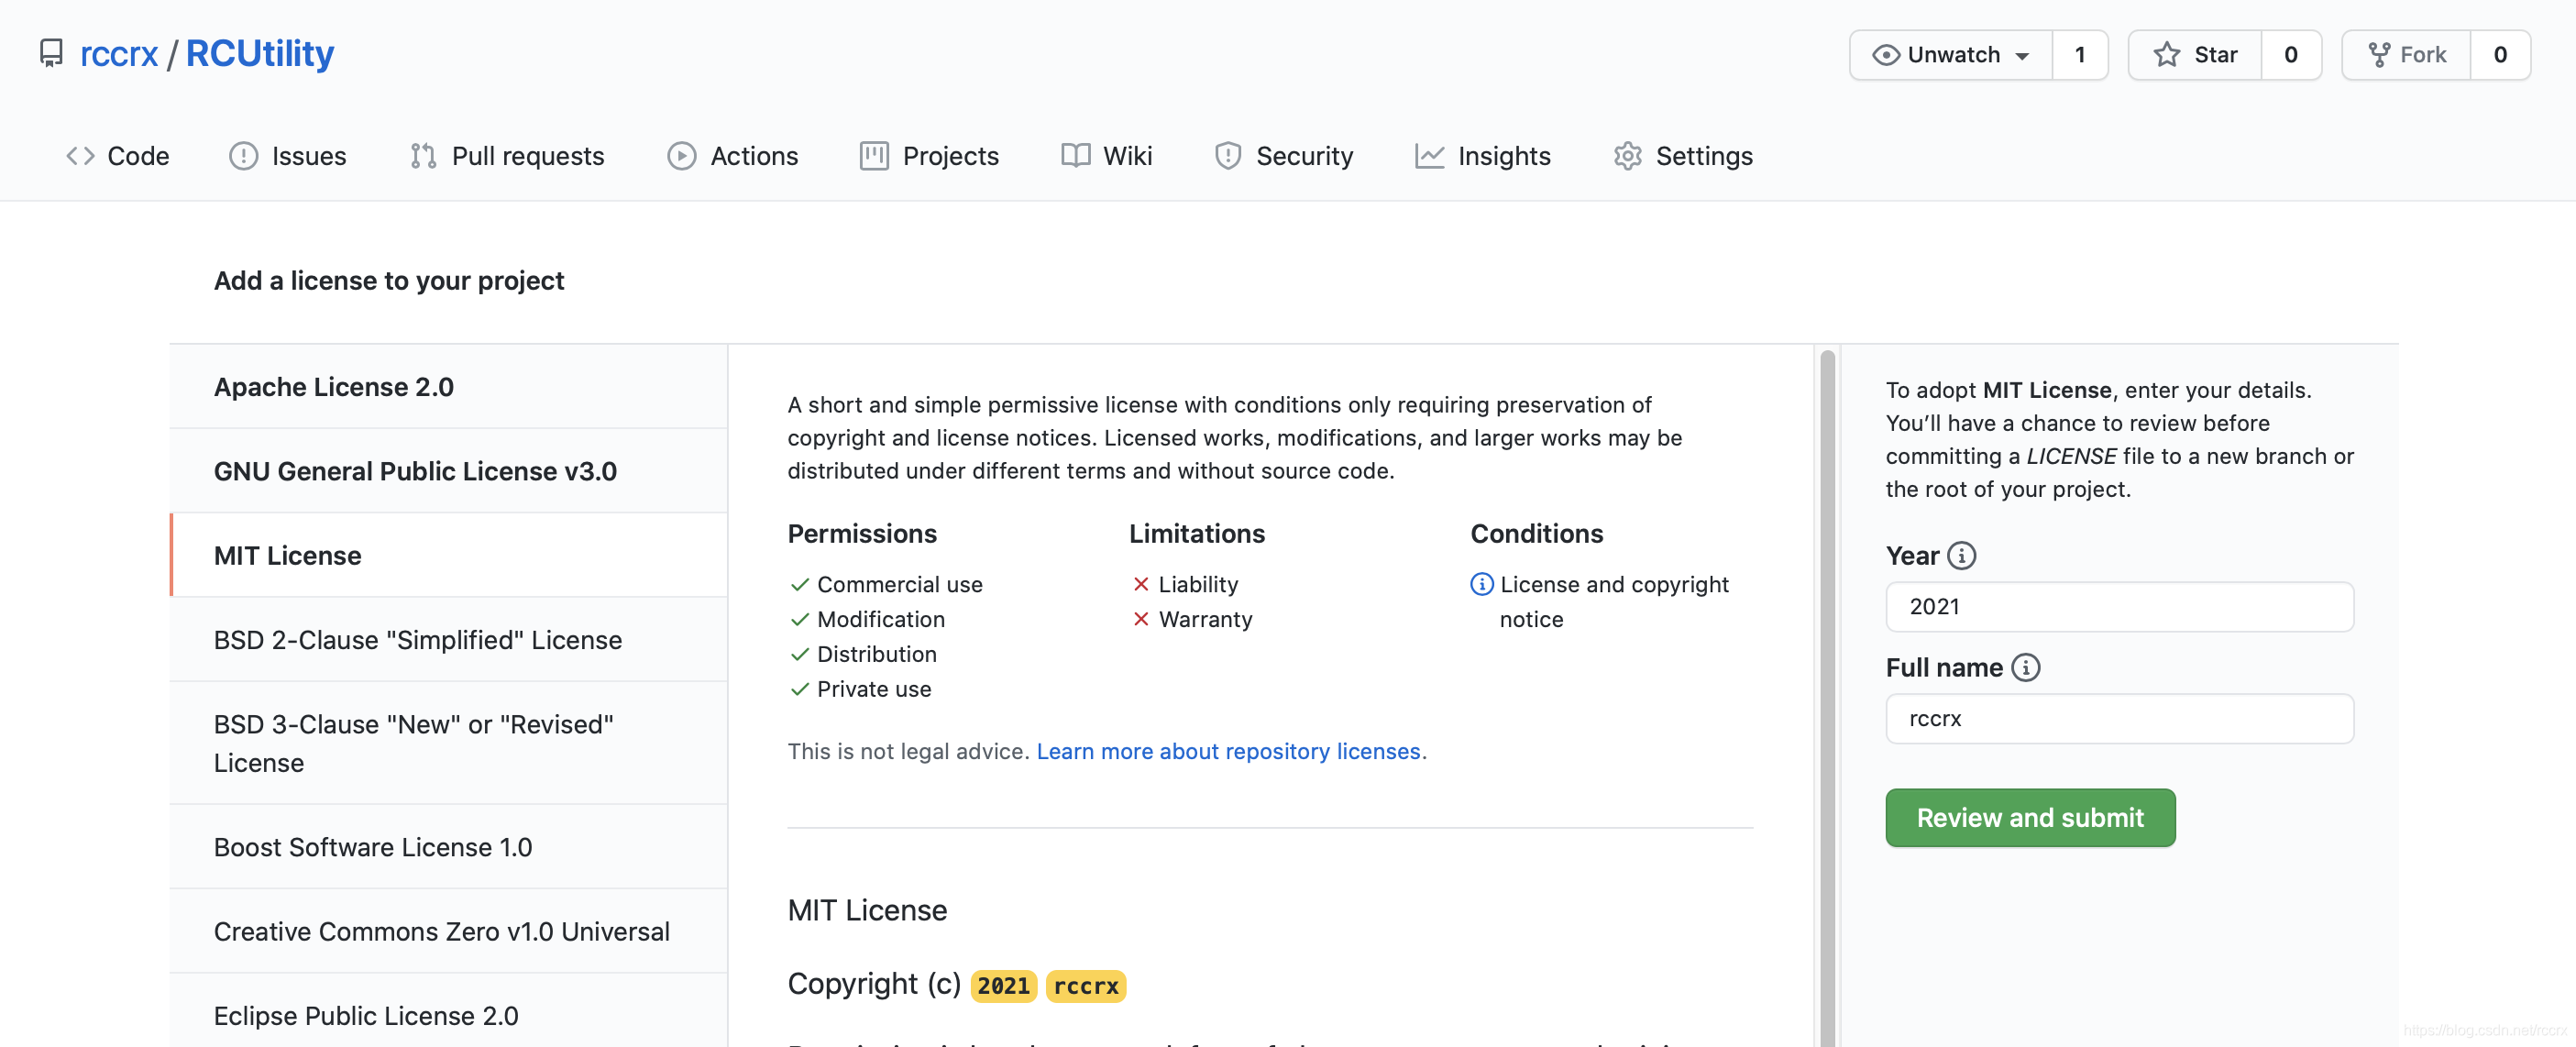
- 3.3、选择“MIT License”,点击“Review and submit”,
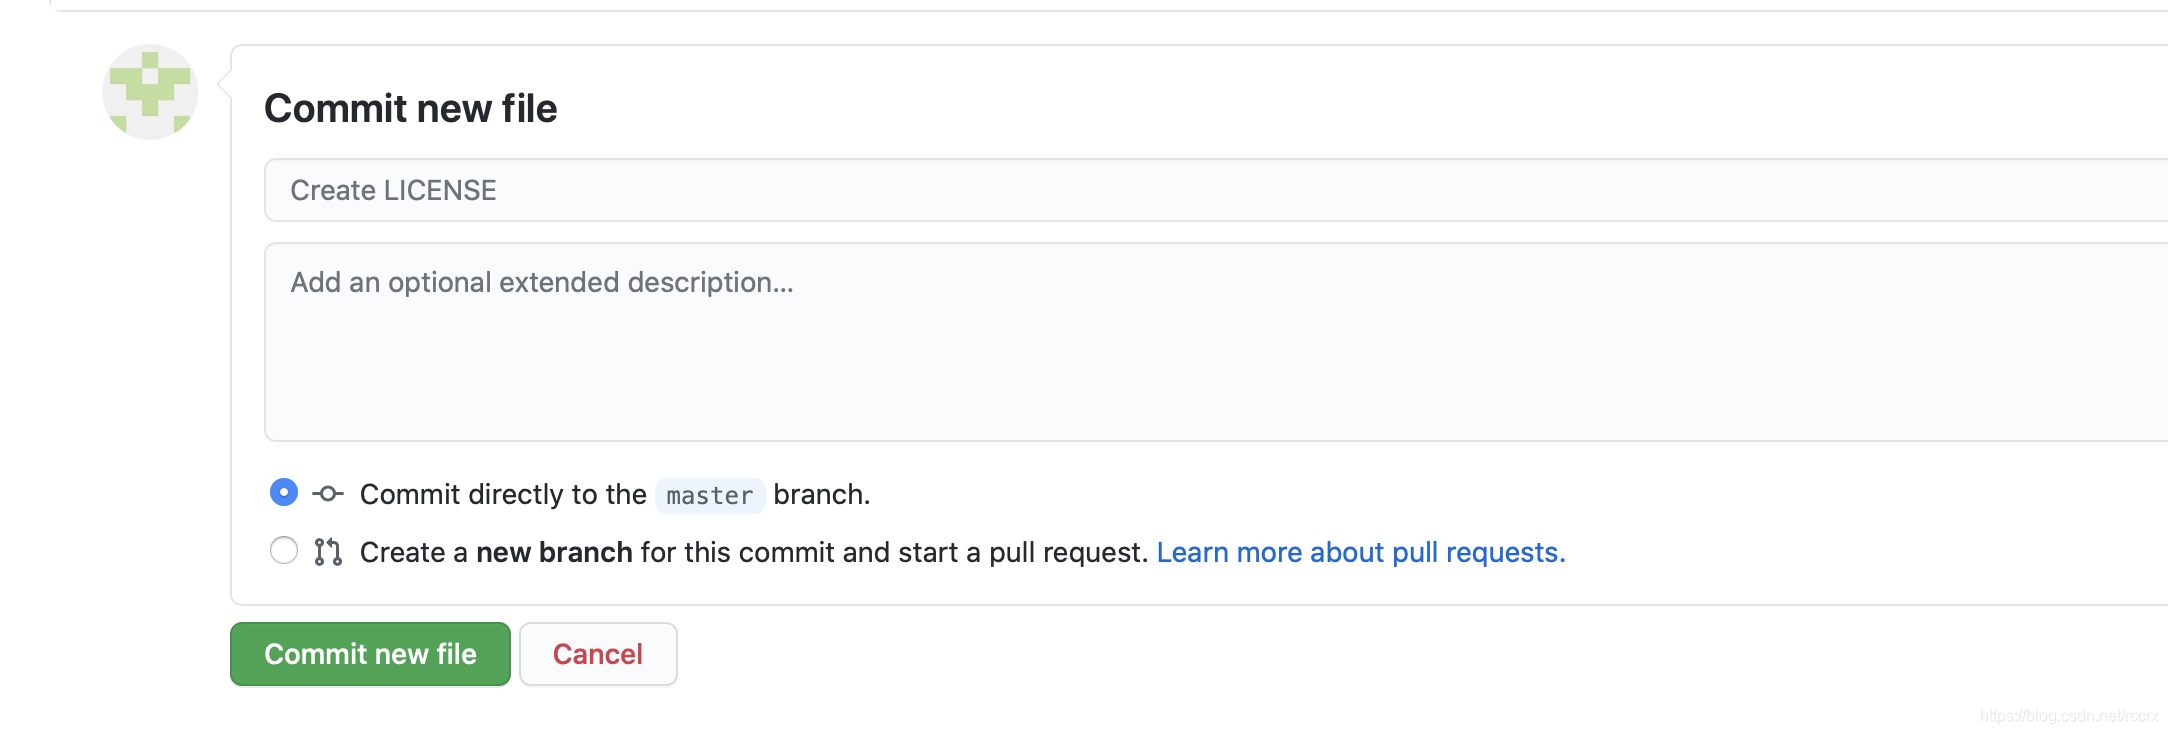
- 3.4、选择“Commit directly to the master branch”,点击“Commit new file”。
4、拉取远程最新代码,包含LICENSE文件。
5、验证podspec文件,执行pod lib lint RCUtility.podspec --allow-warnings(如果是“pod spec lint RCUtility.podspec --allow-warnings”则会出现tag的ERROR),出现“RCUtility passed validation.”则验证通过,接下来要添加tag。
6、添加tag:执行git tag 0.0.1添加一个tag,(“git tag”可以显示本地所有tag,“git ls-remote --tags origin”可以显示远程所有tag),执行“git push --tags”推送tag到远程。
7、再次验证podspec文件,执行pod spec lint RCUtility.podspec --allow-warnings,出现“RCUtility.podspec passed validation.”则验证通过,不再出现tag错误。
8、发布到CocoaPods之前如果未注册CocoaPods,先注册:
- 8.1、先验证是否已经注册,执行
pod trunk me,返回注册信息则已经注册;返回“[!] Authentication token is invalid or unverified. Either verify it with the email that was sent or register a new session.”则需要重新注册;返回“[!] There was an error fetching your info from trunk: execution expired”则已经成功注册,重试直到出现注册信息。 - 8.2、注册CocoaPods执行
pod trunk register [email protected] "crx" --verbose,出现“[!] Please verify the session by clicking the link in the verification email that has been sent to [email protected]”之后查看邮箱点击链接验证即可。
9、发布到CocoaPods:
- 9.1、执行
pod trunk push RCUtility.podspec --allow-warnings,出现错误:
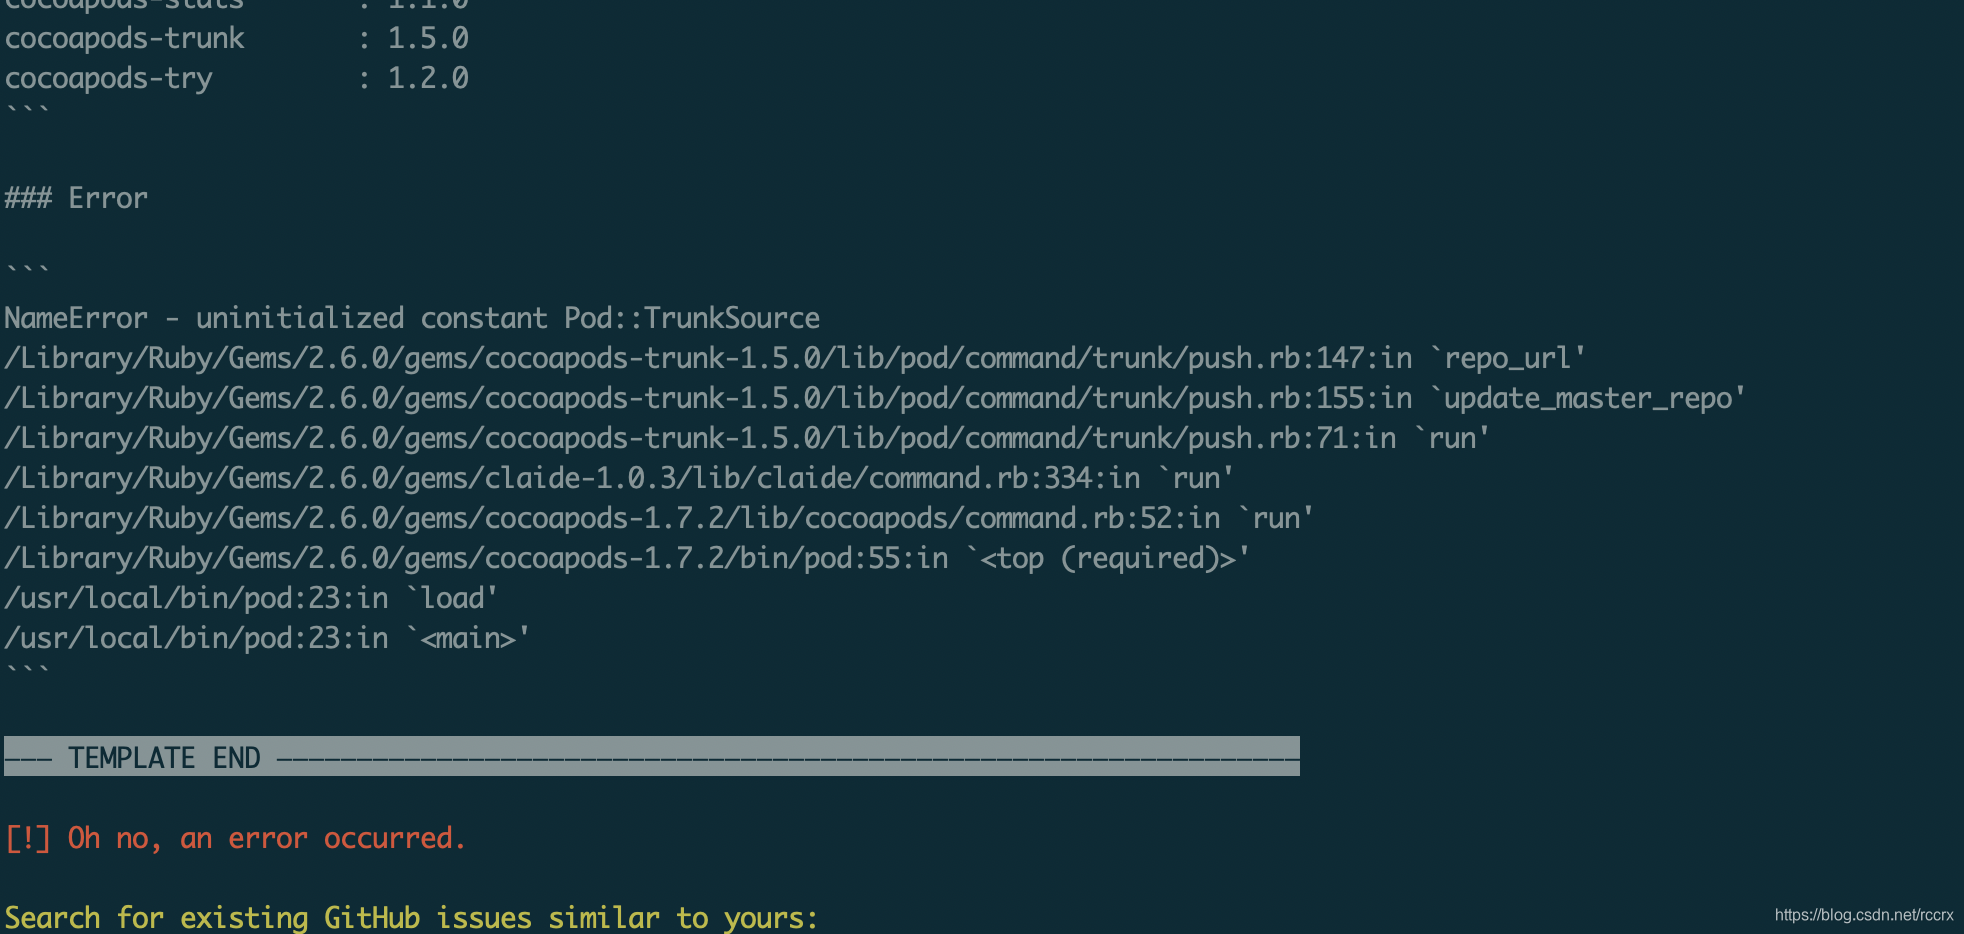
cocoapods版本为1.7.2,cocoapods-trunk版本为1.5.0,执行sudo gem uninstall cocoapods-trunk卸载cocoapods-trunk1.5.0版本,然后执行sudo gem install cocoapods-trunk -v 1.3.1安装cocoapods-trunk1.3.1版本(卸载时好像有提示cocoapods1.7.2需要cocoapods-trunk>=1.3.1,<2.0)(rubygems.org可以查看cocoapods-trunk有哪些版本,当前最新1.5.0,cocoapods最新1.10.1)。 - 9.2、重新执行
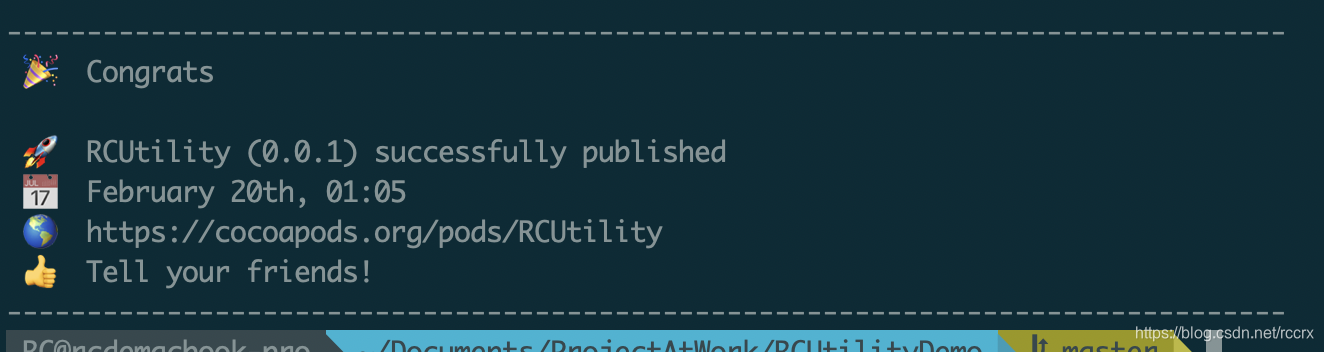
pod trunk push RCUtility.podspec --allow-warnings,出现“Updating spec repo ‘master’”要等1小时最后出现如下:
- 9.3、执行
pod search RCUtility出现错误“[!] Unable to find a pod with name, author, summary, or description matching ‘RCUtility’”,先删除“~/Library/Caches/CocoaPods/”目录下的search_index.json文件,再重新执行search,会出现“Creating search index for spec repo ‘master’… ”,5min后出现搜索结果并且重新生成search_index.json。
10、将RCUtility.podspec文件commit到git仓库。
Framework添加单元测试
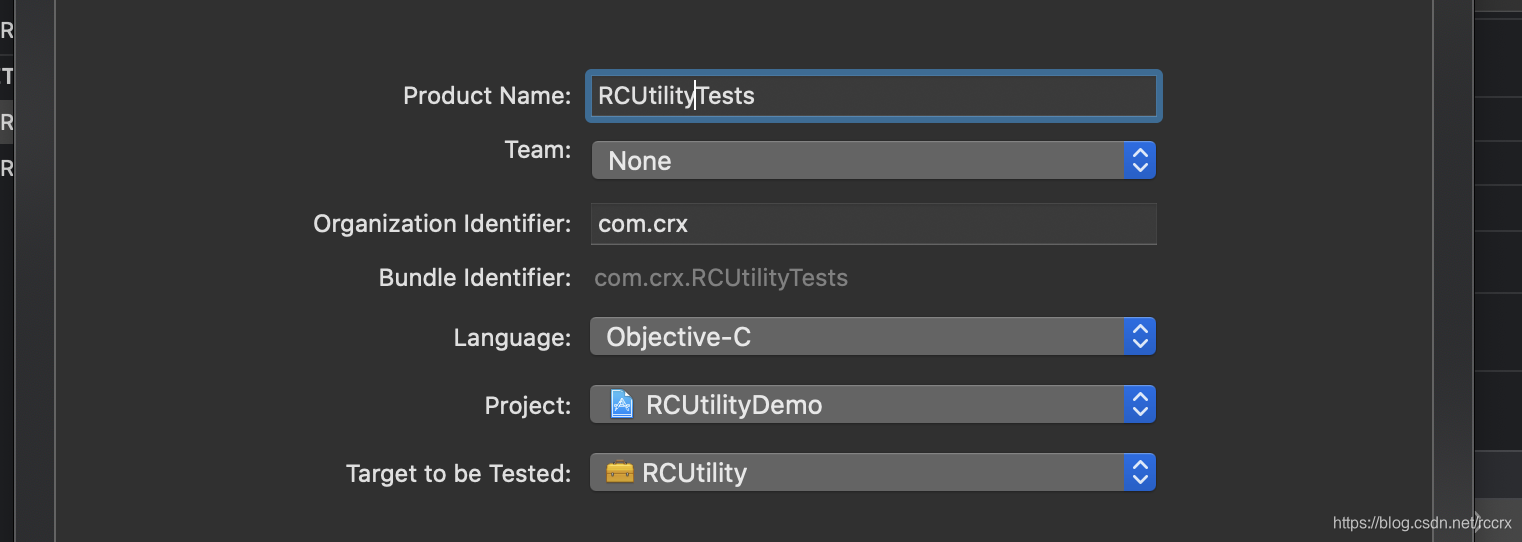
1、点击TARGETS左下角“+”,弹出窗口选择iOS->Test->Unit Testing Bundle,Product Name填“库名称+Tests”,Target to be Tested选择库RCUtility(不是RCUtilityDemo),添加之后,TARGETS会多一个RCUtilityTests,左侧导航窗口会多一个RCUtilityTests目录。

2、“#import “RCFirst.h””导入Framework中一个类,写一个以test开头的方法,方法里面写测试代码,点击test方法左边菱形执行测试用例,测试通过则菱形变成绿色。
2.1、“#import “RCFirst.h””出现警告“Missing submodule ‘RCUtility.RCFirst’”,则在RCUtility.h文件中加上“#import “RCFirst.h””即可消除警告(不加这句也不会影响其他项目通过cocoapods的方式使用这个库),加上之后又出现一个警告“Double-quoted include “RCFirst.h” in framework header, expected angle-bracketed instead”,通过设置TARGETS->“RCUtility”->“Build Settings”->“Quoted Include In Framework Header”为NO可以消除警告,或者改为“#import <RCUtility/RCFirst.h>”。
3、可以使用主项目测试Framework,也可以使用单元测试。
CocoaPods实现组件化
组件化的目的是为了不同产品共用相同模块,避免相同模块重复开发。
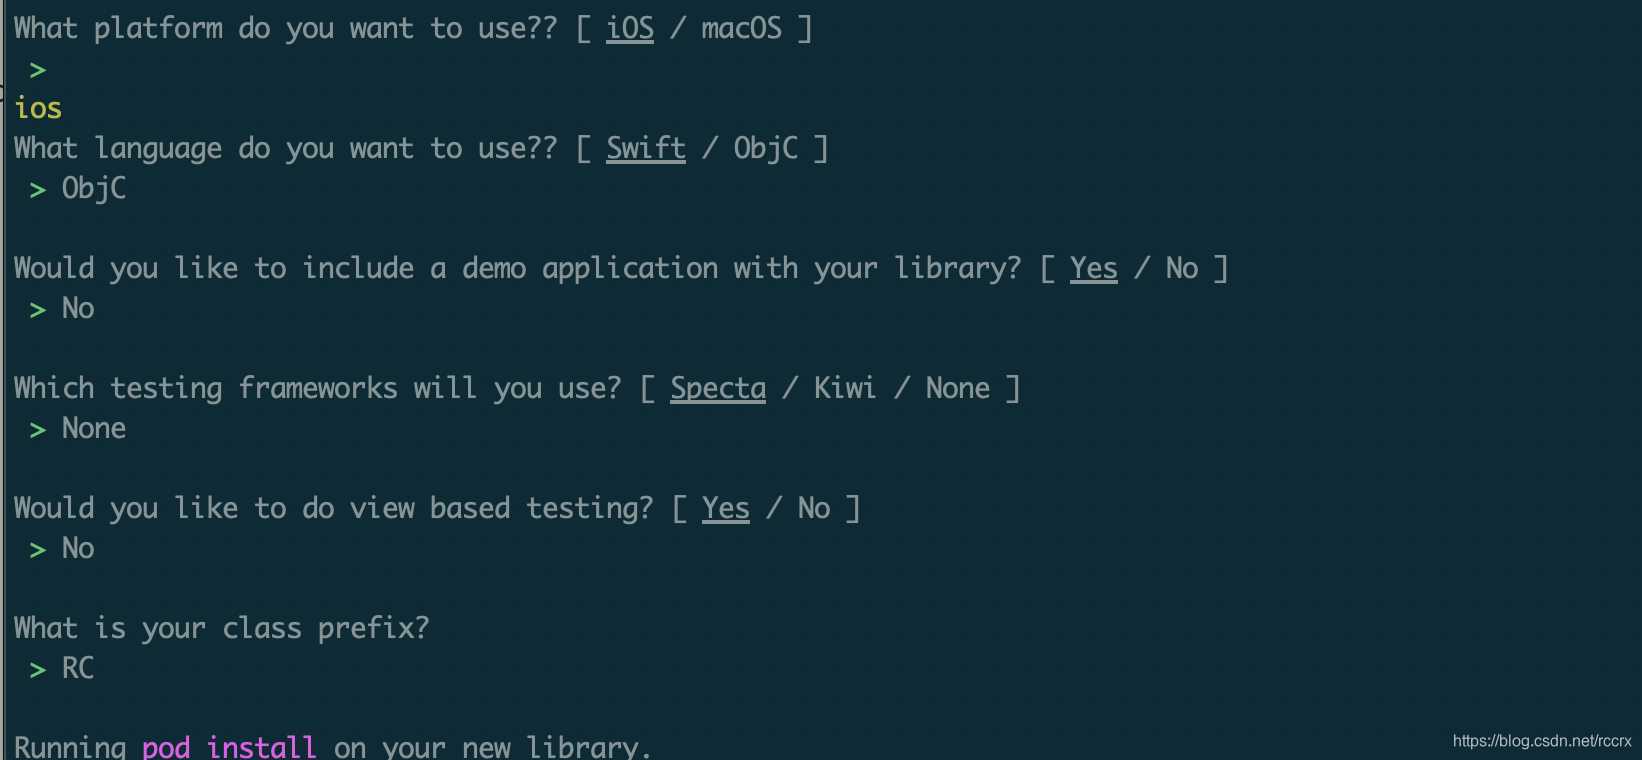
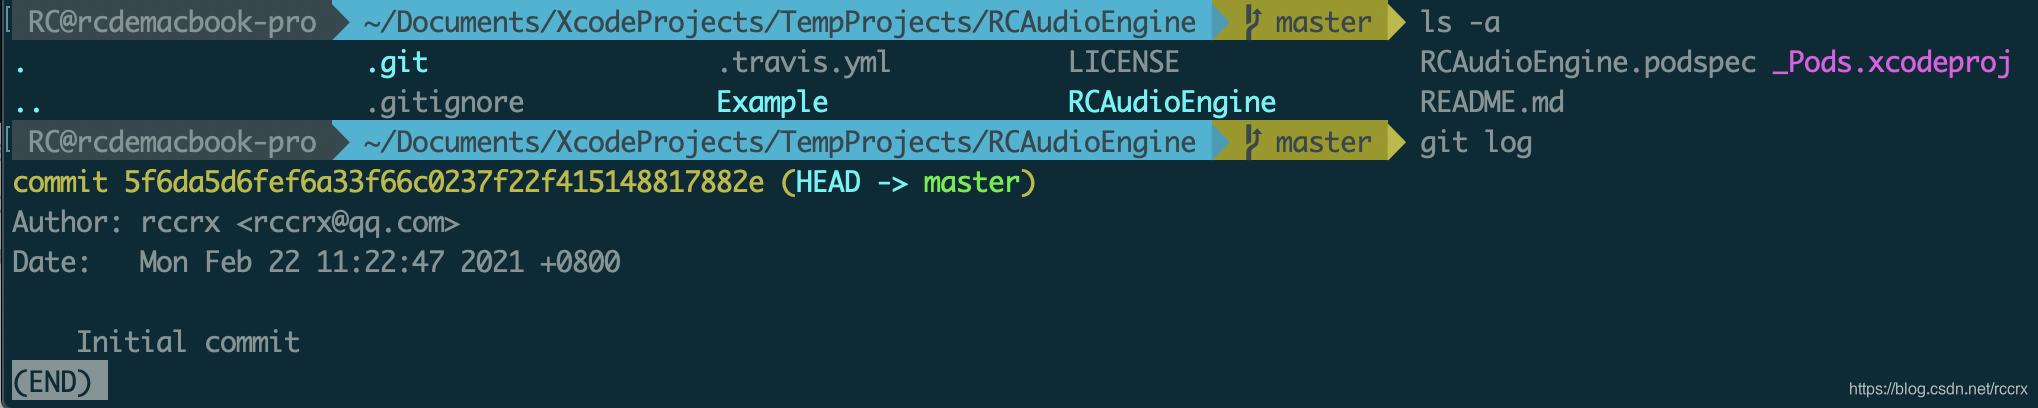
1、cd到任意目录如TempProjects下,执行pod lib create RCAudioEngine创建库,会在TempProjects目录下创建一个RCAudioEngine目录,里面包含Example目录(虽然设置了include a demo app为No但是还是创建了一个测试工程)、LICENSE、RCAudioEngine目录(里面包含这个库的类文件)、RCAudioEngine.podspec、README.md,并且已经初始化了git并且有提交。TempProjects->RCAudioEngine目录下的文件有些需要删除、有些需要保留、有些需要修改、有些位置需要移动,所以没有直接在CBD相关目录下执行pod lib create创建库。

2、在CBD目录下创建一个存放本地组件库的目录,命名为LocalPods。
3、在LocalPods目录下创建一个库目录RCAudioEngine,添加相关文件:
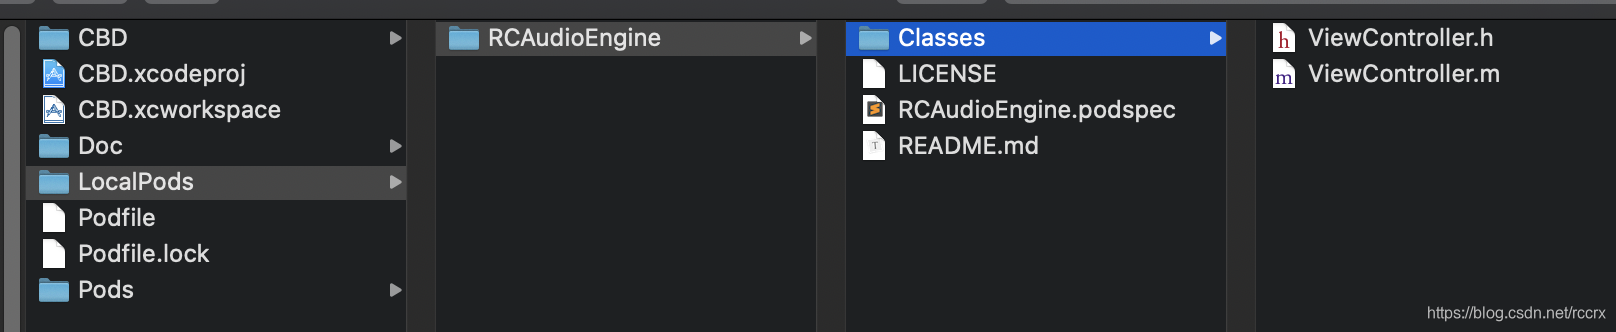
- 3.1、将xx/TempProjects/RCAudioEngine目录下的LICENSE、READEME.md移动到这里(即xx/LocalPods/RCAudioEngine目录,之后的文件和创建目录都是放在这个目录下)。
- 3.2、创建一个Classes目录,将任意文件如一对.h、.m放到这个目录下(这些文件之后可以删除)。
- 3.3、将xx/TempProjects/RCAudioEngine目录下的RCAudioEngine.podspec移动到这里,修改如下:
主要是修改s.source_files为库文件所在目录,其他保持默认,删除注释。
Pod::Spec.new do |s|
  s.name             = 'RCAudioEngine'
  s.version          = '0.1.0'
  s.summary          = 'A short description of RCAudioEngine.'
  s.homepage         = 'https://github.com/rccrx/RCAudioEngine'
  s.license          = {

     :type => 'MIT', :file => 'LICENSE' }
  s.author           = {

     'rccrx' => '[email protected]' }
  s.source           = {

     :git => 'https://github.com/rccrx/RCAudioEngine.git', :tag => s.version.to_s }
  s.ios.deployment_target = '9.0'
  s.source_files = 'Classes/**/*'
end
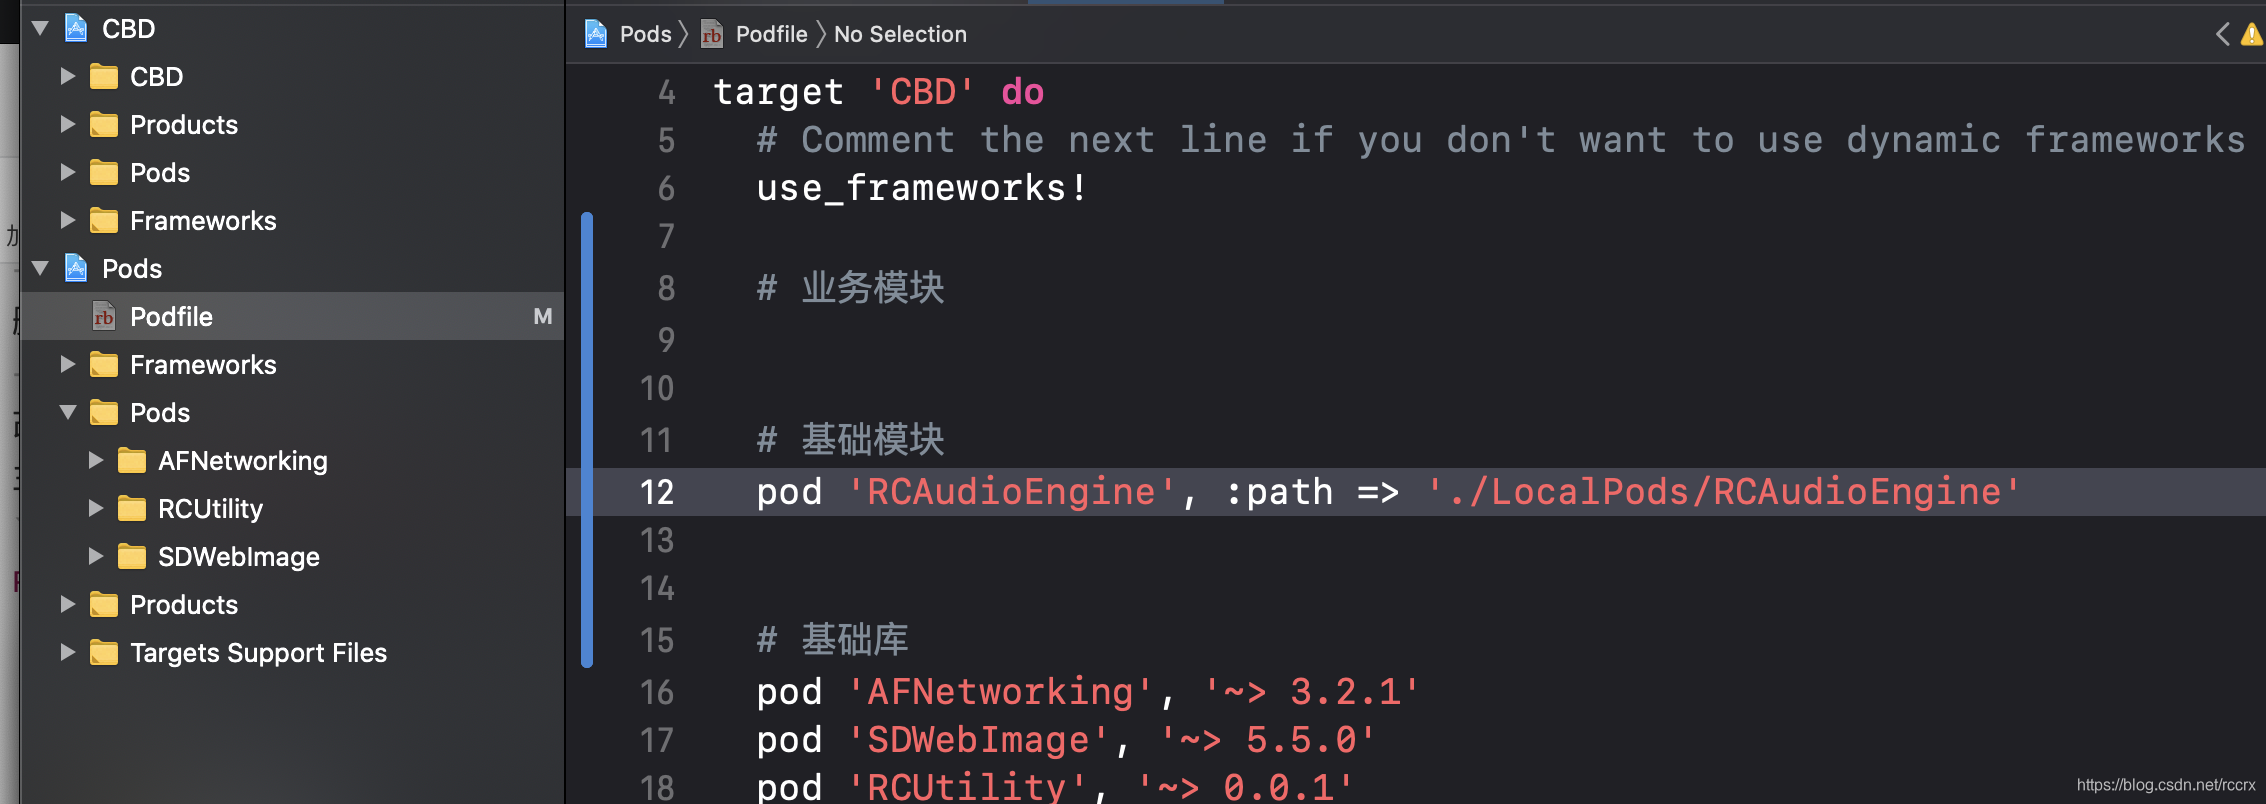
- 3.4、修改CBD的Podfile,添加
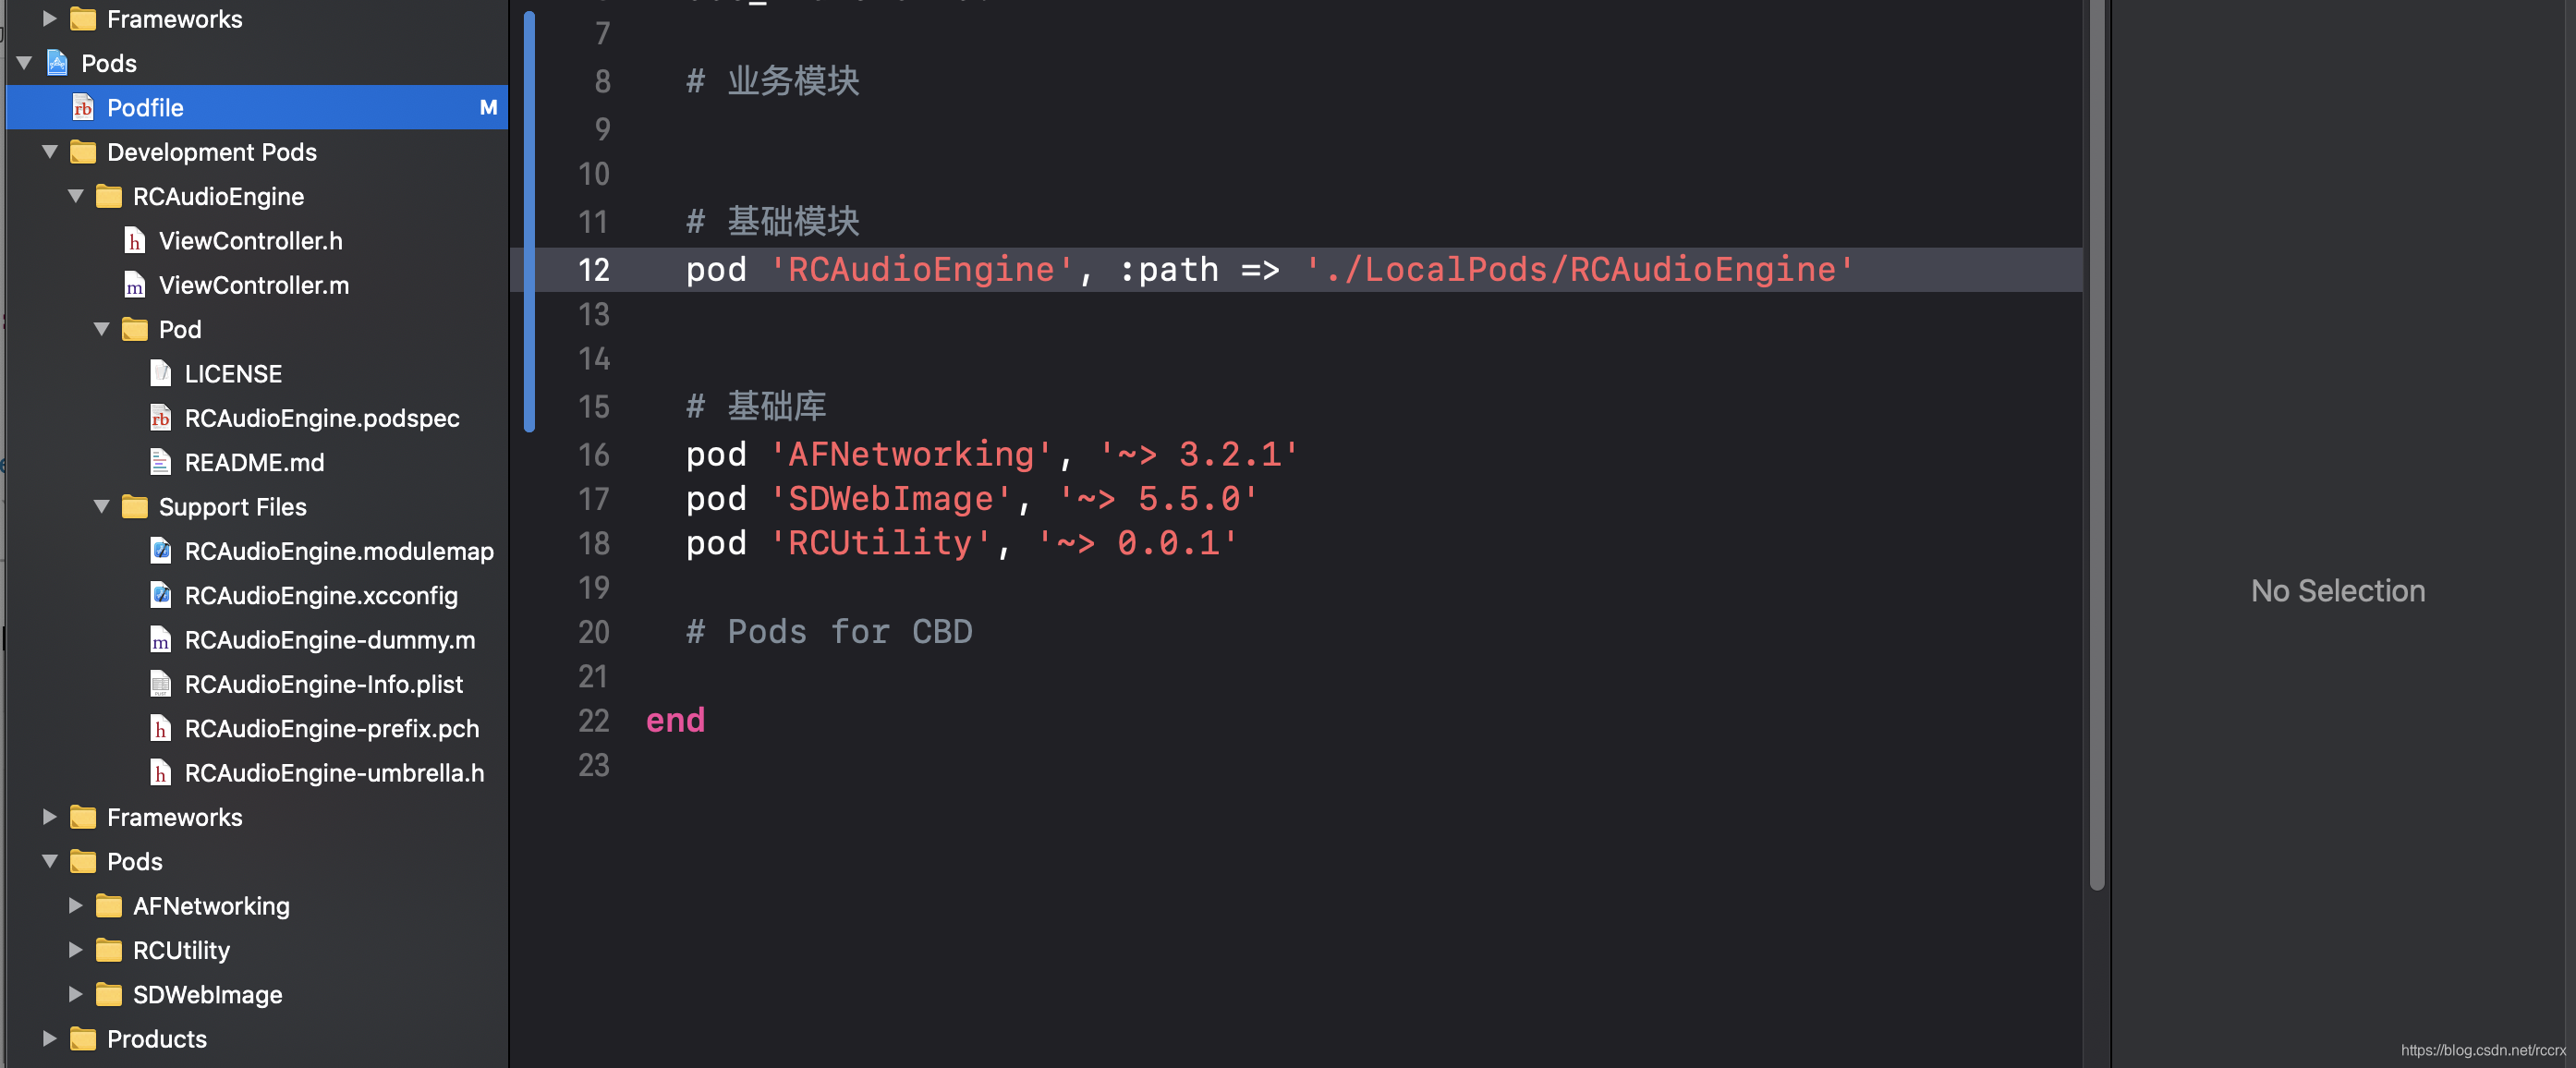
pod 'RCAudioEngine', :path => './LocalPods/RCAudioEngine'(path是本地组件库RCAudioEngine的目录相对CBD的Podfile的位置),cd的CBD目录执行pod install,就会在左侧导航面板Pods工程下出现一个Development Pods目录,里面有本地组件库。
- 3.5、如果需要资源目录(不需要不用创建),则:
【如果使用静态库(即CBD的Podfile没有use_frameworks!),推荐使用“s.resource_bundles=xx”而不是“s.resources=xx”,因为resources中的图片会与主工程中的图片有重名风险。】- 3.5.1、使用resource_bundles:
- 3.5.1.1、在LocalPods/RCAudioEngine目录下创建一个目录Assets,里面放入任意一个文件比如d3.png。
- 3.5.1.2、修改RCAudioEngine.podspec添加
s.resource_bundles = { 'RCAudioEngine' => ['Assets/**/*'] },执行pod install,在Development Pods->RCAudioEngine下自动生成Resources目录,目录下有资源文件。 - 3.5.1.3、不使用“use_frameworks!”,编译之后的CBD->Products下的CBD.app里面会包含RCAudioEngine.bundle文件(Assets.car中只包含添加到主工程CBD->CBD->Assets.xcassets中的图片)(并且工程Pods->Products下也生成RCAudioEngine.bundle文件),因此RCAudioEngine.bundle里面的文件使用方式为:
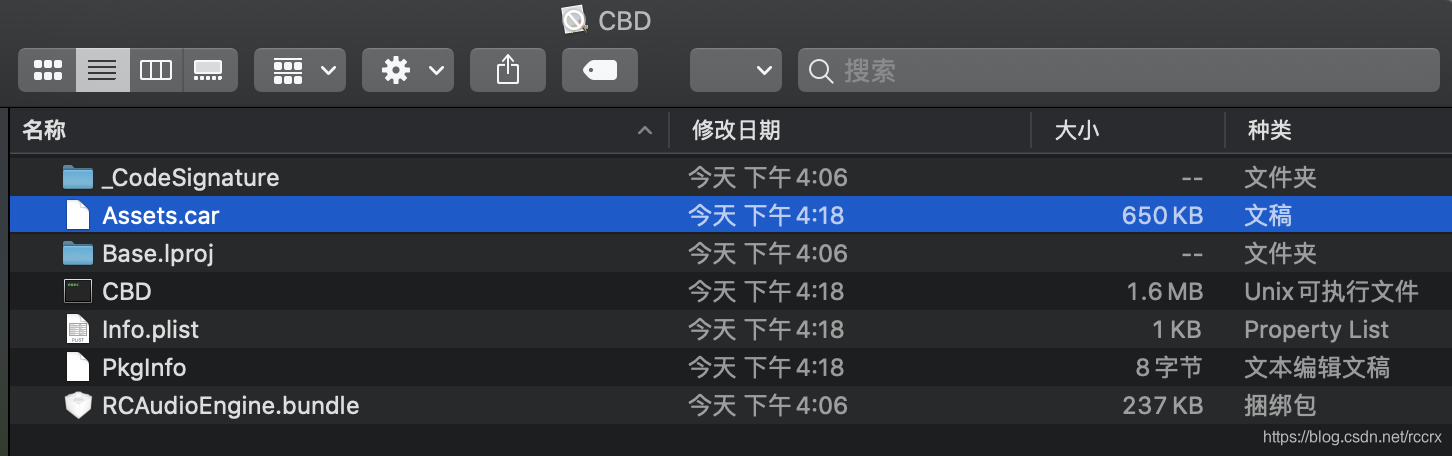
- 3.5.1、使用resource_bundles:
NSBundle *aeBundle = [NSBundle bundleWithPath:[[NSBundle mainBundle] pathForResource:@"RCAudioEngine" ofType:@"bundle"]];
UIImage *image = [UIImage imageWithContentsOfFile:[aeBundle pathForResource:@"d3.png" ofType:nil]];
使用“[UIImage imageNamed:@“d3.png”]”是无法获取图片的,不管是在RCAudioEngine库中还是主工程CBD中都无法显示。
-
3.5.1.4、不要在RCAudioEngine/Assets下创建Asset Catalog文件:如果在Development Pods->RCAudioEngine->Resources下创建一个RCAudioEngineAssets.xcassets(文件存储路径为RCAudioEngine下的Assets,Targets勾选RCAudioEngine-RCAudioEngine,就算不勾选或者勾选其他也会在pod install之后Target Membership自动变成RCAudioEngine-RCAudioEngine),则会生成一个Assets.car在工程Pods->Products->RCAudioEngine.bundle中,但不在主工程CBD->Products->CBD.app->RCAudioEngine.bundle中,且CBD->Products->CBD.app->Assets.car中没有包含RCAudioEngineAssets.xcassets中的图片(用AssetCatalogTinkerer打开),所以不使用Asset Catalog。
- 3.5.2、使用resources:
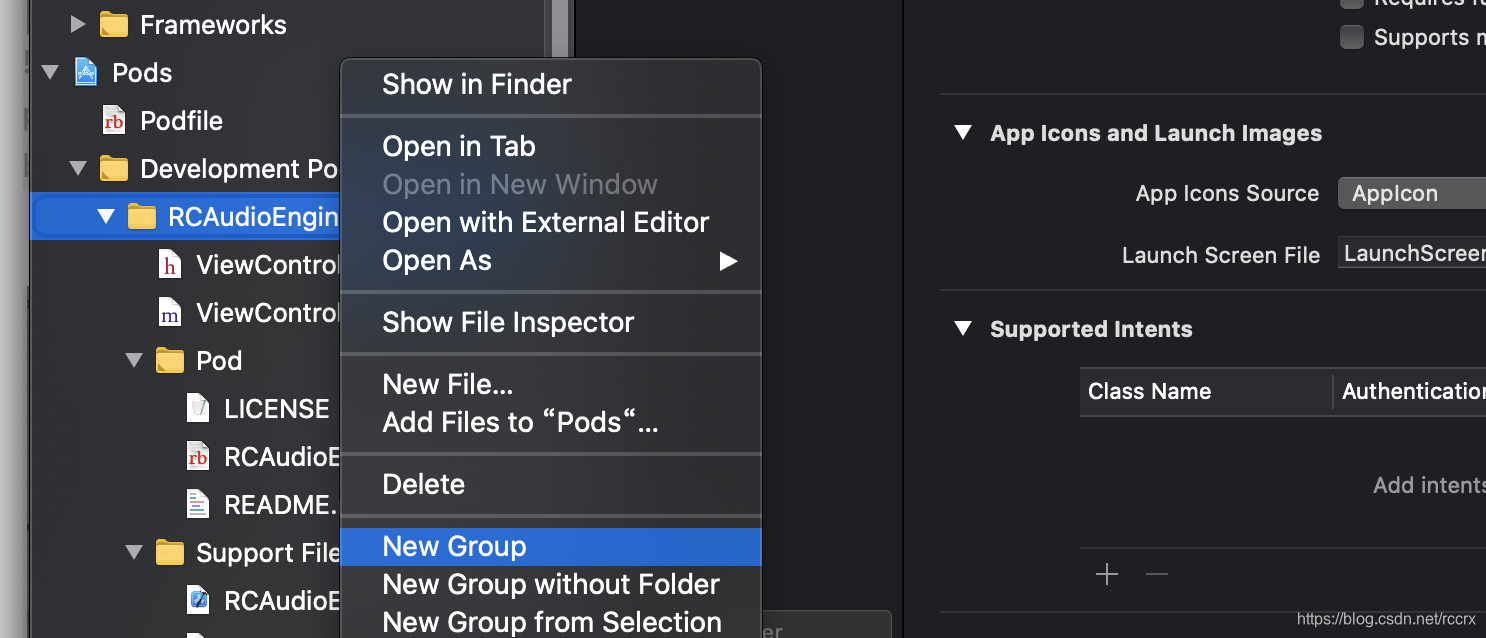
- 3.5.2.1、右键Development Pods->RCAudioEngine,选择New Group创建Resources目录,这个目录和Classes目录同级,这个目录之后可以放xx.xcassets等资源文件,比如选中这个目录,按Command+N新建文件,在弹出的窗口中选择iOS->Resource->Asset Catalog,文件存储路径为RCAudioEngine下的Resources,Group为Resources,Targets不勾选,确定之后会在Resources目录下生成一个文件RCAudioEngine.xcassets。
- 3.5.2.2、修改RCAudioEngine.podspec添加
s.resources = 'Resources/**/*',否则pod install之后这个目录就不显示在Development Pods->RCAudioEngine。(或者在Finder中创建一个Res目录放入一张图片,然后s.resources = ‘Res/**/*’,执行pod install会在Development Pods->RCAudioEngine下生成Resources目录,名称不是Res。) - 3.5.2.3、添加到Res目录中的图片,可以直接在CBD主工程、RCAudioEngine库中通过“[UIImage imageNamed:@“d3.png”]”使用,因为这个图片直接在CBD->Products下的CBD.app里面,没有RCAudioEngine.bundle。
- 3.5.2.4、添加到RCAudioEngine.xcassets中的图片,在编译时出现错误“Mutiple commands produce ‘xx/CBD.app/Assets.car’”也许是指主工程CBD下Assets.xcassets和工程Pods->Development Pods->RCAudioEngine下的RCAudioEngine.xcassets都生成名字为Assets.car的文件,暂时不解决这个问题,使用resource_bundles。

- 3.5.2.1、右键Development Pods->RCAudioEngine,选择New Group创建Resources目录,这个目录和Classes目录同级,这个目录之后可以放xx.xcassets等资源文件,比如选中这个目录,按Command+N新建文件,在弹出的窗口中选择iOS->Resource->Asset Catalog,文件存储路径为RCAudioEngine下的Resources,Group为Resources,Targets不勾选,确定之后会在Resources目录下生成一个文件RCAudioEngine.xcassets。
- 3.5.2、使用resources:
-
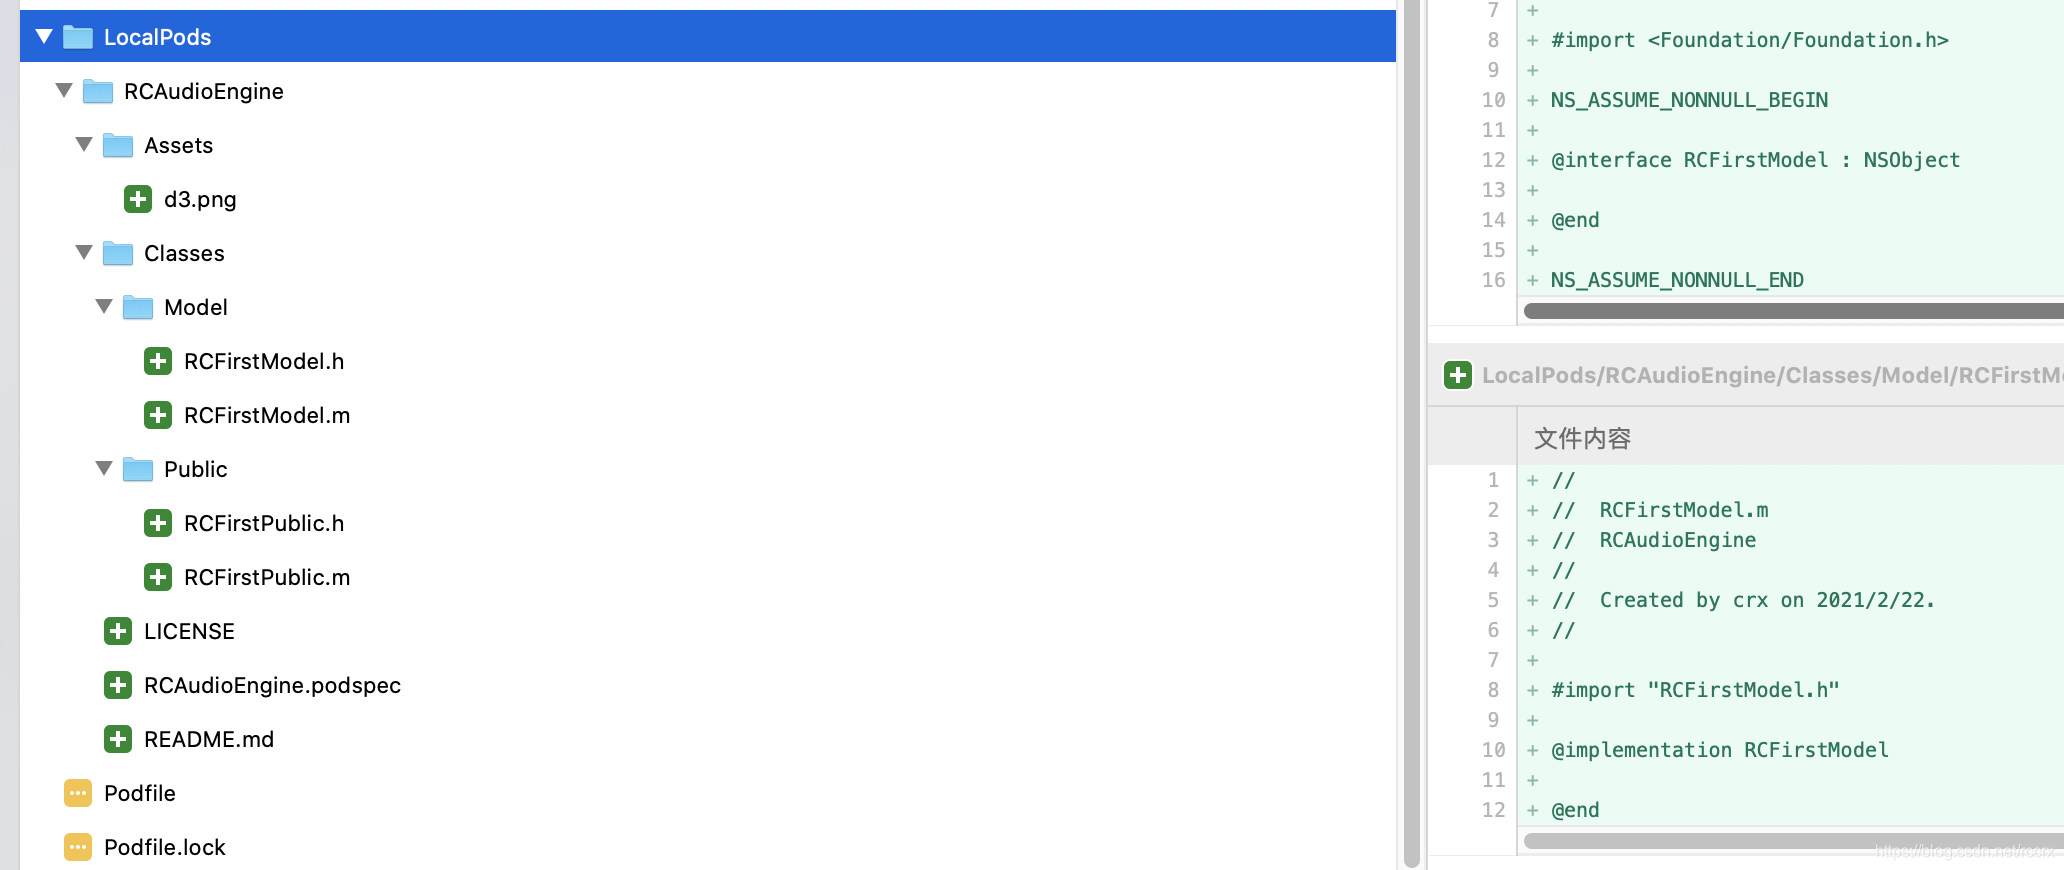
3.6、在Finder中RCAudioEngine/Classes目录下创建两个目录Public、Model(因为右键New Group会在Classes同级目录下生成新目录,所以在Finder中手动创建Classes下的子目录),在这两个目录中放入任意文件再执行pod install,会在Development Pods->RCAudioEngine下出现这两个目录(如果目录中没有文件则不出现)。
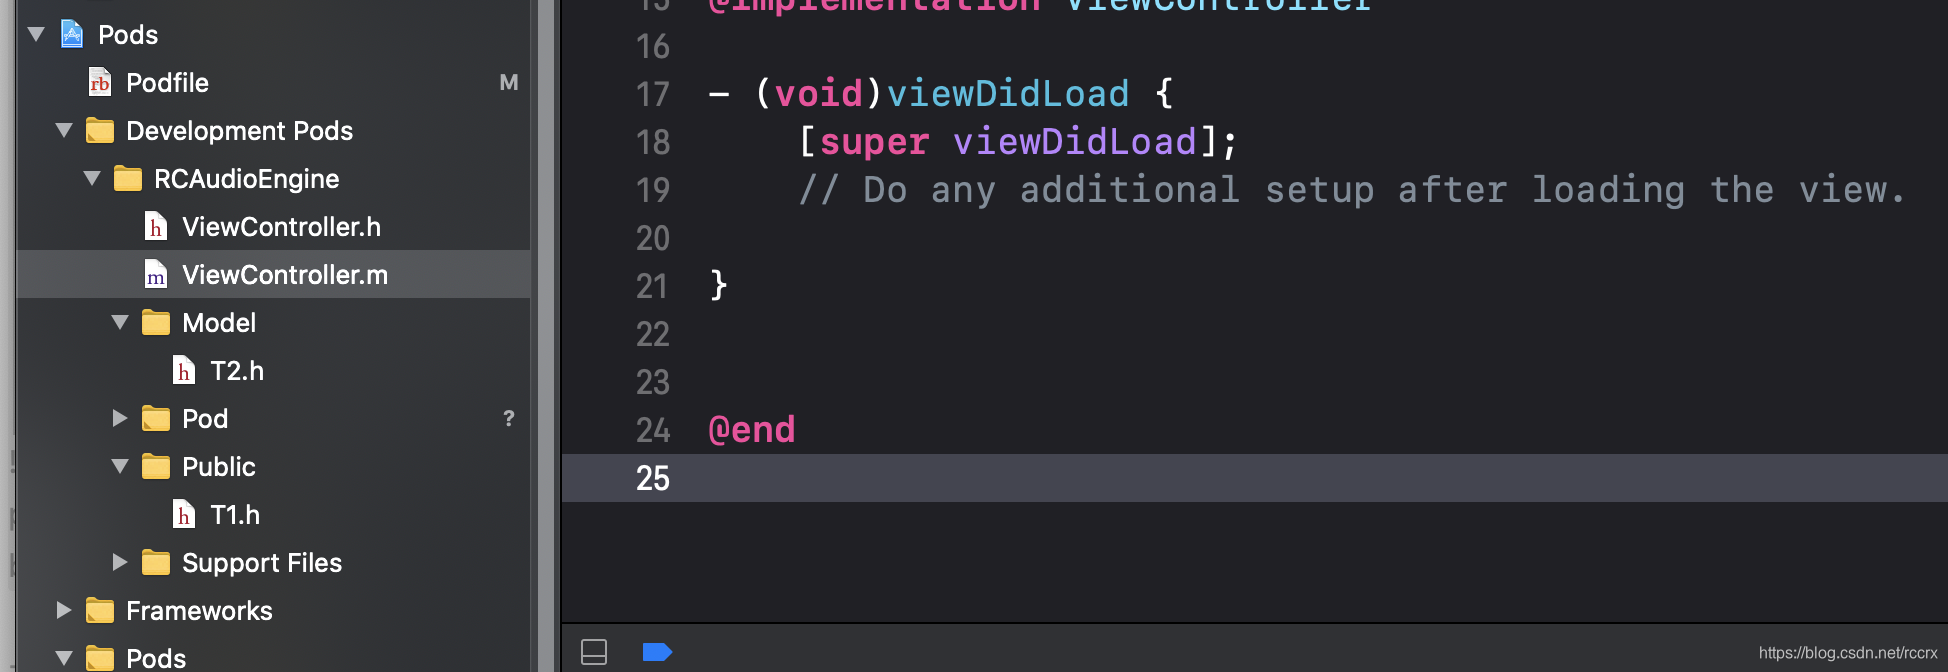
- 3.6.1、删掉ViewController.h、ViewController.m、T1.h、T2.h(选中右键->Delete->Move to Trash),在Model中创建RCFirstModel.h.m、Public创建RCFirstPublic.h.m,弹出窗口的Targets勾选RCAudioEngine。
- 3.6.2、在CBD主工程中使用这个两个类“#import “RCFirstPublic.h” #import “RCFirstModel.h””,报错“‘RCFirstPublic.h’ file not found”,执行“pod install”之后就不再报错了(每次新增删除文件都要pod install)。
- 3.6.3、如果只想暴露Public目录下的文件给主工程使用,则修改RCAudioEngine.podspec添加
s.public_header_files = 'Classes/Public/**/*.h',这样主工程“#import “RCFirstPublic.h””不会报错,“#import “RCFirstModel.h””报错。 - 3.6.4、给RCFirstPublic添加方法aString,编译通过,运行时出现错误“+[RCFirstPublic aString]: unrecognized selector sent to class 0x104e5e298”,Shift+Command+K进行clean,然后重新run。
- 3.6.5、修改RCAudioEngine库中的文件如RCFirstPublic之后,要执行pod install,才会在主工程中使用时有补全提示。
-
3.7、prefix_header_file:
- 3.7.1、默认在Development Pods->RCAudioEngine->Support Files下自动生成RCAudioEngine-prefix.pch文件,如果不想生成这个文件,则修改RCAudioEngine.podspec添加
s.prefix_header_file = false。 - 3.7.2、添加pch文件步骤(但是不推荐使用,因为cocoapods.org中提示Pod不应该污染其他库或用户工程的prefix header):选中Development Pods->RCAudioEngine->Pod新建文件“iOS->Other->PCH File”,名称RCAudioEnginePrefix,存储位置选Classes,Group选Pod,Targets不勾选,修改RCAudioEngine.podspec为
s.prefix_header_file = 'Classes/RCAudioEnginePrefix.pch',执行pod install之后,这个文件出现在Development Pods->RCAudioEngine而不是其下的Pod中,文件中的内容都自动拼接到原RCAudioEngine-prefix.pch文件结尾。
- 3.7.1、默认在Development Pods->RCAudioEngine->Support Files下自动生成RCAudioEngine-prefix.pch文件,如果不想生成这个文件,则修改RCAudioEngine.podspec添加
-
3.8、将本地组件库RCAudioEngine的代码加到主工程CBD的git:
- 3.8.1、因为之前测试时添加了一些文件,又删除了,导致Sourcetree的CBD仓库也显示这些文件,执行“git status”发现这些文件在“Changes to be committed:”显示为new file,在“Changes not staged for commit:”显示为deleted,执行“git restore --staged 文件如LocalPods/RCAudioEngine/Resources/RCAudioEngine.xcassets”,这样Sourcetree就不显示这些文件了。
- 3.8.2、Sourcetree的CBD仓库勾选全部文件(特别是LocalPods目录下全部文件),commit。