1.VS Qt中信号槽使用方法一
①在头文件中定义槽函数,如下:
private slots:
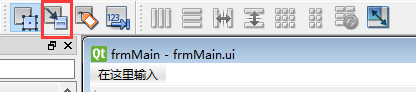
void testBtnClicked();②在.ui 文件中拖入控件,点击F3快捷键,或者点击如下图标,编辑信号槽。
③点击“test”按钮,可以实现对信号和槽的编辑。
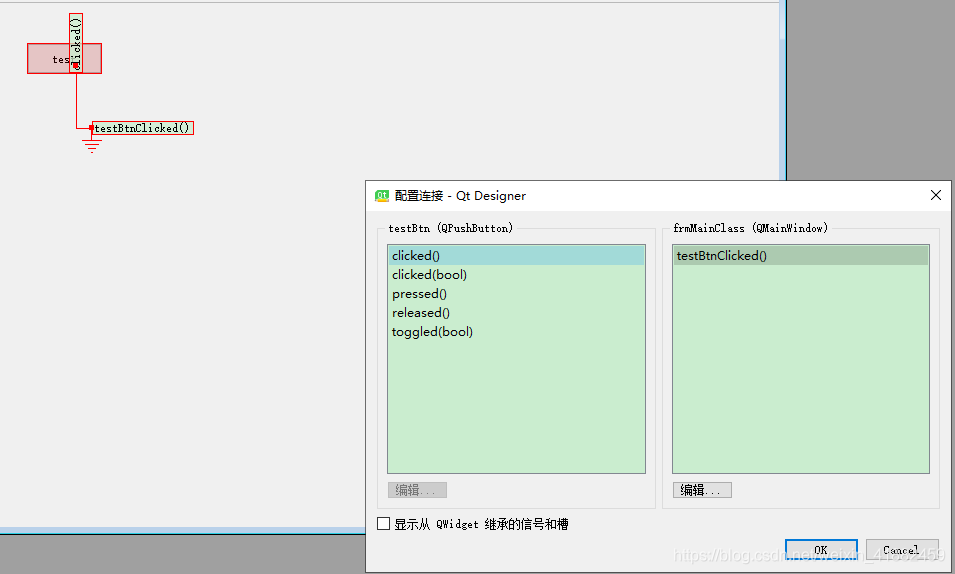
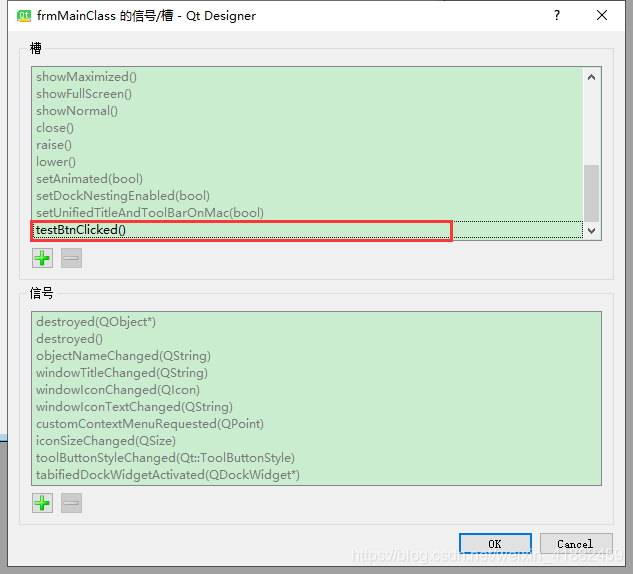
④更改标红出为testBtnClicked(),与头文件定义的槽函数名字一致。
⑤在.cpp文件中实现槽函数
void frmMain::testBtnClicked()
{
	QMessageBox *msg = new QMessageBox;
	msg->aboutQt(this, "about qt");
}
2.信号槽使用方法二
直接使用connect函数连接信号和槽,此方法和Qt Creator中的使用方法一样。
h文件
#pragma once

#include <QtWidgets/QMainWindow>

#include "ui_frmMain.h"

class frmMain : public QMainWindow
{
    Q_OBJECT

public:
    frmMain(QWidget *parent = Q_NULLPTR);


private slots:
	void testBtnClicked();
	void slotBtn1();
	void slotBtn2();

private:
    Ui::frmMainClass ui;
};
cpp文件
扫描二维码关注公众号,回复:
12636718 查看本文章

#pragma execution_character_set("utf-8")
#include "frmMain.h"
#include<QMessageBox>
#include<QDebug>
#include<QPropertyAnimation>
#include<iostream>
#include<QPushButton>
#include<QGridLayout>
frmMain::frmMain(QWidget *parent)
	: QMainWindow(parent)
{
	ui.setupUi(this);
	setWindowTitle(" 测试 程序 ");
	setFixedSize(QSize(300, 200));
	QPushButton *btn1 = new QPushButton("btn1",this);
	btn1->move(0, 100);
	QPushButton *btn2 = new QPushButton("btn2",this);
	btn2->move(100, 100);
	connect(btn1, SIGNAL(clicked()), this, SLOT(slotBtn1()));
	connect(btn2, SIGNAL(clicked()), this, SLOT(slotBtn2()));
	QGridLayout *layout = new QGridLayout;
	layout->addWidget(btn1);
	layout->addWidget(btn2);
	this->setLayout(layout);

}

void frmMain::testBtnClicked()
{
	QMessageBox *msg = new QMessageBox;
	msg->aboutQt(this, "about qt");
}

void frmMain::slotBtn1()
{
	QMessageBox *msg = new QMessageBox;
	msg->about(this, "btn1 clicked", "btn1");
}

void frmMain::slotBtn2()
{
	QMessageBox *msg = new QMessageBox;
	msg->about(this, "btn2 clicked", "btn2");
}