最后train的代码:
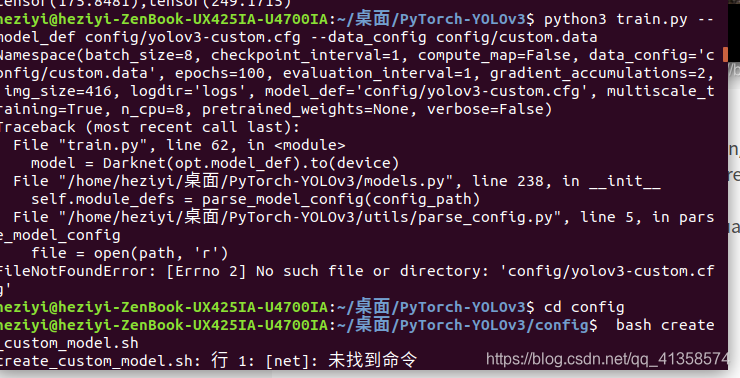
python3 train.py --model_def config/yolov3-custom.cfg --data_config config/custom.data
按资料下载yolov3进行模型训练和检测,下载了好几份代码,有一份官方的一直有问题。有一份很快跑起来了(网址忘记了,可以百度网盘分享),明明都是yolov3的pytorch版本但代码差别很大。记录遇到的问题和一些测试。
遇到的报错有:
pip’s dependency resolver does not currently take into account all the
packages that are installed. This behaviour is the source of the
following dependency conflicts. launchpadlib 1.10.6 requires
testresources, which is not installed.正在保存至: “train2014.zip”
train2014.zip 17%[+++ ] 2.17G 15.7KB/s 剩余
8d 11hget_coco_dataset.sh: 行 13: 31298 段错误 (核心已转储) wget
-c “https://pjreddie.com/media/files/train2014.zip” --header “Referer: pjreddie.com”
–2021-03-14 10:04:08-- https://pjreddie.com/media/files/val2014.zip 正在解析主机 pjreddie.com (pjreddie.com)… 128.208.4.108 正在连接 pjreddie.com
(pjreddie.com)|128.208.4.108|:443… 已连接。 已发出 HTTP 请求,正在等待回应… 206
Partial Content 长度: 6645013297 (6.2G),剩余 6628416607 (6.2G)
[application/zip] 正在保存至: “val2014.zip”val2014.zip 0%[ ] 19.08M 2.01KB/s 用时
7m 15sh2021-03-14 10:11:34 (7.66 KB/s) - 在 20004216 字节处连接关闭。 重试中。
python3 test.py --weights_path weights/yolov3.weights
Namespace(batch_size=8, class_path='data/coco.names', conf_thres=0.5, data_config='config/coco.data', img_size=416, iou_thres=0.5, model_def='config/yolov3.cfg', n_cpu=8, nms_thres=0.5, weights_path='weights/yolov3.weights')
Compute mAP...
Traceback (most recent call last):
File "test.py", line 109, in <module>
batch_size=opt.batch_size,
File "test.py", line 28, in evaluate
dataset = ListDataset(path, img_size=img_size, multiscale=False, transform=DEFAULT_TRANSFORMS)
File "/home/heziyi/桌面/PyTorch-YOLOv3/utils/datasets.py", line 68, in __init__
with open(list_path, "r") as file:
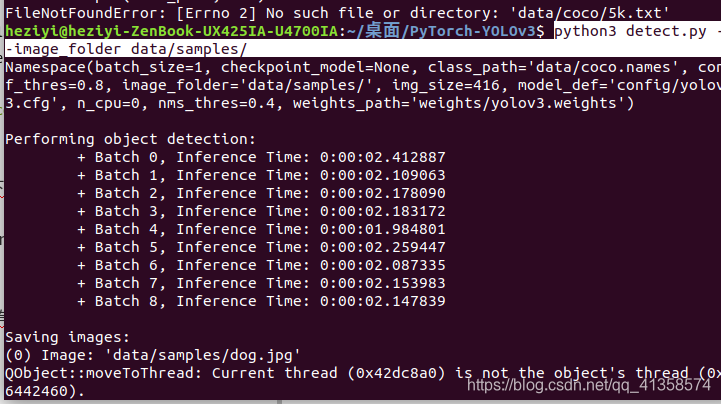
FileNotFoundError: [Errno 2] No such file or directory: 'data/coco/5k.txt'
推测上面的报错是因为train2014.zip和val2014.zip 一直没法下载的原因,可能是占的空间太大下载不了?
测试时:python3 detect.py --image_folder data/samples/
报错:
QObject::moveToThread: Current thread (0x42dc8a0) is not the object’s thread (0x6442460).
Cannot move to target thread (0x42dc8a0)
原因:opencv-python版本高。办法:
sudo pip uninstall opencv-python
Successfully uninstalled opencv-python-4.5.1.48
heziyi@heziyi-ZenBook-UX425IA-U4700IA:~/桌面/PyTorch-YOLOv3$ pip install opencv-python==4.1.0.25 -i https://pypi.tuna.tsinghua.edu.cn/simple
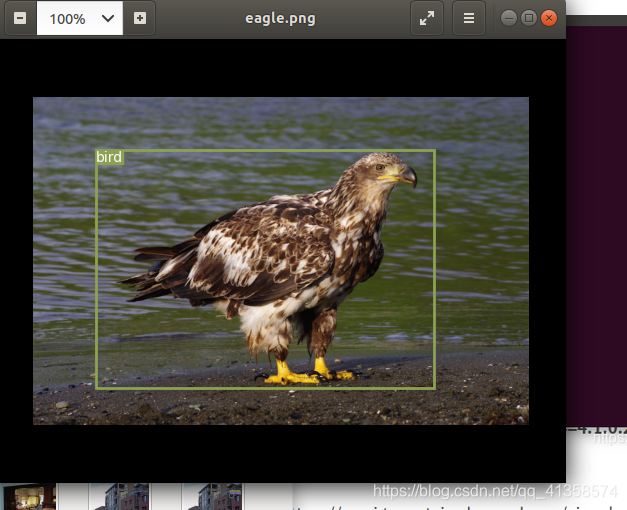
再次运行python3 detect.py --image_folder data/samples/
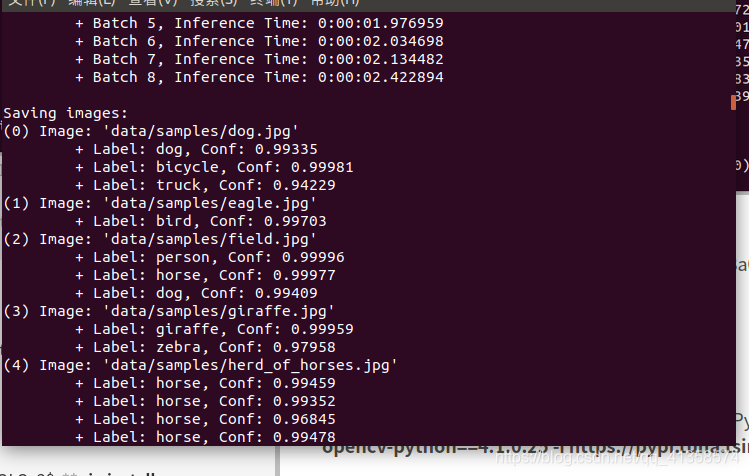 且可以看到输出:
pip install pyqt -i https://pypi.tuna.tsinghua.edu.cn/simple
ERROR: Could not find a version that satisfies the requirement pyqt
ERROR: No matching distribution found for pyqt
改为:pip install pyqt5 -i https://pypi.tuna.tsinghua.edu.cn/simple
ubuntu的输入法打字容易错字,还是截图把。
试图训练自己引入的图片。过程:
 bash create_custom_model.sh
create_custom_model.sh: 行 1: [net]: 未找到命令
原因:bash格式错误,应该加:
#!/bin/bash
NUM_CLASSES=$1
echo "
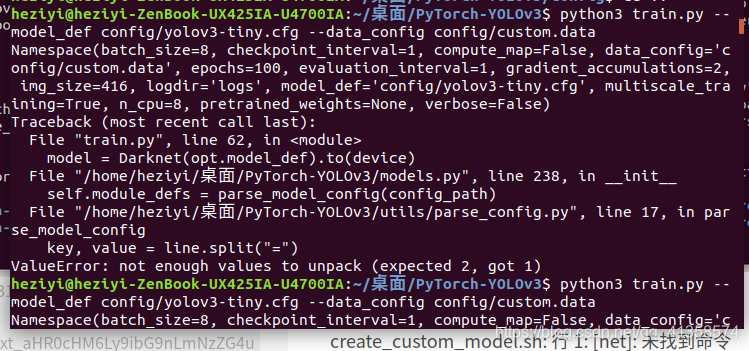
改为了用yolov3-tiny.cfg
key, value = line.split("=")
ValueError: not enough values to unpack (expected 2, got 1)
推测是自己的config写的错误之类的,把空行和多余的符号都删掉了。
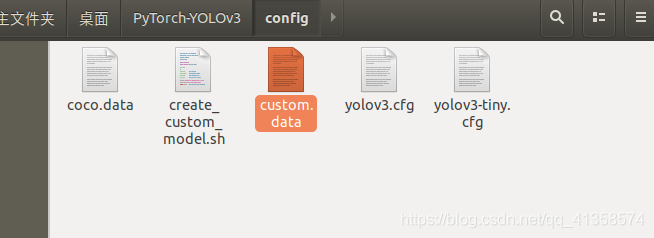
目前的config:
 create_custom_model.sh
执行 bash create_custom_model.sh
可以看到生成了yolov3-custom.cfg
#!/bin/bash

NUM_CLASSES=$1

echo "

[net]
# Testing
batch=1
subdivisions=1
# Training
# batch=64
# subdivisions=2
width=416
height=416
channels=3
momentum=0.9
decay=0.0005
angle=0
saturation = 1.5
exposure = 1.5
hue=.1
learning_rate=0.001
burn_in=1000
max_batches = 500200
policy=steps
steps=400000,450000
scales=.1,.1
[convolutional]
batch_normalize=1
filters=16
size=3
stride=1
pad=1
activation=leaky
[maxpool]
size=2
stride=2
[convolutional]
batch_normalize=1
filters=32
size=3
stride=1
pad=1
activation=leaky
[maxpool]
size=2
stride=2
[convolutional]
batch_normalize=1
filters=64
size=3
stride=1
pad=1
activation=leaky
[maxpool]
size=2
stride=2
[convolutional]
batch_normalize=1
filters=128
size=3
stride=1
pad=1
activation=leaky
[maxpool]
size=2
stride=2
[convolutional]
batch_normalize=1
filters=256
size=3
stride=1
pad=1
activation=leaky
[maxpool]
size=2
stride=2
[convolutional]
batch_normalize=1
filters=512
size=3
stride=1
pad=1
activation=leaky
[maxpool]
size=2
stride=1
[convolutional]
batch_normalize=1
filters=1024
size=3
stride=1
pad=1
activation=leaky
[convolutional]
batch_normalize=1
filters=256
size=1
stride=1
pad=1
activation=leaky
[convolutional]
batch_normalize=1
filters=512
size=3
stride=1
pad=1
activation=leaky
[convolutional]
size=1
stride=1
pad=1
filters=18
activation=linear
[yolo]
mask = 3,4,5
anchors = 10,14,  23,27,  37,58,  81,82,  135,169,  344,319
classes=1
num=6
jitter=.3
ignore_thresh = .7
truth_thresh = 1
random=1
[route]
layers = -4
[convolutional]
batch_normalize=1
filters=128
size=1
stride=1
pad=1
activation=leaky
[upsample]
stride=2
[route]
layers = -1, 8
[convolutional]
batch_normalize=1
filters=256
size=3
stride=1
pad=1
activation=leaky
[convolutional]
size=1
stride=1
pad=1
filters=18
activation=linear
[yolo]
mask = 0,1,2
anchors = 10,14,  23,27,  37,58,  81,82,  135,169,  344,319
classes=1
num=6
jitter=.3
ignore_thresh = .7
truth_thresh = 1
random=1
" >> yolov3-custom.cfg
`

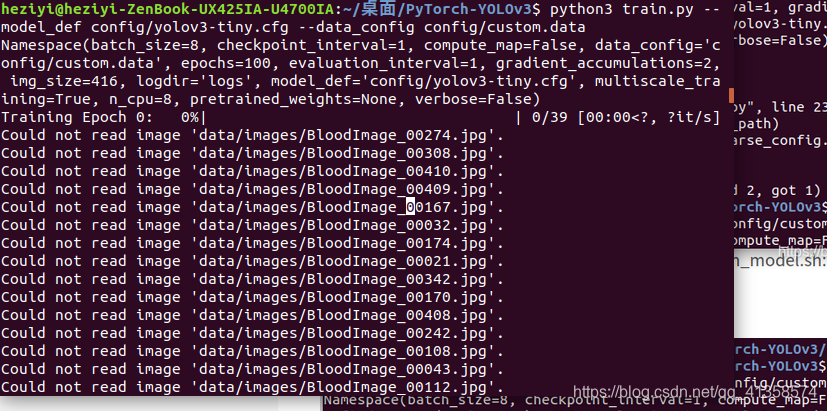
Could not read image ‘data/images/BloodImage_00274.jpg’.
Could not read image ‘data/images/BloodImage_00308.jpg’.
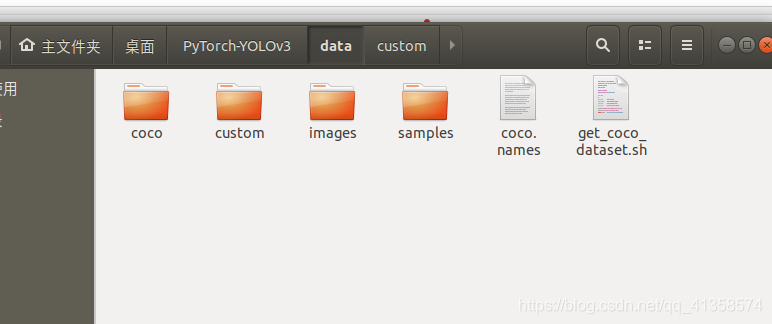
这问题找了很久,终于知道了还是图片位置的原因,需要放在custom下才行,预测是代码中有设定读取的是同级文件夹。
 只能读取这个里面的images而不能读取下面这个images文件夹的:
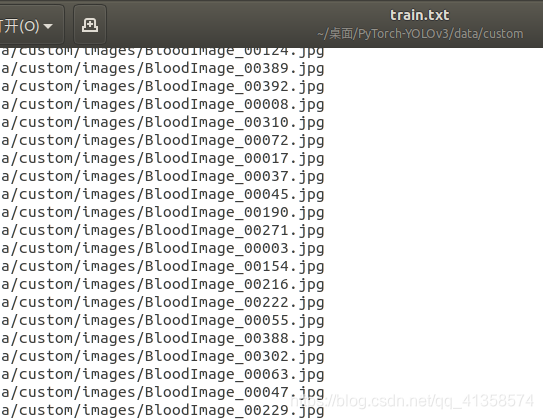
于是把train.txt内容改为:
 现在能运行成功了:
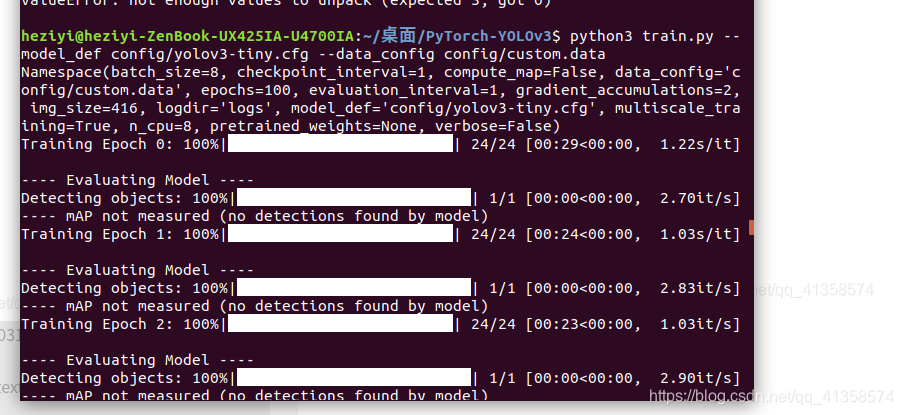 最后一轮epoch
---- mAP 0.6698849929680083
还是挺低的,估计跟图片过少有关系。
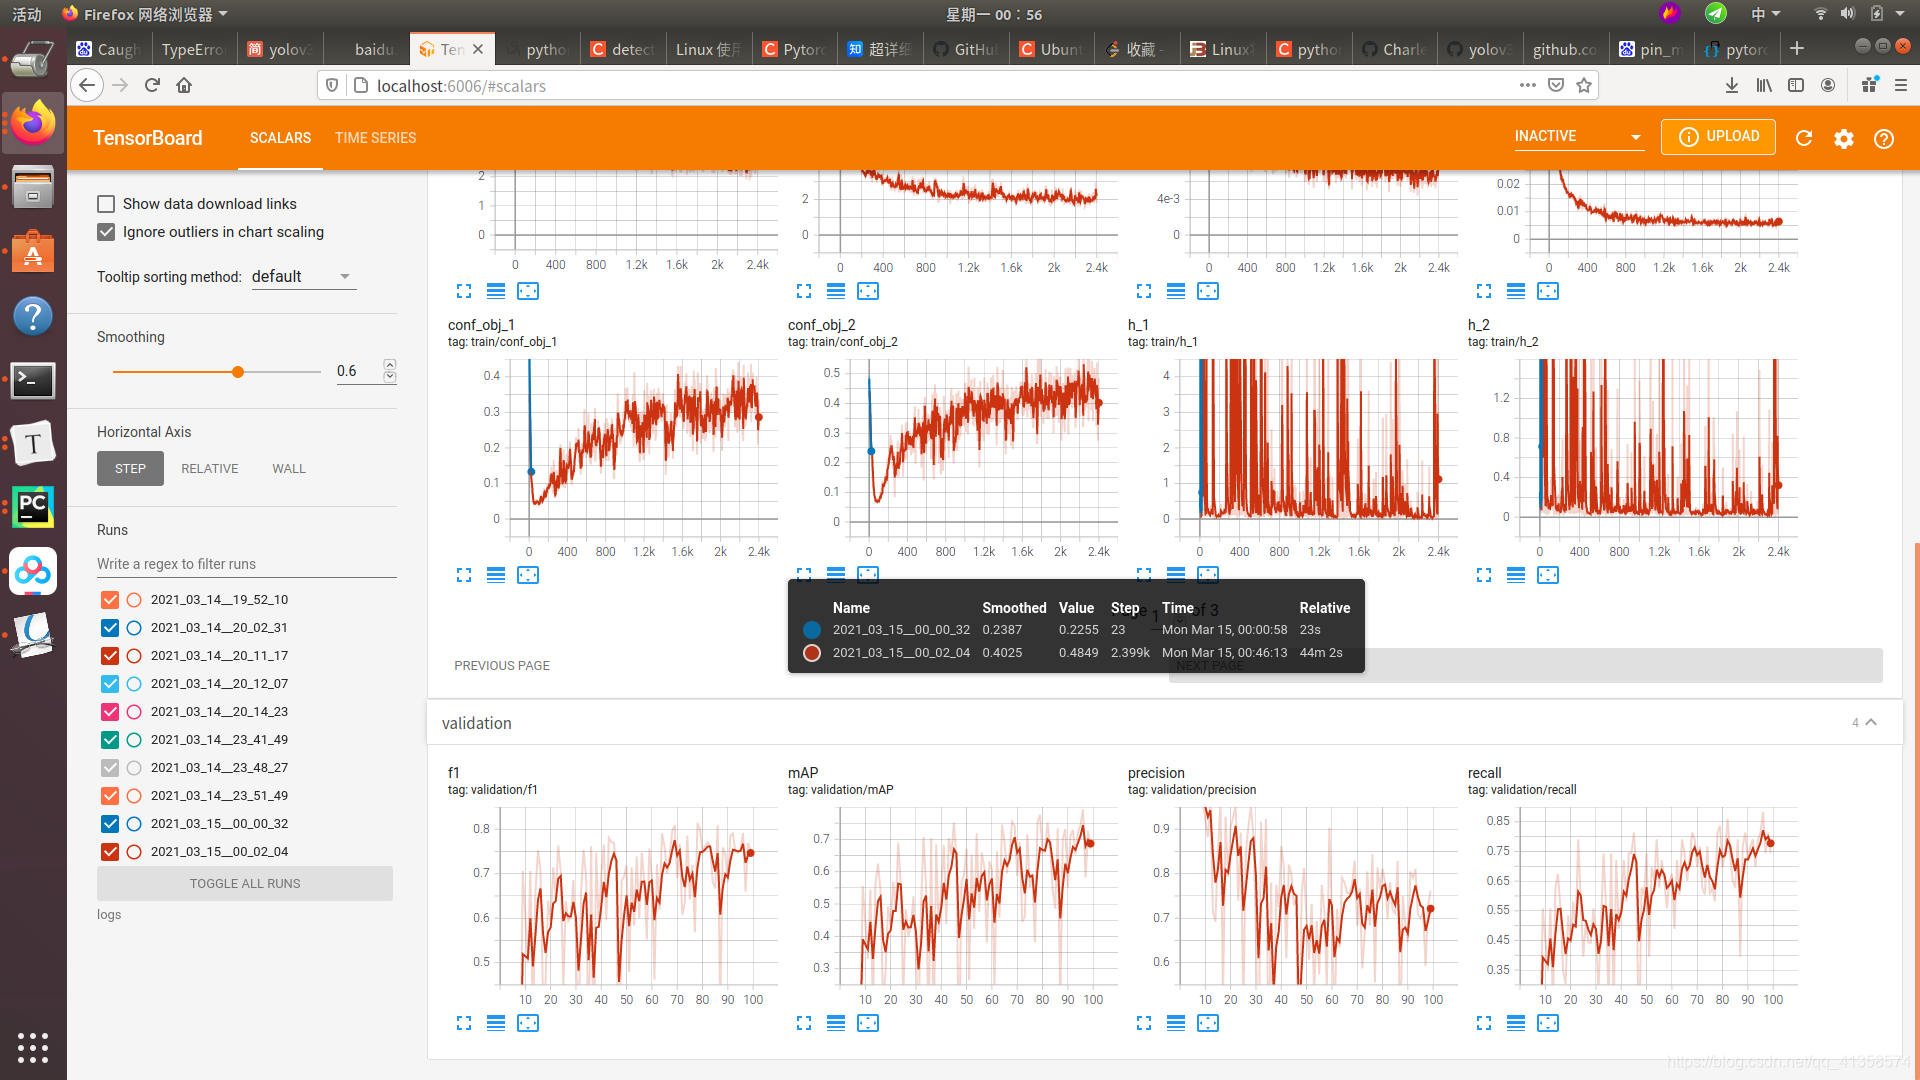
输入
tensorboard --logdir=‘logs’ --port=6006
打开6006: