文章目录
前言
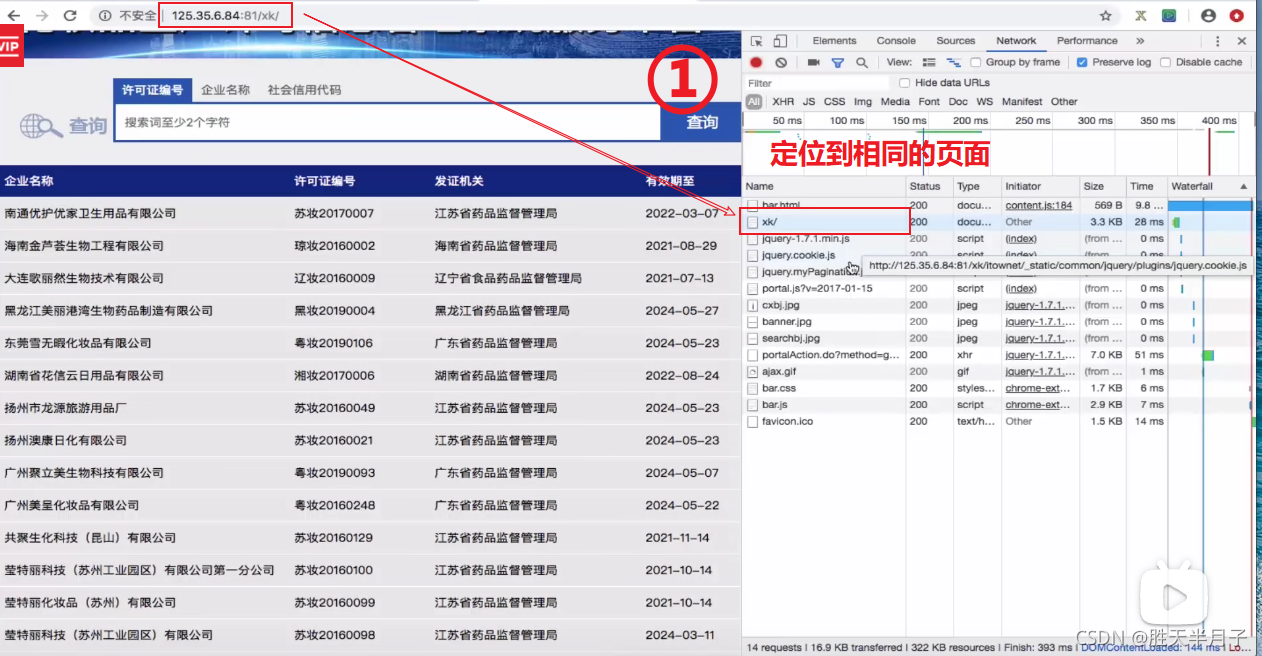
- 关于一个页面是否是动态加载(Aajax)数据的判断方法⭐⭐
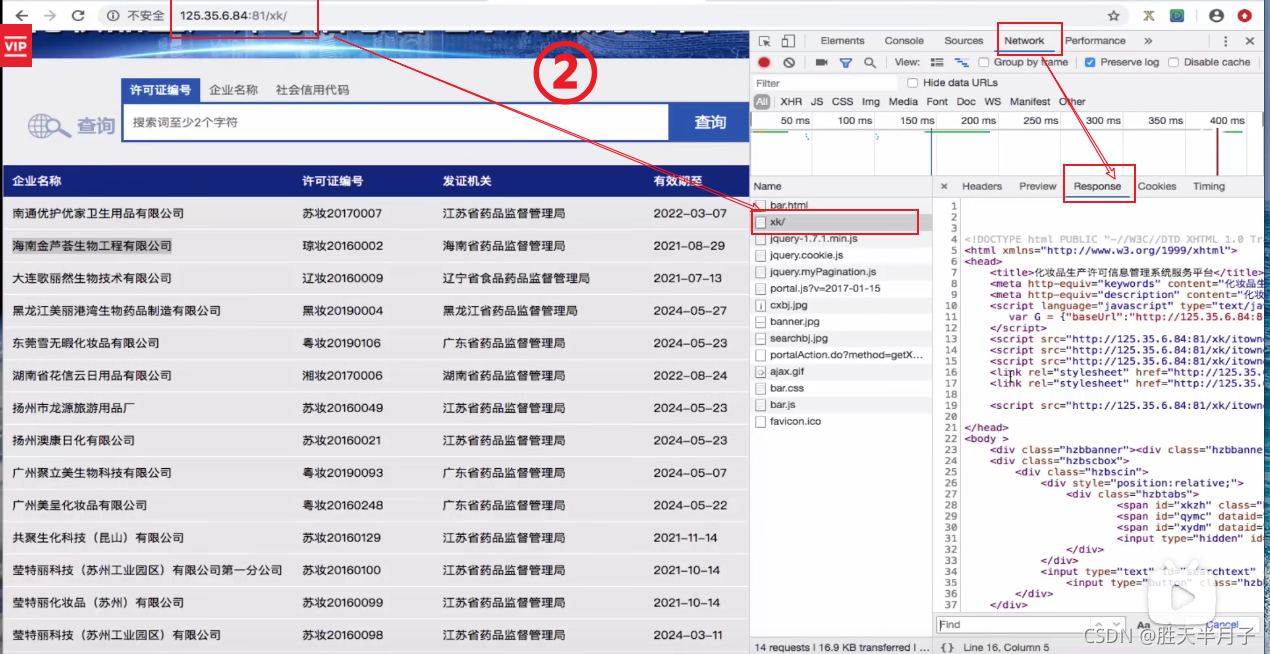
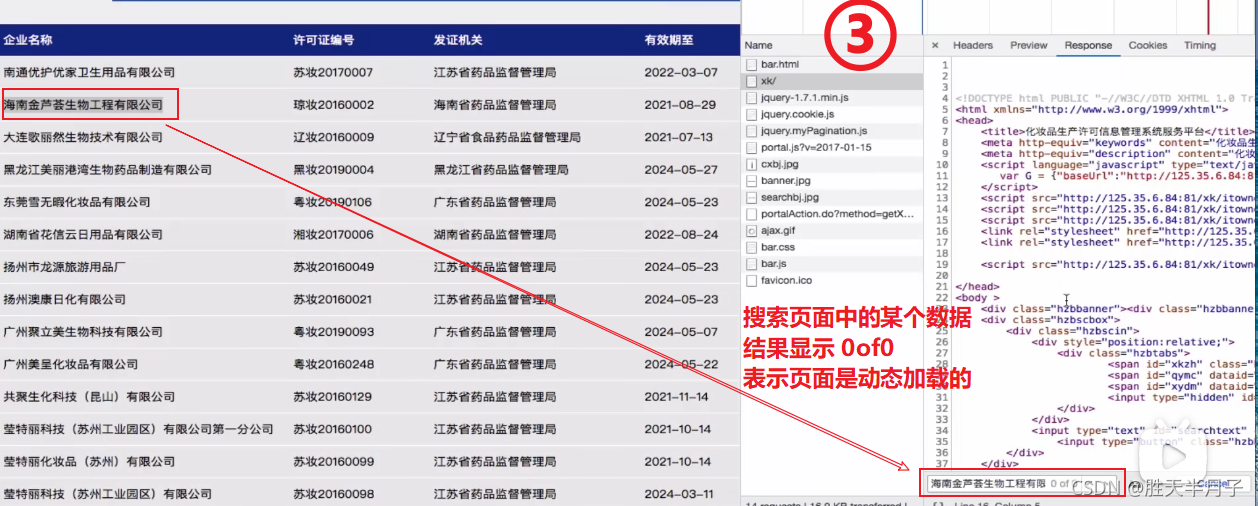
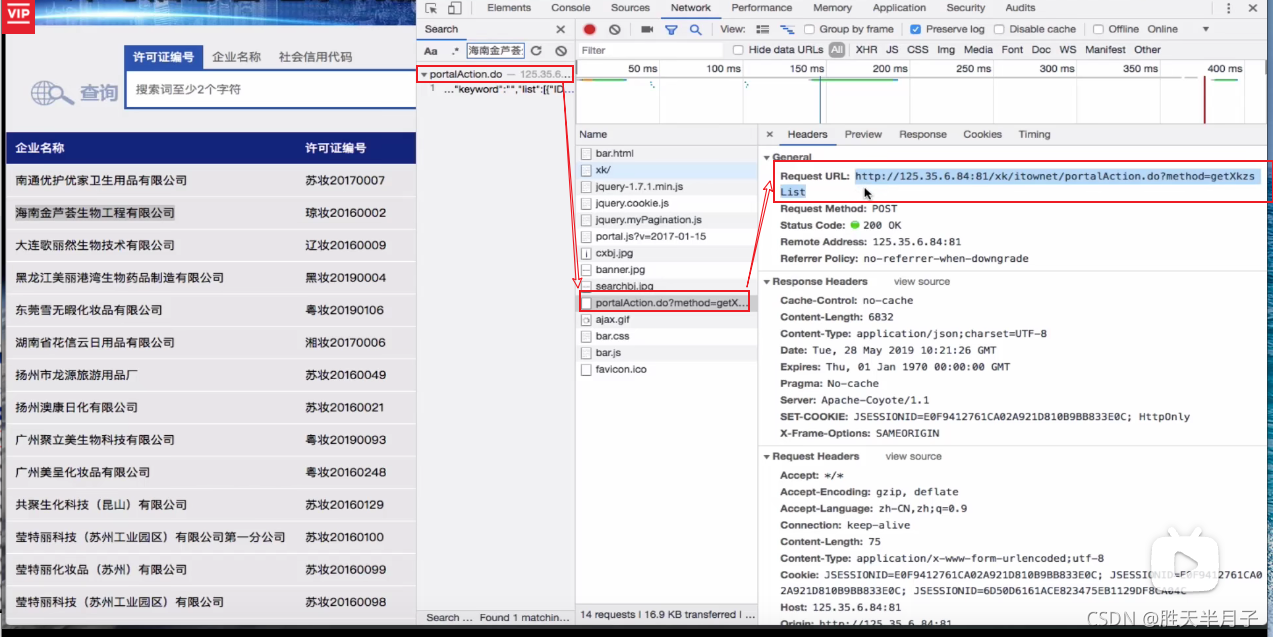
动态加载数据意味着直接对网址进行请求是无法直接拿到页面数据的,我们可以通过网页上的抓包工具定位到network对网页进行请求,并查看网页上的某个数据是否在network请求页面加载的数据页中
- 步骤详解
动态加载的数据是如何来的?

一、selenium简介
selenium模块和爬虫之间具有怎样的关联?
- 便捷的获取网站中动态加载的数据
- 边界的实现模拟登录
什么是selenium模块?
- 基于
浏览器自动化的一个模块
selenium模块使用流程:
- 环境安装:
pip install selenium⭐- 下载一个浏览器的驱动程序:用什么浏览器就下载什么浏览器驱动程序:谷歌驱动程序
对于现在正在使用的google浏览器根据版本号寻找对应驱动程序即可。- 实例化一个浏览器对象
- 编写基于浏览器自动化的操作代码:
- 发起请求:get(url)
- 标签定位:find系列方法
- 标签交互:send_keys(‘xxx’)
- 执行js程序:execte_script(‘jsCode’)
- 关闭浏览器:quit()
- 使用selenium爬取药监总局的数据⭐
from selenium import webdriver
from lxml import etree
from time import sleep
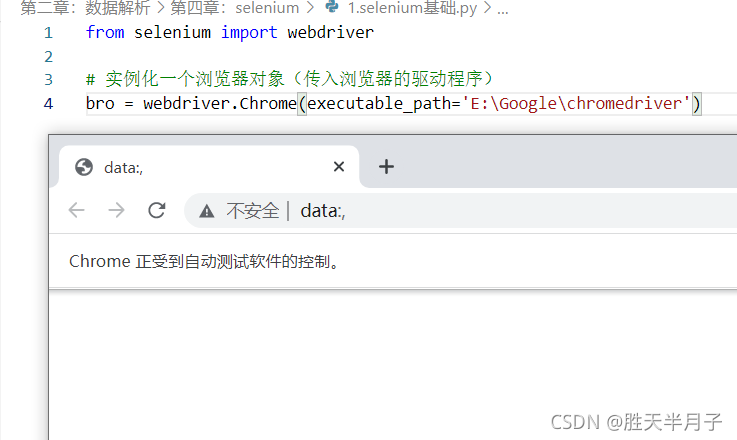
# 实例化一个浏览器对象(传入浏览器的驱动程序)
bro = webdriver.Chrome(executable_path='E:\Google\chromedriver')
# 让浏览器发起一个指定的url对应请求
bro.get('http://scxk.nmpa.gov.cn:81/xk/')
# 获取浏览器当前的页面源码数据
page_text = bro.page_source
# 解析企业名称
tree = etree.HTML(page_text)
li_list = tree.xpath('//ul[@id="gzlist"]/li')
for li in li_list:
name = li.xpath('./dl/@title')[0]
print(name)
sleep(5)
# 关闭浏览器
bro.quit()

- 使用selenium进行简单的自动化操作
from selenium import webdriver
from time import sleep

bro = webdriver.Chrome(executable_path=r'E:\Google\chromedriver')

bro.get('https://www.taobao.com/')

# 找到搜索框:标签定位
search_input = bro.find_element_by_id('q') # 返回所定位的标签
# 标签的交互
search_input.send_keys('Iphone')

# 执行一组js程序 :滚轮滚动一个屏幕的高度
bro.execute_script('window.scrollTo(0,document.body.scrollHeight)')
sleep(2)
# 点击搜索按钮  class = 'btn-search tb-bg'
btn = bro.find_element_by_css_selector('.btn-search')
# btn = bro.find_element_by_class_name('btn-search')
btn = bro.find_element_by_class_name('tb-bg')
btn.click()


bro.get('https://www.baidu.com')
sleep(2)
# 回退
bro.back()
sleep(2)
# 前进
bro.forward()

sleep(5)
bro.quit()
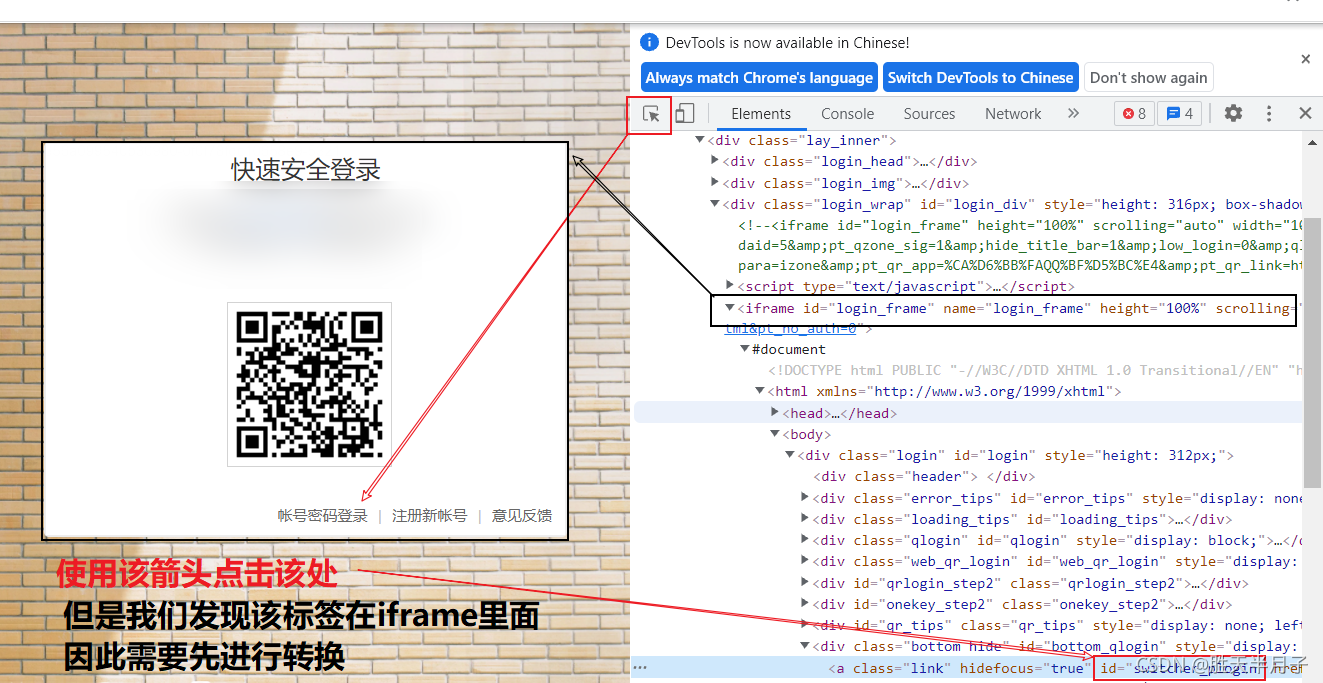
二、selenium处理iframe
- 如果定位的标签是存在iframe标签之中的则必须使用switch_to.frame(id)
- 动作链(拖动):
from selenium.webdriver import ActionChains# 动作链
- 实例化动作链对象:
action = ActionChains(bro)
action.click_and_hold(div):长按并点击
move_by_offset(x,y):想要偏移的像素值
action.move_by_offset(17,yoffset=0).perform():让动作链立即执行
action.release()释放动作链对象
- iframe
iframe就是我们常用的iframe标签:<iframe>。iframe标签是框架的一种形式,也比较常用到,iframe一般用来包含别的页面,例如我们可以在我们自己的网站页面加载别人网站或者本站其他页面的内容。
iframe标签的最大作用就是让页面变得美观。
iframe标签的用法有很多,主要区别在于对iframe标签定义的形式不同,例如定义iframe的长宽高。扫描二维码关注公众号,回复: 13327845 查看本文章
- 使用selenium实现如下操作

- 查看被拖动的标签并进行输出
from selenium import webdriver
from time import sleep

bro = webdriver.Chrome(executable_path=r'E:\Google\chromedriver')

url = 'http://www.runoob.com/try/try.php?filename=jqueryui-api-droppable'
bro.get(url)

div = bro.find_element_by_id('draggable')
print(div)
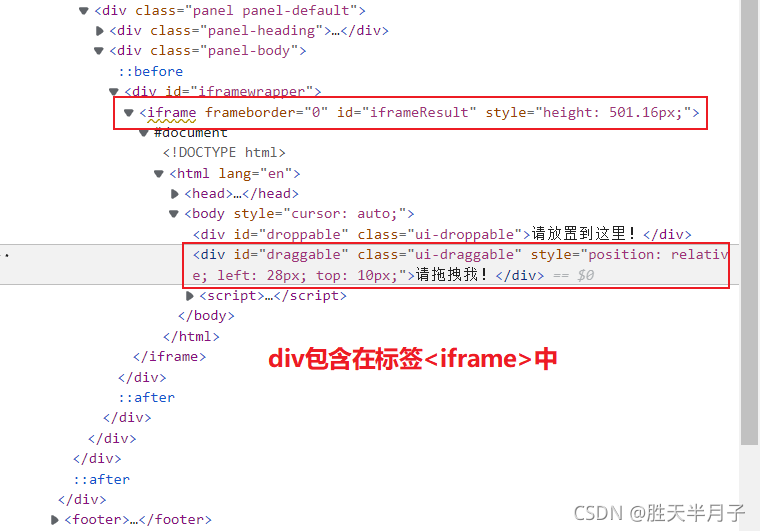
如果定位的标签是存在iframe标签之中的则必须通过如下操作进行定位
# 填写被包含的iframme的id名字
bro.switch_to.frame('iframeResult') # 切换浏览器标签的作用域
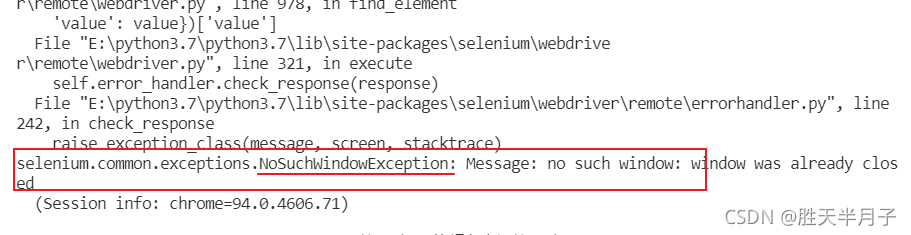
再次运行没有报错,并打印结果:

- 完整动作
from selenium import webdriver
from time import sleep
from selenium.webdriver import ActionChains # 动作链

bro = webdriver.Chrome(executable_path=r'E:\Google\chromedriver')

url = 'http://www.runoob.com/try/try.php?filename=jqueryui-api-droppable'
bro.get(url)

# 如果定位的标签是存在iframe标签之中的则必须通过如下操作进行定位
bro.switch_to.frame('iframeResult') # 切换浏览器标签的作用域
div = bro.find_element_by_id('draggable')
# print(div)

# 动作链 :触发一系列操作
action = ActionChains(bro)
# 点击并且长按
action.click_and_hold(div)
for i in range(5):
    # move_by_offset(x,y)
    action.move_by_offset(17,yoffset=0).perform() # 一次性便宜17像素  perform()立即执行动作链
    sleep(0.3)

# 动作链释放
action.release()

sleep(5)
bro.quit()
三、selenium的模拟登录
- 需求
模拟登录:https://qzone.qq.com/
- 模拟打开网址
from selenium import webdriver
from time import sleep

bro = webdriver.Chrome(executable_path=r'E:\Google\chromedriver')

bro.get('https://qzone.qq.com/')
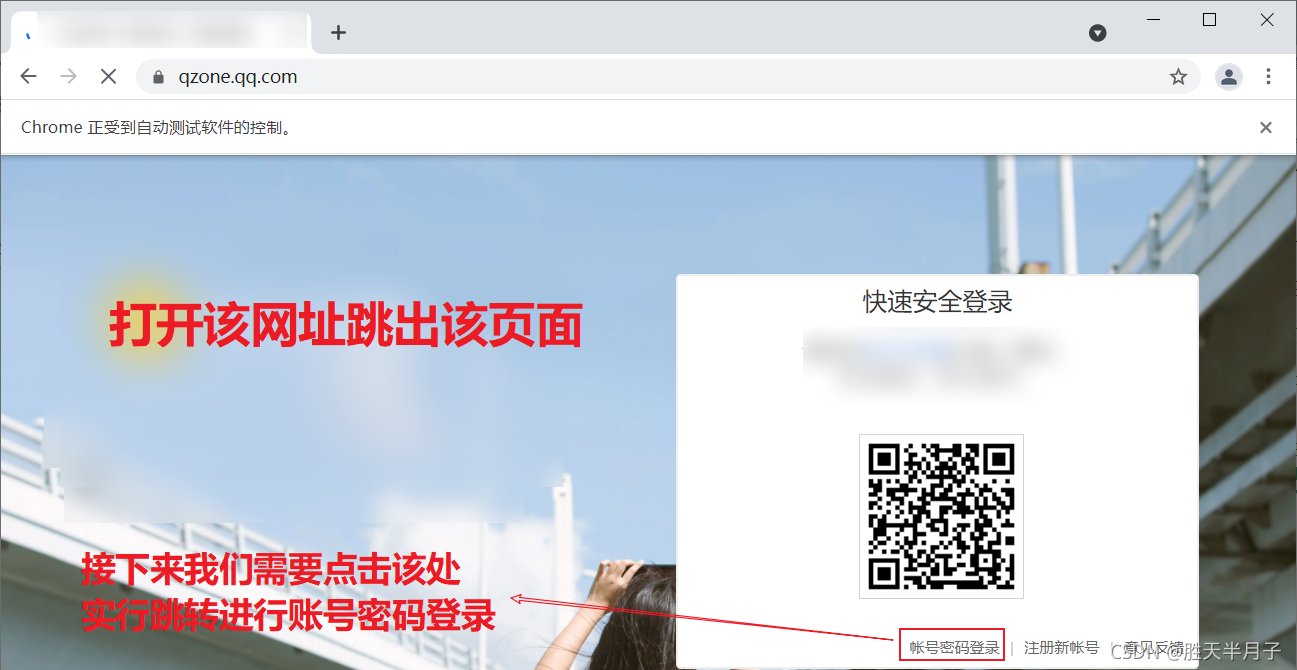
- 跳转iframe
from selenium import webdriver
from time import sleep

bro = webdriver.Chrome(executable_path=r'E:\Google\chromedriver')

bro.get('https://qzone.qq.com/')

bro.switch_to.frame('login_frame')

a_tag = bro.find_element_by_id('switcher_plogin')
a_tag.click()

# 找到输入账号和密码的文本狂
userName_tag = bro.find_element_by_id('u')
password_tag = bro.find_element_by_id('p')
sleep(1)
userName_tag.send_keys('2328409226')
sleep(1)
password_tag.send_keys('123456789')
sleep(1)

# 登录按钮
btn = bro.find_element_by_id('login_button')
btn.click()

sleep(3)
bro.quit()

四、无头浏览器和规避检测
4.1 无可视化界面
如何让我们的谷歌浏览器不进行可视化操作,也就是没有可视化界面(无头浏览器)
- 添加代码⭐
from selenium.webdriver.chrome.options import Options

# 创建一个参数对象,用来控制chrome以无界面模式打开
chrome_options = Options()
chrome_options.add_argument('--headless')
chrome_options.add_argument('--disable-gpu')

bro = webdriver.Chrome(executable_path=r'E:\Google\chromedriver',chrome_options=chrome_options)
- 验证
from selenium import webdriver
from time import sleep
from selenium.webdriver.chrome.options import Options
# 创建一个参数对象,用来控制chrome以无界面模式打开
chrome_options = Options()
chrome_options.add_argument('--headless')
chrome_options.add_argument('--disable-gpu')
bro = webdriver.Chrome(executable_path=r'E:\Google\chromedriver',chrome_options=chrome_options)
# 无可视化界面(无头浏览器)
# phantomJs也是无头浏览器,但是停止更新和维护了
bro.get('https://www.baidu.com/')
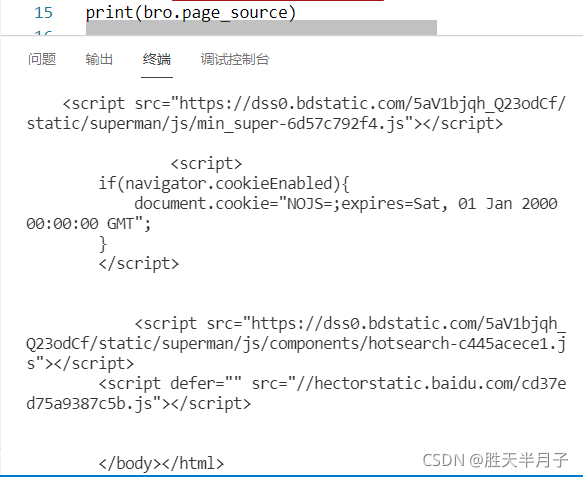
print(bro.page_source)
bro.quit()
4.2 规避检测
- 添加代码⭐
from selenium.webdriver import ChromeOptions

# 实现规避检测
option = ChromeOptions()
option.add_experimental_option('excludeSwitches', ['enable-automation'])
- 验证
from selenium import webdriver
from time import sleep
# 实现无可视化界面
from selenium.webdriver.chrome.options import Options
# 实现规避检测
from selenium.webdriver import ChromeOptions

# 创建一个参数对象,用来控制chrome以无界面模式打开
chrome_options = Options()
chrome_options.add_argument('--headless')
chrome_options.add_argument('--disable-gpu')

# 实现规避检测
option = ChromeOptions()
option.add_experimental_option('excludeSwitches', ['enable-automation'])


# 如何实现让selenium规避被检测的风险
bro = webdriver.Chrome(executable_path=r'E:\Google\chromedriver',chrome_options=chrome_options,options=option)

# 无可视化界面(无头浏览器)
# phantomJs也是无头浏览器,但是停止更新和维护了
bro.get('https://www.baidu.com/')
print(bro.page_source)


bro.quit()
五、One-Two-Three-Zero-Six模拟登录
- 编码流程
- 找到账号登录
- 找到账号和密码对应的标签
- 找到滑块的标签
- 使用动作链进行滑动
感谢以下博客提供的解决方法:
5.1 步骤讲解
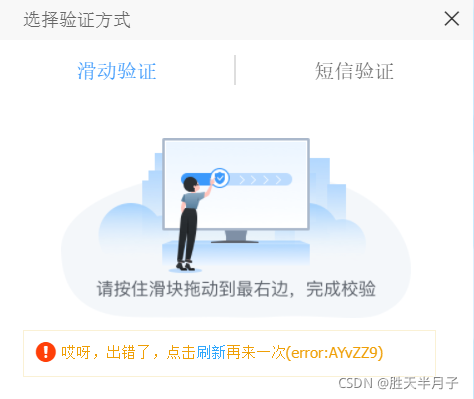
- 不出现滑动
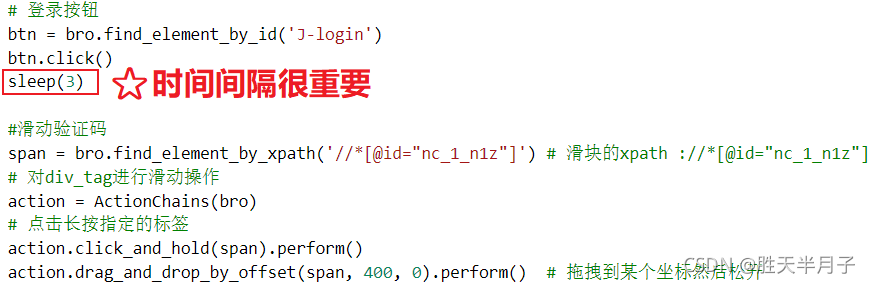
由于在点击按钮操作后没有时间停顿出现该情况,设置时间间隔即可
- 滑块滑动失败
bro.get('https://kyfw.12306.cn/otn/resources/login.html')
#防止被12306识别为selenium登陆  ⭐⭐
script = 'Object.defineProperty(navigator,"webdriver",{get:()=>undefined,});'
bro.execute_script(script)
- 滑块移动位置
move_by_offset(xoffset, yoffset) ——鼠标从当前位置移动到某个坐标
# 动作链 :触发一系列操作
action = ActionChains(bro)
# 点击并且长按
action.click_and_hold(div)
for i in range(5):
    # move_by_offset(x,y)
    action.move_by_offset(17,yoffset=0).perform() # 一次性偏移17像素
    sleep(0.3)

# 动作链释放
action.release()
move_to_element(to_element) ——鼠标移动到某个元素
move_to_element_with_offset(to_element, xoffset, yoffset) ——移动到距某个元素(左上角坐标)多少距离的位置


drag_and_drop_by_offset(source, xoffset, yoffset) ——拖拽到某个坐标然后松开
#滑动验证码
span = bro.find_element_by_xpath('//*[@id="nc_1_n1z"]') # 滑块的xpath ://*[@id="nc_1_n1z"]

bigspan = bro.find_element_by_class_name('nc-lang-cnt')
print('big_span:',bigspan.size)# 标签对应的长和宽

# 对div_tag进行滑动操作
action = ActionChains(bro)
# 点击长按指定的标签
action.click_and_hold(span).perform()
action.drag_and_drop_by_offset(span, 350, 0).perform()  # 拖拽到某个坐标然后松开
# action.drag_and_drop_by_offset(span, 400, 0)
# 动作链释放
action.release()
电脑显示屏坐标系:
X从左往右递增,Y从上往下递增。即:最左上方可见像素的坐标是(0,0)
关于拖动坐标点的问题:
关于是(350, 0)还是(400, 0)或者其他的坐标(x,y),只要将滑块拖动到底即可
perform() ——立即执行动作链
5.2 源码
from selenium import webdriver
from time import sleep
from selenium.webdriver import ActionChains # 动作链
from selenium.webdriver import ChromeOptions

# 实现规避检测
option = ChromeOptions()
option.add_experimental_option('excludeSwitches', ['enable-automation'])


bro = webdriver.Chrome(executable_path=r'E:\Google\chromedriver')

bro.get('https://kyfw.12306.cn/otn/resources/login.html')
#防止被12306识别为selenium登陆
script = 'Object.defineProperty(navigator,"webdriver",{get:()=>undefined,});'
bro.execute_script(script)

# 找到账号登录按钮
tag = bro.find_element_by_xpath('//*[@id="toolbar_Div"]/div[2]/div[2]/ul/li[2]/a')
tag.click()
sleep(1)

# 输入账号密码
userName_tag = bro.find_element_by_id('J-userName')
password_tag = bro.find_element_by_id('J-password')
sleep(1)
userName_tag.send_keys('17349868689')
sleep(1)
password_tag.send_keys('ZHENHAO0903')
sleep(1)

# 登录按钮
btn = bro.find_element_by_id('J-login')
btn.click()
sleep(3)

#滑动验证码
span = bro.find_element_by_xpath('//*[@id="nc_1_n1z"]') # 滑块的xpath ://*[@id="nc_1_n1z"]

bigspan = bro.find_element_by_class_name('nc-lang-cnt')
print('big_span:',bigspan.size)# 标签对应的长和宽


# 对div_tag进行滑动操作
action = ActionChains(bro)
# 点击长按指定的标签
action.click_and_hold(span).perform()
action.drag_and_drop_by_offset(span, 350, 0).perform()  # 拖拽到某个坐标然后松开
# action.drag_and_drop_by_offset(span, 400, 0)
# 动作链释放
action.release()

sleep(5)
bro.quit()
总结
- 使用动作链滑动点击
已知坐标 234,11 | 21,3 对坐标中的数据进行点击
- 将坐标数据转换为列表
result = '253,83|253,153'
all_list = [] # 存储即将被点击的点的坐标
if '|' in result:
	list_1 = result.split('|')
	cout_1 = len(list_1)
	for i in range(count_1):
		xy_list = []
		x = int(list_1[i].split(',')[0])
		y = int(list_1[i].split(',')[1])
		xy_list.append(x)
		xy_list.append(y)
		all_list.append(xy_list)
else:
	xy_list = []
	x = int(list_1[i].split(',')[0])
	y = int(list_1[i].split(',')[1])
	xy_list.append(x)
	xy_list.append(y)
	all_list.append(xy_list)
print(all_list)

- 遍历列表,使用动作链操作
# 遍历列表,使用动作链对每一个列表元素对应的x,y指定的位置进行点击操作
for l in all_list:
	x = l[0]
	y = l[1]
	ActionChains(bro).move_to_element-with_offset(img,x,y).perform() # perform()立即执行
	time.sleep(0.5)
# img是切换参照物为当前的图片标签