
文件目录
Refs & 类组件

使用Refs的时候,当 ref 属性用于自定义 class 组件时, ref 对象接收组件的实例作为其 current 属性。
//RefCom.js
import React, { Component } from 'react'
export default class RefCom extends
Component {
    onLog() {
        console.log('这些是打印的信息')
   }
    render() {
        return (
            <div>
                <h3>我是一个自定义的类组件</h3>
            </div>
       )
   }
}
//RefTest.js
 componentDidMount(){
    console.log(this.comRef)
 }
  render() {
    return (
      <>
         <button onClick= {()=>this.comRef.current.onLog()}>调用refCom组件中的函数</button>
      <RefCom ref={this.comRef}/>
      </>
   )
 }
}

Refs & 函数组件

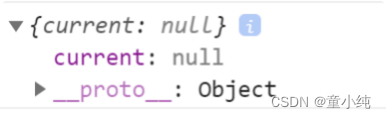
我们不能直接在函数组件上使用 ref 属性,ref的 current 会是一个 null。
function FnCom (){
    return <h1>hello,baizhan</h1>
}
export default FnCom
//App.js
componentDidMount(){
console.log(this.comRef)
}
render() {
return (
<>
<FnCom ref={this.comRef}/>
</>
)
}
转发 refs 到 DOM 组件
通过转发refs可以将ref转发到一个 DOM 元素或 class 组件。
//FnCom.js
import React from "react"
export default React.forwardRef(
   (props,ref)=><h1 ref={ref}>hello,小童</h1>
)
回调 Refs

React 也支持另一种设置 refs 的方式,不同于传递 React.createRef() 创建的Refs,我们可以给ref属性传递一个函数。在这个函数中通过参数来获取 React 组件实例或 HTML DOM 元素。
使用 回调Refs
componentDidMount() {
      this.inputDom.focus()
      this.refcom.onLog()
}
setInputRef = (ele) => {
     console.log(ele)
     this.inputDom=ele
}
setClassRef = (refcom) => {
      console.log(refcom)
     this.refcom=refcom

}
render() {
     return (
          <>
              <input ref={this.setInputRef}/>
              <RefCom ref={this.setClassRef}/>
          </>
     )
}
提示:
React 将在组件挂载时,会调用 ref 回调函数并传入 DOM 元素,当卸载时调用它并传入 null 。在 componentDidMount 或 componentDidUpdate 触发前,React 会保证 refs 一定是最新的。
高阶组件(HOC)

高阶组件(HOC) 是参数为组件,返回值为新组件的函数。
可以把 高阶组件 看作是 组件的加工厂 ,接收旧组件返回包装后的新组件。
export default function withUserData(WrappedComponent) {
    return class extends React.Component {
        constructor(props) {
            super(props)
            // 初始化state的userInfo属性
            this.state = { userInfo: {} }
       }
        componentDidMount() {
            // 获取用户信息,并且存储到state当中
            let userInfo = JSON.parse(localStorage.getItem("userInfo"))
            this.setState({ userInfo })
       }
        render() {
            // ...this.props 传递给当前组件的属性继续向下传递
            return <WrappedComponent userInfo={this.state.userInfo}{...this.props} />
       }
   }
}
什么情况下使用高阶组件
react如果有多个组件都用到了 同一段逻辑 , 这时,就可以把共同的逻辑部分提取出来,利用高阶组件的形式将这段逻辑整合到每一个组件中,从而减少代码的逻辑重复。
//UserView1.js
import React, { Component } from 'react'
export default class UserView1 extends
Component {
    constructor(props) {
        super(props)
        // 初始化state的userInfo属性
        this.state = { userInfo: {} }
   }
    componentDidMount(){
         // 获取用户信息,并且存储到state当中
         let userInfo = JSON.parse(localStorage.getItem("userInfo"))
         this.setState({ userInfo })
   }
    render() {
        return (
            <div>
                <h3>我是第一个使用用户信息的界面</h3>
              用户账号是: {this.state.userInfo.account}
            </div>
       )
   }
}
//UserView2.js
import React, { Component } from 'react'
export default class UserView2 extends
Component {
constructor(props) {
super(props)
// 初始化state的userInfo属性
this.state = { userInfo: {} }
}
componentDidMount(){
// 获取用户信息,并且存储到state当中
let userInfo = JSON.parse(localStorage.getItem("userInfo"))
this.setState({ userInfo })
}
render() {
return (
<div>
<h3>我是第二个使用用户信息的界面</h3>
用户账号是: {this.state.userInfo.account}
</div>
)
}
}
使用高阶组件
//UserView1.js
import React, { Component } from 'react'
import withUserData from './components/withUserData'
class UserView1 extends Component {


    render() {
        return (
            <div>
                <h3>我是第一个使用用户信息的界面</h3>
               用户账号是:{this.props.userInfo.account}
            </div>
       )
   }
}
export default withUserData(UserView1)
//UserView2.js
import React, { Component } from 'react'
import withUserData from './components/withUserData'
class UserView2 extends Component {
    render() {
        return (
            <div>
                <h3>我是第二个使用用户信息的界面</h3>
               用户账号是: {this.props.userInfo.account}
            </div>
       )
   }
}
export default withUserData(UserView2)
高阶组件(HOC)组合参数组件

HOC 不应该修改 传入组件,而应该使用组合的方式,通过将组件 包装 来组成 新组件 。
HOC 是纯函数,没有副作用。
export default function withUserData(WrappedComponent) {
    // 修改传入的组件的render函数
    WrappedComponent.prototype.render = function () {
        return <div>使用高阶组件修改后的界面</div>
   };
    //返回修改后的组件
    return WrappedComponent
}
export default function withUserData(WrappedComponent) {
   return class extends React.Component {
       render(){
           return <WrappedComponent data={}/>
       }
   }
}
提示:
修改传入组件的 HOC 是一种糟糕的抽象方式。
调用者必须知道他们是如何实现的,以避免与其他 HOC 发生冲突。
高阶组件传递不相关props

参数组件(被包装组件)除了接收需要从高阶组件返回的新组件(容器组件)获得的数据之外,还需要接收来自容器组件的所有 props。
//UserView1.js
import React, { Component } from 'react'
import withUserData from './components/withUserData'
class UserView1 extends Component {

    render() {
        return (
            <div>
                <h3>我是第一个使用用户信息的界面</h3>
               用户{

   {'name':'名称','account':'账号'}[this.props.attr]}是:
               {this.props.userInfo[this.props.attr]}
            </div>
       )
   }
}
export default withUserData(UserView1)
<UserView1 attr='name'/>
//withUserData.js
render() {
// ...this.props 传递给当前组件的属性继续向下传递
return <WrappedComponent userInfo={this.state.userInfo} {...this.props} />
}性能优化_代码分割(一)

页面初始化优化
大多数 React 应用都会使用 Webpack,Rollup或 Browserify 这类的构建工具来打包文件。
打包是一个将文件引入合并到一个单独文件的过程,最终形成一个“bundle”。 接着在页面上引入该 bundle,整个应用即可一次性加载。
随着应用的增长,你的代码包也将随之增长。尤其是在整合了体积巨大的第三方库的情况下。最终打包后的文件体积会很大,这样对页面初始化很不友好,会延长页面初始化时间。
代码分割
对应用进行代码分割能够帮助你“懒加载”当前用户所需要的内容,能够显著地提高你的应用性能。
尽管并没有减少应用整体的代码体积,但你可以避免加载用户永远不需要的代码,并在初始加载的时候减少所需加载的代码量。
React.lazy
React.lazy 接受一个函数,这个函数需要动态调用 import()。它必须返回一个 Promise,该 Promise 需要 resolve 一个 defalut export 的 React 组件。
React.lazy(() => import('./LazyComponent'));import React from 'react';
const LazyComponent = React.lazy(() => import('./LazyComponent'));
function LazyTest() {
return (
<div>
<h3>下面要展示的组件页面是延迟加载的</h3>
<LazyComponent />
</div>
);
}提示:代码分割我们一般会结合react路由一起实现。
性能优化_代码分割(二)

Suspense组件
应在 Suspense 组件中渲染 lazy 组件,如此使得我们可以使用在等待加载 lazy 组件时做优雅降级(如 loading 指示器等)。fallback 属性接受任何在组件加载过程中你想展示的 React 元素。
import React, { Component,Suspense } from 'react';
const LazyComponent= React.lazy(()=>import ('./LazyComponent'))
export default class LazyTest extends Component {
    constructor(){
        super()
        this.state={}
   }
  render() {
    return (
      <div>
       下面的组件被延迟加载
        <button onClick= {()=>this.setState({show:true})}>加载组件</button>
       {this.state.show&&<Suspense fallback= {<div>loading....</div>}>
        <LazyComponent/>
           </Suspense>}
      </div>
   );
 }
}
异常捕获边界
如果模块加载失败(如网络问题),它会触发一个错误。你可以通过异常捕获边界(Error boundaries)技术来处理这些情况,以显示良好的用户体验并管理恢复事宜。
import React, { Component,Suspense } from 'react';
import MyErrorBoundary from './MyErrorBoundary';
const LazyComponent= React.lazy(()=>import ('../LazyComponent'))

export default class LazyTest extends Component {
    constructor(){
        super()
        this.state={}
   }
  render() {
    return (
      <div>
       下面的组件被延迟加载
        <button onClick= {()=>this.setState({show:true})}>加载组件</button>
       {this.state.show&&<MyErrorBoundary>
        <Suspense fallback={<div>loading.... </div>}>
        <LazyComponent/>
           </Suspense>
           </MyErrorBoundary>}
      </div>
   );
 }
}