一、Apache
1、概念:
Apache HTTP Server(简称Apache)是Apache软件基金会的一个开放源码的网页服务器。是最流行的Web服务器端软件之一,有多种产品,可以支持SSL技术,支持多个虚拟主机。它快速、可靠并且可通过简单的API扩充,将Perl/Python等解释器编译到服务器中。
2、特点:
Apache的特点是简单、速度快、性能稳定,并可做代理服务器来使用。它可以在大多数计算机操作系统中运行,由于其跨平台和安全性被广泛使用。
3、Apache web服务器的特性:
1.支持最新的HTTP/1.1通信协议
2.拥有简单而强有力的基于文件的配置过程
3.支持网关接口
4.支持基于IP和基于域名的虚拟主机
5.支持多种方式的HTTP认证
6.集成Perl处理模块
7.集成代理服务器模块
8.支持实时监视服务器状态和定制服务器日志
9.支持服务器端包含指令(SSI)
10.支持安全Socket层(SSL)
11.提供用户会话过程的跟踪
12.支持FastCGI
13.通过第三方模块可以支持JavaServlets
二.Apache的安装部署
实验主机为apache-server,测试为真机浏览器
1、apache服务的基本配置
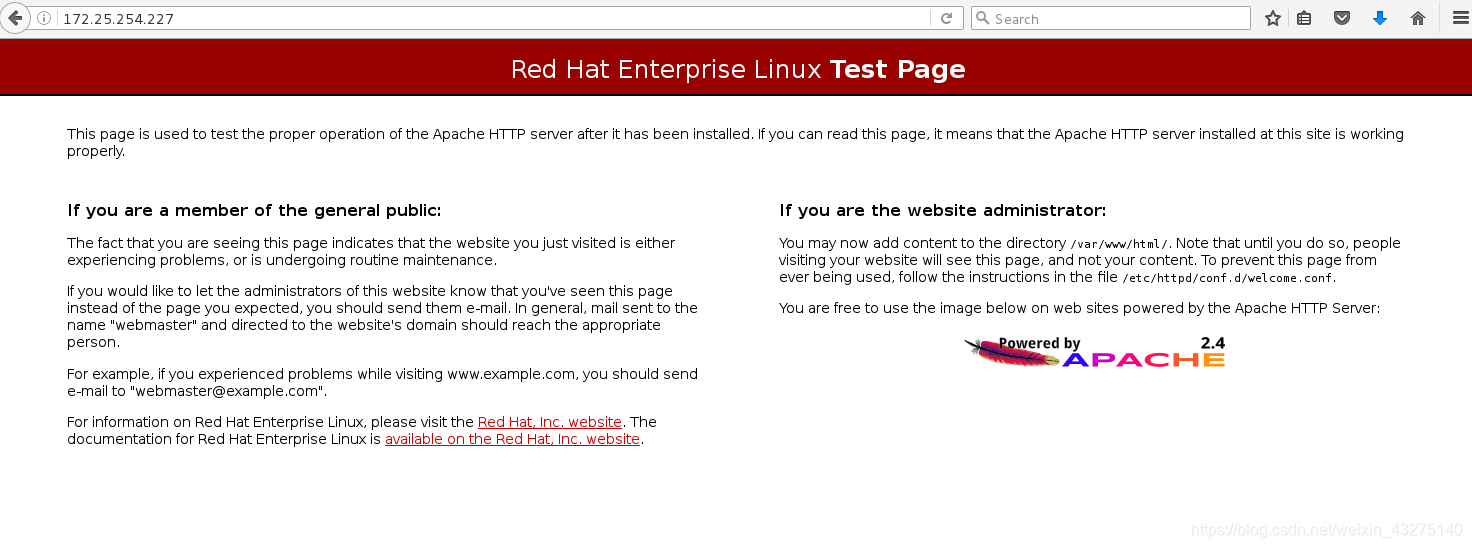
[root@apache-server ~]# yum install httpd.x86_64 -y   #安装http服务
[root@apache-server ~]# systemctl start httpd         #启动http服务
[root@apache-server ~]# systemctl enable httpd        #开启http服务并设为开机自启动

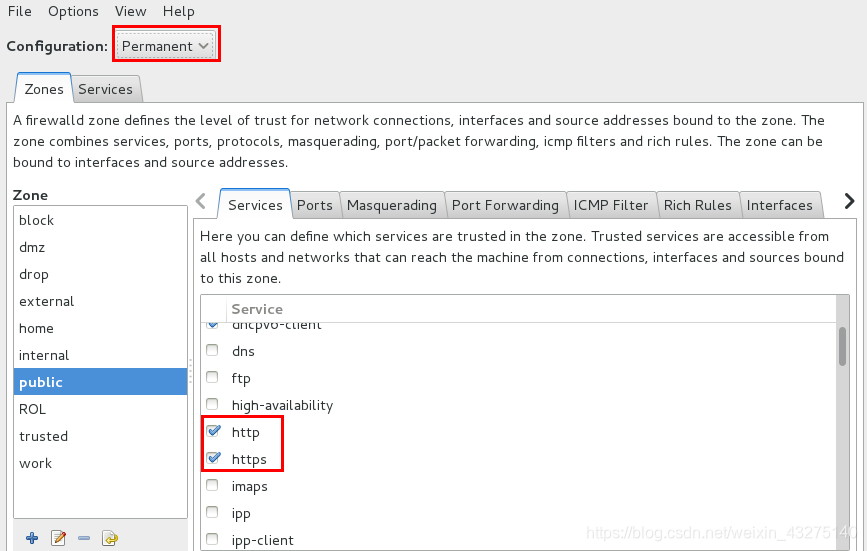
2、列出火墙信息,并设置永久允许http,htpps
[root@apache-server ~]# firewall-cmd --permanent --add-service=http #添加http到火墙策略
[root@apache-server ~]# firewall-cmd --permanent --add-service=https #添加https到火墙策略
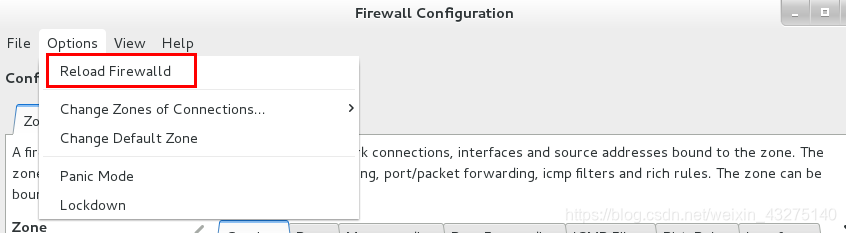
[root@apache-server ~]# firewall-cmd --reload #刷新火墙信息
[root@apache-server ~]# firewall-cmd --list-all #列出火墙信息


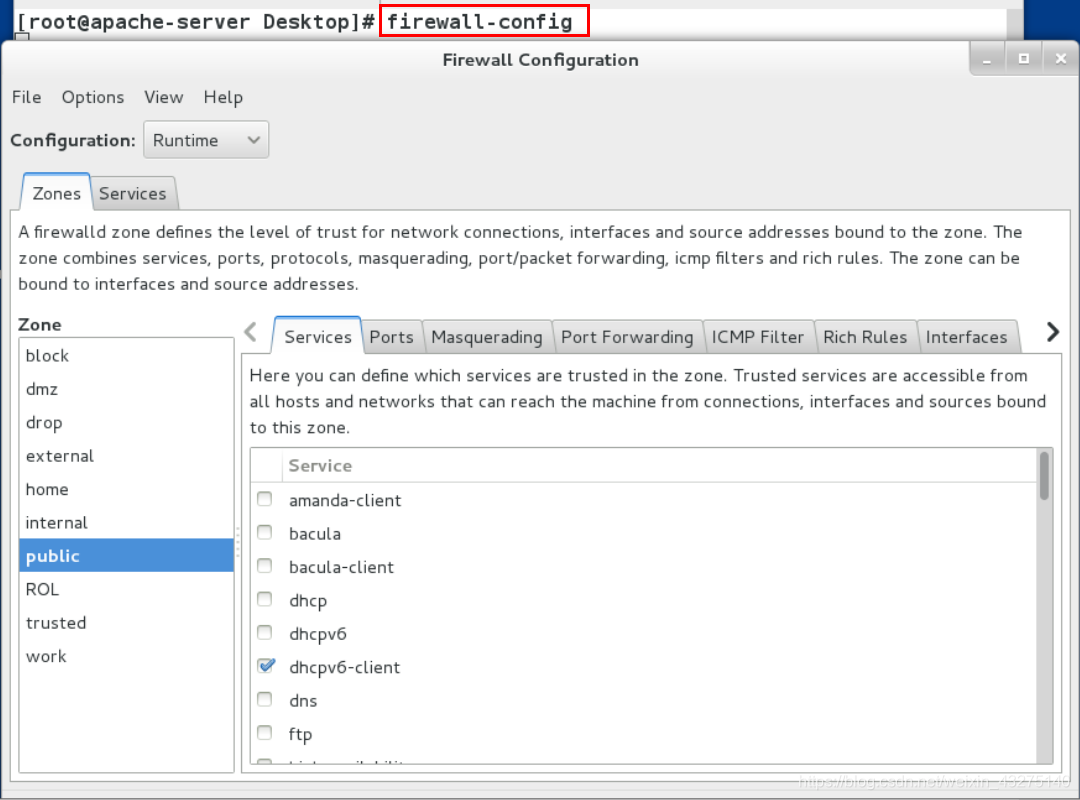
**用图形的方式也可以设定:
[root@apache-server ~]# firewall-config #打开火墙图形界面
重启服务
systemctl restart firewalld
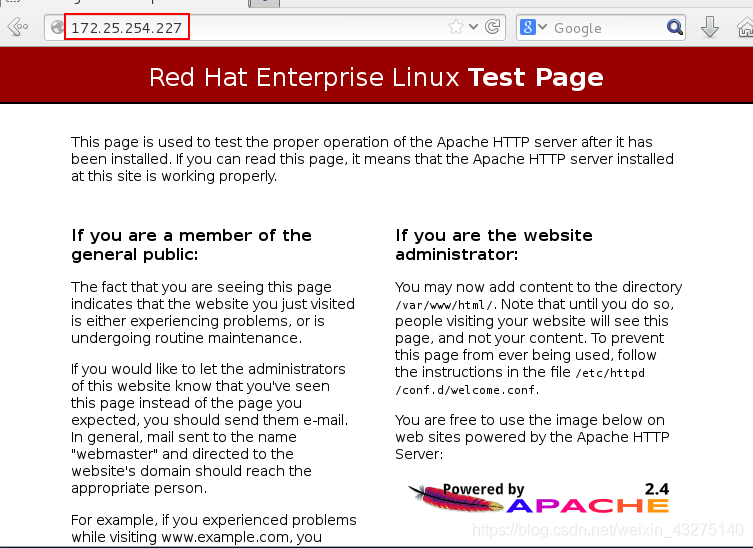
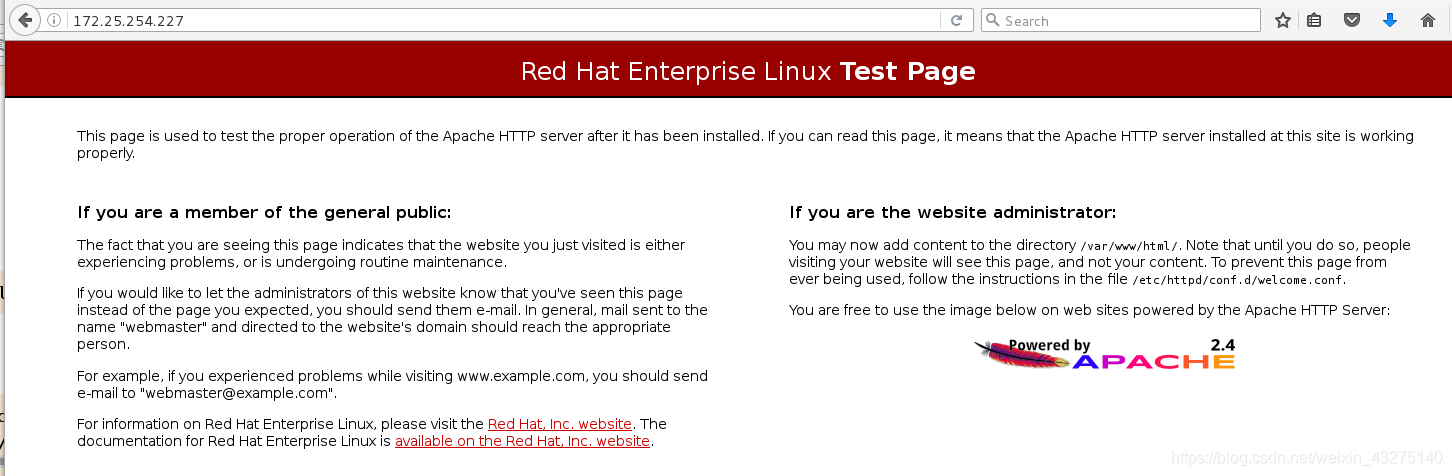
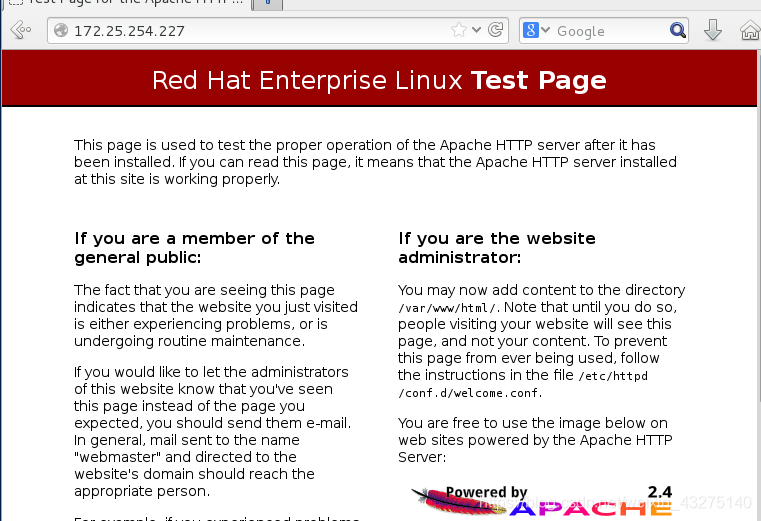
在浏览器中输入测试端ip,看到apache已经开启
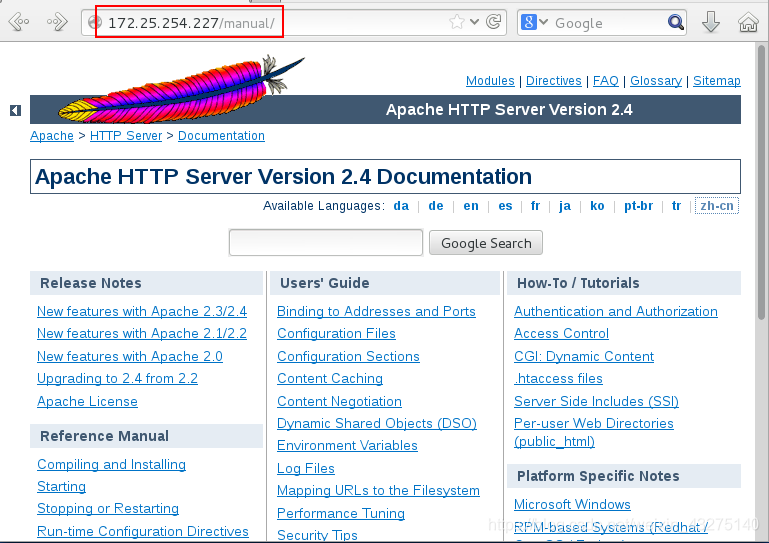
[root@apache-server ~]# yum install httpd-manual -y    # 这是提供apache使用的手册的软件
[root@apache-server ~]# systemctl restart httpd        # 重启
网页访问 172.25.254.227/manual/ 即可看到手册内容
在默认发布目录:/var/www/html下建立发布文件
[root@apache-server ~]# cd /var/www/html/ # 这是httpd的默认发布目录
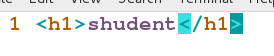
[root@apache-server html]# vim index.html # 这是httpd的默认发布文件
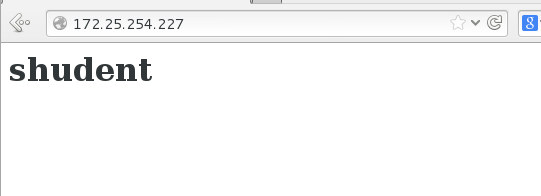
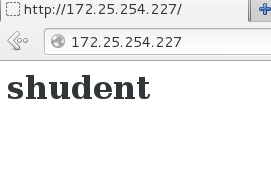
在浏览器中输入测试端ip,可以看到相应的文件内容
三、apache基础信息的修改
apache的基础信息:
- 主配置目录:/etc/httpd/conf
- 主配置文件:/etc/httpd/conf/httpd.conf
- 子配置目录:/etc/http/conf.d
- 子配置文件:/etc/httpd/conf.d/*.conf
- 默认发布目录:/var/www/html
- 默认发布文件:index.html
- 默认监听端口:80
- 默认安全上下文:httpd_sys_content_t
- 程序开启默认用户: apache
- 错误日志 :/var/httpd/log/error_log
配置 httpd 服务程序时最常用的参数以及用途描述:
- DirectoryIndex # 默认的索引页页面
- Directory # 网站数据目录的权限
- ServerRoot # 服务目录
- ServerName # 网站服务器的域名
- Listen # 监听的 IP 地址与端口号
- CustomLog # 访问日志文件
- DocumentRoot # 定义网站数据保存路径
1、修改端口
(1)查看默认监听端口是80

(2)编辑主配置文件
[root@apache-server html]# vim /etc/httpd/conf/httpd.conf
默认是80

修改端口80 ----> 8080

(3)重启服务
[root@apache-server html]# systemctl restart httpd.service
(4)查看端口修改成功

(5)测试:
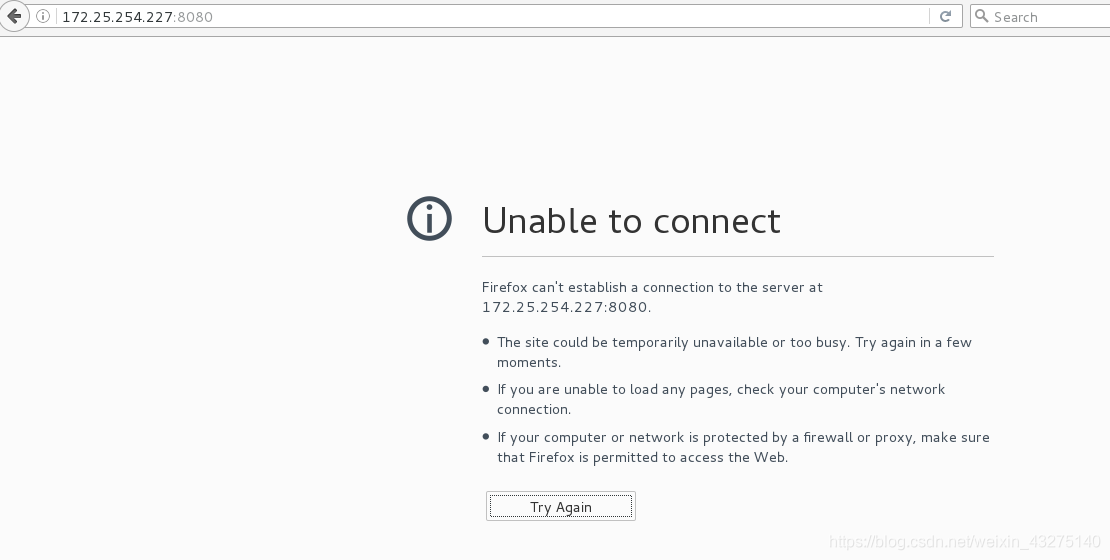
可以看到,默认的80端口已经无法访问
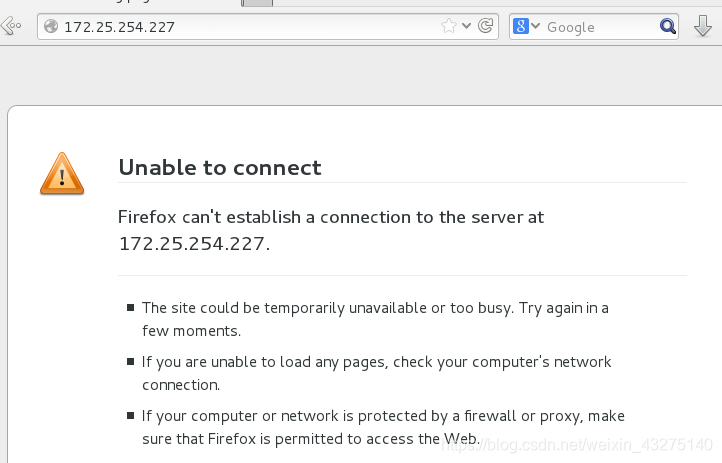
但是8080端口仍然不可以进行访问
(6)在火墙中允许8080端口
[root@apache-server html]# firewall-cmd --add-port=8080/tcp --zone=public   # 在火墙中添加httpd的8080端口
[root@apache-server html]# firewall-cmd --list-all
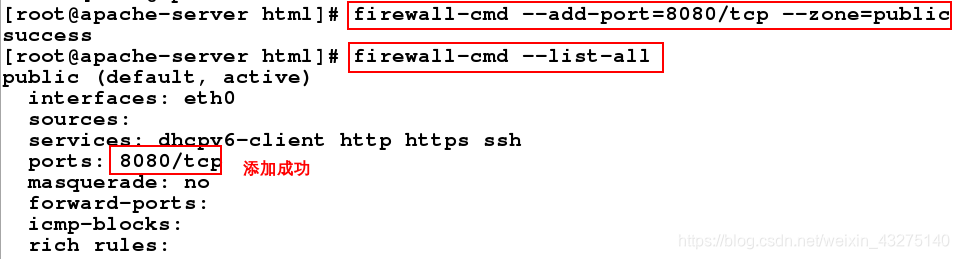
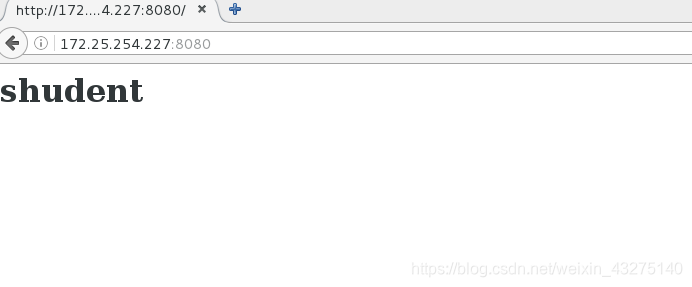
(7)测试:8080端口可以进行访问
(8)再次主配置文件,修改端口为7777
[root@apache-server html]# vim /etc/httpd/conf/httpd.conf

查看selinux状态,如果为强制模式,则重启服务会失败
[root@apache-server html]# getenforce
Enforcing
警告模式下重启成功,而强制模式下重启失败

这是因为selinux只允许几个特定的端口
[root@apache-server html]# semanage port -l | grep http

selinux添加7777端口
[root@apache-server html]# semanage port -a -t http_port_t -p tcp 7777  # 把7777这个接口添加到gttp的默认接口中
[root@apache-server html]# semanage port  -l | grep http

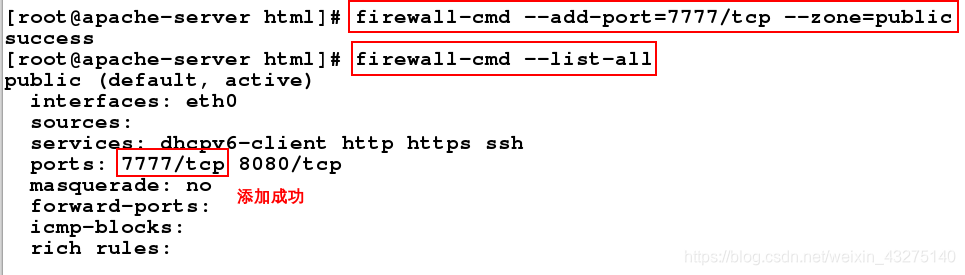
火墙中允许7777端口
[root@apache-server html]# firewall-cmd --add-port=7777/tcp --zone=public   # 在火墙中添加httpd的8080端口
[root@apache-server html]# firewall-cmd --list-all
重启服务
 [root@apache-server html]# systemctl restart httpd.service  # 重启服务成功
 [root@apache-server html]# netstat  -antlp | grep httpd   # 查看接口修改成功

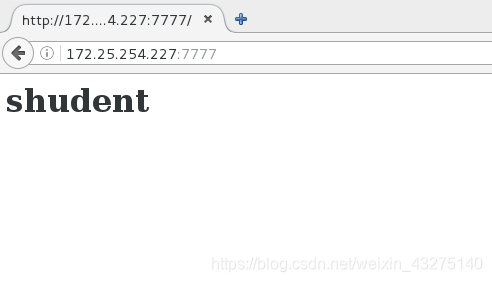
测试:7777端口可以访问文件
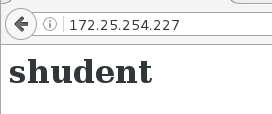
为了后面实验方便,我们把端口修改为默认
[root@apache-server html]# vim /etc/httpd/conf/httpd.conf
[root@apache-server html]# systemctl restart httpd.service

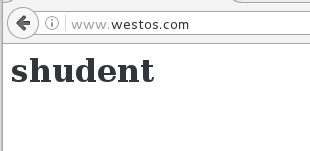
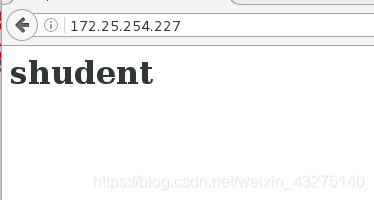
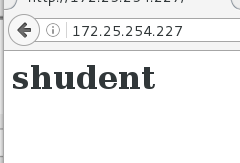
2、修改默认发布文件
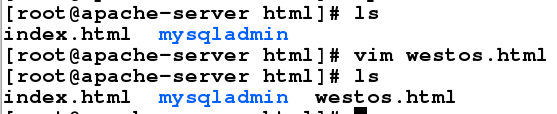
(1)在默认发布目录下建立一个新的发布文件
[root@apache-server html]# ls
index.html mysqladmin
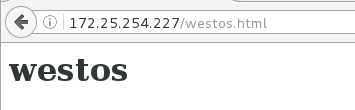
[root@apache-server html]# vim westos.html

  [root@apache-server html]# ls
  index.html  mysqladmin  westos.html
  [root@apache-server html]# vim westos.html
(2)重启服务
[root@apache-server html]# systemctl restart httpd
(3)测试:
发现默认发布文件没有改变
必须在ip后添加新发布的文件名才能看到相应内容
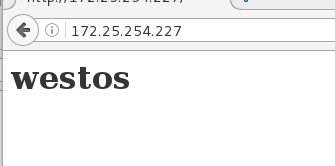
(4)编辑主配置文件
[root@apache-server html]# vim /etc/httpd/conf/httpd.conf

!!!注意:westos.html这个文件写在前面才能被优先读取
(5)再次重启服务

(6)测试:
默认发布文件修改成功
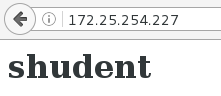
(7)如果将westo.html删除掉,则默认发布文件又是index.html
[root@apache-server html]# rm -fr westos.html
[root@apache-server html]# ls
index.html  mysqladmin
3、修改默认发布目录
(1)新建一个目录
[root@apache-server html]# pwd
/var/www/html
[root@apache-server html]# mkdir /westos/web/html -p
(2)并在新建目录下编辑一个发布文件
[root@apache-server html]# vim /westso/web/html/shiyan.html

(3)编辑主配置文件
[root@apache-server html]# vim /etc/httpd/conf/httpd.conf

修改默认发布目录

重启服务
[root@apache-server html]# systemctl restart httpd
打开浏览器进行访问,发现访问不到
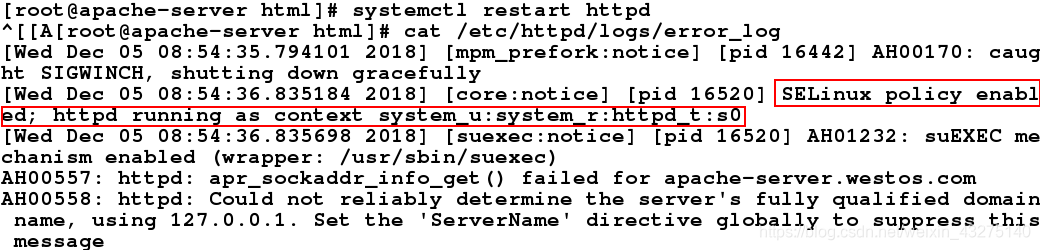
(5)查看报错,是因为服务端没有提供权限
[root@apache-server html]# cat /etc/httpd/logs/error_log

编辑配置文件,给默认发布目录提供所有权限

[root@apache-server html]# systemctl restart httpd # 重启服务
查看还是不能
(6)安全上下文
[root@apache-server html]# cat /etc/httpd/logs/error_log # 查看日志,发现是selinux禁止了,安全上下文不一致
修改上下文为httpd_sys_content_t
[root@apache-server html]# ls -Zd /westos/   # 查看安全上下文,确实不一致
drwxr-xr-x. root root unconfined_u:object_r:default_t:s0 /westos/
[root@apache-server html]# semanage fcontext -a -t httpd_sys_content_t '/westos(/.*)?'    # 修改安全上下文
[root@apache-server html]# restorecon -FvvR /westos/   # 刷新
[root@apache-server html]# ls -Zd /westos/   # 查看
drwxr-xr-x. root root system_u:object_r:httpd_sys_content_t:s0 /westos/

重启服务
[root@apache-server html]# systemctl restart httpd
(7)测试:成功

恢复环境(如果你忘记自己干过什么,就这样恢复)
[root@apache-server html]# rm -fr /etc/httpd/conf/httpd.conf      # 删除配置文件
[root@apache-server html]# yum reinstall httpd -y           #重新安装httpd
[root@apache-server html]# systemctl restart httpd          #重启服务
四、apache的虚拟主机
虚拟主机:
     虚拟主机(Virtual Host),又称虚拟服务器、主机空间或是网页空间,是一种网络技术,可以让多
 个主机名称,在一个单一的服务器上运作,而且可以分开支持每个单一的主机名称
目的:通过访问不同的域名来访问不同的页面
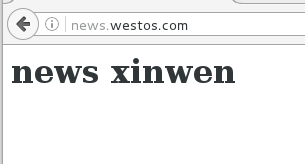
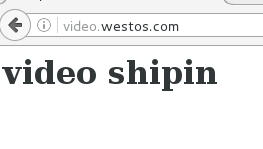
虚拟主机(apache-server)的配置:
1、在/var/www目录下建立指定访问news和video的访问目录
[root@apache-server html]# cd /var/www/
[root@apache-server www]# ls
cgi-bin  html
[root@apache-server www]# mkdir westos.com/news/html -p
[root@apache-server www]# mkdir westos.com/video/html -p

2、在访问目录下写入默认发布文件
[root@apache-server www]# vim westos.com/news/html/index.html

[root@apache-server www]# vim westos.com/video/html/index.html

3、创建编辑子配置文件
(1)编辑默认站点的子配置文件
[root@apache-server www]# cd /etc/httpd/conf.d/
[root@apache-server conf.d]# ls
autoindex.conf  manual.conf  php.conf  README  userdir.conf  welcome.conf
[root@apache-server conf.d]# vim a_default.conf

(2)编辑news.westos.com站点的子配置文件
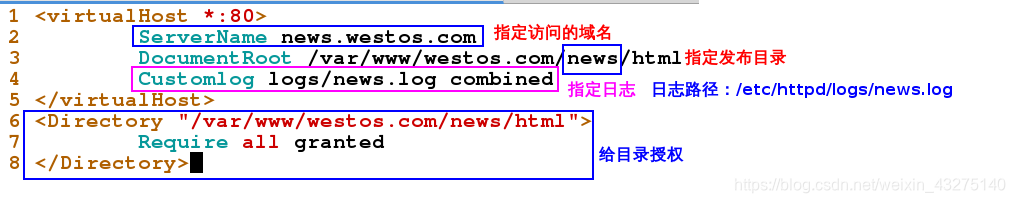
[root@apache-server conf.d]# vim news.conf    # 当访问news.westos.com 这个域名时,读取/var/www/westos.com/news/html这个目录里的默认发布文件
<VirtualHost *:80>       # * 代指下一行的ServerName.80表示指定到80端口
      ServerName news.westos.com                  ##指定访问的域名
      DocumentRoot /var/www/westos.com/news/html  ##指定目录
      CustomLog logs/news.log combined            ##指定日志
</VirtualHost>

<Directory "/var/www/westos.com/news/html">           ##授权目录
         Require all granted
</Directory>
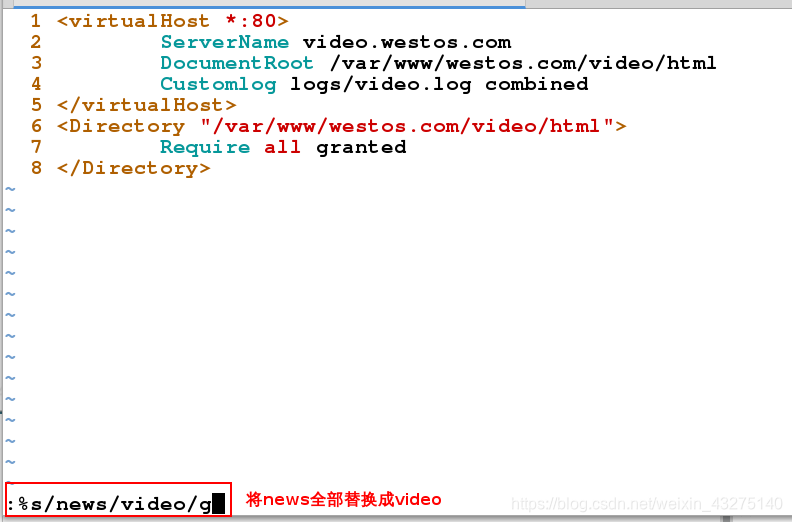
(3)编辑video.westos.com站点的子配置文件
[root@apache-server conf.d]# cp news.conf video.conf    #复制news的模版
[root@apache-server conf.d]# vim video.conf
[root@apache-server conf.d]# systemctl restart httpd # 重启服务
4、在测试端主机做好本地解析
[root@foundation61 kiosk]# vim /etc/hosts

5、测试:此时输入三个不同的网址,都看到的文件都是对应的
五、访问控制
1、基于ip的访问控制
(1)添加允许访问的ip
[root@apache-server conf.d]# vim a_default.conf
<virtualHost _default_:80>   # 访问默认80端口时,访问以下目录
               DocumentRoot /var/www/html    # apache的默认发布目录
               Customlog logs/default.log combined   # 这个文件记录着所有类的日志,即混合日志

</virtualHost>
<Directory "/var/www/html">
         Order Deny,Allow     # Deny,allow谁在前就先读谁
         Allow from 172.25.254.61
         Deny from all
</Directory>
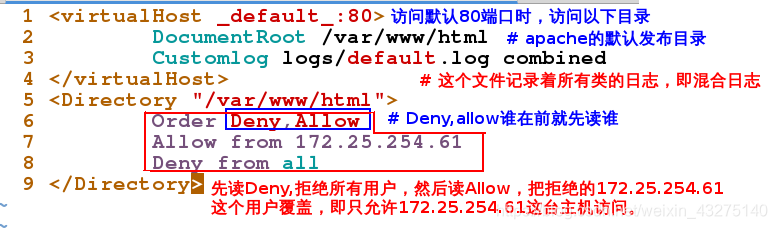
[root@apache-server conf.d]# systemctl restart httpd # 重启服务
测试:
主机(172.25.254.61)在允许名单里:访问成功
在虚拟机(172.25.254.227)在拒绝名单里:访问失败
(2)添加禁止访问的ip
[root@apache-server conf.d]# vim a_default.conf
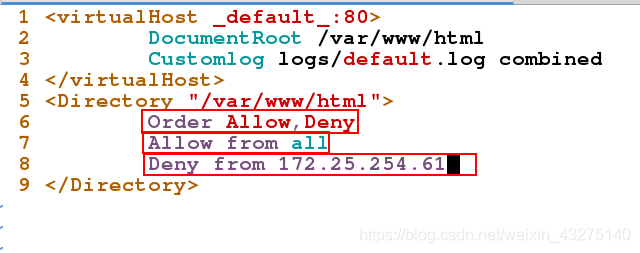
font color=red size=4>顺序访问Allow和Deny(Deny会覆盖掉Allow的设置)不允许172.25.254.31这个主机访问,其他主机都可以访问
[root@apache-server conf.d]# systemctl restart httpd # 重启服务
测试:
主机(172.25.254.61):访问失败
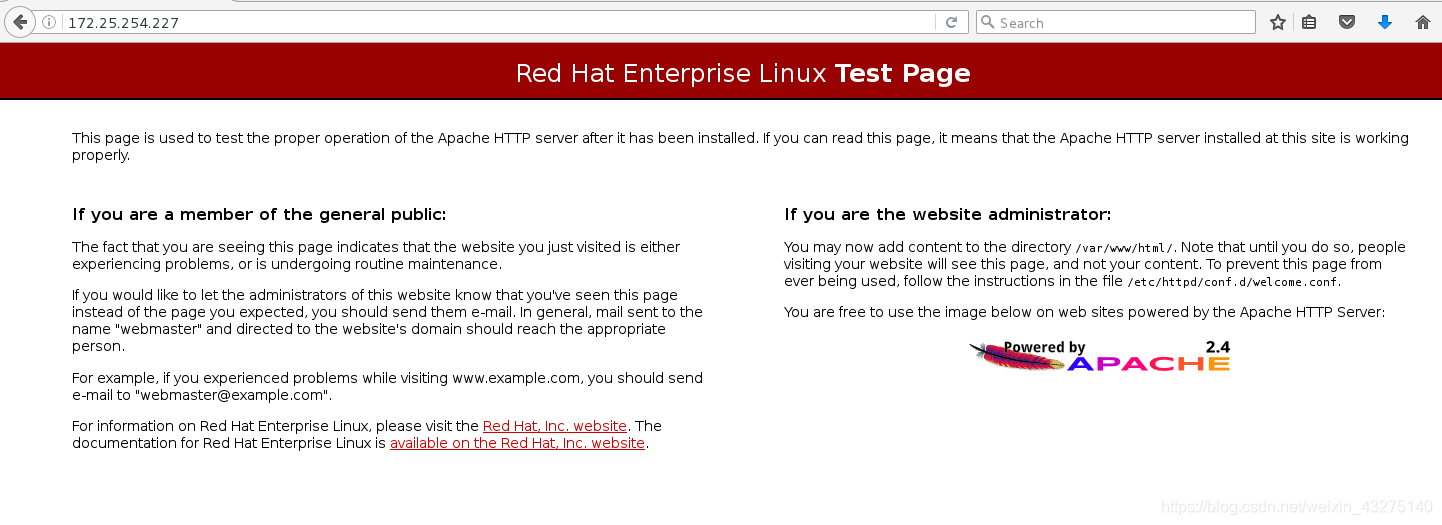
在虚拟机(172.25.254.227):访问成功
2、基于用户的访问控制
(1)新建用户
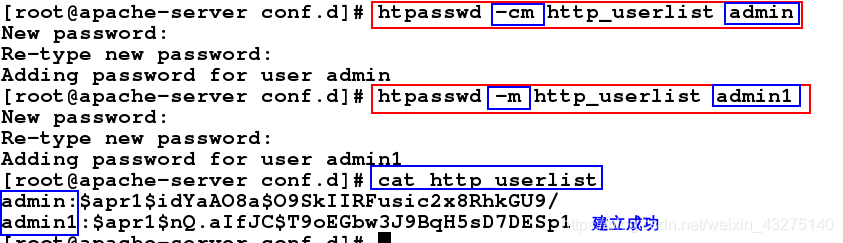
 [root@apache-server conf.d]# htpasswd -cm http_userlist admin
 # 生成lala的基本认证的密码文件,c =create表示创建一个加密文件,m表示默认采用MD5算法对密码进行加密,http_userlist存放生成的明文密码
  New password:     # 输入密码
  Re-type new password:   # 再次输入密码
  Adding password for user admin
!!!注意:-cm中的c是覆盖性创建
新建一个用户admin1时,如果用-c参数,则会覆盖掉admin用户,所以去掉c
[root@apache-server conf.d]# htpasswd -m http_userlist admin1    新建一个用户admin1时,所以去掉c
New password:
Re-type new password:
Adding password for user admin1
[root@apache-server conf.d]# cat http_uselist     #查看生成的明文密码
admin:$apr1$paxJPHYj$eBjY4T2Yl6IdiLTi2py6v/
admin1:$apr1$1DON9rJq$CD61.xQoxEMTO3FKymXK2.
(2)在配置文件中添加用户认证
[root@apache-server conf.d]# vim a_default.conf
<Directory "/var/www/html">
 11          AuthUserFile /etc/httpd/conf.d/http_userlist    # 指定密码文件的路径
 12          AuthName "Please input uasename and password!!!"   # 访问时的提示内容
 13          AuthType basic    # 用户认证的类型是mod_auth提供的basic

 # 下面这两行只能出现一行
 14 #        Require user admin   # 只允许admin这个用户进行访问
 15          Require valid-user   # 允许所有apache用户进行访问
 16 </Directory>
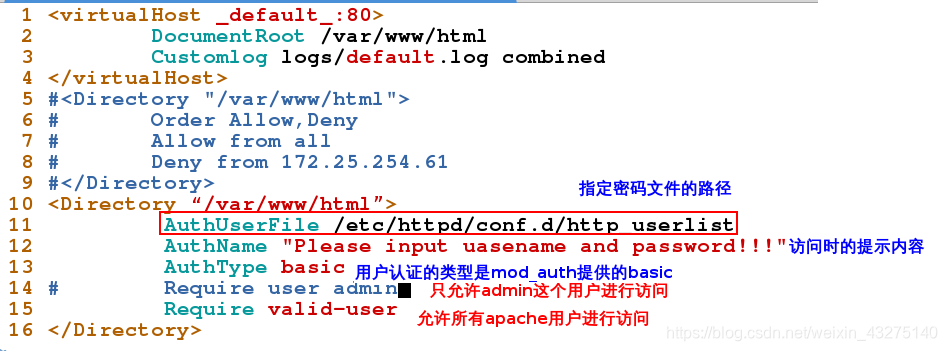
[root@apache-server conf.d]# systemctl restart httpd # 重启服务
(3)测试:
在浏览器中输入服务端ip,则提示要输入用户认证信息
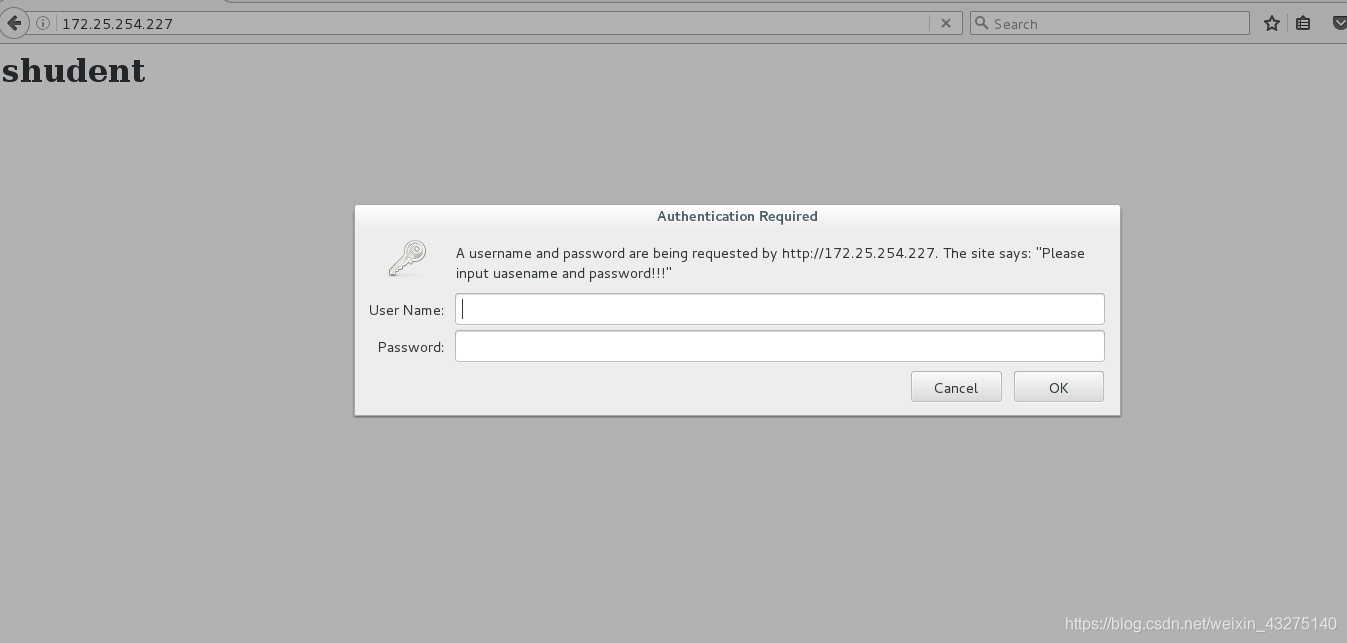
输入用户名和密码
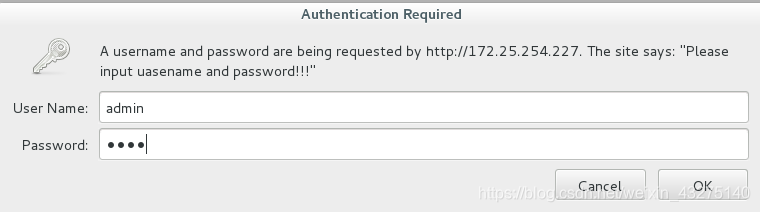
认证成功
六、apache支持的语言
1、html:
上述实验都是html的例。
2、php:
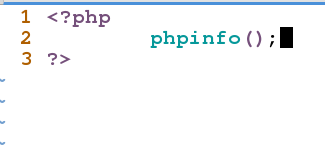
(1)编写php测试页
[root@apache-server conf.d]# cd /var/www/html/
[root@apache-server html]# ls
index.html  mysqladmin
[root@apache-server html]# vim index.php
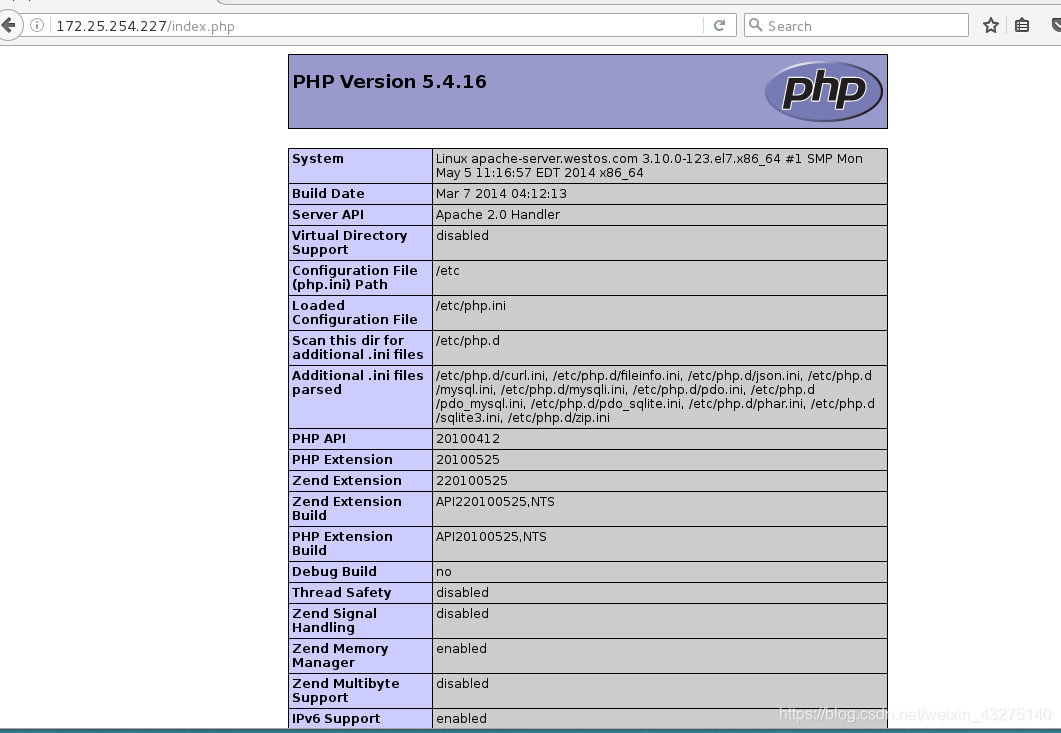
(2)安装php
[root@apache-server html]# yum install php -y

此时可以看到子配置目录下有php.conf这个文件

(3)重启服务
[root@apache-server conf.d]# systemctl restart httpd
(4)测试
3、cgi:
#通用网关接口
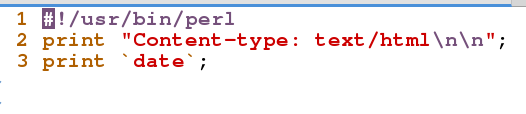
(1)在/var/www/cgi-bin/目录下建立并编辑访问文件
[root@apache-server conf.d]# cd /var/www/cgi-bin/
[root@apache-server cgi-bin]# vim index.cg

(2)给文件添加可执行的权限
[root@apache-server cgi-bin]# chmod +x index.cgi
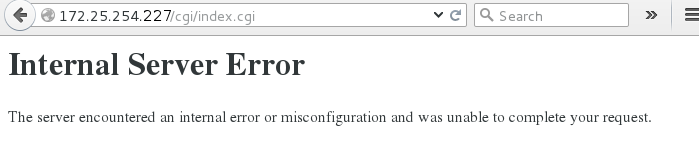
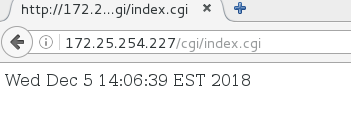
(3)测试:
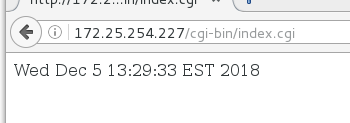
!!!注意:
(1)在其他目录下新建并编辑访问文件

(2)测试的时候脚本不执行,而是直接将代码暴露出来
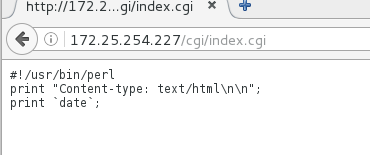
(3)解决方式:
[root@apache-server html]# cd /etc/httpd/conf.d/
[root@apache-server conf.d]# vim a_default.conf
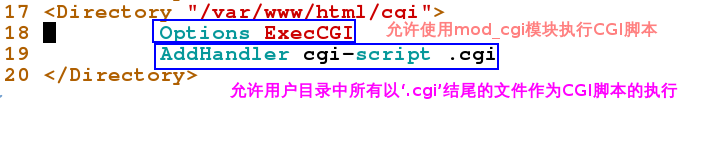
此时重启服务,文件内容不会暴露出来,但是访问仍然失败
[root@apache-server conf.d]# systemctl restart httpd
这是因为安全上下问的问题

修改安全上下文和/var/www/cgi-bin/的安全上下文一致
[root@apache-server html]# semanage fcontext -a -t httpd_sys_script_exec_t '/var/www/html/cgi(/.*)?'  # 修改安全上下文
[root@apache-server html]# restorecon -RvvF /var/www/html/cgi/  # 刷新
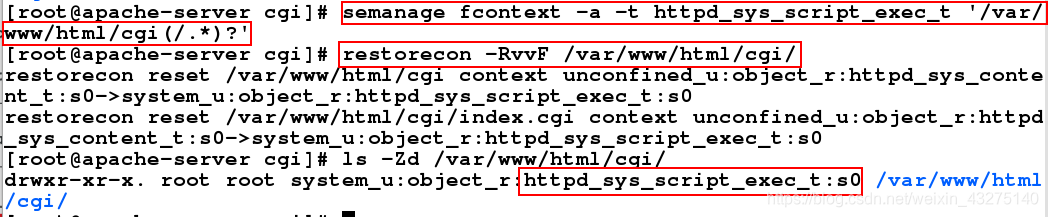
给文件添加可执行权限
[root@apache-server cgi]# chmod +x /var/www/html/cgi/index.cgi
重启服务
[root@apache-server cgi]# systemctl restart httpd
测试:成功
4、python:
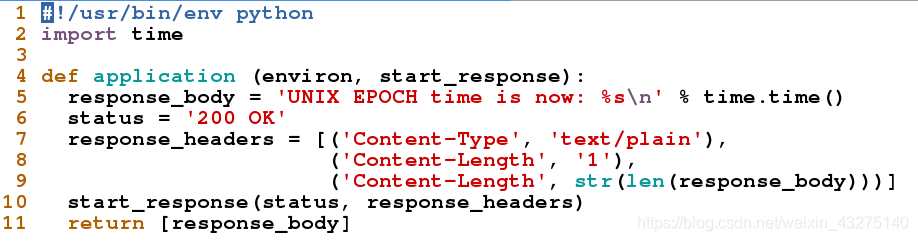
(1)将写好的python脚本放在/var/www/cgi-bin/目录下

python脚本内容如下:(功能:显示时间)
 1 #!/usr/bin/env python
  2 import time
  3
  4 def application (environ, start_response):
  5   response_body = 'UNIX EPOCH time is now: %s\n' % time.time()
  6   status = '200 OK'
  7   response_headers = [('Content-Type', 'text/plain'),
  8                       ('Content-Length', '1'),
  9                       ('Content-Length', str(len(response_body)))]
 10   start_response(status, response_headers)
 11   return [response_body]
(2)用python命令调用脚本,不能执行,所以要给它添加执行权限

测试:
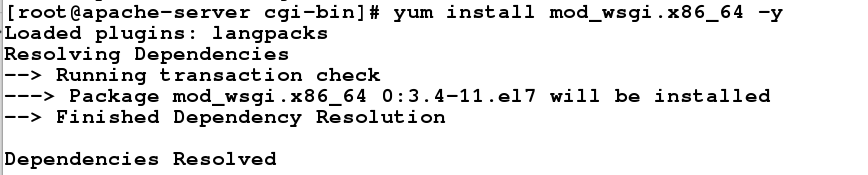
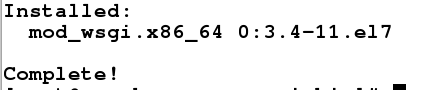
(3)安装mod_wsgi
[root@apache-server cgi-bin]# yum install mod_wsgi.x86_64 -y
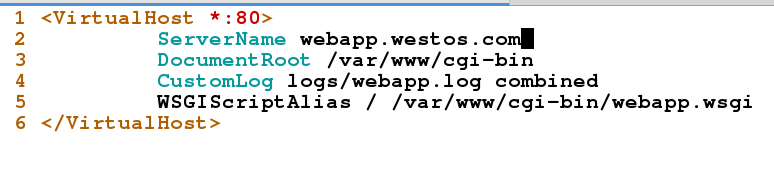
(4)进入子配置目录,编辑子配置文件webapp.con
[root@apache-server cgi-bin]# cd /etc/httpd/conf.d/
[root@apache-server conf.d]# ls
a_default.conf  http_userlist  news.conf  README        video.conf
autoindex.conf  manual.conf    php.conf   userdir.conf  welcome.conf
[root@apache-server conf.d]# vim webapp.conf
  1 <VirtualHost *:80>
  2          ServerName webapp.westos.com
  3          DocumentRoot /var/www/cgi-bin
  4          CustomLog logs/webapp.log combined
  5          WSGIScriptAlias / /var/www/cgi-bin/webapp.wsgi
  6 </VirtualHost>
(5)在测试端主机添加相应的解析信息
[root@foundation61 kiosk]# vim /etc/hosts

(6)重启服务
[root@apache-server conf.d]# systemctl restart httpd
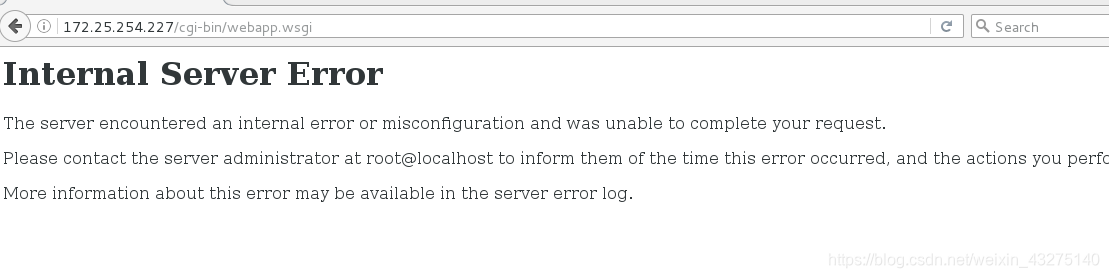
(7)测试:在测试端浏览器中输入webapp.westos.com,会显示脚本执行结果

七、HTTPS(加密认证)
关于https:
HTTPS(全称:Hypertext Transfer Protocol Secure,超文本传输安全协议),是以安全为目标的HTTP通道,即HTTP的安全版。HTTP下加入SSL层,HTTPS的安全基础是SSL,因此加密的详细内容就需要SSL。 它是一个URI scheme(抽象标识符体系),句法类同http体系。用于安全的HTTP数据传输。https:URL表明它使用了HTTP,但HTTPS存在不同于HTTP的默认端口及一个加密/身份验证层(在HTTP与TCP之间)。
HTTPS 主要用途:
- 通过证书等信息确认网站的真实性;
- 建立加密的信息通道;
- 数据内容的完整性。
http与https的区别:
(1)https协议需要到ca申请证书,一般免费证书较少,需要一定费用。
(2)http是超文本传输协议,信息是明文传输,https则是具有安全性的ssl加密传输协议。
(3)http和https使用的是完全不同的连接方式,用的端口也不一样,前者是80,后者是443。
(4)http的连接很简单,是无状态的;HTTPS协议是由SSL+HTTP协议构建的可进行加密传输、身份认证的网络协议,比http协议安全
https的实现
1、加密认证
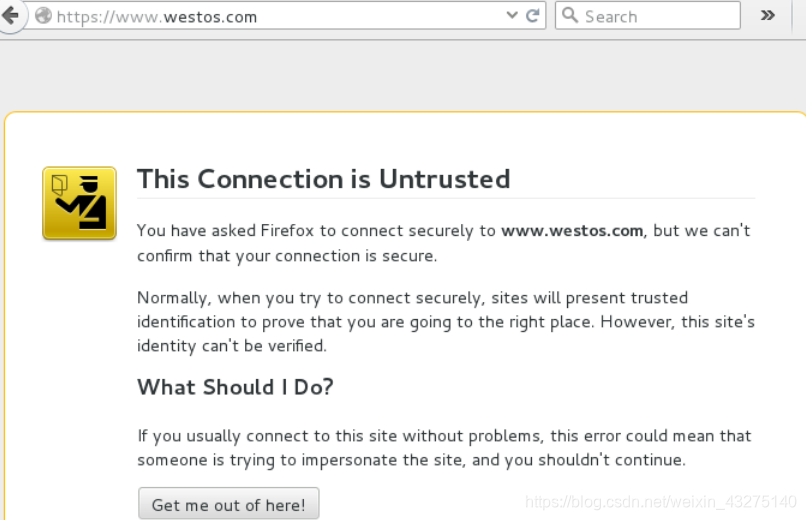
没有加密之前,访问https不能访问

2、安装mod_ssl软件
[root@apache-server conf.d]# yum install mod_ssl.x86_64 -y


此时子配置目录下会有ssl.conf文件

3、重启服务
[root@apache-server conf.d]# systemctl restart httpd
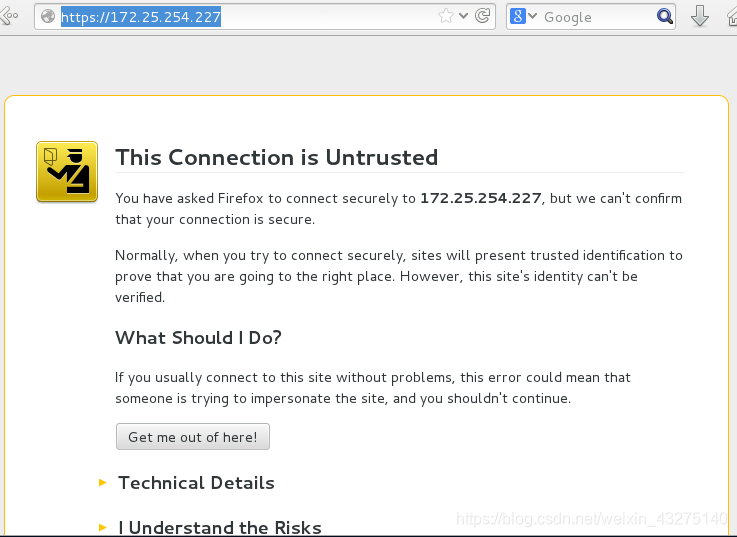
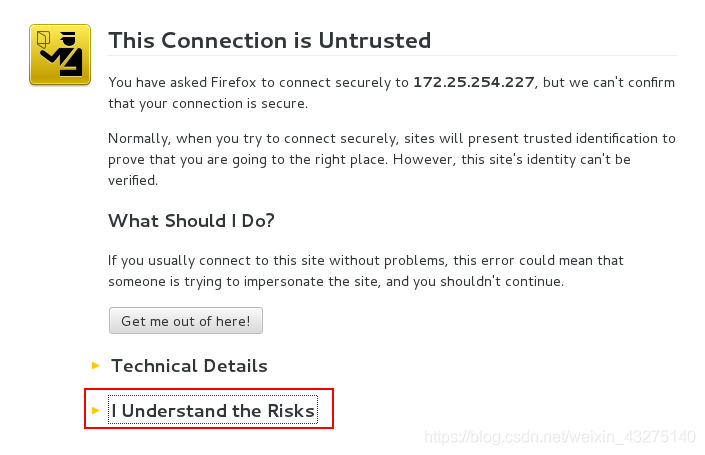
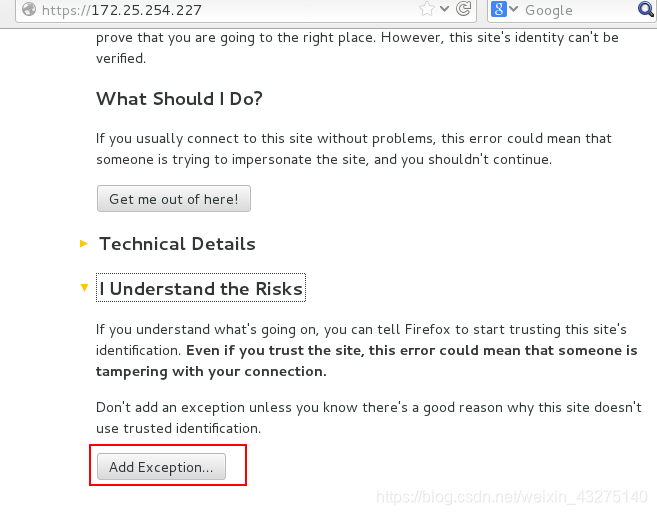
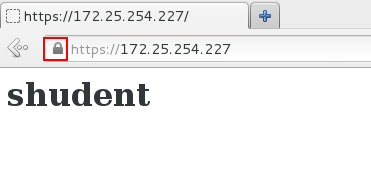
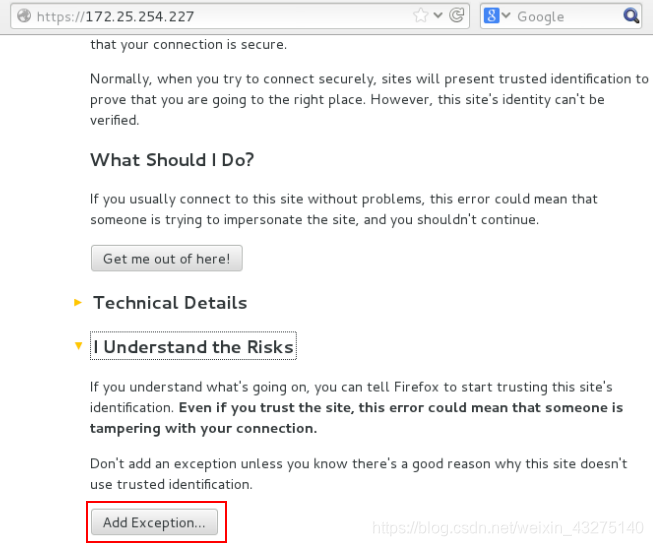
4、测试:在浏览器中输入的ip前加https://,可以实现
5、获得加密key

认证完成后可以进行访问
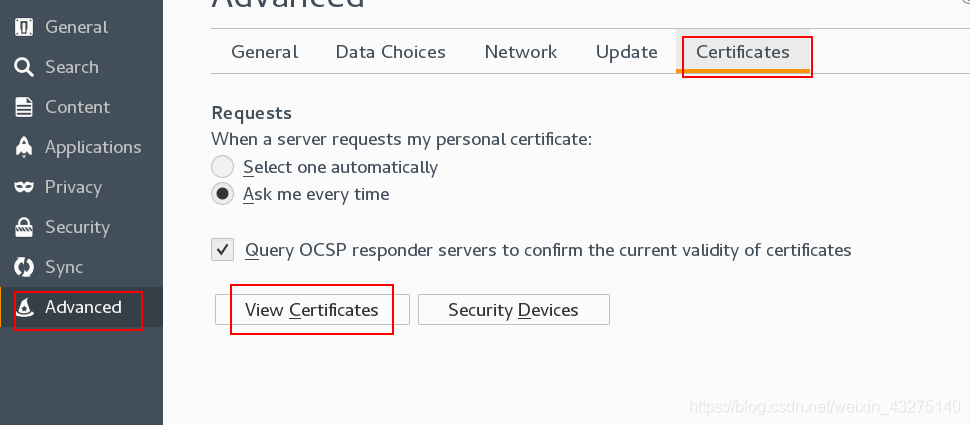
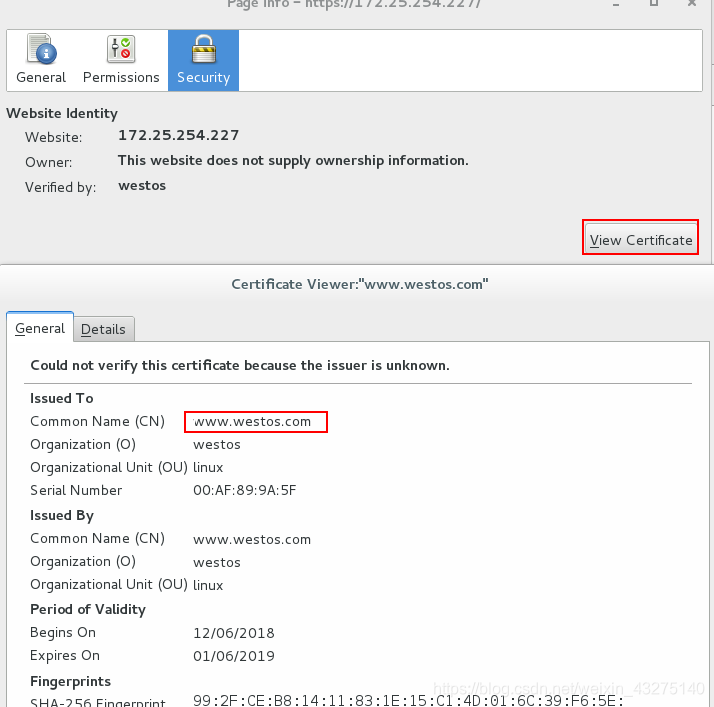
点开这个锁,会发现这个加密key是由apache提供的,这样不安全
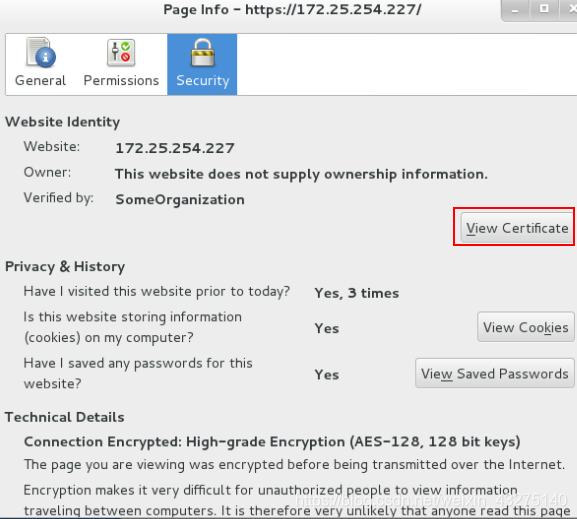
证书内容:
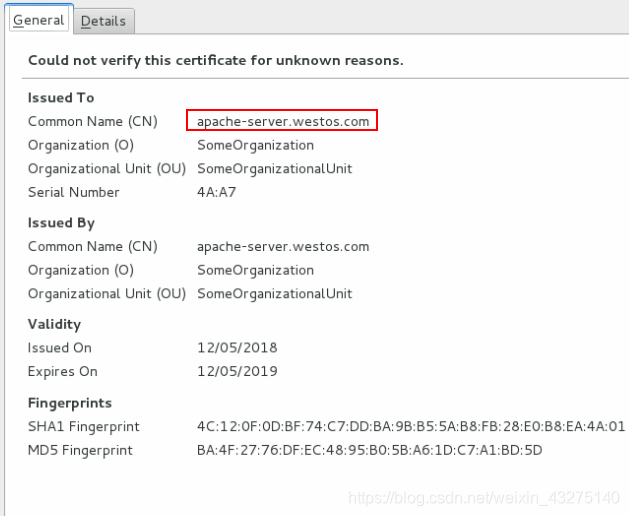
上面的证书是系统自己生成的,以下操作是我自己在生成证书
删除加密key
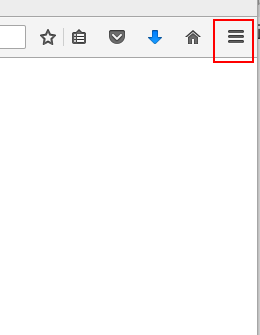
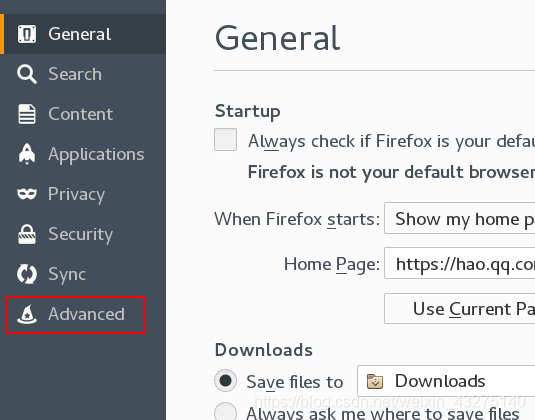
点击浏览器右上角

6自主提供加密key
(1)安装 crypto-utils
[root@apache-server conf.d]# yum install crypto-utils.x86_64 -y


(2)进入目录 /etc/httpd/conf.d下,生成加密文件
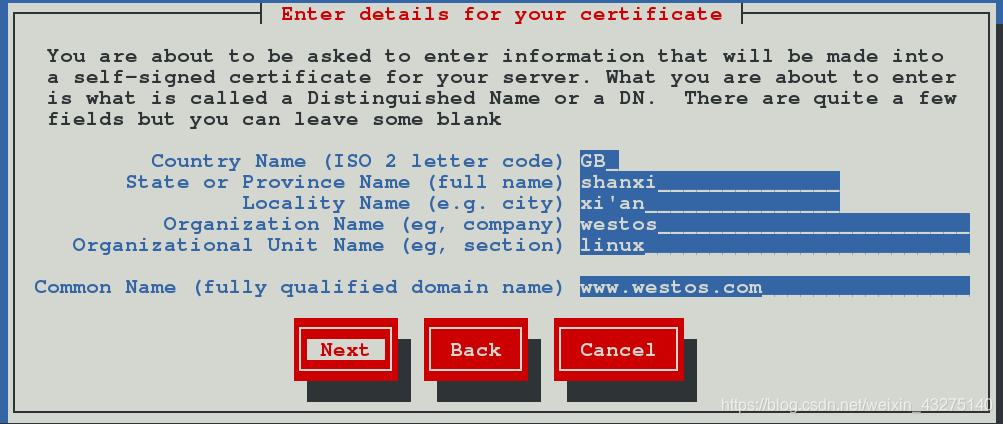
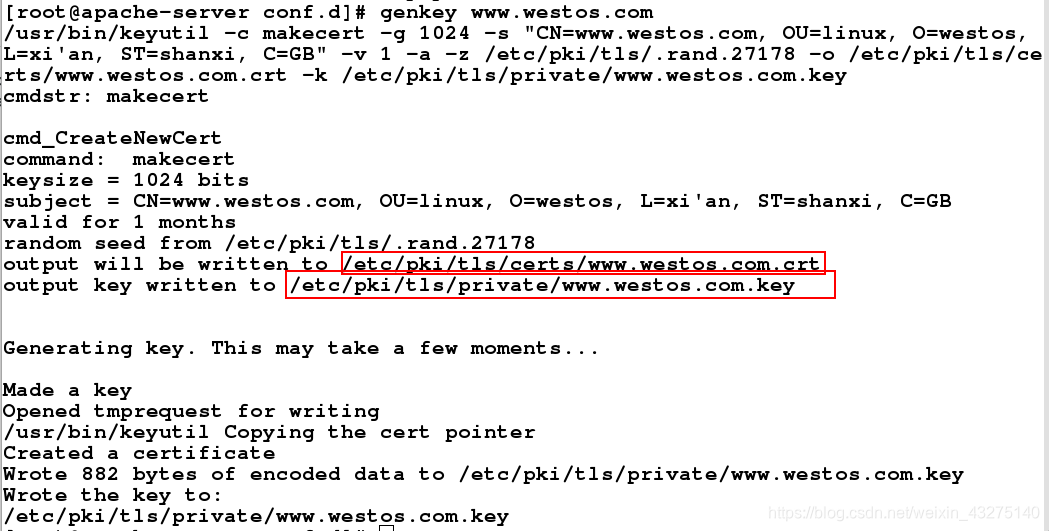
[root@apache-server conf.d]# genkey www.westos.com
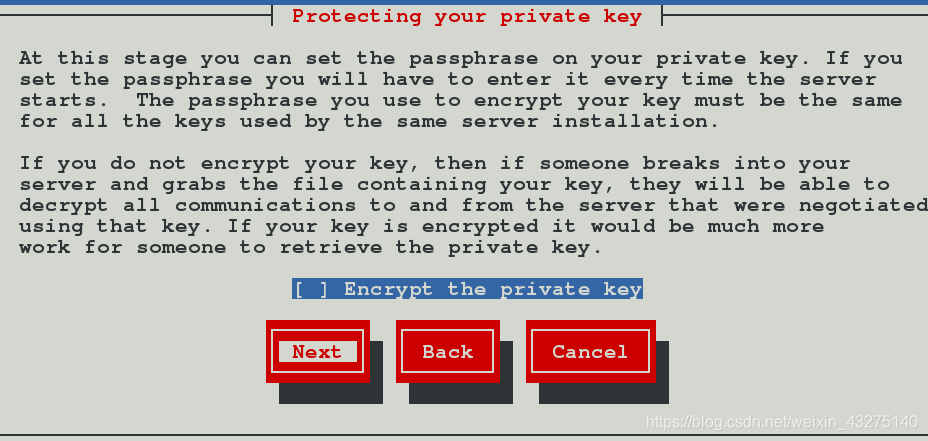
上下左右键操作,回车键确认。
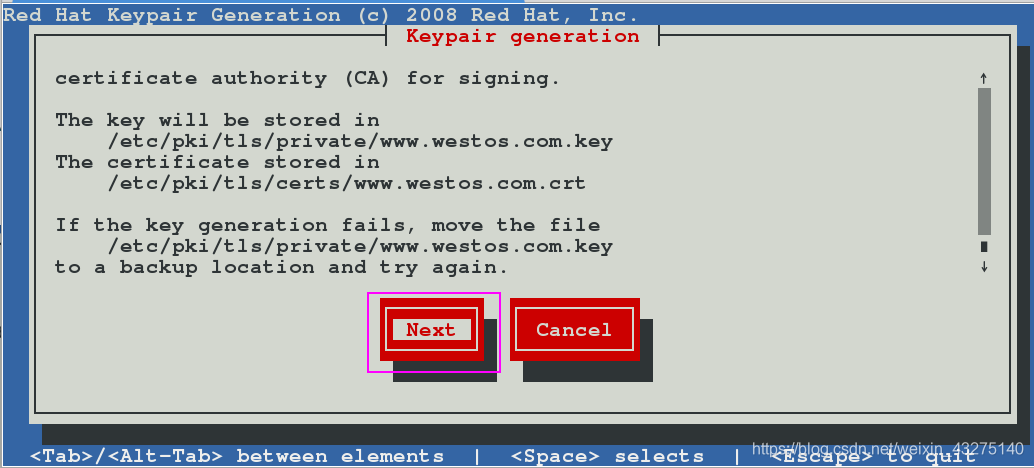
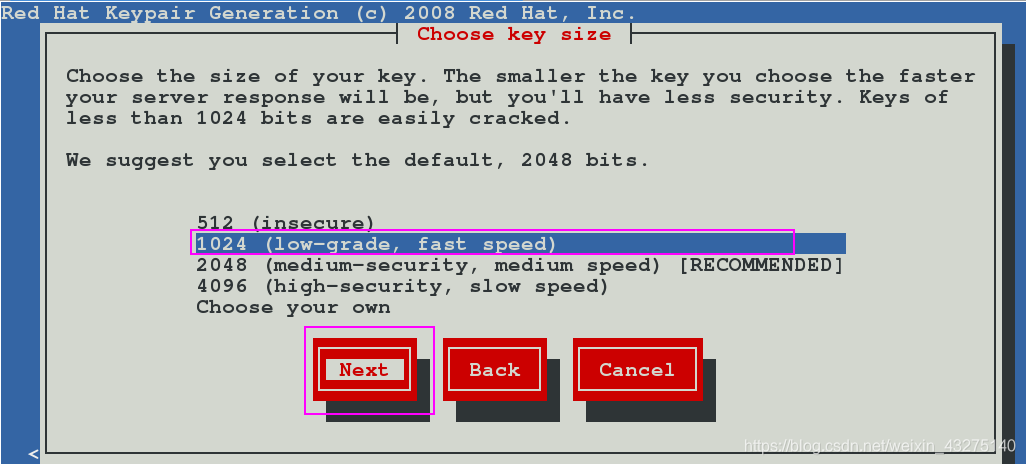
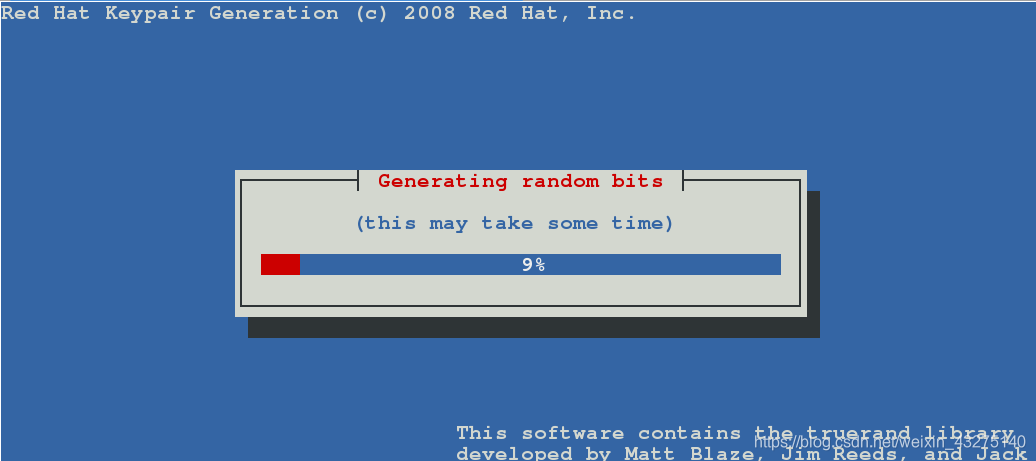
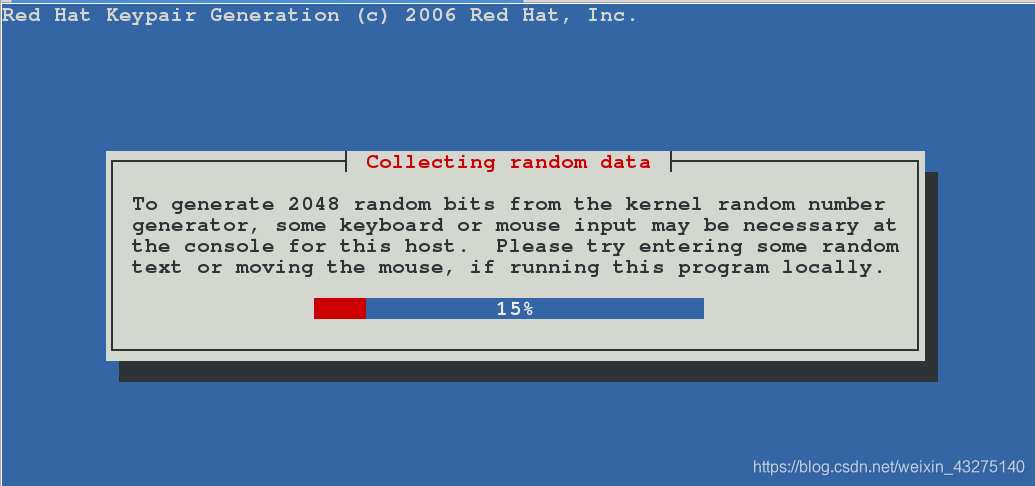
注意:生成随机数时, 需要敲击我们在虚拟机敲击键盘,使其进行下去

(3)查看生成的加密key信息
(4)编辑子配置目录下的ssl.conf文件

[root@apache-server conf.d]# vim ssl.conf
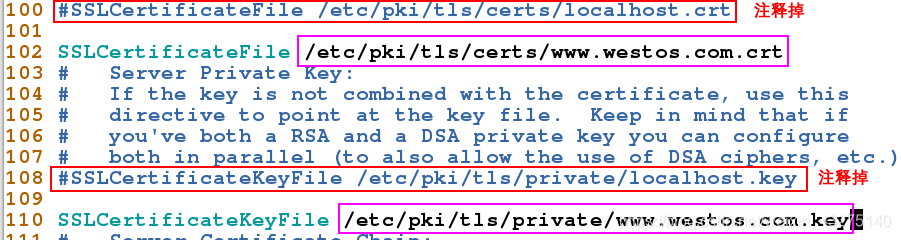
将加密key信息写入(将原有的可以先注释掉)(100行,和108行)
(5)重启服务
[root@apache-server conf.d]# systemctl restart httpd
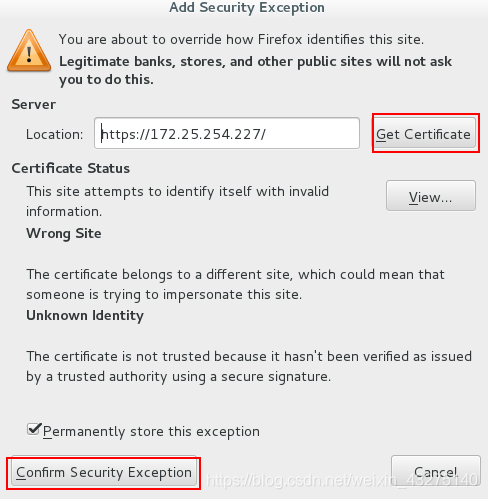
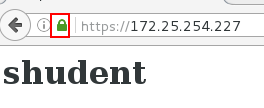
(6)测试:
重新获取加密key
普通访问自动转换加密访问方式:
1、在输入一个网址的时候,必须在网址前添加http://才能转换到加密访问的方式
认证成功就可以访问

2. 实现自动转化的步骤(网页重写):
(1)进入/var/www/westos.com目录下,创建目录/login/html
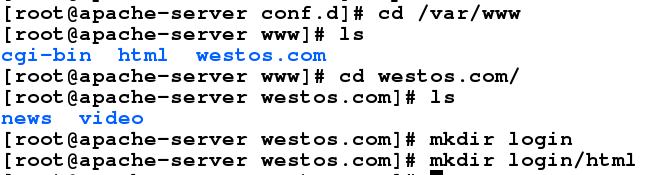
(2)在新建目录下添加访问文件
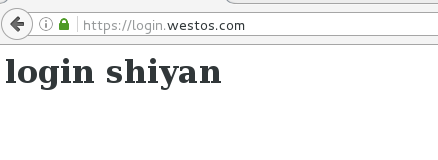
[root@apache-server westos.com]# vim login/html/index.html

(3)在测试端的主机添加相应的解析信息
[root@foundation61 kiosk]# vim /etc/hosts

(4)编辑主配置文件
  [root@apache-server westos.com]# cd /etc/httpd/conf.d/
  [root@apache-server conf.d]# vim login.conf
  1 <VirtualHost *:443>
  2         SSLEngine on
  3         ServerName login.westos.com
  4         DocumentRoot /var/www/westos.com/login/html
  5         CustomLog logs/login.log combined
  6         SSLCertificateFile /etc/pki/tls/certs/www.westos.com.crt
  7         SSLCertificateKeyFile  /etc/pki/tls/private/www.westos.com.key
  8 </VirtualHost>
  9 <Directory "/var/www/westos.com/login/html">
 10         Require all granted
 11 </Directory>
 12 <VirtualHost *:80>
 13         ServerName login.westos.com
 14         RewriteEngine on
 15         RewriteRule ^(/.*)$ https://%{HTTP_HOST}$1 [redirect=301]
 16 </VirtualHost>
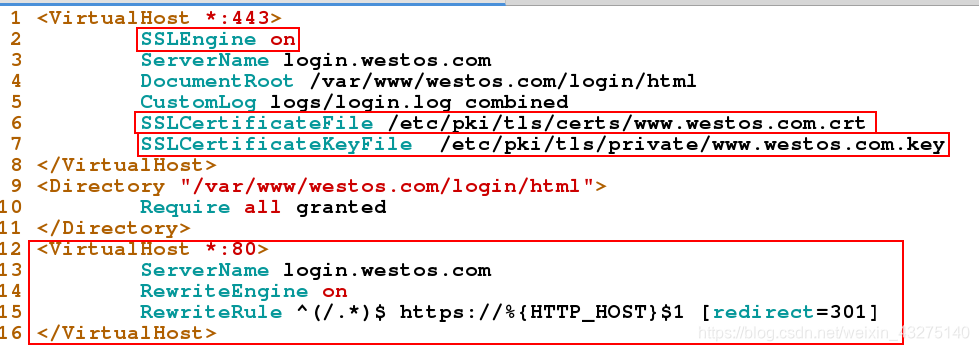
^(/.*)$       客户在浏览器地址中输入的所有字符
https://       强制客户加密访问
%{HTTP_HOST}     客户请求主机
$1          “ $1”表示^(/.*)$的值
[redirect=301]    永久转换(302表示临时重写)
(5)重启服务
[root@apache-server conf.d]# systemctl restart httpd
(6)测试:
输入网址