作者简介
赵安家,山东顺能网络全栈研发工程师。前端后端通吃,DevOps、安全、培训都有涉猎,负责了公司从单体服务迁移至微服务的项目。
介绍
CloudBoot
CloudBoot是云霁科技科技开源的一款简单易用的装机系统,类似Cobbler ,但是功能更强大,更易用。(详情可参阅参考资料的链接)
RancherOS
RancherOS是Rancher Labs开源的一款容器操作系统,类似coreOS,RancherOS是Rancher Labs设计的小巧、专用的容器操作系统,可用安装到服务器本地硬盘中,也可以部署到公有云上,或者配合DockerMachine使用。与Ubuntu和CentOS不同,RancherOS使用cloud-config.yml配置文件来管理机器的配置信息,包括系统启动时的服务、网络相关的配置信息、存储配置、容器配置等等,都可以放到配置文件中进行管理。
安装cloudboot
可参阅CloudBoot一键部署 :
http://idcos.github.io/osinstall-doc/environment/%E4%B8%80%E9%94%AE%E9%83%A8%E7%BD%B2.html
挂载RancherOS镜像
wget -P /tmp/ http://releases.rancher.com/os/latest/rancheros.iso
mkdir -p $PWD/cloudboot/deploy/iso/rancheros/1.5.1/
mount -o loop /tmp/rancheros.iso /media
rsync -a /media/ $PWD/cloudboot/deploy/iso/rancheros/1.5.1/
umount /media
创建软连接
docker exec -it cloudboot /bin/sh
ln -s /data/iso/rancheros /home/www/rancheros
注意:
- CloudBoot默认用户名密码是 admin/admin
- 登陆后需要配置dhcp(【系统管理】-> 【系统设置】)
- 需要配置网段(【网段管理】->【应用网段】)
- 本文讲的是VMware,所以不需要配置OOB
- 需要配置设备位置(【模板管理】->【位置管理】)
- 如果CloudBoot和RancherOS都装在VMware虚拟机里,需要把VMware的网络设置中的dhcp去掉,否则会冲突
pxe安装RancherOS
参考RancherOS#docs#iPXE和CloudBoot PXE模板定制规范
- RancherOS#docs#iPXE:https://rancher.com/docs/os/v1.x/en/installation/running-rancheros/server/pxe/
- CloudBoot PXE模板定制规范:
- http://idcos.github.io/osinstall-doc/os/PXE%E6%A8%A1%E6%9D%BF%E5%AE%9A%E5%88%B6%E8%A7%84%E8%8C%83.html
PXE模板管理
从【模板管理】->【PXE模板管理】 新增RancherOS-1.5.1
DEFAULT rancheros
LABEL rancheros
KERNEL http://osinstall.idcos.com/rancheros/1.5.1/boot/vmlinuz-4.14.85-rancher
APPEND initrd=http://osinstall.idcos.com/rancheros/1.5.1/boot/initrd-v1.5.1 rancher.cloud_init.datasources=[url:http://osinstall.idcos.com/api/osinstall/v1/device/getSystemBySn?sn={sn}] rancher.autologin=tty1 rancher.autologin=ttyS0 rancher.autologin=ttyS1 rancher.autologin=ttyS1 console=tty1 console=ttyS0 console=ttyS1 printk.devkmsg=on panic=10
IPAPPEND 2
系统模板管理
从【模板管理】->【系统模板管理】 新增rancheros-1.5.1
把docker mirror换成实际的加速器,如果不需要,可以删除,ssh_authorized_keys 换成真实的ssh key
#cloud-config
rancher:
  console: alpine
  docker:
    registry_mirror: "https://xxx.mirror.aliyuncs.com"
runcmd:
  - sh -c 'curl http://osinstall.idcos.com/scripts/rancheros.sh | bash'
ssh_authorized_keys:
  - ssh-rsa AAAA....ZZZZ user@user
自定义脚本
在CloudBoot宿主机上,运行 docker exec -it cloudboot /bin/sh ,然后运行 vim /home/www/scripts/rancheros.sh
#!/bin/bash
progress() {
  curl -H "Content-Type: application/json" -X POST -d "{\"Sn\":\"$_sn\",\"Title\":\"$1\",\"InstallProgress\":$2,\"InstallLog\":\"$3\"}" http://osinstall.idcos.com/api/osinstall/v1/report/deviceInstallInfo
}
_sn=$(sed q /sys/class/net/eth0/address)
progress "配置主机名和网络" 0.7 "6YWN572u5Li75py65ZCN5ZKM572R57uc"
# config network
curl -o /tmp/networkinfo "http://osinstall.idcos.com/api/osinstall/v1/device/getNetworkBySn?sn=${_sn}&type=raw"
source /tmp/networkinfo
cat > /etc/network/interfaces <<EOF
auto lo
iface lo inet loopback
auto eth0
iface eth0 inet static
address $IPADDR
netmask $NETMASK
gateway $GATEWAY
EOF
echo "$HOSTNAME" > /etc/hostname
sudo hostname "$HOSTNAME"
progress "配置alpine镜像源" 0.8 "6YWN572uYWxwaW5l6ZWc5YOP5rqQ"
sed -i 's/dl-cdn.alpinelinux.org/mirrors.aliyun.com/g' /etc/apk/repositories
progress "安装完成" 1 "5a6J6KOF5a6M5oiQ"
sudo ros install -c http://osinstall.idcos.com/api/osinstall/v1/device/getSystemBySn?sn=$_sn" -d /dev/sda -f
自动化安装RancherOS
从VMware创建 空盘 -> 其他Linux4.x或更高版本内核64位,2核2G虚拟机,然后上电
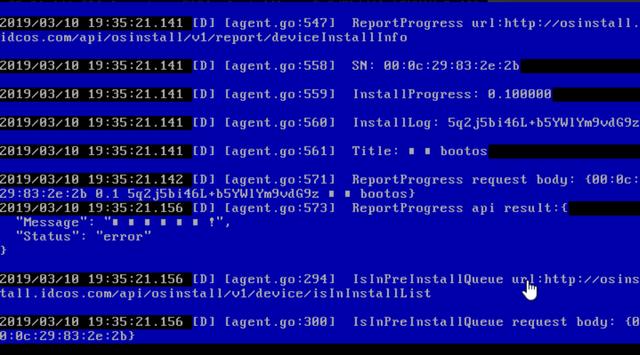
虚拟机会从PXE拉取CloudBoot的bootos 安装到内存中,并且往CloudBoot上注册待录入的设备(待屏幕变蓝色)
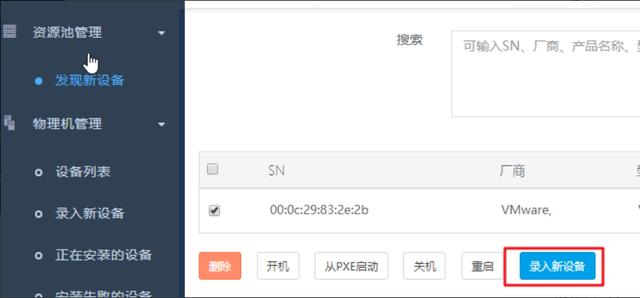
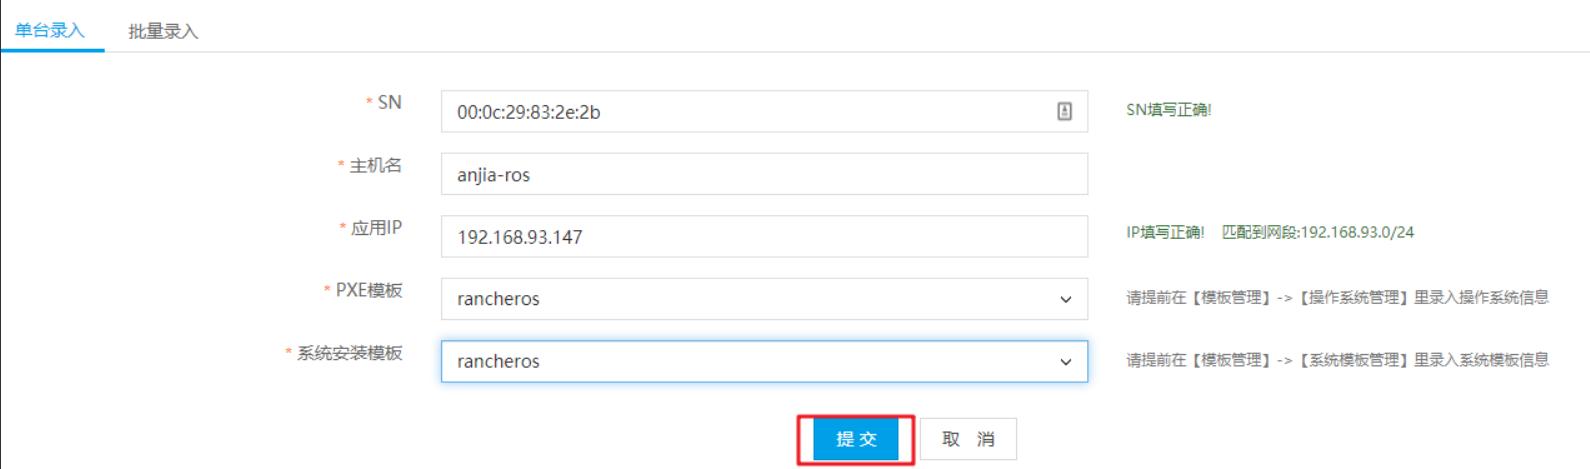
从 http://${cloudboot host}/#/dashboard/device/scan/list 会发现新设备,选中后,点击录入新设备
bootos会自动轮询是否有自动装机任务,所以静候即可。如果等不及,可以在录入成功后,手动重启虚拟机。
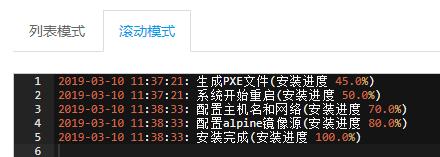
在【正在安装的设备】中,会自动出现要安装的设备

点击【详情】会在滚动模式下试试看到安装进度
在【设备列表】可以看到已安装成功的设备

注意
和Rancher Labs架构师张智博讨论后,张智博指出
booting from ISO 首次启动,整个系统都在内存中。执行ros install后,安装bootloader和initrd/vmlinuz到磁盘。再次启动后,就是完整的运行在硬盘上的操作系统。
脑洞
可以在 cloud config 配置自定义服务,这样装机后,就可以直接启动服务,不需要ssh到ros上,手动执行命令,例如配置Rancher client的添加主机的命令,这样就可以直接添加到已有集群。
更多参考 Custom System Services:
https://rancher.com/docs/os/v1.x/en/installation/system-services/custom-system-services/
#cloud-config
rancher:
 services:
  nginxapp:
   image: nginx
   restart: always
参考资料
- https://juejin.im/post/5c748ae2f265da2d84108d71
- https://juejin.im/post/5c748b2af265da2d9262ed0f