一、关于ansible
Ansible是什么?
Ansible是一款运维自动化工具,功能是帮助运维实现IT自动化、降低人为操作失误、提高业务自动化率、提升一运维工作效率。
常用于软件部署自动化、配置自动化、管理自动化、系统化系统人物、持续集成、;零宕机平滑升级。
常见的部署管理工具由Chef、Puppet、SaltStack、Fabric。
Ansible基于Python开发,集合了众多运维工具(puppet、cfengine、chef、func、fabric)的优点,实现了批量系统配置、批 量程序部署、批量运行命令等功能。ansible是基于模块工作的,本身没有批量部署的能力。真正具有批量部署的是ansible所运行的模 块,ansible只是提供一种框架。主要包括:
(1)、连接插件connection plugins:负责和被监控端实现通信;
(2)、host inventory:指定操作的主机,是一个配置文件里面定义监控的主机;
(3)、各种模块核心模块、command模块、自定义模块;
(4)、借助于插件完成记录日志邮件等功能;
(5)、playbook:剧本执行多个任务时,非必需可以让节点一次性运行多个任务。
为什么要用Ansible呢?
Ansible全部给予python开发,DevOps又是一种趋势,python的普及,方便了Ansible的二次开发。
Ansible丰富的内置模块,甚至还专门为商业平台开发的公呢个模块,为拿uqnbakeyi满足日常功能所需。
Ansible去中心化概念下,简单的复制操作即可完成配置中心的迁移。
Ansibless(无客户端),客户端无需入呢和培植,由管理配置好后饥渴怀斯用,非常方便。
Ansible如何工作的呢?
无客户端,底层通信依赖于系统软件,Linux系统基于openssh通信,windows基于powershell,管理端必须是linux系统。
使用角色: 使用者,ansible工具集,作用对象。

Ansible的通信机制
优点之一就是:无需任何和daemon维护进程即可实现互相通信,基于ssh安全连接。
无客户端,仅需安装ssh和python即可
基于OpenSSH通信,底层基于SSH协议
支持密码和ssh认证,建议公私钥,密码认证需要明文配置文件,虽说可以加密,但是会增加ansible的复杂程度。
支持windows,但仅支持客户端,服务端必须是linux系统
二、ansible的安装与配置
安装ansible
实验前提:
server1 安装ansible的服务器
server2 客户端
server3 客户端
server1可以上网并且配置epel(企业版Linux软件包),yum方式安装ansible
[root@server1 yum.repos.d]# ls
ansible.repo  redhat.repo  yum.repo
[root@server1 yum.repos.d]# cat ansible.repo
[epel]
name=epel
baseurl=https://mirrors.tuna.tsinghua.edu.cn/epel/7/x86_64
gpgcheck=0

或者在阿里云上下载:
https://opsx.alibaba.com/mirror
[root@server1 ~]# yum install ansible -y
[root@server1 ~]# ansible --version  #查看版本
ansible 2.9.1
  config file = /etc/ansible/ansible.cfg
  configured module search path = [u'/root/.ansible/plugins/modules', u'/usr/share/ansible/plugins/modules']
  ansible python module location = /usr/lib/python2.7/site-packages/ansible
  executable location = /usr/bin/ansible
  python version = 2.7.5 (default, Aug  2 2016, 04:20:16) [GCC 4.8.5 20150623 (Red Hat 4.8.5-4)]
2、查看配置文件
[root@server1 ansible]# pwd
/etc/ansible
[root@server1 ansible]# ls
ansible.cfg  hosts  roles

主配置文件  主机清单  存放角色的目录
3、安装ansible后生成的主要文件
/etc/ansible/ansible.cfg :配置文件
/etc/ansible/hosts :主机库(host inventory)管理被监控的主机
/usr/bin/ansible : 主程序
/usr/bin/ansible-doc : 文档
/usr/bin/ansible-playbook : 剧本
4、编辑/etc/hosts文件,添加本地解析(三台主机都做)(因为ansible的连接是通过ssh)
[root@server1 ~]# cat /etc/hosts
127.0.0.1   localhost localhost.localdomain localhost4 localhost4.localdomain4
::1         localhost localhost.localdomain localhost6 localhost6.localdomain6
172.25.58.1 sever1
172.25.58.2 sever2
172.25.58.3 sever3
5、刚开始使用root用户,对两个被控节点进行操作
[root@server1 ansible]# ansible test -m ping -k
[root@server1 ansible]# ansible test -m ping -k
SSH password:
172.25.58.3 | FAILED! => {
    "msg": "Using a SSH password instead of a key is not possible because Host Key checking is enabled and sshpass does not support this.  Please add this host's fingerprint to your known_hosts file to manage this host."
}
172.25.58.2 | FAILED! => {
    "msg": "Using a SSH password instead of a key is not possible because Host Key checking is enabled and sshpass does not support this.  Please add this host's fingerprint to your known_hosts file to manage this host."
}
此时失败,原因:没有密码,ssh一次之后,就有了密码,此时进行操作,成功~~~
[root@server1 ansible]# ssh 172.25.58.2
[root@server1 ansible]# ansible test -m ping -k
SSH password:
172.25.58.3 | FAILED! => {
    "msg": "Using a SSH password instead of a key is not possible because Host Key checking is enabled and sshpass does not support this.  Please add this host's fingerprint to your known_hosts file to manage this host."
}
172.25.58.2 | SUCCESS => {
    "ansible_facts": {
        "discovered_interpreter_python": "/usr/bin/python"
    },
    "changed": false,
    "ping": "pong"
}
6、测试:给被控节点拷贝一个脚本过去,并且执行
[root@server1 ansible]# ansible test -m copy -a "src=test.sh dest=/tmp/test.sh" -k
SSH password:
172.25.58.3 | CHANGED => {
    "ansible_facts": {
        "discovered_interpreter_python": "/usr/bin/python"
    },
    "changed": true,
    "checksum": "30f775110e0be674843711629492d0af60ee0104",
    "dest": "/tmp/test.sh",
    "gid": 0,
    "group": "root",
    "md5sum": "50660d6dfadad1aeb06eef0eb27b59e4",
    "mode": "0644",
    "owner": "root",
    "size": 32,
    "src": "/root/.ansible/tmp/ansible-tmp-1574343305.05-238345582540097/source",
    "state": "file",
    "uid": 0
}
172.25.58.2 | CHANGED => {
    "ansible_facts": {
        "discovered_interpreter_python": "/usr/bin/python"
    },
    "changed": true,
    "checksum": "30f775110e0be674843711629492d0af60ee0104",
    "dest": "/tmp/test.sh",
    "gid": 0,
    "group": "root",
    "md5sum": "50660d6dfadad1aeb06eef0eb27b59e4",
    "mode": "0644",
    "owner": "root",
    "size": 32,
    "src": "/root/.ansible/tmp/ansible-tmp-1574343305.04-115503533640589/source",
    "state": "file",
    "uid": 0
}
执行脚本,失败~~~~
[root@server1 ansible]# ansible test -m shell -a "/tmp/test.sh" -k
SSH password:
172.25.58.2 | FAILED | rc=126 >>
/bin/sh: /tmp/test.sh: Permission deniednon-zero return code

172.25.58.3 | FAILED | rc=126 >>
/bin/sh: /tmp/test.sh: Permission deniednon-zero return code原因,其权限不够:
给该文件一个 755权限,此时才可以执行该脚本:此时执行成功~~~
[root@server1 ansible]# ansible test -m copy -a "src=test.sh dest=/tmp/test.sh mode=755" -k
[root@server1 ansible]# ansible test -m shell -a "src=test.sh dest=/tmp/test.sh" -k问题:以上我们用的是root用户,但是在日常生产环境中不可能都使用root用户
并且,从上边示例可以看出,每次主控节点对server2 3 进行操作时,都要使用-k 参数,输入密码,比较麻烦
7、添加普通用户使用ansible,编辑ansible主配置文件
[root@server1 ~]# useradd devops
[root@server1 ~]# echo westos | passwd --stdin devops   #设置密码
Changing password for user devops.
passwd: all authentication tokens updated successfully.

[devops@server1 ~]$ mkdir ansible/
[devops@server1 ~]$ cd ansible/
[devops@server1 ansible]$ ls
ansible.cfg  hosts
[devops@server1 ansible]$ cat ansible.cfg  #主配置文件,写的默认主机清单是当前目录下的hosts文件
[defaults]
inventory  = ./hosts
[devops@server1 ansible]$ cat hosts  #hosts主机清单里,由两个模块
[test]
172.25.58.2

[db]
172.25.58.3
设置ssh免密登陆,分发公钥
[devops@server1 ansible]$ ssh-keygen
[devops@server1 ansible]$ ssh-copy-id 172.25.58.2
[devops@server1 ansible]$ ssh-copy-id 172.25.58.3
8、其余两台机器都创建普通用户
[root@server1 ansible]# ansible test -m user -a 'name=devops state=present' -k  #test模块里对应的主机是server2

[root@server2 ~]# echo westos | passwd --stdin devops #设置密码9、进行测试ping,发现全部ping通。在这里,返回绿色说明,主控节点在被控节点无操作,返回黄色表示,有操作。eg:ping会返回绿色,hostnamectl 会返回黄色
[devops@server1 ansible]$ ansible all -m ping

等价于

[devops@server1 ansible]$ ansible ‘*’ -m ping
server2和server3同时进行以下操作:
由于在server2和server3上创建了devops用户,但是我们需要给它权限,给它和root一样的权限
[root@server2 devops]# passwd -l devops
Locking password for user devops.
passwd: Success
[root@server2 devops]# ll -d /mnt
drwxr-xr-x. 2 root root 6 Mar 10  2016 /mnt
[root@server2 devops]# visudo

root    ALL=(ALL)       ALL
devops  ALL=(ALL)       NOPASSWD: ALL
此时给被控节点copy文件,失败!!!
[devops@server1 ansible]$ ansible all -m copy -a "src=yyz dest=/mnt/hosts mode=755"
172.25.58.3 | FAILED! => {
    "ansible_facts": {
        "discovered_interpreter_python": "/usr/bin/python"
    },
    "changed": false,
    "checksum": "6f4a4004dcca482c732eefcb1d0f6be5de74ee0f",
    "msg": "Destination /mnt not writable"
}
172.25.58.2 | FAILED! => {
    "ansible_facts": {
        "discovered_interpreter_python": "/usr/bin/python"
    },
    "changed": false,
    "checksum": "6f4a4004dcca482c732eefcb1d0f6be5de74ee0f",
    "msg": "Destination /mnt not writable"
}
原因:没有可写权限
解决1:此时使用-b参数,可以将其转换成root用户权限,成功~~~
[devops@server1 ansible]$ ansible all -m copy -a "src=yyz dest=/mnt/hosts" -b解决2:也可以在
[devops@server1 ansible]$ cat ansible.cfg
[defaults]
inventory = ./hosts
remote_user = devops
中添加下边的内容,可以不用添加-b参数,每次直接转换成root权限:
[privilege_escalation]
become=True
become_method=sudo
become_user=root
become_ask_pass=False
此时便可以进行自由传输文件~~~
10、ansible工具的常用参数及命令
命令格式: ansible <host-pattern> [options]
[root@server1 ansible]# ansible --help
Usage: ansible <host-pattern> [options]
Options:
-m MODULE_NAME, --module-name=MODULE_NAME 要执行的模块,默认为command
-a MODULE_ARGS, --args=MODULE_ARGS 模块的参数
-u REMOTE_USER, --user=REMOTE_USER ssh 连接的用户名,默认用root,ansible.cfg 中可以配置
-k, --ask-pass 提示输入ssh 登录密码,当使用密码验证登录的时候用
-s, --sudo sudo 运行
-U SUDO_USER, --sudo-user=SUDO_USER sudo 到哪个用户,默认为root
-K, --ask-sudo-pass 提示输入sudo 密码,当不是NOPASSWD 模式时使用
-B SECONDS, --background=SECONDS run asynchronously, failing after X seconds(default=N/A)
-P POLL_INTERVAL, --poll=POLL_INTERVAL set the poll interval if using
-B (default=15)
-C, --check 只是测试一下会改变什么内容,不会真正去执行
-c CONNECTION 连接类型(default=smart)
-f FORKS, --forks=FORKS fork 多少个进程并发处理,默认5
-i INVENTORY, --inventory-file=INVENTORY 指定hosts 文件路径,默认default=/etc/ansible/hosts
-l SUBSET, --limit=SUBSET 指定一个pattern,对<host_pattern>已经匹配的主机中再过滤一次
--list-hosts 只打印有哪些主机会执行这个playbook 文件,不是实际执行该playbook
-M MODULE_PATH, --module-path=MODULE_PATH 要执行的模块的路径,默认为/usr/share/ansible/
-o, --one-line 压缩输出,摘要输出
--private-key=PRIVATE_KEY_FILE 私钥路径
-T TIMEOUT, --timeout=TIMEOUT ssh 连接超时时间,默认10 秒
-t TREE, --tree=TREE 日志输出到该目录,日志文件名会以主机名命名
-v, --verbose verbose mode (-vvv for more, -vvvv to enable connection debugging)
三、lnventory主机清单的配置
1、lnventory是ansible管理主机信息的配置文件,相当于系统HOSTS文件的功能,默认存放在,etc/ansible/hosts。
2、定义主机和组
    lnventory可以直接为ip地址
    端口号不是默认的22端口时,可明确表示为:
    server2:2222
    server2 ansible_port = 2222 ansible_host=172.25.58.2
    中括号表示一个组,也可以表示一个范围

    [webserver]
    www[1:10].example.com
    db-[a:f].example.com
3、定义主机变量
    在playbook中使用时对主机进行个性化定制
    [webserver]
    web1 http_port = 8080
4、定义组变量
    [webserver]
    server2
    server3
    [webserver:vars]
    ntp_server=time.aliyun.com
    weebserver组中的所有主机ntp_server值为time.aliyun.com
5、定义组嵌套及组变量
组与组之间可以相互调用,并且可以向组中的主机指定变量。不过,这些变量只能在Ansible-playbook中使用,而Ansible不支持
[apache]
server1
server2
[nginx]
server3
server4
[webservers:children]
apache nginx
[webservers:vars]
ntp_server=time1.aliyun.com
6、在inventory 主文件中保存所有的变量并不是最佳的方式.还可以保存在独立的文件中
这些独立文件的格式为
YAML /etc/ansible/group_vars/raleigh
/etc/ansible/group_vars/webservers
/etc/ansible/host_vars/foosball
当变量变得太多时,分文件定义变量更方便进行管理和组织
/etc/ansible/group_vars/raleigh/db_settings
/etc/ansible/group_vars/raleigh/cluster_settings
7、变量的检索位置
Inventory配置文件(默认/etc/ansible/hosts)
Playbook中vars定义的区域
Roles中vars目录下的文件
Roles同级目录group_vars和hosts_vars目录下的文件
大家设置变量时尽量沿用同一种方式,以方便维护人员管理。
[devops@server1 ansible]$ cat hosts
[test]
172.25.58.2

[db]
172.25.58.3

[webserver:children]
test
db

[webserver:vars]
http_port=80
此时对被控主机操作:
[devops@server1 ansible]$ ansible webserver -m ping
172.25.58.2 | SUCCESS => {
    "ansible_facts": {
        "discovered_interpreter_python": "/usr/bin/python"
    },
    "changed": false,
    "ping": "pong"
}
172.25.58.3 | SUCCESS => {
    "ansible_facts": {
        "discovered_interpreter_python": "/usr/bin/python"
    },
    "changed": false,
    "ping": "pong"
}
四、ansible与正则表达式:
1、匹配所有主机,all与*功能相同:
ansible all -m ping
ansible "*" -m ping
ansible 172.25.58.* -m ping
2、对多台主机或多个组同时执行,相互之间用冒号
ansible “web1:web2” -m ping
3、在test组但不再db组的主机,用感叹号表示
ansible “test:!db” -m ping
4、在test组和db组中同时存在的主机用&符号表示
ansible “teat:&db” -m ping
五、Ansible Ad-Hoc命令集
1、ad-hoc 使用场景
Ansible提供两种方式去完成任务
(1)、ad-hoc 命令(2)、 Ansible playbook
在学习了 playbooks 之后,你才能体会到 Ansible 真正的强大之处在哪里。
ad-hoc更注重于解决一些简单或者平时工作中临时遇到的任务,相当于Linux系统命令行下的Shell命令
后者更适合于解决复杂或需固化下来的任务,相当于Linux系统的Shell Scripts。
使用场景
关闭所有不必要的服务器
临时更新Apache或Nginx的配置文件
2、ansible命令执行流程
3、Ansible的并发特性
Ansible和Ansible-playbook默认会fork 5个线程并发执行命令,如果同时操作的主机数比较多的话,可以调整到一个更大的值。
Ansible为我们提供了便捷的选项,-f指定线程数。
[devops@server1 ansible]$ ansible test1 -m ping -f 3ansible有许多模块,默认是 command,也就是命令模块,我们可以通过 -m 选项来指定不同的模块。
4、Ansible-doc用法
ansible的模块非常之多,Ansible也提供了类似于man功能的help说明工具ansible-doc。
正式学习Ansible模块使用前,有必要先了解ansible-doc用法:
ansible-doc -l : 列出常用的模块文档列表。ansible支持超多的模块,可以使用这个命令找到自己想要使用的对应模块。
ansible-doc -s 模块名称: 查看某一个模块支持的具体参数 <wbr>
按q推退出
eg:获取yum模块帮助 ansible-doc yum
一般直接翻到最低下的例子就可以,然后参考例子来使用
5、常用模块:
copy模块
# ansible webservers -m copy -a "src=/etc/hosts   dest=/tmp/hosts"
file模块
# ansible webservers -m file -a "dest=/tmp/hosts mode=600 owner=root group=root"			#修改文件权限和属性
# ansible webservers -m file -a "dest=/tmp/dir1/dir2 mode=755 owner=root group=root state=directory"    #递归创建
# ansible webservers -m file -a "dest=/tmp/dir1/dir2 state=absent"
yum模块
# ansible webservers -m yum -a "name=httpd state=present"
# ansible server3 -m yum -a "name=http://172.25.0.250/rhel7.3/x86_64/dvd/Packages/vsftpd-3.0.2-21.el7.x86_64.rpm state=present"	#在线安装
# ansible server3 -m yum -a "name=/mnt/vsftpd-3.0.2-21.el7.x86_64.rpm state=present"			#本地安装
# ansible server3 -m yum -a "name=httpd state=absent"					#卸载软件
service模块
# ansible webservers -m service -a "name=httpd state=started"
# ansible webservers -m service -a "name=httpd state=restarted"
# ansible webservers -m service -a "name=httpd state=stopped"
user模块
# ansible all -m user -a "name=wxh password=<加密密码>"
# ansible all -m user -a "name=wxh state=absent remove=yes"
# ansibledb -m user -a "name=wxh shell=/bin/bash groups=users,wheel append=yes state=present"
mysql_user模块
# ansible server3 -m mysql_user -a "name=wxh password=testpass priv=*.*:select host='%' state=present"
远程主机需要安装MySQL-python
六、常用模块练习
1、使用devops的身份去检测
- u表示指定用户
可以看出以devops用户的身份去ping远程主机的devops用户是可以的
以devops用户的身份去ping远程主机的root用户是不可以的
记住:这里的用户指的都是远程主机的用户,拿谁家的钥匙开谁家的门
[devops@server1 ansible]$ ansible all -m ping -u devops 成功以devops的身份,去访问被控节点的devops用户
[devops@server1 ansible]$ ansible all -m ping -u root 失败现在是devops却以root的身份去访问,所以失败
2、user模块:可以快速在被管控主机上批量添加用户
示例:ansible all -m user -a 'name=ly state=present' <wbr>
常用参数:
state=present <wbr> : 创建用户
home= <wbr> <wbr> :来指定用户家目录路径;
system=true <wbr> :创建系统用户
uid= ** <wbr>:** 来指定用户uid
shell= <wbr> <wbr> <wbr> :指定用户的默认shell
删除用户:
ansible all -m user -a 'name=ly state=absent remove=true'
state=absent : 删除用户
remove=true : 删除用户家目录!
3、group模块
和user类似,用于创建系统组
示例:ansible all -m group -a ‘name=go state=present gid=5001 system=true’
system=true <wbr>: <wbr> 创建一个系统组
如果要删除该组,只需要将state=present改成absent就可以了
4、copy模块
将本地的文件拷贝到远程主机(test组的主机)的tmp目录下面
这个是可以的,因为远程主机的devops用户对tmp目录有权限
直接时用默认身份:
[devops@server1 ansible]$ pwd
/etc/ansible
[devops@server1 ansible]$ vim ansible.cfg
复制以下内容:
[privilege_escalation]
#become=True
#become_method=sudo
#become_user=root
#become_ask_pass=False

[devops@server1 ansible]$ pwd
/home/devops/ansible
[devops@server1 ansible]$ cat ansible.cfg
[defaults]
inventory  = ./hosts
remote_user = devops

[privilege_escalation]
become=True
become_method=sudo
become_user=root
become_ask_pass=False
5、cron模块
为被管控主机在crontab -e列表中添加计划任务
示例:ansible all -m cron -a “minute='/5' job='/usr/sbin/ntpdate 172.16.0.1 &> /dev/null' name='sync time' state='present'"*
为所有被管控主机添加一条计划任务,每5分钟向172.16.0.1同步一次系统时间
name= <wbr> <wbr> <wbr> <wbr> :表示工作名称
job= <wbr> <wbr> <wbr> <wbr> <wbr> <wbr> :表示具体运行什么命令
hour=* <wbr> <wbr> <wbr> <wbr> <wbr>: 每小时
day=* <wbr> <wbr> <wbr>: <wbr> 每天
month=3 <wbr> <wbr>: 3月
weekday=3 <wbr> : 周三
6、file模块
为被管控主机创建新文件
示例:ansible all -m file -a 'path=/tmp/test.txt state=touch owner=user1 mode=600'
在/tmp下创建一个叫test.txt的普通文件,属主为user1,权限为600
mode= <wbr> <wbr> <wbr> : 文件权限
group= <wbr> <wbr> <wbr>: 文件属组
state=touch:创建普通文件
state=directory: 创建目录
state=link <wbr> :创建一个软连接,还要使用src=/etc/passwd参数来指定源文件。
state=hard <wbr>: 创建一个硬链接,和上面一样也要使用src参数
state=absent:删除文件
7、yum模块
为被管控主机用yum安装软件
示例:ansible all -m yum -a 'name=httpd state=present'
为所有管控主机安装httpd,各管控主机默认从自己的base源中进行安装
state=absent卸载 =started开启
state=latest <wbr> <wbr> : 为某个包做更新操作
enablerepo= <wbr> <wbr> :启动某个仓库源
disablerepo= <wbr> <wbr> :禁用某个仓库源
还可以使用yum模块给webserver组里面的主机安装httpd服务
[devops@server1 ansible]$ ansible webserver -m yum -a "name=httpd state=present"
[devops@server1 ansible]$ ansible webserver -m service -a "name=httpd state=started" 开启
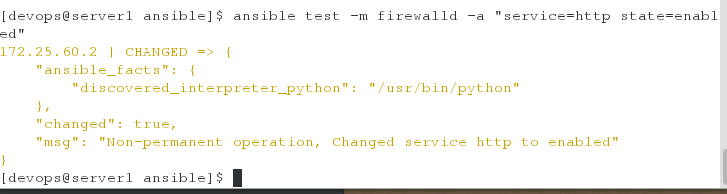
[devops@server1 ansible]$ ansible webserver -m service -a "name=httpd state=stopped"此时还要考虑防火墙的因素:
8、copy模块
为被管控主机执行复制操作
示例:ansible all -m copy -a 'src=/etc/fstab dest=/tmp/fstab owner=ly group=ly mode=600'
让所有被管控主机复制管控主机的/etc/fstab文件到被管控主机的/tmp/fstab,属主属组为ly,权限为600
content=123 <wbr> :将‘123’复制到dest=字段指定的文件中,会覆盖目标文件的所有内容,基本就是远程输出重定向的意思。而且和src=参数不能一起用。
9、service
可以管理被管控主机上的各种服务程序,从简单的开启和关闭,到 在不同级别下是否开机自动启动等都可以操作
示例:ansbile all -m service -a 'name=httpd state=started ' <wbr>
10、script
这个模块非常有用,可以把本地的脚本在各被管控主机上跑一遍,我可以现在本地主机的/root目录下建立一个脚本123.sh,然后运行:
ansible <wbr>all -m script -a '/root/123.sh'
11、shell : <wbr>
直接在被管控主机上启动一个子shell进程来运行命令,可以支持绝大多数的shell命令,包括管道符
ansible all -m shell -a "echo $RANDOM | tr <wbr>'0-9' 'a-z' > /root/123"
12、mysql模块
1)安装数据库
[root@server1 httpd]# ansible db -m yum -a "name=mariadb-server state=present"2)登陆
[root@server1 httpd]# ansible db -m service -a "name=mariadb state=started"3)授权
[root@server1 httpd]# ansible db -m mysql_user -a "name=yyz password=westos priv=test.*:ALL state=present"
server2 | FAILED! => {
    "changed": false,
    "msg": "The PyMySQL (Python 2.7 and Python 3.X) or MySQL-python (Python 2.X) module is required."
}
这里需要在server2端安装依赖
[root@server1 httpd]# ansible test -m yum -a "name=MySQL-python state=present"
授权

[root@server1 httpd]# ansible test -m mysql_user -a "name=yyz password=westos priv=test.*:ALL state=present"
测试:
[root@server3 dir1]# mysql -uyyz -pwestos test
Welcome to the MariaDB monitor. Commands end with ; or \g.
Your MariaDB connection id is 4
Server version: 5.5.52-MariaDB MariaDB Server
Copyright (c) 2000, 2016, Oracle, MariaDB Corporation Ab and others.
Type 'help;' or '\h' for help. Type '\c' to clear the current input statement.
MariaDB [test]>
或者进行远程登陆:
远程登陆数据库
[root@foundation58 ~]# msyql -h 172.25.58.3 -u yyz -p

创建用户的时候对用户密码加密
[devops@server1 ansible]$ ansible test2 -m user -a "name=yyz password={{'westos' | password_hash('yyz1234')}}"
在server3上看加密后的密码
[root@server3 devops]# cat /etc/shadow | grep yyz
七、练习
1、找出在test1组里面但是不在test2组里面的主机(正则表达式)
[devops@server1 ansible]$ ansible 'test1:!test2' -m ping
2、找出在既在test1组里面也在test2组里面的主机
[devops@server1 ansible]$ ansible 'test1:&test2' -m ping
3、创建webserver组,批量检测
[devops@server1 ansible]$ cat hosts
[test1]
172.25.58.2

[test2]
172.25.58.3

[webserver:children]
test1
test2
4、给test1组的主机创建用户
[devops@server1 ansible]$ ansible test2 -m user -a "name=yyz password=westos"
