目标:使用虚拟机运行nexus,数据目录使用本机系统文件夹。
1、windows环境vmware虚拟机安装centos7
安装vmware workstation,从https://www.centos.org/download/下载centos7的最小安装iso,安装虚拟机,具体过程自行百度或者谷歌。
2、sonartype/nexus3安装文件
官网下载地址:https://www.sonatype.com/download-oss-sonatype
坑1:无法下载则用下面的方法:
从docker镜像里面复制一份出来
参考1:https://blog.csdn.net/weixin_34389926/article/details/86972295
启动docker容器,使用docker cp命令复制/opt/sonartype出来,这里面的sonartype是最新版本。
(参考我之前的博文在windows环境安装配置Docker toolbox)
3、windows给vmware共享目录
参考2:https://blog.csdn.net/tiramisu_L/article/details/80628345
https://blog.csdn.net/alexzt/article/details/81352643
坑2:安装VMware tools的时候遇到这个错误
The path "" is not a valid path to the 3.10.0-514.el7.x86_64 kernel headers
ctrl+z退出安装,提示什么版本就安装什么版本的kernel-devel就得了,做符号链接也不好使。
# yum -y install kernel-devel-3.10.0-514.el7.x86_64
再次启动安装VMware tools
# ./vmware-install.pl
一路回车
安装成功后查看一下
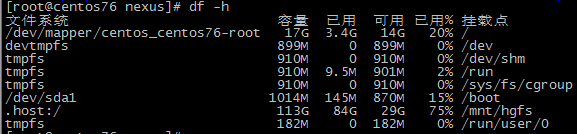
.host:/ 这个就是,进入/mnt/hgfs可以看到windows共享的目录
我的windows可读写共享目录名是: nexus-data
4、配置并启动nexus3
# cd /opt/sonatype/sonatype-work
# ln -s /mnt/hgfs/nexus-data nexus3
将nexus的数据目录链接到 /mnt/hgfs 里面去,即实现本文目标。
坑3:配置nexus使用的java虚拟机参数(按照自己的实际情况来,传说nexus3不能低于2G内存)
bin/nexus.vmoptions
-Xms256M
-Xmx512M
-XX:MaxDirectMemorySize=1024M
修改nexus上下文:nexus-context-path=/nexus3
/opt/sonatype/nexus/etc/nexus-default.properties
centos7防火墙开端口:
firewall-cmd --zone=public --add-port=8081/tcp --permanent
使防火墙规则生效:firewall-cmd --reload
查看是否生效:firewall-cmd --list-ports
启动nexus3:bin/nexus start
5、nexus3忘记密码(坑4)
主要步骤如下:
5.1、停服 bin/nexus stop,调整虚拟机内存为2G,然后进行后面的操作(坑3续)
5.2、进入OrientDB控制台:java -jar ./lib/support/nexus-orient-console.jar
5.3、在控制台执行:
connect plocal:../sonatype-work/nexus3/db/security admin admin
5.4、重置密码为admin123 :
update user SET password="$shiro1$SHA-512$1024$NE+wqQq/TmjZMvfI7ENh/g==$V4yPw8T64UQ6GfJfxYq2hLsVrBY8D1v+bktfOxGdt4b/9BthpWPNUy/CBk6V9iA0nHpzYzJFWO8v/tZFtES8CA==" UPSERT WHERE id="admin"坑5:不要自行修改sonatype-work\nexus3\db\security\user.pcl文件内容,否则nexus-orient-console没法用。
若不幸跌入此坑,请停止nexus并清空nexus-data目录后重新启动nexus,再次生成数据文件,然后从步骤5.1开始重新操作
5.5、启动服务
bin/nexus start
启动成功后web访问http://ip:8081/nexus3
第一次登入成功后要求修改admin密码
如果仍然不成功,官网链接里也给出了相应的解决办法,这里不再赘述。
