本文是按照这个教程执行的结果记录:Creating a private network and deploying a contract with Remix
Ethereum Aleth在Wins上面的编译和安装请参考本人上一篇文章。https://blog.csdn.net/liangyihuai/article/details/103737223
本人只在这里讲注意事项,具体的步骤其参考上面第一个link。
- genesis 区块的配置文件config.json的账号需要替换成自己的。同时把/**/和中间的文字删除。
- 执行下面命令的时候,需要替换其中的账号为自己的。
aleth/aleth --config /Users/johndoe/Documents/config.json -m on -a 008a78302c6fe24cc74008c7bdae27b7243a7066 --no-discovery --pin --unsafe-transactions
- 在win下运行命令
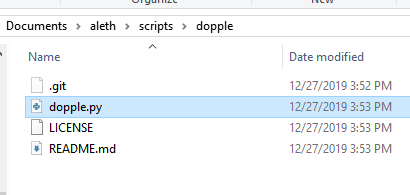
scripts/dopple.py是有问题的,解决的方法是,使用anaconda的命令行窗口,在窗口中进入下图所在的目录,执行python dopple.py。如下面三张图片所示。


经过运行dopply.py文件,我们把Dopple JSON-RPC代理跑起来了。使用浏览器验证一下。

到这里,我们已经把两个服务分别在两个cmd窗口中执行起来了,一个是aleth客户端服务,另一个是json-rpc 代理服务。分别使用的是系统的cmd和anaconda的cmd窗口。

下面便是使用remix编写和部署一个智能合约。remix是在线的IDE,输入下面的网址即可:http://remix.ethereum.org/, 这里建议使用http,而不是https。不过,都可以试一下。下面给出一个简单的智能合约代码:
pragma solidity ^0.4.0;

contract Greeter{
    string public yourName;

    function Greeter() public {
        yourName = "World";
    }


    function set(string name) public{
        yourName = name;
    }

    function hello() constant public returns (string){
        return yourName;
    }
}
下图显示了三个注意点,1,需要选择Web3Provider环境。2,选择相应的智能合约。3.部署和操作智能合约。

在点击部署按钮之后,需要回到命令行窗口输入密码,手速快一点输入就okay。
下面是本人智能合约的执行结果

谢谢
还可参考:https://github.com/ethereum/aleth/blob/master/doc/index.rst
Creating a private network and deploying a contract with Remix
This guide describes creating a private network with a single node and connecting it to Remix through an HTTP RPC interface.

Initializing Aleth using the command-line interface
1. Create a new Aleth account:

aleth/aleth account new
Enter and confirm a new password for this account when prompted.

2. Create a JSON file (e.g. config.json). Its content should look roughly like this:

{
  "sealEngine": "Ethash",
  "params": {
    "accountStartNonce": "0x00",
    "maximumExtraDataSize": "0x20",
    "homesteadForkBlock": "0x00",
    "daoHardforkBlock": "0x00",
    "EIP150ForkBlock": "0x00",
    "EIP158ForkBlock": "0x00",
    "byzantiumForkBlock": "0x00",
    "constantinopleForkBlock": "0x00",
    "constantinopleFixForkBlock": "0x00",
    "istanbulForkBlock": "0x00",
    "minGasLimit": "0x5208",
    "maxGasLimit": "0x7fffffffffffffff",
    "tieBreakingGas": false,
    "gasLimitBoundDivisor": "0x0400",
    "minimumDifficulty": "0x100000",
    "difficultyBoundDivisor": "0x0800",
    "durationLimit": "0x0d",
    "blockReward": "0x4563918244F40000",
    "networkID" : "0x42",
    "chainID": "0x42",
    "allowFutureBlocks" : false
  },
  "genesis": {
    "nonce": "0x0000000000000042",
    "difficulty": "0x100000",
    "mixHash": "0x0000000000000000000000000000000000000000000000000000000000000000",
    "author": "0x0000000000000000000000000000000000000000",
    "timestamp": "0x5A5B92D7",
    "parentHash": "0x0000000000000000000000000000000000000000000000000000000000000000",
    "extraData": "0x655741534d2074657374206e6574776f726b2030",
    "gasLimit": "0x989680"
  },
  "accounts": {
    "008a78302c6fe24cc74008c7bdae27b7243a7066" /* <= Enter your account address here */: {
        "balance" : "0x200000000000000000000000000000000000000000000000000000000000000"
    }
  }
}
This includes all forks activated at genesis and the initial balance for your account.

Note that this format can change occasionally. For the latest format, please consult the source files in https://github.com/ethereum/aleth/tree/master/libethashseal/genesis.

3. Run Aleth with config.json:

aleth/aleth --config /Users/johndoe/Documents/config.json -m on -a 008a78302c6fe24cc74008c7bdae27b7243a7066 --no-discovery --pin --unsafe-transactions
Argument Descriptions:

-m on enables CPU mining

-a 008a78302c6fe24cc74008c7bdae27b7243a7066 sets the beneficiary of mined blocks

--no-discovery --pin effectively disables networking; we have only a single node, we don't need to discover other ones, and we don't allow other nodes to connect to us

--unsafe-transactions disables additional prompt before sending each transaction, we don't need it in the testing environment

It can take a while to mine the first block, but block generation latency should decrease with time.

4. While Aleth is mining, open a new window in your CLI, navigate to the aleth directory, and run

scripts/dopple.py
This enables HTTP RPC at http://127.0.0.1:8545 by running a proxy which forwards all HTTP requests to Aleth's IPC interface.

Connecting Remix
This assumes that the contract code has already been successfully compiled.

1. On the Run tab, choose Web3 Provider in the Environment list.

2. After connecting to your node, it should fetch your account's address and automatically select it in the Account list.

3. Use the Deploy button to deploy a compiled contract into the blockchain. Aleth requests the confirmation and the account's password in its CLI - switch to the Aleth window and confirm the transaction when prompted (our tests currently show that Remix may not wait for the confirmation and consider the transaction failed. If this occurs, try redeploying the contract. Aleth will have cached your password and won't prompt for confirmation a second time.)
