elasticsearch是一个功能强大的高级检索工具,针对其部署和使用在这里做一个记录
- 部署环境:centos+docker
- 版本:7.9.3
1.在docker中部署
首先是在docker中pull它的镜像,我这里选择了7.9.3版本,与springboot中的版本保持一致
docker pull elasticsearch:7.9.3

接着运行它的一个容器,这里的命令需要注意一下:
docker run -d -e ES_JAVA_OPTS="-Xms256m -Xmx256m" -e "discovery.type=single-node" -p 9200:9200 -p 9300:9300 --name myES 1ab13f928dc8
ES_JAVA_OPTS后面接的Xms和Xmx分别是启动内存和最大内存,固定为256mb,不固定的话默认有2G,虚拟机是不够的discovery.type=single-node是设置为单节点部署,不设置的话可能ES会默认你是生产环境,会检查你的环境是否满足要求,从而产生比如闪退等各种各样的问题
输入curl localhost:9200命令查看本机是否部署成功
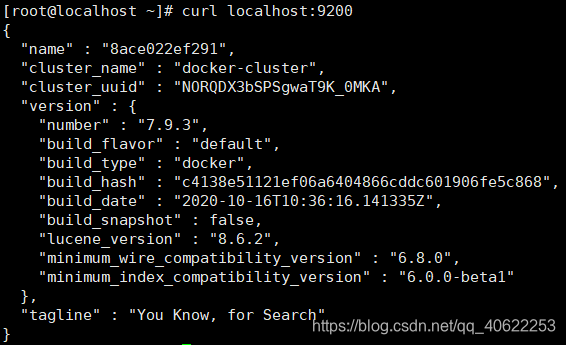
出现这个json字符串就代表成功
在虚拟机外利用ip访问,虚拟机ip+9200端口
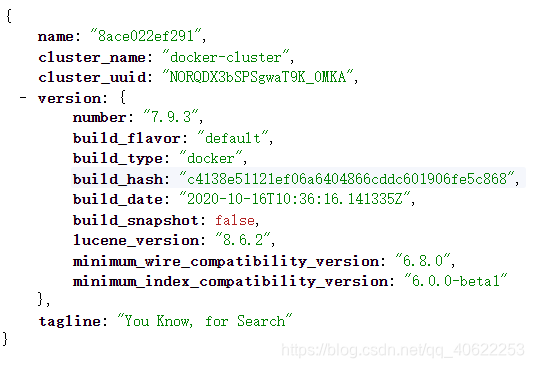
访问成功
这里要是访问不成功的话,可以通过
docker exec -it 容器名 /bin/bash进入容器,修改config文件夹下的elasticsearch.yml,修改network.host: 0.0.0.0,放行所有ip
2.结合springboot的基本使用
jest在高版本已被弃用,这里采用Rest和SpringDataElasticsearch两种方法
A. Rest方法
首先springboot初始化时,加入elasticsearch的依赖。 接着观察pom文件,发现默认采用的是SpringDataElasticsearch

注释掉,并使用RestHighLevelClient的依赖
<dependency>
    <groupId>org.elasticsearch.client</groupId>
    <artifactId>elasticsearch-rest-high-level-client</artifactId>
    <version>7.9.3</version>
</dependency>
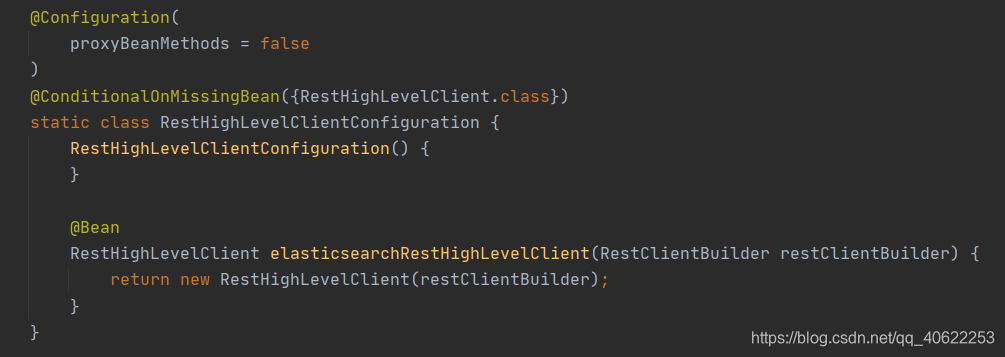
观察自动配置源码,发现springboot自动配置了RestHighLevelClient组件,也就是说使用时直接拿过来用就可以了
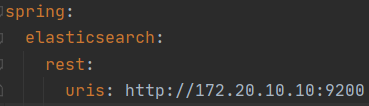
接着在yml文件中指定主机
- 从Elasticsearch5.x开始就提出了弱化索引类型-type的使用,起初,我们说"索引"和关系数据库的“库”是相似的,“类型”和“表”是对等的。这是一个不正确的对比,导致了不正确的假设。在关系型数据库里,"表"是相互独立的,一个“表”里的列和另外一个“表”的同名列没有关系,互不影响。但在类型里字段不是这样的
- 举个例子,两个不同type下的两个user_name,在ES同一个索引下其实被认为是同一个field,你必须在两个不同的type中定义相同的field映射。否则,不同type中的相同字段名称就会在处理中出现冲突的情况,导致Lucene处理效率下降
- 所以在Elasticsearch7.x及之后就完全去除了type。每个索引的type默认且只有为_doc
可以通过配置include_type_name: true来改变默认的索引,但不建议这么做,因为根据官方说明在ES8之后这个字段就不会再使用了
首先注入
@Autowired
RestHighLevelClient restHighLevelClient;
I) PUT
@Test
void put() throws IOException {


    //设置索引和id
    IndexRequest indexRequest = new IndexRequest();
    indexRequest.index("test").id("article1");

    // 方法1,通过JSON
    Article article = new Article();
    article.setId(1);
    article.setTitle("title1");
    article.setAuthor("zhangsan");
    article.setContent("Hello World");
    indexRequest.source(JSON.toJSONString(article), XContentType.JSON);

    //方法2,通过map
    /*
    Map<String, String> map = new HashMap<>();
    map.put("id", "1");
    map.put("title", "title1");
    map.put("author", "zhangsan");
    map.put("content", "Hello World");
    indexRequest.source(map);
    */

    //方法3,通过键值对
    /*
    indexRequest.source("id", "1", "title", "title1", "author", "zhangsan", "content", "Hello World");
     */

    //方法4,通过byte数组,这里就省略了

    restHighLevelClient.index(indexRequest, RequestOptions.DEFAULT);
}
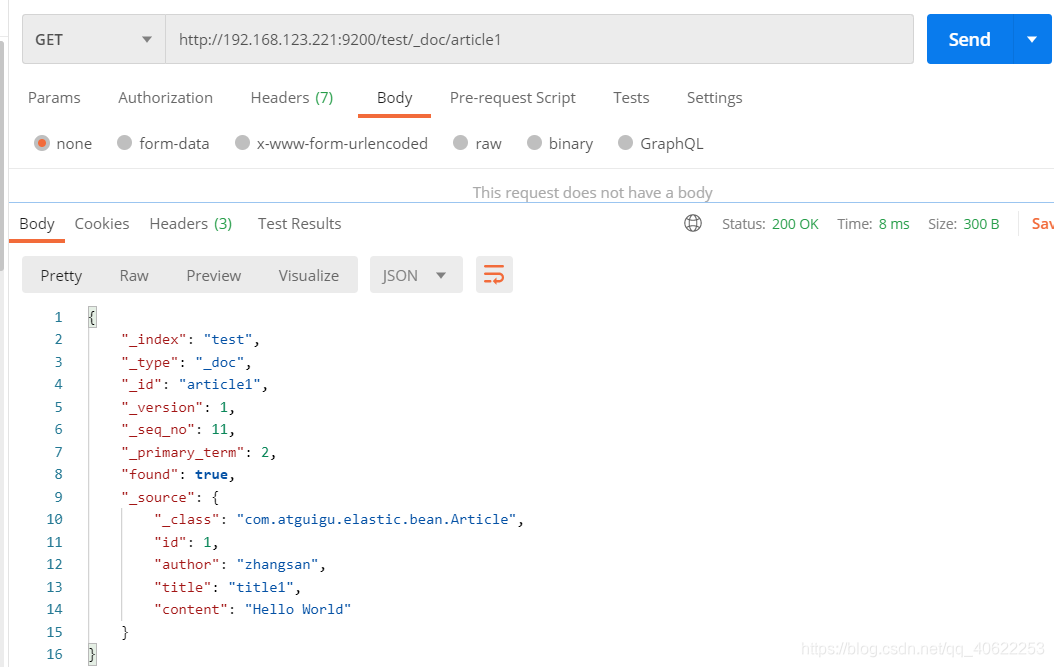
Postman发送请求查看结果
II) GET
@Test
void get() throws IOException {


    GetRequest getRequest = new GetRequest("test", "article1"); //发送获取请求
    GetResponse getResponse = restHighLevelClient.get(getRequest, RequestOptions.DEFAULT); //获取
    if(getResponse.isExists()){


        System.out.println(JSON.parseObject(getResponse.getSourceAsString(), Article.class));
    }
}

II) DELETE
@Test
public void delete() throws IOException {


    DeleteRequest request = new DeleteRequest("test", "article1");
    DeleteResponse deleteResponse = restHighLevelClient.delete(request,RequestOptions.DEFAULT);
    if (deleteResponse.status() == RestStatus.OK) {


        System.out.println("删除成功");
    }
}
Postman测试

B. SpringDataElasticsearch方法
观察源码
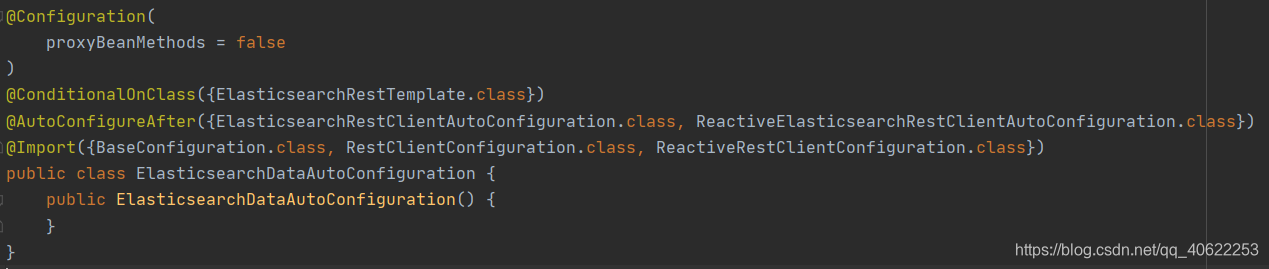
两种方法
- ElasticsearchRepository
- ElasticsearchRestTemplate
a. ElasticsearchRepository
首先写接口继承ElasticsearchRepository接口
package com.atguigu.elastic.repository;

import com.atguigu.elastic.bean.Article;
import org.springframework.data.elasticsearch.repository.ElasticsearchRepository;

public interface MyRepository extends ElasticsearchRepository<Article, Integer> {


}
接着在bean上添加索引注解
@Document(indexName = "test")
public class Article
编写具体实现
@Autowired
MyRepository myRepository;
@Test
void putByRepository() {


    Article article = new Article();
    article.setId(1);
    article.setTitle("title1");
    article.setAuthor("zhangsan");
    article.setContent("Hello World");
    myRepository.save(article);
}
其他类似,这里省略,注意这时id会自动默认为对象的id

还支持模糊查询,首先在接口内定义方法,注意命名规则,会自动按命名来封装相应功能(JPA思想)
public interface MyRepository extends ElasticsearchRepository<Article, Integer> {


    List<Article> findArticlesByAuthorLike(String author);
}
@Test
void getByRepository() {


    List<Article> articles = myRepository.findArticlesByAuthorLike("zhang");
    for(Article article: articles){


        System.out.println(article);
    }
}

b. ElasticsearchRestTemplate
@Autowired
ElasticsearchRestTemplate elasticsearchRestTemplate;

@Test
void putByTemplate() {


    Article article = new Article();
    article.setId(1);
    article.setTitle("title1");
    article.setAuthor("zhangsan");
    article.setContent("Hello World");
    IndexQuery indexQuery = new IndexQuery();
    IndexCoordinates indexCoordinates = IndexCoordinates.of("test");
    indexQuery.setId("article1");
    indexQuery.setObject(article);
    elasticsearchRestTemplate.index(indexQuery, indexCoordinates);
}
用起来也非常方便