在 ubuntu16.04 系统成功安装 caffe 并编译,网上有很多教程,但是某些步骤并没有讲解详尽,导致配置过程总是出现各种各样匪夷所思的问题,尤其对于新手而言更是欲哭无泪,在我饱受折磨后决定把安装步骤记录下来,尽量详尽清楚明白,避免后来小白重蹈覆辙。
本文是基于Python2进行安装,没有使用anaconda2,因为基于anaconda2和anaconda3在安装caffe时会报错,很难解决。
再者,应用caffe框架的很多代码是基于Python2的,比如caffe-segnet,所以使用Python2。
安装硬件: intel i5 + NVIDIA 940 M
安装流程细分为如下6个步骤,细化步骤粒度更易避免出错:
0.前言
1.安装驱动
2.安装相关依赖项
3.安装CUDA
4.安装OpenCV3.1.0
5.安装caffe
6.安装pycaffe
0.前言
一般Ubuntu16.04 自带python2.7和python3.5,默认的是python3.5,需要将其修改的默认为python2.7,因为后面需要用python进行编译。
修改Ubuntu默认python:
先列出系统中的python:
sudo update-alternatives --list python 显示如下:
/usr/bin/python2.7
/usr/bin/python3.5
更换默认的python:
update-alternatives --config python下面就简单了,会提示你输入序号,你想用哪个版本为默认,就输入序号就可以了!

参考:https://blog.csdn.net/beijiu5854/article/details/77897767
1.安装驱动
找到“System Settings”,在找到“Details”。

查看驱动,我这里安装后显示的。

安装NVIDIA驱动:
在“System Settings”找到“Software & Updates ”

再找到“Additional Drivers”,系统会自动搜索可用的 NVIDIA驱动,选择 “NVIDIA”驱动即可。

再去“System Settings”,在找到“Details”,查看驱动:

2.安装相关依赖项
安装后续步骤或环境必需的依赖包,依次输入以下命令:
sudo apt-get install libprotobuf-dev libleveldb-dev libsnappy-dev libopencv-dev libhdf5-serial-dev protobuf-compiler

sudo apt-get install --no-install-recommends libboost-all-dev

sudo apt-get install libopenblas-dev liblapack-dev libatlas-base-dev

sudo apt-get install libgflags-dev libgoogle-glog-dev liblmdb-dev

sudo apt-get install git cmake build-essential
有一定几率安装失败而导致后续步骤出现问题,所以要确保以上依赖包都已安装成功,验证方法就是重新运行安装命令,如验证 git cmake build-essential是否安装成功共则再次运行以下命令:
sudo apt-get install git cmake build-essential 界面提示如下则说明已成功安装依赖包,否则继续安装直到安装成功。
yhao@yhao-X550VB:~$ sudo apt-get install git cmake build-essential
正在读取软件包列表... 完成
正在分析软件包的依赖关系树 正在读取状态信息... 完成
build-essential 已经是最新版 (12.1ubuntu2)。
cmake 已经是最新版 (3.5.1-1ubuntu3)。
git 已经是最新版 (1:2.7.4-0ubuntu1.1)。
下列软件包是自动安装的并且现在不需要了:
lib32gcc1 libc6-i386 使用'sudo apt autoremove'来卸载它(它们)。
升级了 0 个软件包,新安装了 0 个软件包,要卸载 0 个软件包,有 94 个软件包未被升级。
3.安装CUDA
CUDA是NVIDIA的编程语言平台,想使用GPU就必须要使用cuda。
(1)下载CUDA8.0
首先在官网上(https://developer.nvidia.com/cuda-downloads)下载CUDA,选择自己合适的版本。
该链接界面只显示最新版本。若需要下载以前的版本,可在页面下方点击Legacy Releases,选择自己需要的其他版本,这里安装的是cuda8.0。
这里写图片描述
在Windows中使用迅雷下载,然后再Ubuntu中使用,这样比较快。

图2.CUDA下载
(2)安装CUDA
下载完成后执行以下命令:
sudo chmod 777 cuda_8.0.44_linux.run

sudo ./cuda_8.0.44_linux.run
(注意:执行后会先出现一个声明,需要阅读到100%,同意声明后才会开始安装。)
安装时首先会有一系列提示让你确认,但是注意,有个让你选择是否安装nvidia361驱动时,一定要选择否:
Install NVIDIA Accelerated Graphics Driver for Linux-x86_64 361.62?因为前面我们已经安装了更加新的nvidia384,所以这里不要选择安装。其余的都直接默认或者选择是即可。
可能出现的错误:
安装cuda时可能有下面的信息:
Installing the CUDA Toolkit in /usr/local/cuda-8.0 …
Missing recommended library: libGLU.so
Missing recommended library: libX11.so
Missing recommended library: libXi.so
Missing recommended library: libXmu.so
原因是缺少相关的依赖库,安装相应库就解决了:
sudo apt-get install freeglut3-dev build-essential libx11-dev libxmu-dev libxi-dev libgl1-mesa-glx libglu1-mesa libglu1-mesa-dev再次安装,就不再提示了。
安装成功后会出现如下界面:
===========
= Summary =
===========
Driver: Not Selected
Toolkit: Installed in /usr/local/cuda-8.0
Samples: Installed in /home/textminer
Please make sure that
– PATH includes /usr/local/cuda-8.0/bin
– LD_LIBRARY_PATH includes /usr/local/cuda-8.0/lib64, or, add /usr/local/cuda-8.0/lib64 to /etc/ld.so.conf and run ldconfig as root
To uninstall the CUDA Toolkit, run the uninstall script in /usr/local/cuda-8.0/bin
Please see CUDA_Installation_Guide_Linux.pdf in /usr/local/cuda-8.0/doc/pdf for detailed information on setting up CUDA.
***WARNING: Incomplete installation! This installation did not install the CUDA Driver. A driver of version at least 361.00 is required for CUDA 8.0 functionality to work.
To install the driver using this installer, run the following command, replacing with the name of this run file:
sudo .run -silent -driver
Logfile is /opt/temp//cuda_install_6583.log
(3)环境变量配置
打开~/.bashrc文件: sudo gedit ~/.bashrc 将以下内容写入到~/.bashrc尾部:
export CUDA_HOME=/usr/local/cuda-8.0
export LD_LIBRARY_PATH=/usr/local/cuda-8.0/lib64:/usr/local/cuda-8.0/extras/CUPTI/lib64:$LD_LIBRARY_PATHs
export PATH=/usr/local/cuda-8.0/bin:$PATH
export LD_LIBRARY_PATH="/usr/local/cuda-8.0/lib64:/usr/local/cuda-8.0/extras/CUPTI/lib64:/usr/local/cuda-8.0/lib64:/usr/local/cuda-8.0/lib64"
刷新:
source ~/.bashrc(4)配置cuDNN
注意:首次配置cuDNN时我是下载的cuDNN6.0版本,但是后来在编译fast rcnn及SSD时发现有很多问题是由于cuDNN版本不匹配引起的,因此后来又手动删除掉了cuDNN6.0的include和lib文件,重新下载cuDNN5.1版本并重新编译caffe。
cuDNN是GPU加速计算深层神经网络的库。 首先去官网https://developer.nvidia.com/rdp/cudnn-download 下载cuDNN,需要注册一个账号才能下载。
注册后的下载网址:https://developer.nvidia.com/rdp/cudnn-archive
在Windows中使用迅雷下载,然后再Ubuntu中使用,这样比较快。

图3.cuDNN下载
下载cuDNN5.1 之后进行解压:
sudo tar -zxvf ./cudnn-8.0-linux-x64-v5.1.tgz进入cuDNN5.1 解压之后的include目录,在命令行进行如下操作:
cd cuda/include
sudo cp cudnn.h /usr/local/cuda/include  #复制头文件
再进入lib64目录下的动态文件进行复制和链接:
(这里的libcudnn.so.5.1.10是固有文件,而libcudnn.so.5是libcudnn.so.5.1.10链接得到的动态文件,libcudnn.so是libcudnn.so.5链接得到的动态文件。)
cd ..
cd lib64
sudo cp lib* /usr/local/cuda/lib64/   #复制动态链接库
cd /usr/local/cuda/lib64/
sudo rm -rf libcudnn.so libcudnn.so.5 #删除原有动态文件sudo ln -s libcudnn.so.5.1.10 libcudnn.so.5
#生成软衔接(注意这里要和自己下载的cudnn版本对应,可以在/usr/local/cuda/lib64下查看自己libcudnn的版本)
sudo ln -s libcudnn.so.5 libcudnn.so #生成软链接
这里需要注意上面这个命令,网上有人的第三行命令为:
sudo ln -s libcudnn.so.5.1.5 libcudnn.so.5 #生成软衔接起初我执行的也是上条链接 libcudnn.so.5.1.5 的命令,但是后面编译caffe时出错,报错内容为 /usr/bin/ld: 找不到 -lcudnn,所以这里需要先查看一下自己应该链接的是 libcudnn.so.5.1.10 还是 libcudnn.so.5.1.5 ,查看方法为下:
locate libcudnn.so我执行完后显示如下:
yhao@yhao-X550VB:~$ locate libcudnn.so
/home/yhao/.local/share/Trash/files/libcudnn.so
/home/yhao/.local/share/Trash/files/libcudnn.so.5
/home/yhao/.local/share/Trash/files/libcudnn.so.5.1.10
/home/yhao/.local/share/Trash/files/cuda/lib64/libcudnn.so
/home/yhao/.local/share/Trash/files/cuda/lib64/libcudnn.so.5
/home/yhao/.local/share/Trash/files/cuda/lib64/libcudnn.so.5.1.10
/home/yhao/.local/share/Trash/info/libcudnn.so.5.1.10.trashinfo
/home/yhao/.local/share/Trash/info/libcudnn.so.5.trashinfo
/home/yhao/.local/share/Trash/info/libcudnn.so.trashinfo
/home/yhao/cuda/lib64/libcudnn.so
/home/yhao/cuda/lib64/libcudnn.so.5
/home/yhao/cuda/lib64/libcudnn.so.5.1.10
/usr/local/lib/libcudnn.so
/usr/local/lib/libcudnn.so.5
可以看到我的文件是 libcudnn.so.5.1.10 ,并没有 libcudnn.so.5.1.5,所以第三行命令我链接的是 libcudnn.so.5.1.10 ,这里第三行链接命令视你的查看结果而定。
注意:下面这个步骤不能缺少!!否则可能链接失败!
执行
sudo ldconfig -v

#必须在/usr/local/cuda/lib64/目录下执行,否则可能会报
libcudnn.so.5: cannot open shared object file:
No such file or directory
或者
sudo ldconfig /usr/local/cuda/lib64至此,cudnn就配置完成了。
安装完成后可用 nvcc -V 命令验证是否安装成功,若出现以下信息则表示安装成功:
yhao@yhao-X550VB:~$ nvcc -V
nvcc: NVIDIA (R) Cuda compiler driver
Copyright (c) 2005-2016 NVIDIA
Corporation Built on Tue_Jan_10_13:22:03_CST_2017
Cuda compilation tools, release 8.0, V8.0.61
(5)测试CUDA的samples
cd /usr/local/cuda-8.0/samples/1_Utilities/deviceQuery
sudo make
sudo ./deviceQuery
如果显示一些关于GPU的信息,则说明安装成功。

例二:
cd /usr/local/cuda/samples/5_Simulations/fluidsGL
sudo make clean && sudo make
./fluidsGL
自带例子测试通过,Cuna8.0安装配置完成!

参考:
https://blog.csdn.net/jiangyanting2011/article/details/78873113#commentBox
https://blog.csdn.net/CAU_Ayao/article/details/80578600#commentBox
https://blog.csdn.net/yhaolpz/article/details/71375762
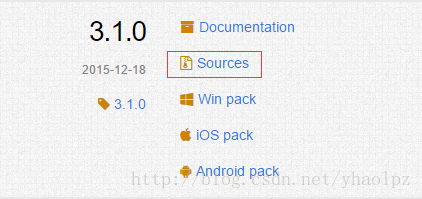
4.安装OpenCV3.1.0
事实证明使用conda便捷安装的opencv是阉割版,不能实现视频和摄像头的读取功能,所以需要自己手动编译。
(1)下载opencv,我在window中用迅雷下载,下载后放到Ubuntu中,这样比较快。
进入官网 : http://opencv.org/releases.html , 选择 3.1.0 版本的 source , 下载 opencv-3.1.0.zip
解压后,放在软件安装目录下,我是放在了“/home/zqzy”目录下了
(2)更新,否则可能会面会报错
sudo apt-get update
sudo apt-get upgrade
(3)安装依赖
sudo apt-get install build-essential
sudo apt-get install cmake git libgtk2.0-dev pkg-config libavcodec-dev libavformat-dev libswscale-dev
sudo apt-get install python-dev python-numpy libtbb2 libtbb-dev libjpeg-dev libpng-dev libtiff-dev libjasper-dev libdc1394-22-dev
sudo apt-get install libavcodec-dev libavformat-dev libswscale-dev libv4l-dev
sudo apt-get install libxvidcore-dev libx264-dev
sudo apt-get install libgtk-3-dev
sudo apt-get install libatlas-base-dev gfortran pylint
sudo apt-get install python2.7-dev python3.5-dev
sudo apt-get install build-essential
sudo apt-get install cmake git libgtk2.0-dev pkg-config libavcodec-dev libavformat-dev libswscale-dev
sudo apt-get install python-dev python-numpy libtbb2 libtbb-dev libjpeg-dev libpng-dev libtiff-dev libjasper-dev libdc1394-22-dev # 处理图像所需的包
sudo apt-get install libavcodec-dev libavformat-dev libswscale-dev libv4l-dev liblapacke-dev
sudo apt-get install libxvidcore-dev libx264-dev # 处理视频所需的包
sudo apt-get install libatlas-base-dev gfortran # 优化opencv功能
sudo apt-get install ffmpeg
(4)修改 sudo gedit opencv-3.1.0/modules/cudalegacy/src/graphcuts.cpp 文件
如果不修改的话,在执行 make -j8 命令编译到 92% 时可能会出现以下错误:
modules/cudalegacy/src/graphcuts.cpp:120:54: error:
‘NppiGraphcutState’ has not been declared
typedef NppStatus (*init_func_t)(NppiSize oSize,
NppiGraphcutState** ppState, Npp8u* pDeviceMem);
由于opecv3.1与cuda8.0不兼容导致的。解决办法:
修改 opencv-3.1.0/modules/cudalegacy/src/graphcuts.cpp 文件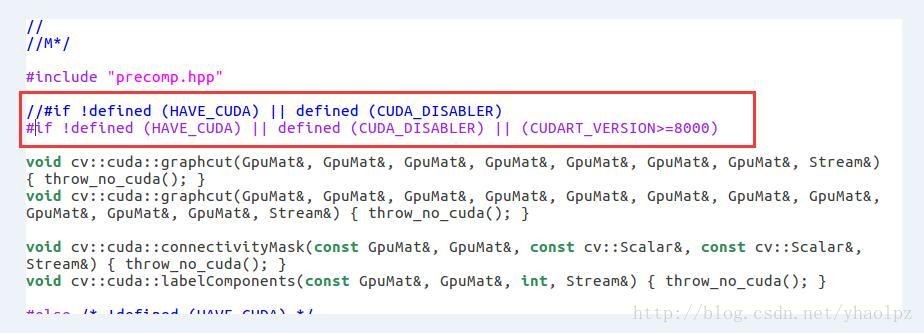
(5)编译
cd  /home/zqzy/opencv-3.1.0

mkdir build # 创建编译的文件目录

cd build

cmake -D CMAKE_BUILD_TYPE=Release -D CMAKE_INSTALL_PREFIX=/usr/local ..

sudo make -j8  #编译
(6)编译成功后安装:
sudo make install #安装(7)安装完成后通过查看 opencv 版本验证是否安装成功:
pkg-config --modversion opencv 附上测试摄像头的代码:
#!/usr/bin/python
# -*- coding: UTF-8 -*-
# 打开摄像头并灰度化显示
import cv2

capture = cv2.VideoCapture(0)

while(True):
    # 获取一帧
    ret, frame = capture.read()
    # 将这帧转换为灰度图
    gray = cv2.cvtColor(frame, cv2.COLOR_BGR2GRAY)

    cv2.imshow('frame', gray)
    if cv2.waitKey(1) == ord('q'):
        break
capture.release()
cv2.destroyAllWindows()
参考:https://blog.csdn.net/yhaolpz/article/details/71375762#t8
5.安装caffe
1)安装依赖
sudo apt-get install libprotobuf-dev libleveldb-dev libsnappy-dev libopencv-dev libhdf5-serial-dev protobuf-compiler
sudo apt-get install --no-install-recommends libboost-all-dev
sudo apt-get install libatlas-base-dev
sudo apt-get install libgflags-dev libgoogle-glog-dev liblmdb-dev
sudo apt-get install build-essential
sudo apt-get install python-dev
(2)下载caffe
git clone https://github.com/BVLC/caffe.git(3)将caffe-master修改为caffe;
mv caffe-master caffe进入 caffe ,将 Makefile.config.example 文件复制一份并更名为 Makefile.config ,也可以在 caffe 目录下直接调用以下命令完成复制操作 :
sudo cp Makefile.config.example Makefile.config(4)修改Makefile.config文件
a.使用 cudnn
USE_CUDNN := 1

b.使用的 opencv 版本是 3
OPENCV_VERSION := 3

c.使用 python 接口
WITH_PYTHON_LAYER := 1

d.删去CUDA_ARCH 的前两行,-gencode arch=compute_20,code=sm_20 \
		-gencode arch=compute_20,code=sm_21 \

# For CUDA < 8.0, comment the *_60 and *_61 lines for compatibility.
CUDA_ARCH := -gencode arch=compute_20,code=sm_20 \
		-gencode arch=compute_20,code=sm_21 \
                -gencode arch=compute_30,code=sm_30 \
		-gencode arch=compute_35,code=sm_35 \
		-gencode arch=compute_50,code=sm_50 \
		-gencode arch=compute_52,code=sm_52 \
		-gencode arch=compute_60,code=sm_60 \
		-gencode arch=compute_61,code=sm_61 \
		-gencode arch=compute_61,code=compute_61


e.重要的一项 :
将# Whatever else you find you need goes here.下面的
INCLUDE_DIRS := $(PYTHON_INCLUDE) /usr/local/include
LIBRARY_DIRS := $(PYTHON_LIB) /usr/local/lib /usr/lib
修改为:
INCLUDE_DIRS := $(PYTHON_INCLUDE) /usr/local/include /usr/include/hdf5/serial
LIBRARY_DIRS := $(PYTHON_LIB) /usr/local/lib /usr/lib /usr/lib/x86_64-linux-gnu /usr/lib/x86_64-linux-gnu/hdf5/serial

这是因为ubuntu16.04的文件包含位置发生了变化,尤其是需要用到的hdf5的位置,所以需要更改这一路径
这里附上我修改后的针对python2的Makefile.config:
## Refer to http://caffe.berkeleyvision.org/installation.html
# Contributions simplifying and improving our build system are welcome!

# cuDNN acceleration switch (uncomment to build with cuDNN).
USE_CUDNN := 1

# CPU-only switch (uncomment to build without GPU support).
# CPU_ONLY := 1

# uncomment to disable IO dependencies and corresponding data layers
# USE_OPENCV := 0
# USE_LEVELDB := 0
# USE_LMDB := 0

# uncomment to allow MDB_NOLOCK when reading LMDB files (only if necessary)
#	You should not set this flag if you will be reading LMDBs with any
#	possibility of simultaneous read and write
# ALLOW_LMDB_NOLOCK := 1

# Uncomment if you're using OpenCV 3
OPENCV_VERSION := 3

# To customize your choice of compiler, uncomment and set the following.
# N.B. the default for Linux is g++ and the default for OSX is clang++
# CUSTOM_CXX := g++

# CUDA directory contains bin/ and lib/ directories that we need.
CUDA_DIR := /usr/local/cuda
# On Ubuntu 14.04, if cuda tools are installed via
# "sudo apt-get install nvidia-cuda-toolkit" then use this instead:
# CUDA_DIR := /usr

# CUDA architecture setting: going with all of them.
# For CUDA < 6.0, comment the *_50 through *_61 lines for compatibility.
# For CUDA < 8.0, comment the *_60 and *_61 lines for compatibility.
CUDA_ARCH := -gencode arch=compute_30,code=sm_30 \
		-gencode arch=compute_35,code=sm_35 \
		-gencode arch=compute_50,code=sm_50 \
		-gencode arch=compute_52,code=sm_52 \
		-gencode arch=compute_60,code=sm_60 \
		-gencode arch=compute_61,code=sm_61 \
		-gencode arch=compute_61,code=compute_61

# BLAS choice:
# atlas for ATLAS (default)
# mkl for MKL
# open for OpenBlas
BLAS := atlas
# Custom (MKL/ATLAS/OpenBLAS) include and lib directories.
# Leave commented to accept the defaults for your choice of BLAS
# (which should work)!
# BLAS_INCLUDE := /path/to/your/blas
# BLAS_LIB := /path/to/your/blas

# Homebrew puts openblas in a directory that is not on the standard search path
# BLAS_INCLUDE := $(shell brew --prefix openblas)/include
# BLAS_LIB := $(shell brew --prefix openblas)/lib

# This is required only if you will compile the matlab interface.
# MATLAB directory should contain the mex binary in /bin.
# MATLAB_DIR := /usr/local
# MATLAB_DIR := /Applications/MATLAB_R2012b.app

# NOTE: this is required only if you will compile the python interface.
# We need to be able to find Python.h and numpy/arrayobject.h.
PYTHON_INCLUDE := /usr/include/python2.7 \
		/usr/lib/python2.7/dist-packages/numpy/core/include
# Anaconda Python distribution is quite popular. Include path:
# Verify anaconda location, sometimes it's in root.
# ANACONDA_HOME := $(HOME)/anaconda
# PYTHON_INCLUDE := $(ANACONDA_HOME)/include \
		# $(ANACONDA_HOME)/include/python2.7 \
		# $(ANACONDA_HOME)/lib/python2.7/site-packages/numpy/core/include

# Uncomment to use Python 3 (default is Python 2)
# PYTHON_LIBRARIES := boost_python3 python3.5m
# PYTHON_INCLUDE := /usr/include/python3.5m \
#                 /usr/lib/python3.5/dist-packages/numpy/core/include

# We need to be able to find libpythonX.X.so or .dylib.
PYTHON_LIB := /usr/lib
# PYTHON_LIB := $(ANACONDA_HOME)/lib

# Homebrew installs numpy in a non standard path (keg only)
# PYTHON_INCLUDE += $(dir $(shell python -c 'import numpy.core; print(numpy.core.__file__)'))/include
# PYTHON_LIB += $(shell brew --prefix numpy)/lib

# Uncomment to support layers written in Python (will link against Python libs)
WITH_PYTHON_LAYER := 1

# Whatever else you find you need goes here.
#INCLUDE_DIRS := $(PYTHON_INCLUDE) /usr/local/include
#LIBRARY_DIRS := $(PYTHON_LIB) /usr/local/lib /usr/lib

INCLUDE_DIRS := $(PYTHON_INCLUDE) /usr/local/include /usr/include/hdf5/serial
LIBRARY_DIRS := $(PYTHON_LIB) /usr/local/lib /usr/lib /usr/lib/x86_64-linux-gnu /usr/lib/x86_64-linux-gnu/hdf5/serial

# If Homebrew is installed at a non standard location (for example your home directory) and you use it for general dependencies
# INCLUDE_DIRS += $(shell brew --prefix)/include
# LIBRARY_DIRS += $(shell brew --prefix)/lib

# NCCL acceleration switch (uncomment to build with NCCL)
# https://github.com/NVIDIA/nccl (last tested version: v1.2.3-1+cuda8.0)
# USE_NCCL := 1

# Uncomment to use `pkg-config` to specify OpenCV library paths.
# (Usually not necessary -- OpenCV libraries are normally installed in one of the above $LIBRARY_DIRS.)
# USE_PKG_CONFIG := 1

# N.B. both build and distribute dirs are cleared on `make clean`
BUILD_DIR := build
DISTRIBUTE_DIR := distribute

# Uncomment for debugging. Does not work on OSX due to https://github.com/BVLC/caffe/issues/171
# DEBUG := 1

# The ID of the GPU that 'make runtest' will use to run unit tests.
TEST_GPUID := 0

# enable pretty build (comment to see full commands)
Q ?= @
然后修改 caffe 目录下的 Makefile 文件:
将:
NVCCFLAGS +=-ccbin=$(CXX) -Xcompiler-fPIC $(COMMON_FLAGS)
替换为:
NVCCFLAGS += -D_FORCE_INLINES -ccbin=$(CXX) -Xcompiler -fPIC $(COMMON_FLAGS)
将:
LIBRARIES += glog gflags protobuf boost_system boost_filesystem m hdf5_hl hdf5
改为:
LIBRARIES += glog gflags protobuf boost_system boost_filesystem m hdf5_serial_hl hdf5_serial然后修改 /usr/local/cuda/include/host_config.h 文件 :
将
#error-- unsupported GNU version! gcc versions later than 5 are not supported!
改为
//#error-- unsupported GNU version! gcc versions later than 5 are not supported!
OK ,可以开始编译了,在 caffe 目录下执行 :
sudo make all -j8这是如果之前的配置或安装出错,那么编译就会出现各种各样的问题,所以前面的步骤一定要细心。
编译成功后可运行测试:
sudo make runtest -j8错误:
CXX src/caffe/test/test_mvn_layer.cpp
CXX src/caffe/test/test_tanh_layer.cpp
NVCC src/caffe/test/test_im2col_kernel.cu
CXX src/gtest/gtest-all.cpp
CXX/LD -o .build_release/test/test_all.testbin src/caffe/test/test_caffe_main.cpp
.build_release/tools/caffe
.build_release/tools/caffe: error while loading shared libraries: libopencv_core.so.3.1: cannot open shared object file: No such file or directory
Makefile:544: recipe for target 'runtest' failed
make: *** [runtest] Error 127
解决方法:
先去在/usr/local/lib目录下查看,找到了libopencv_core.so.3.1
再接着执行:
cat /etc/ld.so.conf显示内容如下:
include /etc/ld.so.conf.d/*.conf
执行:
sudo gedit /etc/ld.so.conf添加内容:
/usr/local/lib
执行:
sudo ldconfig最后再执行:
sudo make runtest -j8参考:https://blog.csdn.net/sinat_23619409/article/details/85918843

参考:https://blog.csdn.net/yhaolpz/article/details/71375762#t8
6.安装pycaffe
首先编译 pycaffe :
cd caffe

sudo make pycaffe -j8
以下是我编译 pycaffe 时出现的错误:
python/caffe/_caffe.cpp:10:31: fatal error: numpy/arrayobject.h: 没有那个文件或目录解决方法:
sudo apt-get install python-numpy此外也可能是由于 Makefile.config 文件中 python 路径设置错误出现的错误,可根据上一步检查一下,也可能出现别的错误,百度谷歌之~
添加环境变量:
sudo gedit ~/.bashrc
最后一行添加export PYTHONPATH=/home/zqzy/caffe/python:$PYTHONPATH
source ~/.bashrc
编译 pycaffe 成功后,验证一下是否可以在 python 中导入 caffe 包,首先进入 python 环境:
python

再导入caffe:

import caffe
若不报错则表示 caffe 的 python 接口已正确编译,但是应该不会那么顺利,以下是我导入 caffe 时出现的错误:
错误1:
ImportError: No module named skimage.io解决方法:
sudo -H pip install --upgrade pip  #升级 pip
sudo -H pip install -U scikit-image
错误2:
from google.protobuf.internal import enum_type_wrapper ImportError: No module named google.protobuf解决方法:
sudo -H pip install protobuf参考:https://blog.csdn.net/yhaolpz/article/details/71375762#t8