Spring @ 注解。
文章目录
Spring IoC 常用注解。
使用注解之前需要的 jar 包。
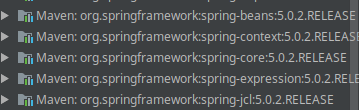
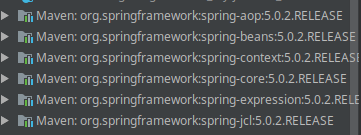
使用注解需要的 jar 包。
+ aop。
xml 约束头。
<?xml version="1.0" encoding="UTF-8"?>
<beans xmlns="http://www.springframework.org/schema/beans"
       xmlns:xsi="http://www.w3.org/2001/XMLSchema-instance"
       xmlns:context="http://www.springframework.org/schema/context"
       xsi:schemaLocation="http://www.springframework.org/schema/beans
                http://www.springframework.org/schema/beans/spring-beans.xsd
http://www.springframework.org/schema/context
                http://www.springframework.org/schema/context/spring-context.xsd
">
Conponent。
@Component(value=“accountService”)
value:指定 bean 的 id。
如果不写,ta 的默认值是当前类名,首字母小写。
注解:如果只有一个 value 属性,可以省略 value。
@Component(“accountService”)
xml 配置注解扫描。
<?xml version="1.0" encoding="UTF-8"?>
<beans xmlns="http://www.springframework.org/schema/beans"
       xmlns:xsi="http://www.w3.org/2001/XMLSchema-instance"
       xmlns:context="http://www.springframework.org/schema/context"
       xsi:schemaLocation="http://www.springframework.org/schema/beans
                http://www.springframework.org/schema/beans/spring-beans.xsd
http://www.springframework.org/schema/context
                http://www.springframework.org/schema/context/spring-context.xsd
">

    <!--
    <bean id="accountService" class="com.geek.service.impl.AccountServiceImpl"/>

    <bean id="accountDao" class="com.geek.dao.impl.AccountDaoImpl"/>
-->

    <!-- 告知 Spring 在创建容器时扫描的包。
        配置所需要的标签不在 Beans 的约束中,而在 context 的命名空间的约束中。
    -->
    <context:component-scan base-package="com.geek"/>


</beans>
@Controller,@Service,@Repository
- @Controller ——> 表现层。
- @Service ——> 业务层。
- @Repository ——> 持久层。
作用和 @Component 一样。使三层构架更清晰。
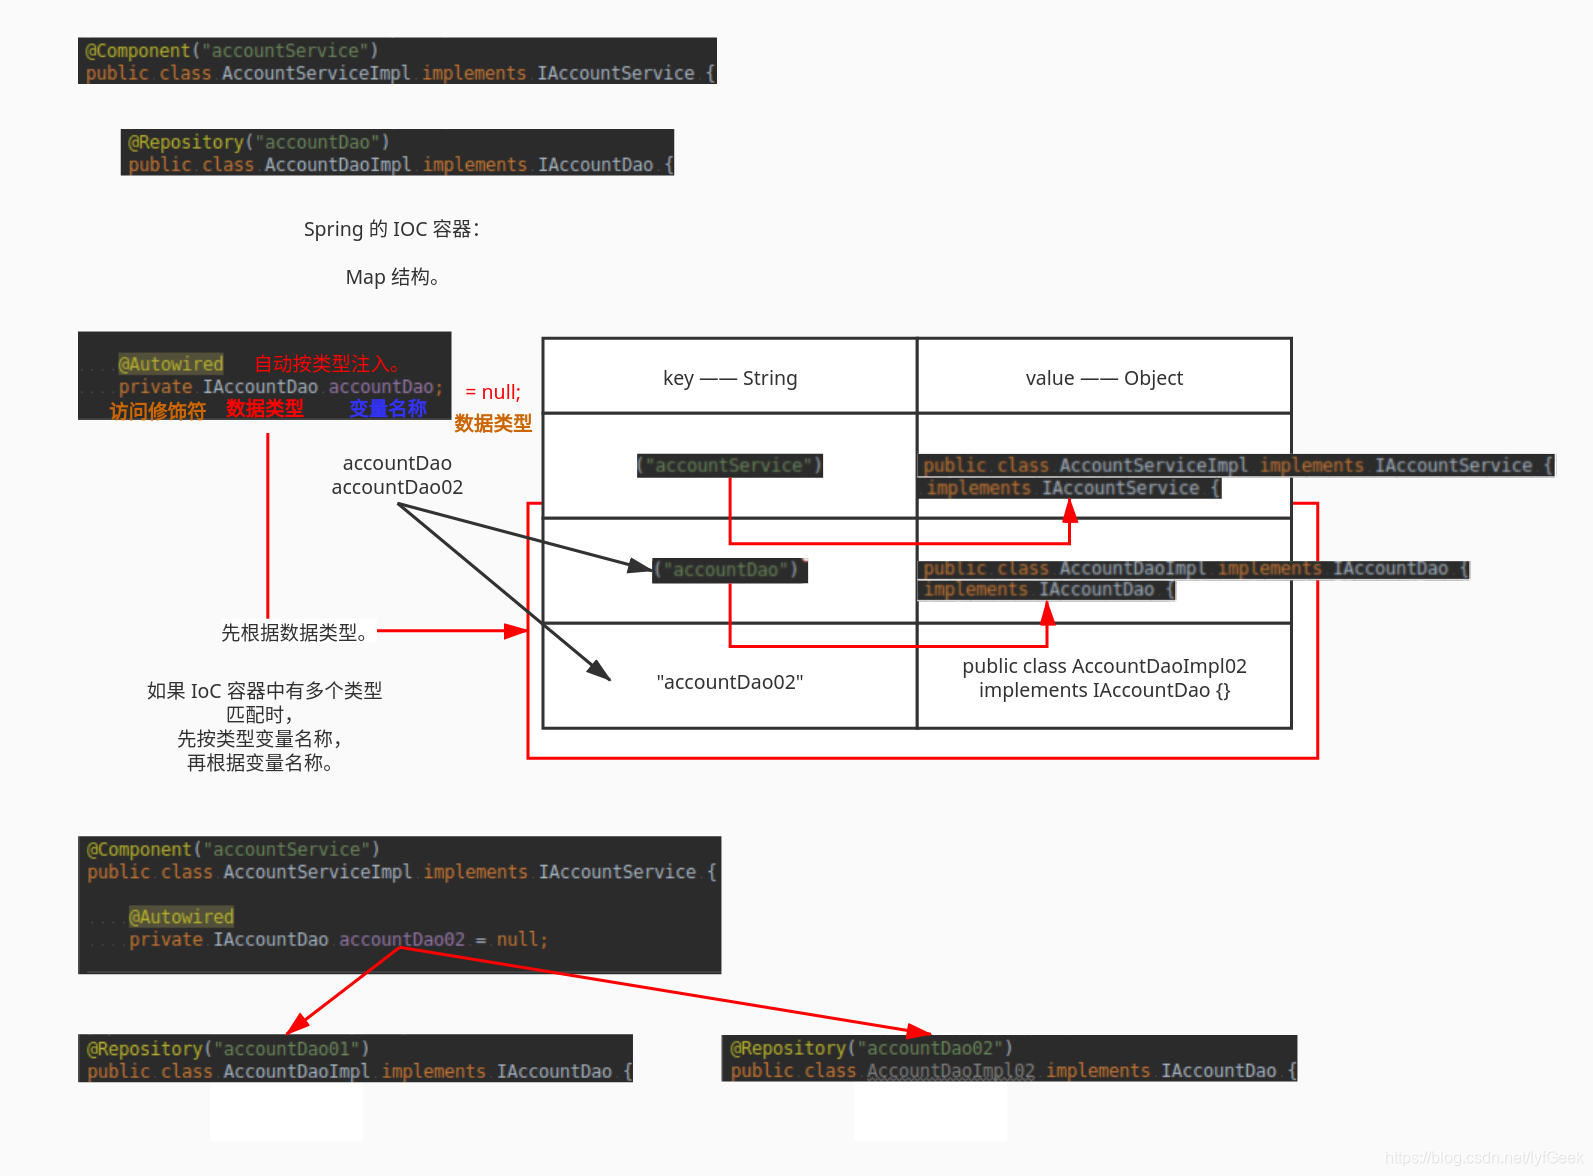
@Repository("accountDao")
public class AccountDaoImpl implements IAccountDao {
@Component("accountService")
public class AccountServiceImpl implements IAccountService {
package com.geek.ui;

import com.geek.dao.IAccountDao;
import com.geek.service.IAccountService;
import org.springframework.context.support.ClassPathXmlApplicationContext;

/**
 * 模拟一个表现层,用于调用业务层。
 */
public class Client {

    /**
     * 获取 SpringIoC 核心容器,并根据 id 获取对象。
     *
     * @param args
     */
    public static void main(String[] args) {

        // 创建核心容器对象。
        ClassPathXmlApplicationContext applicationContext = new ClassPathXmlApplicationContext("bean.xml");
        // 根据 id 获取 Bean 对象。
        IAccountService accountService = (IAccountService) applicationContext.getBean("accountService");

        System.out.println("accountService = " + accountService);

        IAccountDao accountDao = applicationContext.getBean("accountDao", IAccountDao.class);

        System.out.println("accountDao = " + accountDao);
    }
}
注入。
@Autowired
 * 用于注入数据的注解。
 *      ==> xml 中的 bean 标签中 <property></property>。
 *      @Autowired
 *          自动按照类型注入。只要容器中有唯一一个 bean 对象类型和要注入的变量类型匹配,就可以注入成功。
 *          set 方法可以不要了。
如果 IoC 容器中有多个类型匹配时,先按类型变量名称,再根据变量名称。
进化:@Qualifier。(必须和 @Autowired 一起使用)。
在按照类型注入的基础上再按名称注入。
属性。
value:指定注入 bean 的 id。
    @Autowired
    @Qualifier("accountDao01")
    private IAccountDao accountDao = null;
//    private IAccountDao accountDao02 = null;
必须和 @Autowired 一起使用。
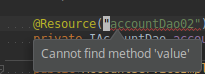
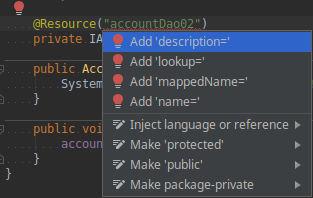
再进化。@Resource。
直接按照 bean 的 id 注入,可以独立使用。不再需要 @Autowired。
但属性为 name,用于指定 bean 的 id。

以上,只能少注入其他 bean 类型数据,基本类型和 String 类型不能使用以上方式注入。另外,集合类型的注入只能用 xml 实现。
↓↓↓
@Value。(用于注入基本类型和 String 类型的数据)。
- 属性:value。用于指定数据的值。
- 也可以使用 Spring 的 SPEL (Spring 的 EL 表达式)。
- ${表达式}。
改变作用范围。@scope。
- 属性:value。
指定范围。
singleton。默认。
prototype。
生命周期相关。@PreDestroy @PostConstruct。
- @PreDestroy 用于指定销毁方法。
- @PostConstruct 用于指定初始化方法。
持久层:dbutils。
// 当我们使用注解配置方法时,如果方法有参数,Spring 会去容器中查找有没有可用的 bean。
纯注解。
@Configuration
@ComponentScan(basePackages = {“com.geek”})// == value。(属性)。
@Import(JDBCConfig.class)// 主配置类 import 子配置类。
@Bean(“queryRunner”)
@Scope(“prototype”)
@PropertySource(“classpath:jdbcConfig.properties”)
package com.geek.config;
import com.mchange.v2.c3p0.ComboPooledDataSource;
import org.apache.commons.dbutils.QueryRunner;
import org.springframework.context.annotation.Bean;
import org.springframework.context.annotation.ComponentScan;
import org.springframework.context.annotation.Configuration;
import javax.sql.DataSource;
import java.beans.PropertyVetoException;
/**
* 配置类。
* 作用和 bean.xml 一样。
*/
// 指定当前类是一个配置类。
@Configuration
// 用于通过注解指定 Spring 在创建容器时需要扫描的包。
@ComponentScan(basePackages = {"com.geek"})// == value。(属性)。
// <context:component-scan base-package="com.geek"/>
public class SpringConfiguration {
/**
* 创建一个 QueryRunner 对象。
*
* @param dataSource
* @return
*/
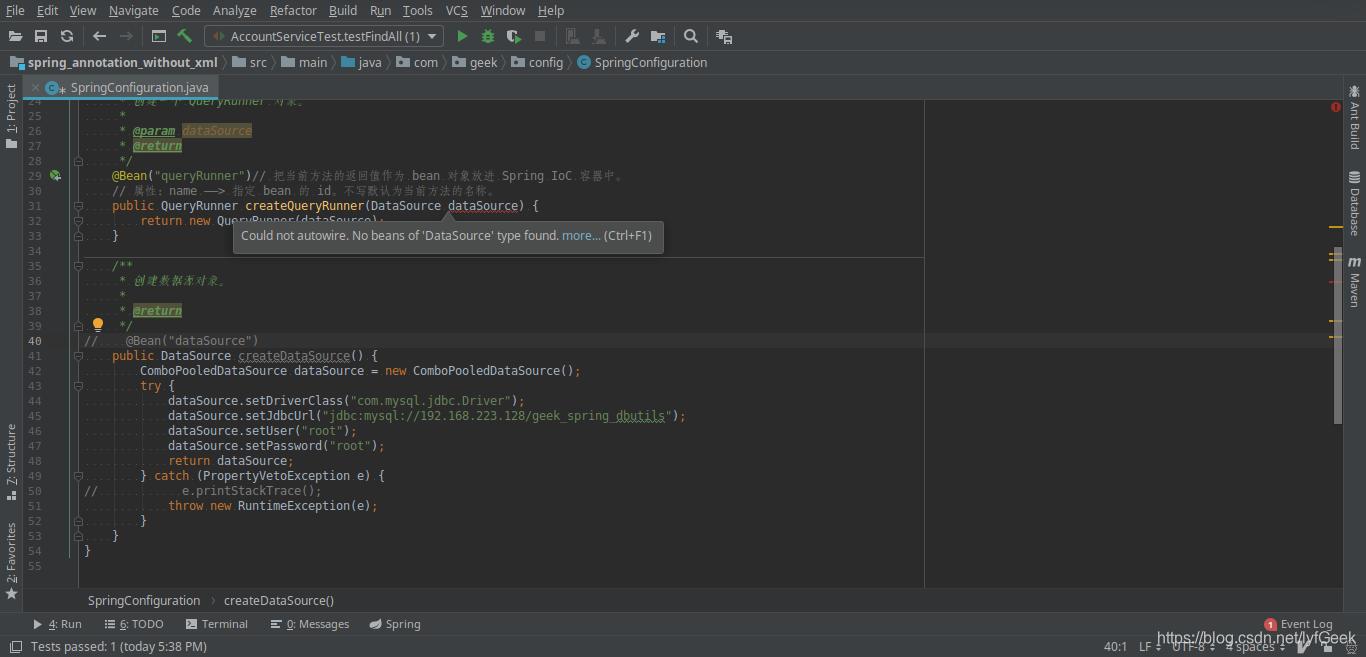
@Bean("queryRunner")// 把当前方法的返回值作为 bean 对象放进 Spring IoC 容器中。
// 属性:name ——> 指定 bean 的 id。不写默认为当前方法的名称。
public QueryRunner createQueryRunner(DataSource dataSource) {
// 当我们使用注解配置方法时,如果方法有参数,Spring 会去容器中查找有没有可用的 bean。
// 查找的方式的 @Autowired 的作用是一样的。
return new QueryRunner(dataSource);
}
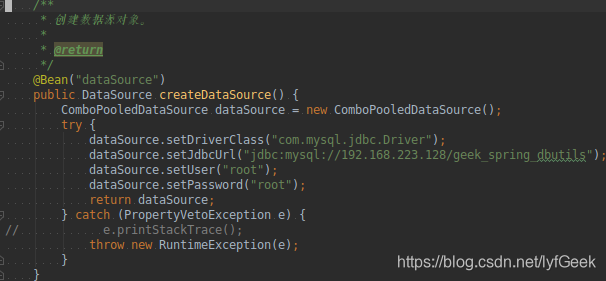
/**
* 创建数据源对象。
*
* @return
*/
@Bean("dataSource")
public DataSource createDataSource() {
ComboPooledDataSource dataSource = new ComboPooledDataSource();
try {
dataSource.setDriverClass("com.mysql.jdbc.Driver");
dataSource.setJdbcUrl("jdbc:mysql://192.168.223.128/geek_spring_dbutils");
dataSource.setUser("root");
dataSource.setPassword("root");
return dataSource;
} catch (PropertyVetoException e) {
// e.printStackTrace();
throw new RuntimeException(e);
}
}
}
测试类中,
ApplicationContext applicationContext = new ClassPathXmlApplicationContext("bean.xml");
不能再使用。
而是 ApplicationContext 的另一个实现类 AnnotationConfigApplicationContext。
ApplicationContext applicationContext = new AnnotationConfigApplicationContext(SpringConfiguration.class);
多例 or 单例?
package com.geek.test;

import com.geek.config.SpringConfiguration;
import org.apache.commons.dbutils.QueryRunner;
import org.junit.Test;
import org.springframework.context.ApplicationContext;
import org.springframework.context.annotation.AnnotationConfigApplicationContext;

public class QueryRunnerTest {

    @Test
    public void testQueryRunner() {

        // 获取容器。
        ApplicationContext applicationContext = new AnnotationConfigApplicationContext(SpringConfiguration.class);
        // 获取 QueryRunner 对象。
        QueryRunner queryRunner = applicationContext.getBean("queryRunner", QueryRunner.class);
        QueryRunner queryRunner1 = applicationContext.getBean("queryRunner", QueryRunner.class);
        System.out.println(queryRunner == queryRunner1);

    }
}

~~~

true
说明是单例。
@Scope
    @Bean("queryRunner")// 把当前方法的返回值作为 bean 对象放进 Spring IoC 容器中。
    // 属性:name ——> 指定 bean 的 id。不写默认为当前方法的名称。
    @Scope("prototype")
    public QueryRunner createQueryRunner(DataSource dataSource) {
// 指定当前类是一个配置类。
@Configuration
// 当配置类作为 AnnotationConfigApplicationContext 对象创建的参数时,该注解可以不写。
ApplicationContext applicationContext = new AnnotationConfigApplicationContext(SpringConfiguration.class);
@Configuration 可以不写是因为参数指定了 .class。
参数中指定了 .class,那么 @ComponentScan(basePackages = {"com.geek"})@ComponentScan(basePackages = {"com.geek"}) 也可以不写。
如果都不想写。又出场一个注解。
@Import。
用于导入其他的配置类。
@PropertySource
看这里,耦合~!
在 resources 目录下创建配置文件 jdbcConfig.propertis。
jdbc.driverClass=com.mysql.jdbc.Driver
jdbc.url=jdbc:mysql://192.168.223.128/geek_spring_dbutils?characterEncoding=utf-8
jdbc.user=root
jdbc.password=root
在配置类的成员变量上使用 @Value + Spring EL 表达式读取配置文件中的值。
并使用 @PropertySource 指定从哪个配置文件读取。
classpath:表示类路径下。
package com.geek.config;

import com.mchange.v2.c3p0.ComboPooledDataSource;
import org.apache.commons.dbutils.QueryRunner;
import org.springframework.beans.factory.annotation.Value;
import org.springframework.context.annotation.Bean;
import org.springframework.context.annotation.PropertySource;
import org.springframework.context.annotation.Scope;

import javax.sql.DataSource;
import java.beans.PropertyVetoException;

/**
 * 和 Spring 连接相关的配置类。
 */
//@Configuration// 这是第一关。如果有 @Import,这个也可以不写。
@PropertySource("classpath:jdbcConfig.properties")
public class JDBCConfig {

    @Value("${jdbc.driverClass}")
    private String driverClass;
    @Value("${jdbc.url}")
    private String url;
    @Value("${jdbc.user}")
    private String user;
    @Value("${jdbc.password}")
    private String password;

    /**
     * 创建一个 QueryRunner 对象。
     *
     * @param dataSource
     * @return
     */
    @Bean("queryRunner")// 把当前方法的返回值作为 bean 对象放进 Spring IoC 容器中。
    // 属性:name ——> 指定 bean 的 id。不写默认为当前方法的名称。
    @Scope("prototype")
    public QueryRunner createQueryRunner(DataSource dataSource) {
        // 当我们使用注解配置方法时,如果方法有参数,Spring 会去容器中查找有没有可用的 bean。
        // 查找的方式的 @Autowired 的作用是一样的。

        return new QueryRunner(dataSource);
    }

    /**
     * 创建数据源对象。
     *
     * @return
     */
    @Bean("dataSource")
    public DataSource createDataSource() {
        ComboPooledDataSource dataSource = new ComboPooledDataSource();
        try {
//            dataSource.setDriverClass("com.mysql.jdbc.Driver");
//            dataSource.setJdbcUrl("jdbc:mysql://192.168.223.128/geek_spring_dbutils");
//            dataSource.setUser("root");
//            dataSource.setPassword("root");

            dataSource.setDriverClass(driverClass);
            dataSource.setJdbcUrl(url);
            dataSource.setUser(user);
            dataSource.setPassword(password);

            return dataSource;
        } catch (PropertyVetoException e) {
//            e.printStackTrace();
            throw new RuntimeException(e);
        }
    }

}
Spring 整合 JUnit。
测试类的简化。
package com.geek.test;

import com.geek.config.SpringConfiguration;
import com.geek.domain.Account;
import com.geek.service.IAccountService;
import org.junit.Before;
import org.junit.Test;
import org.springframework.context.ApplicationContext;
import org.springframework.context.annotation.AnnotationConfigApplicationContext;

import java.util.List;

/**
 * 使用 JUnit 单元测试。
 */
public class AccountServiceTest {

    private ApplicationContext applicationContext = null;
    private IAccountService accountService = null;

    @Before
    public void init() {
        // 获取容器。
//        ApplicationContext applicationContext = new ClassPathXmlApplicationContext("bean.xml");
        applicationContext = new AnnotationConfigApplicationContext(SpringConfiguration.class);

        // 业务层对象。
        accountService = applicationContext.getBean("accountService", IAccountService.class);
    }

    @Test
    public void testFindAll() {
        // 执行方法。
        List<Account> accounts = accountService.FindAllAccount();
        for (Account account : accounts) {
            System.out.println(account);
        }
    }

    @Test
    public void testFindOne() {

    }

    @Test
    public void testSave() {
        Account account = new Account();
        account.setName("李");
        account.setMoney(1000F);

        // 执行方法。
        accountService.saveAccount(account);
    }

    @Test
    public void testUpdate() {
        Account account = accountService.findAccountById(2);
        account.setName("testUpdate");
        account.setMoney(234F);
        accountService.updateAccount(account);
    }

    @Test
    public void testDelete() {
        accountService.deleteAccount(4);
    }

}
- 应用程序的入口:main();方法。
- JUnit 单元测试中,没有 main();方法也能执行。
JUnit 集成了一个 main();方法。
该方法会判断当前测试类中哪些方法有 @Test 注解。
JUnit 就会让有 @Test 注解的方法执行。
- JUnit 不会管我们是否采用 Spring 框架。
在执行测试方法时,JUnit 根本不知道我们是不是使用了 Spring 框架。
所以也就不会为我们读取配置文件/配置类创建 Spring 核心容器。
综上,当测试方法执行时,没有 IoC 容器,就算写了 @Autowired 注解,也无法实现注入。
Spring 整合 JUnit。
jar 包。
<dependency>
    <groupId>org.springframework</groupId>
    <artifactId>spring-test</artifactId>
    <version>5.0.2.RELEASE</version>
</dependency>
-
使用 JUnit 提供的注解把原有的 main(); 方法替换了,替换成 Spring 提供的
@RunWith。 -
告知 Spring 的运行器,Spring 的 IoC 的创建是基于 xml 还是基于注解的。并且说明位置。
@ContextConfiguration()
- locations ——> 指定 xml 文件的位置,加上 classpath 关键字,表示在类路径下。
- classes ——> 指定注解类所在位置。
- 注:
版本问题。
当使用 Spring 5.x 时,要求 JUnit 的版本 4.12 及以上。
package com.geek.test;

import com.geek.config.SpringConfiguration;
import com.geek.domain.Account;
import com.geek.service.IAccountService;
import org.junit.Before;
import org.junit.Test;
import org.junit.runner.RunWith;
import org.springframework.beans.factory.annotation.Autowired;
import org.springframework.context.ApplicationContext;
import org.springframework.context.annotation.AnnotationConfigApplicationContext;
import org.springframework.test.context.ContextConfiguration;
import org.springframework.test.context.junit4.SpringJUnit4ClassRunner;

import java.util.List;

/**
 * 使用 JUnit 单元测试。
 * Spring 整合 Junit。
 * + 导入 jar 包。(Maven)。
 * + 使用 Junit 提供的注解把原有的 main(); 方法替换了,替换成 Spring 提供的
 * ——> @RunWith
 * <p>
 * + 告知 Spring 的运行器,Spring 的 IoC 的创建是基于 xml 还是基于注解的。并且说明位置。
 * <p>
 * > @ContextConfiguration()
 * > + locations ——> 指定 xml 文件的位置,加上 classpath 关键字,表示在类路径下。
 * > + classes ——> 指定注解类所在位置。
 */
@RunWith(SpringJUnit4ClassRunner.class)
@ContextConfiguration(classes = SpringConfiguration.class)
public class AccountServiceTest {

    @Autowired
    private ApplicationContext applicationContext = null;
    private IAccountService accountService = null;

    @Before
    public void init() {
        // 获取容器。
//        ApplicationContext applicationContext = new ClassPathXmlApplicationContext("bean.xml");
        applicationContext = new AnnotationConfigApplicationContext(SpringConfiguration.class);

        // 业务层对象。
        accountService = applicationContext.getBean("accountService", IAccountService.class);
    }

    @Test
    public void testFindAll() {
        // 执行方法。
        List<Account> accounts = accountService.FindAllAccount();
        for (Account account : accounts) {
            System.out.println(account);
        }
    }

    @Test
    public void testFindOne() {
        Account account = accountService.findAccountById(1);
        System.out.println("account = " + account);
    }

    @Test
    public void testSave() {
        Account account = new Account();
        account.setName("李");
        account.setMoney(1000F);

        // 执行方法。
        accountService.saveAccount(account);
    }

    @Test
    public void testUpdate() {
        Account account = accountService.findAccountById(2);
        account.setName("testUpdate");
        account.setMoney(234F);
        accountService.updateAccount(account);
    }

    @Test
    public void testDelete() {
        accountService.deleteAccount(4);
    }

}
