一、Spring是什么
Spring是一个开源的控制反转(Inversion of Control, IoC)和面向切面(AOP)的容器框架,它的主要目的是简化企业开发。
所谓控制反转就是应用本身不负责依赖对象的创建及维护,依赖对象的创建及维护是由外部容器负责的。这样控制权就由应用转移到了外部容器,控制权的转移就是所谓反转。
例:
public class PersonServiceBean {
    private PersonDao personDao;

    // 通过构造函数参数,让容器把创建好的依赖对象注入进PersonServiceBean,
    // 当然也可以使用setter方法进行注入。
    public PersonServiceBean(PersonDao personDao){
        this.personDao = personDao;
    }

    public void save(Person person){
        personDao.save(person);
    }
}
所谓依赖注入(Dependency Injection)就是指,在运行期,由外部容器动态地将依赖对象注入到组件中。
二、为什么要使用Spring
1,降低组件直接的耦合度,实现软件各层之间的解耦。
2,可以使用容器提供的众多服务,如事务管理服务、消息服务等等。当我们使用容器管理事务时,开发人员就不再需要手工控制事务,也不需要处理复杂的事务传播。
3,容器提供单例模式支持,开发人员不再需要自己编写实现代码。
4,容器提供了AOP技术,利用它很容易实现如权限拦截、运行期监控等功能。
5、容器提供的众多辅助类,使用这些类能够加快应用的开发,如JdbcTemplate、HibernateTemplate。
6、Spring对于主流的应用框架提供了集成支持,如:集成Hibernate、JPA、Struts等,这样更便于应用的开发。
应用轻量级与重量级的划分:
对于Spring容器,它提供了很多服务,但这些服务并不是默认为应用打开的,应用需要某种服务,还需要指明使用该服务,
如果应用使用的服务很少,如只使用了spring核心服务,那么我们可以认为此时应用属于轻量级的,如果应用使用了spring提供的大部分服务,这时应用就属于重量级。
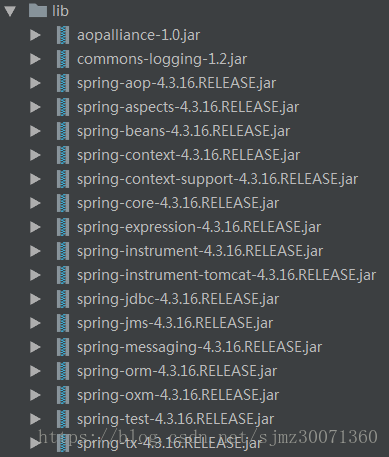
三、使用Spring需要的jar(以4.3.16.RELEASE为例)
使用IDEA创建Spring工程,默认会下载以下jar包
四、实例化Spring容器
实例化Spring容器常用的两种方式:
方式一:在类路径下寻找配置文件来实例化容器(测试、生产环境使用)
ApplicationContext ctx = new ClassPathXmlApplicationContext(new String[]{"beans.xml"});
方式二:在文件系统路径下寻找配置文件来实例化容器(一般测试时使用)
ApplicationContext ctx = new FileSystemXmlApplicationContext(new String[]{"d:\\beans.xml"});
Spring的配置文件可以指定多个,可以通过String数组传入。
五、Spring配置文件(beans.xml)
id属性不支持特殊字符,name可以支持特殊字符
<?xml version="1.0" encoding="UTF-8"?>
<beans xmlns="http://www.springframework.org/schema/beans"
       xmlns:xsi="http://www.w3.org/2001/XMLSchema-instance"
       xsi:schemaLocation="http://www.springframework.org/schema/beans http://www.springframework.org/schema/beans/spring-beans.xsd">
    <bean id="personService" class="cn.sjmz.service.impl.PersonServiceBean"></bean>
</beans>
六、实现解析Spring配置文件解析
1,pom文件中需要引入dom4j 和 jaxen
<!--自己解析spring配置文件用-->
<!-- https://mvnrepository.com/artifact/dom4j/dom4j -->
<dependency>
    <groupId>dom4j</groupId>
    <artifactId>dom4j</artifactId>
    <version>1.6.1</version>
</dependency>
<!--自己解析spring配置文件用-->
<!-- https://mvnrepository.com/artifact/jaxen/jaxen -->
<!--解决 Caused by: java.lang.ClassNotFoundException: org.jaxen.JaxenException -->
<dependency>
    <groupId>jaxen</groupId>
    <artifactId>jaxen</artifactId>
    <version>1.1.6</version>
</dependency>
2,实现代码
public class BeanDefinition {
    private String id;
    private String className;

    public BeanDefinition(String id, String className) {
        this.id = id;
        this.className = className;
    }

    public String getId() {
        return id;
    }

    public void setId(String id) {
        this.id = id;
    }

    public String getClassName() {
        return className;
    }

    public void setClassName(String className) {
        this.className = className;
    }
}
import org.dom4j.Document;
import org.dom4j.Element;
import org.dom4j.XPath;
import org.dom4j.io.SAXReader;

import java.net.URL;
import java.util.ArrayList;
import java.util.HashMap;
import java.util.List;
import java.util.Map;

public class ItcastClassPathXmlApplicationContext {
    private List<BeanDefinition> beanDefinitions = new ArrayList<BeanDefinition>();

    private Map<String, Object> singletons = new HashMap<String, Object>();

    public ItcastClassPathXmlApplicationContext(String fileName) {
        this.readXML(fileName);
        this.instanceBeans();
    }

    /**
     * 完成bean的实例化
     */
    private void instanceBeans() {
        for (BeanDefinition beanDefinition : beanDefinitions) {
            if (beanDefinition.getClassName() != null && (!"".equals(beanDefinition.getClassName().trim()))) {
                try {
                    singletons.put(beanDefinition.getId(), Class.forName(beanDefinition.getClassName()).newInstance());
                } catch (Exception e) {
                    e.printStackTrace();
                }
            }
        }
    }

    /**
     * 读取xml配置文件
     *
     * @param fileName
     */
    public void readXML(String fileName) {
        SAXReader saxReader = new SAXReader();
        Document document = null;
        try {
            URL xmlPath = this.getClass().getClassLoader().getResource(fileName);
            document = saxReader.read(xmlPath);
            Map<String, String> nsMap = new HashMap<String, String>();
            nsMap.put("ns", "http://www.springframework.org/schema/beans");
            XPath xsub = document.createXPath("//ns:beans/ns:bean");
            xsub.setNamespaceURIs(nsMap);
            List<Element> beans = xsub.selectNodes(document);   //获取文档下所有bean节点
            for (Element element : beans) {
                String id = element.attributeValue("id");       //获取id属性值
                String clazz = element.attributeValue("class"); //获取class属性值
                BeanDefinition beanDefinition = new BeanDefinition(id, clazz);
                beanDefinitions.add(beanDefinition);
            }
        } catch (Exception e) {
            e.printStackTrace();
        }
    }

    /**
     * 获取bean实例
     * @param beanName
     * @return
     */
    public Object getBean(String beanName){
        return this.singletons.get(beanName);
    }
}
3、测试代码
import cn.sjmz.service.PersonService;
import org.junit.Test;
import org.springframework.context.ApplicationContext;
import org.springframework.context.support.ClassPathXmlApplicationContext;

public class SpringTest {
    public void setUp() throws Exception {
    }

    @Test
    public void instanceSpring() {
//        ApplicationContext ctx = new ClassPathXmlApplicationContext("beans.xml");
        ItcastClassPathXmlApplicationContext ctx = new ItcastClassPathXmlApplicationContext("beans.xml");
        PersonService personService = (PersonService) ctx.getBean("personService");
        personService.save();
    }
}
七、三种实例化bean的方法
1、使用类构造器实例化
<bean id="personService" class="cn.sjmz.service.impl.PersonServiceBean"></bean>
2、使用静态工厂方法实例化
<bean id="personService2" class="cn.sjmz.service.impl.PersonServiceBeanFactory" factory-method="createPersonServiceBean"></bean>
package cn.sjmz.service.impl;

public class PersonServiceBeanFactory {
    public static PersonServiceBean createPersonServiceBean() {
        return new PersonServiceBean();
    }
}
import cn.sjmz.service.PersonService;
import org.junit.Test;
import org.springframework.context.ApplicationContext;
import org.springframework.context.support.ClassPathXmlApplicationContext;

public class SpringTest {
    public void setUp() throws Exception {
    }

    @Test
    public void instanceSpring() {
        ApplicationContext ctx = new ClassPathXmlApplicationContext("beans.xml");
        PersonService personService = (PersonService) ctx.getBean("personService2");
        personService.save();
    }
}
3、使用实例工厂方法实例化
<bean id="personServiceFactory" class="cn.sjmz.service.impl.PersonServiceBeanFactory"></bean>
<bean id="personService3" factory-bean="personServiceFactory" factory-method="createPersonServiceBean3"></bean>
package cn.sjmz.service.impl;

public class PersonServiceBeanFactory {
    public PersonServiceBean createPersonServiceBean3() {
        return new PersonServiceBean();
    }
}
import cn.sjmz.service.PersonService;
import org.junit.Test;
import org.springframework.context.ApplicationContext;
import org.springframework.context.support.ClassPathXmlApplicationContext;

public class SpringTest {
    public void setUp() throws Exception {
    }

    @Test
    public void instanceSpring() {
        ApplicationContext ctx = new ClassPathXmlApplicationContext("beans.xml");
        PersonService personService = (PersonService) ctx.getBean("personService3");
        personService.save();
    }
}
八、Spring Bean的作用域
singleton:默认值,每次从容器获取的bean为单实例
<bean id="personService" class="cn.sjmz.service.impl.PersonServiceBean"></bean>
import cn.sjmz.service.PersonService;
import org.junit.Test;
import org.springframework.context.ApplicationContext;
import org.springframework.context.support.ClassPathXmlApplicationContext;

public class SpringTest {
    public void setUp() throws Exception {
    }

    @Test
    public void instanceSpring() {
        ApplicationContext ctx = new ClassPathXmlApplicationContext("beans.xml");
        PersonService personService = (PersonService) ctx.getBean("personService");
        PersonService personService2 = (PersonService) ctx.getBean("personService");
        personService.save();
        System.out.println(personService==personService2);  //默认情况下获取的bean为单实例,即引用相同,当前语句输出为true
    }
}
prototype:每次从容器中获取的bean都是新的对象
<bean id="personService" class="cn.sjmz.service.impl.PersonServiceBean" scope="prototype"></bean>
System.out.println(personService==personService2) 输出结果为false
request:web应用用
session:web应用用
global session:web应用用
九、Spring bean实例化的时机
scope为默认值(singleton)的情况下,在容器实例化的时候,会对bean进行实例化。
可以通过设置lazy-init="true",延迟bean的初始化,即容器实例化的时候不进行bean的初始化,而是getBean的时候才进行初始化。建议不要设置为true,因为设置为true只有运行期(即调用getBean的时候)才能发现错误,默认在启动容器的
scope=“prototype”的情况下,在容器实例化的时候,不会对bean进行实例化,而是调用getBean方法的时候,才会实例化bean。
未完,待续。。。