第1章 数仓分层概念
1.1 为什么要分层

1.2 分层结构图
数据分层原理

1、ODS层(原始数据层)
原始数据层,存放原始数据,直接加载原始日志、数据,数据保持原貌不做处理。
2、DWD层(明细数据层)
结构和粒度与ODS层保持一致,对ODS层数据进行清洗(去除空值,脏数据,超过极限范围的数据),也有公司叫DWI。
3、DWS层(服务数据层)
以DWD为基础,进行轻度汇总。一般聚集到以用户当日,设备当日,商家当日,商品当日等等的粒度。
在这层通常会有以某一个维度为线索,组成跨主题的宽表,比如,一个用户的当日的签到数、收藏数、评论数、抽奖数、订阅数、点赞数、浏览商品数、添加购物车数、下单数、支付数、退款数、点击广告数组成的多列表。
4、 ADS层(数据应用层)
数据应用层,也有公司或书把这层命名为APP层、DAL层等。
面向实际的数据需求,以DWD或者DWS层的数据为基础,组成的各种统计报表。
统计结果最终同步到RDS以供BI或应用系统查询使用。
1.3 关于区分数据集市与数据仓库
数据集市(Date Market),早在数据仓库诞生之初,一同并存的就有数据集市的概念。
现在市面上的公司和书籍都对数据集市有不同的概念。
狭义上来讲数据集市,可以理解为数据仓库中为用户提供数据支撑的应用层,比如咱们前文说的ADS层。
广义上,数据集市,所有以主题划分的数据仓库中可供查阅的都可以成为数据集市,包括DWD,DWS,ADS层,甚至包括从Hadoop中同步到RDS的数据都可以成为数据集市。
比如订单主题,我可以提供使用者,从明细,聚合统计,比率分析等全部数据,提供给某个部门查询。那么除了订单还有用户、商品、供应商等等主题分别可以供不同的人员部门使用,这都可以称之为数据集市。
第2章 数仓搭建环境准备
2.1 Hive&MySQL安装
集群规划
|
|
服务器1 |
服务器2 |
服务器3 |
| Hive |
Hive |
|
|
| Mysql |
Mysql |
|
|
2.1.1 Hive&MySQL安装
==============================Begin=====================
第2章 Hive安装
2.1 Hive安装地址
1.Hive官网地址
2.文档查看地址
https://cwiki.apache.org/confluence/display/Hive/GettingStarted
3.下载地址
http://archive.apache.org/dist/hive/
4.github地址
https://github.com/apache/hive
2.2 Hive安装部署
1.Hive安装及配置
(1)把apache-hive-1.2.1-bin.tar.gz上传到linux的/opt/software目录下
(2)解压apache-hive-1.2.1-bin.tar.gz到/opt/module/目录下面
[newbies@hadoop102 software]$ tar -zxvf apache-hive-1.2.1-bin.tar.gz -C /opt/module/(3)修改apache-hive-1.2.1-bin.tar.gz的名称为hive
[newbies@hadoop102 module]$ mv apache-hive-1.2.1-bin/ hive(4)修改/opt/module/hive/conf目录下的hive-env.sh.template名称为hive-env.sh
[newbies@hadoop102 conf]$ mv hive-env.sh.template hive-env.sh(5)配置hive-env.sh文件
(a)配置HADOOP_HOME路径
export HADOOP_HOME=/opt/module/hadoop-2.7.2(b)配置HIVE_CONF_DIR路径
export HIVE_CONF_DIR=/opt/module/hive/conf2.Hadoop集群配置
(1)必须启动hdfs和yarn
[newbies@hadoop102 hadoop-2.7.2]$ sbin/start-dfs.sh
[newbies@hadoop103 hadoop-2.7.2]$ sbin/start-yarn.sh
(2)在HDFS上创建/tmp和/user/hive/warehouse两个目录并修改他们的同组权限可写
[newbies@hadoop102 hadoop-2.7.2]$ bin/hadoop fs -mkdir /tmp
[newbies@hadoop102 hadoop-2.7.2]$ bin/hadoop fs -mkdir -p /user/hive/warehouse

[newbies@hadoop102 hadoop-2.7.2]$ bin/hadoop fs -chmod g+w /tmp
[newbies@hadoop102 hadoop-2.7.2]$ bin/hadoop fs -chmod g+w /user/hive/warehouse
3.Hive基本操作
(1)启动hive
[newbies@hadoop102 hive]$ bin/hive(2)查看数据库
hive> show databases;(3)打开默认数据库
hive> use default;(4)显示default数据库中的表
hive> show tables;(5)创建一张表
hive> create table student(id int, name string);(6)显示数据库中有几张表
hive> show tables;(7)查看表的结构
hive> desc student;(8)向表中插入数据
hive> insert into student values(1000,"ss");(9)查询表中数据
hive> select * from student;(10)退出hive
hive> quit;2.3 将本地文件导入Hive案例
需求
将本地/opt/module/datas/student.txt这个目录下的数据导入到hive的student(id int, name string)表中。
1.数据准备
在/opt/module/datas这个目录下准备数据
(1)在/opt/module/目录下创建datas
[newbies@hadoop102 module]$ mkdir datas(2)在/opt/module/datas/目录下创建student.txt文件并添加数据
[newbies@hadoop102 datas]$ touch student.txt
[newbies@hadoop102 datas]$ vi student.txt
1001	zhangshan
1002	lishi
1003	zhaoliu
注意以tab键间隔。
2.Hive实际操作
(1)启动hive
[newbies@hadoop102 hive]$ bin/hive(2)显示数据库
hive> show databases;(3)使用default数据库
hive> use default;(4)显示default数据库中的表
hive> show tables;(5)删除已创建的student表
hive> drop table student;(6)创建student表, 并声明文件分隔符’\t’
hive> create table student(id int, name string) ROW FORMAT DELIMITED FIELDS TERMINATED
 BY '\t';
(7)加载/opt/module/datas/student.txt 文件到student数据库表中。
hive> load data local inpath '/opt/module/datas/student.txt' into table student;(8)Hive查询结果
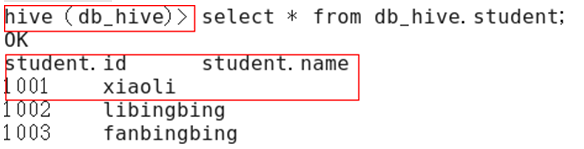
hive> select * from student;
OK
1001	zhangshan
1002	lishi
1003	zhaoliu
Time taken: 0.266 seconds, Fetched: 3 row(s)
3.遇到的问题
再打开一个客户端窗口启动hive,会产生java.sql.SQLException异常。
Exception in thread "main" java.lang.RuntimeException: java.lang.RuntimeException:
 Unable to instantiate
 org.apache.hadoop.hive.ql.metadata.SessionHiveMetaStoreClient
        at org.apache.hadoop.hive.ql.session.SessionState.start(SessionState.java:522)
        at org.apache.hadoop.hive.cli.CliDriver.run(CliDriver.java:677)
        at org.apache.hadoop.hive.cli.CliDriver.main(CliDriver.java:621)
        at sun.reflect.NativeMethodAccessorImpl.invoke0(Native Method)
        at sun.reflect.NativeMethodAccessorImpl.invoke(NativeMethodAccessorImpl.java:57)
        at sun.reflect.DelegatingMethodAccessorImpl.invoke(DelegatingMethodAccessorImpl.java:43)
        at java.lang.reflect.Method.invoke(Method.java:606)
        at org.apache.hadoop.util.RunJar.run(RunJar.java:221)
        at org.apache.hadoop.util.RunJar.main(RunJar.java:136)
Caused by: java.lang.RuntimeException: Unable to instantiate org.apache.hadoop.hive.ql.metadata.SessionHiveMetaStoreClient
        at org.apache.hadoop.hive.metastore.MetaStoreUtils.newInstance(MetaStoreUtils.java:1523)
        at org.apache.hadoop.hive.metastore.RetryingMetaStoreClient.<init>(RetryingMetaStoreClient.java:86)
        at org.apache.hadoop.hive.metastore.RetryingMetaStoreClient.getProxy(RetryingMetaStoreClient.java:132)
        at org.apache.hadoop.hive.metastore.RetryingMetaStoreClient.getProxy(RetryingMetaStoreClient.java:104)
        at org.apache.hadoop.hive.ql.metadata.Hive.createMetaStoreClient(Hive.java:3005)
        at org.apache.hadoop.hive.ql.metadata.Hive.getMSC(Hive.java:3024)
        at org.apache.hadoop.hive.ql.session.SessionState.start(SessionState.java:503)
... 8 more
原因是,Metastore默认存储在自带的derby数据库中,推荐使用MySQL存储Metastore;
2.4 MySql安装
2.4.1 安装包准备
1.查看mysql是否安装,如果安装了,卸载mysql
(1)查看
[root@hadoop102 桌面]# rpm -qa|grep mysql
mysql-libs-5.1.73-7.el6.x86_64
(2)卸载
[root@hadoop102 桌面]# rpm -e --nodeps mysql-libs-5.1.73-7.el6.x86_642.解压mysql-libs.zip文件到当前目录
[root@hadoop102 software]# unzip mysql-libs.zip
[root@hadoop102 software]# ls
mysql-libs.zip
mysql-libs
3.进入到mysql-libs文件夹下
[root@hadoop102 mysql-libs]# ll
总用量 76048
-rw-r--r--. 1 root root 18509960 3月  26 2015 MySQL-client-5.6.24-1.el6.x86_64.rpm
-rw-r--r--. 1 root root  3575135 12月  1 2013 mysql-connector-java-5.1.27.tar.gz
-rw-r--r--. 1 root root 55782196 3月  26 2015 MySQL-server-5.6.24-1.el6.x86_64.rpm
2.4.2 安装MySql服务器
1.安装mysql服务端
[root@hadoop102 mysql-libs]# rpm -ivh MySQL-server-5.6.24-1.el6.x86_64.rpm2.查看产生的随机密码
[root@hadoop102 mysql-libs]# cat /root/.mysql_secret
OEXaQuS8IWkG19Xs
3.查看mysql状态
[root@hadoop102 mysql-libs]# service mysql status4.启动mysql
[root@hadoop102 mysql-libs]# service mysql start2.4.3 安装MySql客户端
1.安装mysql客户端
[root@hadoop102 mysql-libs]# rpm -ivh MySQL-client-5.6.24-1.el6.x86_64.rpm2.链接mysql
[root@hadoop102 mysql-libs]# mysql -uroot -pOEXaQuS8IWkG19Xs3.修改密码
mysql>SET PASSWORD=PASSWORD('000000');4.退出mysql
mysql>exit2.4.4 MySql中user表中主机配置
配置只要是root用户+密码,在任何主机上都能登录MySQL数据库。
1.进入mysql
[root@hadoop102 mysql-libs]# mysql -uroot -p0000002.显示数据库
mysql>show databases;3.使用mysql数据库
mysql>use mysql;4.展示mysql数据库中的所有表
mysql>show tables;5.展示user表的结构
mysql>desc user;6.查询user表
mysql>select User, Host, Password from user;7.修改user表,把Host表内容修改为%
mysql>update user set host='%' where host='localhost';8.删除root用户的其他host
mysql>delete from user where Host='hadoop102';
mysql>delete from user where Host='127.0.0.1';
mysql>delete from user where Host='::1';
9.刷新
mysql>flush privileges;10.退出
mysql>quit;2.5 Hive元数据配置到MySql
2.5.1 驱动拷贝
1.在/opt/software/mysql-libs目录下解压mysql-connector-java-5.1.27.tar.gz驱动包
[root@hadoop102 mysql-libs]# tar -zxvf mysql-connector-java-5.1.27.tar.gz2.拷贝/opt/software/mysql-libs/mysql-connector-java-5.1.27目录下的mysql-connector-java-5.1.27-bin.jar到/opt/module/hive/lib/
[root@hadoop102 mysql-connector-java-5.1.27]# cp mysql-connector-java-5.1.27-bin.jar
 /opt/module/hive/lib/
2.5.2 配置Metastore到MySql
1.在/opt/module/hive/conf目录下创建一个hive-site.xml
[newbies@hadoop102 conf]$ touch hive-site.xml
[newbies@hadoop102 conf]$ vi hive-site.xml
2.根据官方文档配置参数,拷贝数据到hive-site.xml文件中
https://cwiki.apache.org/confluence/display/Hive/AdminManual+MetastoreAdmin
<?xml version="1.0"?>
<?xml-stylesheet type="text/xsl" href="configuration.xsl"?>
<configuration>
	<property>
	  <name>javax.jdo.option.ConnectionURL</name>
	  <value>jdbc:mysql://hadoop102:3306/metastore?createDatabaseIfNotExist=true</value>
	  <description>JDBC connect string for a JDBC metastore</description>
	</property>

	<property>
	  <name>javax.jdo.option.ConnectionDriverName</name>
	  <value>com.mysql.jdbc.Driver</value>
	  <description>Driver class name for a JDBC metastore</description>
	</property>

	<property>
	  <name>javax.jdo.option.ConnectionUserName</name>
	  <value>root</value>
	  <description>username to use against metastore database</description>
	</property>

	<property>
	  <name>javax.jdo.option.ConnectionPassword</name>
	  <value>000000</value>
	  <description>password to use against metastore database</description>
	</property>
</configuration>
3.配置完毕后,如果启动hive异常,可以重新启动虚拟机。(重启后,别忘了启动hadoop集群)
2.5.3 多窗口启动Hive测试
1.先启动MySQL
[newbies@hadoop102 mysql-libs]$ mysql -uroot -p000000查看有几个数据库
mysql> show databases;
+--------------------+
| Database           |
+--------------------+
| information_schema |
| mysql             |
| performance_schema |
| test               |
+--------------------+
2.再次打开多个窗口,分别启动hive
[newbies@hadoop102 hive]$ bin/hive3.启动hive后,回到MySQL窗口查看数据库,显示增加了metastore数据库
	mysql> show databases;
+--------------------+
| Database           |
+--------------------+
| information_schema |
| metastore          |
| mysql             |
| performance_schema |
| test               |
+--------------------+
2.6 HiveJDBC访问
2.6.1 启动hiveserver2服务
[newbies@hadoop102 hive]$ bin/hiveserver22.6.2 启动beeline
[newbies@hadoop102 hive]$ bin/beeline
Beeline version 1.2.1 by Apache Hive
beeline>
2.6.3 连接hiveserver2
beeline> !connect jdbc:hive2://hadoop102:10000(回车)
Connecting to jdbc:hive2://hadoop102:10000
Enter username for jdbc:hive2://hadoop102:10000: newbies(回车)
Enter password for jdbc:hive2://hadoop102:10000: (直接回车)
Connected to: Apache Hive (version 1.2.1)
Driver: Hive JDBC (version 1.2.1)
Transaction isolation: TRANSACTION_REPEATABLE_READ
0: jdbc:hive2://hadoop102:10000> show databases;
+----------------+--+
| database_name  |
+----------------+--+
| default        |
| hive_db2       |
+----------------+--+
2.7 Hive常用交互命令
[newbies@hadoop102 hive]$ bin/hive -help
usage: hive
 -d,--define <key=value>          Variable subsitution to apply to hive
                                  commands. e.g. -d A=B or --define A=B
    --database <databasename>     Specify the database to use
 -e <quoted-query-string>         SQL from command line
 -f <filename>                    SQL from files
 -H,--help                        Print help information
    --hiveconf <property=value>   Use value for given property
    --hivevar <key=value>         Variable subsitution to apply to hive
                                  commands. e.g. --hivevar A=B
 -i <filename>                    Initialization SQL file
 -S,--silent                      Silent mode in interactive shell
 -v,--verbose                     Verbose mode (echo executed SQL to the console)
1.“-e”不进入hive的交互窗口执行sql语句
[newbies@hadoop102 hive]$ bin/hive -e "select id from student;"2.“-f”执行脚本中sql语句
(1)在/opt/module/datas目录下创建hivef.sql文件
[newbies@hadoop102 datas]$ touch hivef.sql文件中写入正确的sql语句
select *from student;
(2)执行文件中的sql语句
[newbies@hadoop102 hive]$ bin/hive -f /opt/module/datas/hivef.sql(3)执行文件中的sql语句并将结果写入文件中
[newbies@hadoop102 hive]$ bin/hive -f /opt/module/datas/hivef.sql > /opt/module/datas/hive_result.txt2.8 Hive其他命令操作
1.退出hive窗口:
hive(default)>exit;
hive(default)>quit;
在新版的hive中没区别了,在以前的版本是有的:
exit:先隐性提交数据,再退出;
quit:不提交数据,退出;
2.在hive cli命令窗口中如何查看hdfs文件系统
hive(default)>dfs -ls /;3.在hive cli命令窗口中如何查看本地文件系统
hive(default)>! ls /opt/module/datas;4.查看在hive中输入的所有历史命令
(1)进入到当前用户的根目录/root或/home/newbies
(2)查看. hivehistory文件
[newbies@hadoop102 ~]$ cat .hivehistory2.9 Hive常见属性配置
2.9.1 Hive数据仓库位置配置
1)Default数据仓库的最原始位置是在hdfs上的:/user/hive/warehouse路径下。
2)在仓库目录下,没有对默认的数据库default创建文件夹。如果某张表属于default数据库,直接在数据仓库目录下创建一个文件夹。
3)修改default数据仓库原始位置(将hive-default.xml.template如下配置信息拷贝到hive-site.xml文件中)。
<property>
<name>hive.metastore.warehouse.dir</name>
<value>/user/hive/warehouse</value>
<description>location of default database for the warehouse</description>
</property>
配置同组用户有执行权限
bin/hdfs dfs -chmod g+w /user/hive/warehouse2.9.2 查询后信息显示配置
1)在hive-site.xml文件中添加如下配置信息,就可以实现显示当前数据库,以及查询表的头信息配置。
<property>
	<name>hive.cli.print.header</name>
	<value>true</value>
</property>

<property>
	<name>hive.cli.print.current.db</name>
	<value>true</value>
</property>
2)重新启动hive,对比配置前后差异。
(1)配置前

(2)配置后
2.9.3 Hive运行日志信息配置
1.Hive的log默认存放在/tmp/newbies/hive.log目录下(当前用户名下)
2.修改hive的log存放日志到/opt/module/hive/logs
(1)修改/opt/module/hive/conf/hive-log4j.properties.template文件名称为
hive-log4j.properties
[newbies@hadoop102 conf]$ pwd
/opt/module/hive/conf
[newbies@hadoop102 conf]$ mv hive-log4j.properties.template hive-log4j.properties
(2)在hive-log4j.properties文件中修改log存放位置
hive.log.dir=/opt/module/hive/logs
2.9.4 参数配置方式
1.查看当前所有的配置信息
hive>set;2.参数的配置三种方式
(1)配置文件方式
默认配置文件:hive-default.xml
用户自定义配置文件:hive-site.xml
注意:用户自定义配置会覆盖默认配置。另外,Hive也会读入Hadoop的配置,因为Hive是作为Hadoop的客户端启动的,Hive的配置会覆盖Hadoop的配置。配置文件的设定对本机启动的所有Hive进程都有效。
(2)命令行参数方式
启动Hive时,可以在命令行添加-hiveconf param=value来设定参数。
例如:
[newbies@hadoop103 hive]$ bin/hive -hiveconf mapred.reduce.tasks=10;注意:仅对本次hive启动有效
查看参数设置:
hive (default)> set mapred.reduce.tasks;(3)参数声明方式
可以在HQL中使用SET关键字设定参数
例如:
hive (default)> set mapred.reduce.tasks=100;注意:仅对本次hive启动有效。
查看参数设置
hive (default)> set mapred.reduce.tasks;上述三种设定方式的优先级依次递增。即配置文件<命令行参数<参数声明。注意某些系统级的参数,例如log4j相关的设定,必须用前两种方式设定,因为那些参数的读取在会话建立以前已经完成了。
type string)
row format delimited fields terminated by "\t";
load data local inpath “/opt/module/datas/person_info.txt” into table person_info;
6.按需求查询数据
select
    t1.base,
    concat_ws('|', collect_set(t1.name)) name
from
    (select
        name,
        concat(constellation, ",", blood_type) base
    from
        person_info) t1
group by
    t1.base;
==============================End======================
2.1.2 修改 hive-site.xml
1)关闭元数据检查
[newbies@hadoop102 conf]$ pwd
/opt/module/hive/conf
[newbies@hadoop102 conf]$ vim hive-site.xml
增加如下配置:
<property>
    <name>hive.metastore.schema.verification</name>
    <value>false</value>
</property>
2.2 Hive运行引擎Tez
Tez是一个Hive的运行引擎,性能优于MR。为什么优于MR呢?看下图。

用Hive直接编写MR程序,假设有四个有依赖关系的MR作业,上图中,绿色是Rgmallce Task,云状表示写屏蔽,需要将中间结果持久化写到HDFS。
Tez可以将多个有依赖的作业转换为一个作业,这样只需写一次HDFS,且中间节点较少,从而大大提升DAG作业的性能。
2.2.1 安装包准备
1)下载tez的依赖包:http://tez.apache.org
2)拷贝apache-tez-0.9.1-bin.tar.gz到hadoop102的/opt/module目录
[newbies@hadoop102 module]$ ls
apache-tez-0.9.1-bin.tar.gz
3)解压缩apache-tez-0.9.1-bin.tar.gz
[newbies@hadoop102 module]$ tar -zxvf apache-tez-0.9.1-bin.tar.gz4)修改名称
[newbies@hadoop102 module]$ mv apache-tez-0.9.1-bin/ tez-0.9.12.2.2 配置Tez环境变量
1)进入到Hive的配置目录:/opt/module/hive/conf
[newbies@hadoop102 conf]$ pwd
/opt/module/hive/conf
2)在hive-env.sh文件中添加tez环境变量配置和依赖包环境变量配置
[newbies@hadoop102 conf]$ vim hive-env.sh添加如下配置
# Set HADOOP_HOME to point to a specific hadoop install directory
export HADOOP_HOME=/opt/module/hadoop-2.7.2

# Hive Configuration Directory can be controlled by:
export HIVE_CONF_DIR=/opt/module/hive/conf

# Folder containing extra libraries required for hive compilation/execution can be controlled by:
export TEZ_HOME=/opt/module/tez-0.9.1    #是你的tez的解压目录
export TEZ_JARS=""
for jar in `ls $TEZ_HOME |grep jar`; do
    export TEZ_JARS=$TEZ_JARS:$TEZ_HOME/$jar
done
for jar in `ls $TEZ_HOME/lib`; do
    export TEZ_JARS=$TEZ_JARS:$TEZ_HOME/lib/$jar
done

export HIVE_AUX_JARS_PATH=/opt/module/hadoop-2.7.2/share/hadoop/common/hadoop-lzo-0.4.20.jar$TEZ_JARS
2.2.3 配置Tez
在Hive 的/opt/module/hive/conf下面创建一个tez-site.xml文件
[newbies@hadoop102 conf]$ pwd
/opt/module/hive/conf
[newbies@hadoop102 conf]$ vim tez-site.xml
添加如下内容
<?xml version="1.0" encoding="UTF-8"?>
<?xml-stylesheet type="text/xsl" href="configuration.xsl"?>
<configuration>
<property>
	<name>tez.lib.uris</name>    <value>${fs.defaultFS}/tez/tez-0.9.1,${fs.defaultFS}/tez/tez-0.9.1/lib</value>
</property>
<property>
	<name>tez.lib.uris.classpath</name>    	<value>${fs.defaultFS}/tez/tez-0.9.1,${fs.defaultFS}/tez/tez-0.9.1/lib</value>
</property>
<property>
     <name>tez.use.cluster.hadoop-libs</name>
     <value>true</value>
</property>
<property>
     <name>tez.history.logging.service.class</name>        <value>org.apache.tez.dag.history.logging.ats.ATSHistoryLoggingService</value>
</property>
</configuration>
2.2.4 上传Tez到集群
1)在hive-site.xml文件中添加如下配置
<property>
  <name>hive.execution.engine</name>
  <value>tez</value>
</property>
2)将/opt/module/tez-0.9.1上传到HDFS的/tez路径
[newbies@hadoop102 conf]$ hadoop fs -mkdir /tez
[newbies@hadoop102 conf]$ hadoop fs -put /opt/module/tez-0.9.1/ /tez
[newbies@hadoop102 conf]$ hadoop fs -ls /tez
/tez/tez-0.9.1
2.2.5 测试
1)启动hive
[newbies@hadoop102 hive]$ bin/hive2)创建lzo表。
hive (default)> create table student(
id int,
name string);
3)向表中插入数据。
hive (default)> insert into student values(1,"zhangsan");4)如果没有报错就表示成功了
hive (default)> select * from student;
1       zhangsan
2.2.6 小结
1)运行Tez时检查到用过多内存而被NodeManager杀死进程问题:
Caused by: org.apache.tez.dag.api.SessionNotRunning: TezSession has already shutdown. Application application_1546781144082_0005 failed 2 times due to AM Container for appattempt_1546781144082_0005_000002 exited with  exitCode: -103
For more detailed output, check application tracking page:http://hadoop103:8088/cluster/app/application_1546781144082_0005Then, click on links to logs of each attempt.
Diagnostics: Container [pid=11116,containerID=container_1546781144082_0005_02_000001] is running beyond virtual memory limits. Current usage: 216.3 MB of 1 GB physical memory used; 2.6 GB of 2.1 GB virtual memory used. Killing container.
这种问题是从机上运行的Container试图使用过多的内存,而被NodeManager kill掉了。
[摘录] The NodeManager is killing your container. It sounds like you are trying to
use hadoop streaming which is running as a child process of the map-reduce task. The
NodeManager monitors the entire process tree of the task and if it eats up more
memory than the maximum set in mapreduce.map.memory.mb or mapreduce.reduce.memory.mb
respectively, we would expect the Nodemanager to kill the task, otherwise your task
is stealing memory belonging to other containers, which you don't want.
解决方法:
方案一:mapred-site.xml中设置map和reduce任务的内存配置如下:(value中实际配置的内存需要根据自己机器内存大小及应用情况进行修改)
<property>
  <name>mapreduce.map.memory.mb</name>
  <value>1536</value>
</property>
<property>
  <name>mapreduce.map.java.opts</name>
  <value>-Xmx1024M</value>
</property>
<property>
  <name>mapreduce.reduce.memory.mb</name>
  <value>3072</value>
</property>
<property>
  <name>mapreduce.reduce.java.opts</name>
  <value>-Xmx2560M</value>
</property>
方案二:或者是关掉虚拟内存检查。我们选这个,修改yarn-site.xml
<property>
<name>yarn.nodemanager.vmem-check-enabled</name>
<value>false</value>
</property>
第3章 数仓搭建之ODS & DWD

3.1 创建数据库
1)创建gmall数据库
hive (default)> create database gmall;说明:如果数据库存在且有数据,需要强制删除时执行:drop database gmall cascade;
2)使用gmall数据库
hive (default)> use gmall;3.2 ODS层
原始数据层,存放原始数据,直接加载原始日志、数据,数据保持原貌不做处理。
3.2.1 创建启动日志表ods_start_log

1)创建输入数据是lzo输出是text,支持json解析的分区表
hive (gmall)>
drop table if exists ods_start_log;
CREATE EXTERNAL TABLE  `ods_start_log`(`line` string)
PARTITIONED BY (`dt` string)
STORED AS
  INPUTFORMAT 'com.hadoop.mapred.DeprecatedLzoTextInputFormat'
  OUTPUTFORMAT 'org.apache.hadoop.hive.ql.io.HiveIgnoreKeyTextOutputFormat'
LOCATION '/warehouse/gmall/ods/ods_start_log';
说明Hive的LZO压缩:https://cwiki.apache.org/confluence/display/Hive/LanguageManual+LZO
2)加载数据
hive (gmall)>
load data inpath '/origin_data/gmall/log/topic_start/2019-02-10' into table gmall.ods_start_log partition(dt='2019-02-10');
注意:时间格式都配置成YYYY-MM-DD格式,这是hive默认支持的时间格式
3)查看是否加载成功
hive (gmall)> select * from ods_start_log limit 2;3.2.2 创建事件日志表ods_event_log

1)创建输入数据是lzo输出是text,支持json解析的分区表
hive (gmall)>
drop table if exists ods_event_log;
CREATE EXTERNAL TABLE  `ods_event_log`(`line` string)
PARTITIONED BY (`dt` string)
STORED AS
  INPUTFORMAT 'com.hadoop.mapred.DeprecatedLzoTextInputFormat'
  OUTPUTFORMAT 'org.apache.hadoop.hive.ql.io.HiveIgnoreKeyTextOutputFormat'
LOCATION '/warehouse/gmall/ods/ods_event_log';
2)加载数据
hive (gmall)>
load data inpath '/origin_data/gmall/log/topic_event/2019-02-10' into table gmall.ods_event_log partition(dt='2019-02-10');
注意:时间格式都配置成YYYY-MM-DD格式,这是Hive默认支持的时间格式
3)查看是否加载成功
hive (gmall)> select * from ods_event_log limit 2;3.2.3 ODS层加载数据脚本
1)在hadoop102的/home/newbies/bin目录下创建脚本
[newbies@hadoop102 bin]$ vim ods.sh在脚本中编写如下内容
#!/bin/bash

# 定义变量方便修改
APP=gmall
hive=/opt/module/hive/bin/hive

# 如果是输入的日期按照取输入日期;如果没输入日期取当前时间的前一天
if [ -n $1 ] ;then
 log_date=$1
else
 log_date=`date  -d "-1 day"  +%F`
fi

echo "===日志日期为 $log_date==="
$hive -e "load data inpath '/origin_data/gmall/log/topic_start/$log_date' into table "$APP".ods_start_log partition(dt='$log_date')"
$hive -e "load data inpath '/origin_data/gmall/log/topic_event/$log_date' into table "$APP".ods_event_log partition(dt='$log_date')"
说明1:
[ -n 变量值 ] 判断变量的值,是否为空
-- 变量的值,非空,返回true
-- 变量的值,为空,返回false
说明2:
查看date命令的使用,[newbies@hadoop102 ~]$ date --help
2)增加脚本执行权限
[newbies@hadoop102 bin]$ chmod 777 ods.sh3)脚本使用
[newbies@hadoop102 module]$ ods.sh 2019-02-114)查看导入数据
hive (gmall)>
select * from ods_start_log where dt='2019-02-11' limit 2;
select * from ods_event_log where dt='2019-02-11' limit 2;
5)脚本执行时间
企业开发中一般在每日凌晨30分~1点
3.3 DWD层数据解析
对ODS层数据进行清洗(去除空值,脏数据,超过极限范围的数据,行式存储改为列存储,改压缩格式)。
3.3.1 创建基础明细表
明细表用于存储ODS层原始表转换过来的明细数据。

1)创建启动日志基础明细表
hive (gmall)>
drop table if exists dwd_base_start_log;
CREATE EXTERNAL TABLE `dwd_base_start_log`(
`mid_id` string,
`user_id` string,
`version_code` string,
`version_name` string,
`lang` string,
`source` string,
`os` string,
`area` string,
`model` string,
`brand` string,
`sdk_version` string,
`gmail` string,
`height_width` string,
`app_time` string,
`network` string,
`lng` string,
`lat` string,
`event_name` string,
`event_json` string,
`server_time` string)
PARTITIONED BY (`dt` string)
stored as  parquet
location '/warehouse/gmall/dwd/dwd_base_start_log/';
其中event_name和event_json用来对应事件名和整个事件。这个地方将原始日志1对多的形式拆分出来了。操作的时候我们需要将原始日志展平,需要用到UDF和UDTF。
2)创建事件日志基础明细表
hive (gmall)>
drop table if exists dwd_base_event_log;
CREATE EXTERNAL TABLE `dwd_base_event_log`(
`mid_id` string,
`user_id` string,
`version_code` string,
`version_name` string,
`lang` string,
`source` string,
`os` string,
`area` string,
`model` string,
`brand` string,
`sdk_version` string,
`gmail` string,
`height_width` string,
`app_time` string,
`network` string,
`lng` string,
`lat` string,
`event_name` string,
`event_json` string,
`server_time` string)
PARTITIONED BY (`dt` string)
stored as  parquet
location '/warehouse/gmall/dwd/dwd_base_event_log/';
3.3.2 自定义UDF函数(解析公共字段)

1)创建一个maven工程:hivefunction
2)创建包名:com.newbies.udf
3)在pom.xml文件中添加如下内容
<properties>
    <project.build.sourceEncoding>UTF8</project.build.sourceEncoding>
    <hive.version>1.2.1</hive.version>
</properties>

<dependencies>
    <!--添加hive依赖-->
    <dependency>
        <groupId>org.apache.hive</groupId>
        <artifactId>hive-exec</artifactId>
        <version>${hive.version}</version>
    </dependency>
</dependencies>

<build>
    <plugins>
        <plugin>
            <artifactId>maven-compiler-plugin</artifactId>
            <version>2.3.2</version>
            <configuration>
                <source>1.8</source>
                <target>1.8</target>
            </configuration>
        </plugin>
        <plugin>
            <artifactId>maven-assembly-plugin</artifactId>
            <configuration>
                <descriptorRefs>
                    <descriptorRef>jar-with-dependencies</descriptorRef>
                </descriptorRefs>
            </configuration>
            <executions>
                <execution>
                    <id>make-assembly</id>
                    <phase>package</phase>
                    <goals>
                        <goal>single</goal>
                    </goals>
                </execution>
            </executions>
        </plugin>
    </plugins>
</build>
4)UDF用于解析公共字段
package com.newbies.udf;

import org.apache.commons.lang.StringUtils;
import org.apache.hadoop.hive.ql.exec.UDF;
import org.json.JSONException;
import org.json.JSONObject;

public class BaseFieldUDF extends UDF {

    public String evaluate(String line, String jsonkeysString) {

        // 0 准备一个sb
        StringBuilder sb = new StringBuilder();

        // 1 切割jsonkeys  mid uid vc vn l sr os ar md
        String[] jsonkeys = jsonkeysString.split(",");

        // 2 处理line   服务器时间 | json
        String[] logContents = line.split("\\|");

        // 3 合法性校验
        if (logContents.length != 2 || StringUtils.isBlank(logContents[1])) {
            return "";
        }

        // 4 开始处理json
        try {
            JSONObject jsonObject = new JSONObject(logContents[1]);

            // 获取cm里面的对象
            JSONObject base = jsonObject.getJSONObject("cm");

            // 循环遍历取值
            for (int i = 0; i < jsonkeys.length; i++) {
                String filedName = jsonkeys[i].trim();

                if (base.has(filedName)) {
                    sb.append(base.getString(filedName)).append("\t");
                } else {
                    sb.append("").append("\t");
                }
            }

            sb.append(jsonObject.getString("et")).append("\t");
            sb.append(logContents[0]).append("\t");
        } catch (JSONException e) {
            e.printStackTrace();
        }

        return sb.toString();
    }

    public static void main(String[] args) {

        String line = "1541217850324|{\"cm\":{\"mid\":\"m7856\",\"uid\":\"u8739\",\"ln\":\"-74.8\",\"sv\":\"V2.2.2\",\"os\":\"8.1.3\",\"g\":\"[email protected]\",\"nw\":\"3G\",\"l\":\"es\",\"vc\":\"6\",\"hw\":\"640*960\",\"ar\":\"MX\",\"t\":\"1541204134250\",\"la\":\"-31.7\",\"md\":\"huawei-17\",\"vn\":\"1.1.2\",\"sr\":\"O\",\"ba\":\"Huawei\"},\"ap\":\"weather\",\"et\":[{\"ett\":\"1541146624055\",\"en\":\"display\",\"kv\":{\"newsid\":\"n4195\",\"copyright\":\"ESPN\",\"content_provider\":\"CNN\",\"extend2\":\"5\",\"action\":\"2\",\"extend1\":\"2\",\"place\":\"3\",\"showtype\":\"2\",\"category\":\"72\",\"newstype\":\"5\"}},{\"ett\":\"1541213331817\",\"en\":\"loading\",\"kv\":{\"extend2\":\"\",\"loading_time\":\"15\",\"action\":\"3\",\"extend1\":\"\",\"type1\":\"\",\"type\":\"3\",\"loading_way\":\"1\"}},{\"ett\":\"1541126195645\",\"en\":\"ad\",\"kv\":{\"entry\":\"3\",\"show_style\":\"0\",\"action\":\"2\",\"detail\":\"325\",\"source\":\"4\",\"behavior\":\"2\",\"content\":\"1\",\"newstype\":\"5\"}},{\"ett\":\"1541202678812\",\"en\":\"notification\",\"kv\":{\"ap_time\":\"1541184614380\",\"action\":\"3\",\"type\":\"4\",\"content\":\"\"}},{\"ett\":\"1541194686688\",\"en\":\"active_background\",\"kv\":{\"active_source\":\"3\"}}]}";
        String x = new BaseFieldUDF().evaluate(line, "mid,uid,vc,vn,l,sr,os,ar,md,ba,sv,g,hw,nw,ln,la,t");
        System.out.println(x);
    }
}
注意:使用main函数主要用于模拟数据测试。
3.3.3 自定义UDTF函数(解析具体事件字段)

1)创建包名:com.newbies.udtf
2)在com.newbies.udtf包下创建类名:EventJsonUDTF
3)用于展开业务字段
package com.newbies.udtf;

import org.apache.commons.lang.StringUtils;
import org.apache.hadoop.hive.ql.exec.UDFArgumentException;
import org.apache.hadoop.hive.ql.metadata.HiveException;
import org.apache.hadoop.hive.ql.udf.generic.GenericUDTF;
import org.apache.hadoop.hive.serde2.objectinspector.ObjectInspector;
import org.apache.hadoop.hive.serde2.objectinspector.ObjectInspectorFactory;
import org.apache.hadoop.hive.serde2.objectinspector.StructObjectInspector;
import org.apache.hadoop.hive.serde2.objectinspector.primitive.PrimitiveObjectInspectorFactory;
import org.json.JSONArray;
import org.json.JSONException;

import java.util.ArrayList;

public class EventJsonUDTF extends GenericUDTF {

    //该方法中,我们将指定输出参数的名称和参数类型:
    @Override
    public StructObjectInspector initialize(ObjectInspector[] argOIs) throws UDFArgumentException {

        ArrayList<String> fieldNames = new ArrayList<String>();
        ArrayList<ObjectInspector> fieldOIs = new ArrayList<ObjectInspector>();

        fieldNames.add("event_name");
        fieldOIs.add(PrimitiveObjectInspectorFactory.javaStringObjectInspector);
        fieldNames.add("event_json");
        fieldOIs.add(PrimitiveObjectInspectorFactory.javaStringObjectInspector);

        return ObjectInspectorFactory.getStandardStructObjectInspector(fieldNames, fieldOIs);
    }

    //输入1条记录,输出若干条结果
    @Override
    public void process(Object[] objects) throws HiveException {

        // 获取传入的et
        String input = objects[0].toString();

        // 如果传进来的数据为空,直接返回过滤掉该数据
        if (StringUtils.isBlank(input)) {
            return;
        } else {

            try {
                // 获取一共有几个事件(ad/facoriters)
                JSONArray ja = new JSONArray(input);

                if (ja == null)
                    return;

                // 循环遍历每一个事件
                for (int i = 0; i < ja.length(); i++) {
                    String[] result = new String[2];

                    try {
                        // 取出每个的事件名称(ad/facoriters)
                        result[0] = ja.getJSONObject(i).getString("en");

                        // 取出每一个事件整体
                        result[1] = ja.getString(i);
                    } catch (JSONException e) {
                        continue;
                    }

                    // 将结果返回
                    forward(result);
                }
            } catch (JSONException e) {
                e.printStackTrace();
            }
        }
    }

    //当没有记录处理的时候该方法会被调用,用来清理代码或者产生额外的输出
    @Override
    public void close() throws HiveException {

    }
}
2)打包

3)将hivefunction-1.0-SNAPSHOT上传到hadoop102的/opt/module/hive/
4)将jar包添加到hive的classpath
hive (gmall)> add jar /opt/module/hive/hivefunction-1.0-SNAPSHOT.jar;5)创建临时函数与开发好的java class关联
hive (gmall)>
create temporary function base_analizer as 'com.newbies.udf.BaseFieldUDF';

create temporary function flat_analizer as 'com.newbies.udtf.EventJsonUDTF';
3.3.4 解析启动日志基础明细表
1)解析启动日志基础明细表
hive (gmall)>
use gmall;

set hive.exec.dynamic.partition.mode=nonstrict;

insert overwrite table dwd_base_start_log
PARTITION (dt)
select
mid_id,
user_id,
version_code,
version_name,
lang,
source ,
os ,
area ,
model ,
brand ,
sdk_version ,
gmail ,
height_width ,
app_time ,
network ,
lng ,
lat ,
event_name ,
event_json ,
server_time ,
dt
 from
(
select
split(base_analizer(line,'mid,uid,vc,vn,l,sr,os,ar,md,ba,sv,g,hw,t,nw,ln,la'),'\t')[0]   as mid_id,
split(base_analizer(line,'mid,uid,vc,vn,l,sr,os,ar,md,ba,sv,g,hw,t,nw,ln,la'),'\t')[1]   as user_id,
split(base_analizer(line,'mid,uid,vc,vn,l,sr,os,ar,md,ba,sv,g,hw,t,nw,ln,la'),'\t')[2]   as version_code,
split(base_analizer(line,'mid,uid,vc,vn,l,sr,os,ar,md,ba,sv,g,hw,t,nw,ln,la'),'\t')[3]   as version_name,
split(base_analizer(line,'mid,uid,vc,vn,l,sr,os,ar,md,ba,sv,g,hw,t,nw,ln,la'),'\t')[4]   as lang,
split(base_analizer(line,'mid,uid,vc,vn,l,sr,os,ar,md,ba,sv,g,hw,t,nw,ln,la'),'\t')[5]   as source,
split(base_analizer(line,'mid,uid,vc,vn,l,sr,os,ar,md,ba,sv,g,hw,t,nw,ln,la'),'\t')[6]   as os,
split(base_analizer(line,'mid,uid,vc,vn,l,sr,os,ar,md,ba,sv,g,hw,t,nw,ln,la'),'\t')[7]   as area,
split(base_analizer(line,'mid,uid,vc,vn,l,sr,os,ar,md,ba,sv,g,hw,t,nw,ln,la'),'\t')[8]   as model,
split(base_analizer(line,'mid,uid,vc,vn,l,sr,os,ar,md,ba,sv,g,hw,t,nw,ln,la'),'\t')[9]   as brand,
split(base_analizer(line,'mid,uid,vc,vn,l,sr,os,ar,md,ba,sv,g,hw,t,nw,ln,la'),'\t')[10]   as sdk_version,
split(base_analizer(line,'mid,uid,vc,vn,l,sr,os,ar,md,ba,sv,g,hw,t,nw,ln,la'),'\t')[11]  as gmail,
split(base_analizer(line,'mid,uid,vc,vn,l,sr,os,ar,md,ba,sv,g,hw,t,nw,ln,la'),'\t')[12]  as height_width,
split(base_analizer(line,'mid,uid,vc,vn,l,sr,os,ar,md,ba,sv,g,hw,t,nw,ln,la'),'\t')[13]  as app_time,
split(base_analizer(line,'mid,uid,vc,vn,l,sr,os,ar,md,ba,sv,g,hw,t,nw,ln,la'),'\t')[14]  as network,
split(base_analizer(line,'mid,uid,vc,vn,l,sr,os,ar,md,ba,sv,g,hw,t,nw,ln,la'),'\t')[15]  as lng,
split(base_analizer(line,'mid,uid,vc,vn,l,sr,os,ar,md,ba,sv,g,hw,t,nw,ln,la'),'\t')[16]  as lat,
split(base_analizer(line,'mid,uid,vc,vn,l,sr,os,ar,md,ba,sv,g,hw,t,nw,ln,la'),'\t')[17]  as ops,
split(base_analizer(line,'mid,uid,vc,vn,l,sr,os,ar,md,ba,sv,g,hw,t,nw,ln,la'),'\t')[18]  as server_time,
dt
from ods_start_log where dt='2019-02-10'  and base_analizer(line,'mid,uid,vc,vn,l,sr,os,ar,md,ba,sv,g,hw,t,nw,ln,la')<>''
) sdk_log lateral view flat_analizer(ops) tmp_k as event_name, event_json;
2)测试
hive (gmall)> select * from dwd_base_start_log limit 2;3.3.5 解析事件日志基础明细表
1)解析事件日志基础明细表
hive (gmall)>
use gmall;

set hive.exec.dynamic.partition.mode=nonstrict;

insert overwrite table dwd_base_event_log
PARTITION (dt)
select
mid_id,
user_id,
version_code,
version_name,
lang,
source ,
os ,
area ,
model ,
brand ,
sdk_version ,
gmail ,
height_width ,
app_time ,
network ,
lng ,
lat ,
event_name ,
event_json ,
server_time ,
dt
 from
(
select
split(base_analizer(line,'mid,uid,vc,vn,l,sr,os,ar,md,ba,sv,g,hw,t,nw,ln,la'),'\t')[0]   as mid_id,
split(base_analizer(line,'mid,uid,vc,vn,l,sr,os,ar,md,ba,sv,g,hw,t,nw,ln,la'),'\t')[1]   as user_id,
split(base_analizer(line,'mid,uid,vc,vn,l,sr,os,ar,md,ba,sv,g,hw,t,nw,ln,la'),'\t')[2]   as version_code,
split(base_analizer(line,'mid,uid,vc,vn,l,sr,os,ar,md,ba,sv,g,hw,t,nw,ln,la'),'\t')[3]   as version_name,
split(base_analizer(line,'mid,uid,vc,vn,l,sr,os,ar,md,ba,sv,g,hw,t,nw,ln,la'),'\t')[4]   as lang,
split(base_analizer(line,'mid,uid,vc,vn,l,sr,os,ar,md,ba,sv,g,hw,t,nw,ln,la'),'\t')[5]   as source,
split(base_analizer(line,'mid,uid,vc,vn,l,sr,os,ar,md,ba,sv,g,hw,t,nw,ln,la'),'\t')[6]   as os,
split(base_analizer(line,'mid,uid,vc,vn,l,sr,os,ar,md,ba,sv,g,hw,t,nw,ln,la'),'\t')[7]   as area,
split(base_analizer(line,'mid,uid,vc,vn,l,sr,os,ar,md,ba,sv,g,hw,t,nw,ln,la'),'\t')[8]   as model,
split(base_analizer(line,'mid,uid,vc,vn,l,sr,os,ar,md,ba,sv,g,hw,t,nw,ln,la'),'\t')[9]   as brand,
split(base_analizer(line,'mid,uid,vc,vn,l,sr,os,ar,md,ba,sv,g,hw,t,nw,ln,la'),'\t')[10]   as sdk_version,
split(base_analizer(line,'mid,uid,vc,vn,l,sr,os,ar,md,ba,sv,g,hw,t,nw,ln,la'),'\t')[11]  as gmail,
split(base_analizer(line,'mid,uid,vc,vn,l,sr,os,ar,md,ba,sv,g,hw,t,nw,ln,la'),'\t')[12]  as height_width,
split(base_analizer(line,'mid,uid,vc,vn,l,sr,os,ar,md,ba,sv,g,hw,t,nw,ln,la'),'\t')[13]  as app_time,
split(base_analizer(line,'mid,uid,vc,vn,l,sr,os,ar,md,ba,sv,g,hw,t,nw,ln,la'),'\t')[14]  as network,
split(base_analizer(line,'mid,uid,vc,vn,l,sr,os,ar,md,ba,sv,g,hw,t,nw,ln,la'),'\t')[15]  as lng,
split(base_analizer(line,'mid,uid,vc,vn,l,sr,os,ar,md,ba,sv,g,hw,t,nw,ln,la'),'\t')[16]  as lat,
split(base_analizer(line,'mid,uid,vc,vn,l,sr,os,ar,md,ba,sv,g,hw,t,nw,ln,la'),'\t')[17]  as ops,
split(base_analizer(line,'mid,uid,vc,vn,l,sr,os,ar,md,ba,sv,g,hw,t,nw,ln,la'),'\t')[18]  as server_time,
dt
from ods_event_log where dt='2019-02-10'  and base_analizer(line,'mid,uid,vc,vn,l,sr,os,ar,md,ba,sv,g,hw,t,nw,ln,la')<>''
) sdk_log lateral view flat_analizer(ops) tmp_k as event_name, event_json;
2)测试
hive (gmall)> select * from dwd_base_event_log limit 2;3.3.6 DWD层数据解析脚本
1)在hadoop102的/home/newbies/bin目录下创建脚本
[newbies@hadoop102 bin]$ vim dwd_base.sh在脚本中编写如下内容
#!/bin/bash

# 定义变量方便修改
APP=gmall
hive=/opt/module/hive/bin/hive

# 如果是输入的日期按照取输入日期;如果没输入日期取当前时间的前一天
if [ -n $1 ] ;then
	log_date=$1
else
	log_date=`date  -d "-1 day"  +%F`
fi

sql="
	add jar /opt/module/hive/hivefunction-1.0-SNAPSHOT.jar;

	create temporary function base_analizer as 'com.newbies.udf.BaseFieldUDF';
	create temporary function flat_analizer as 'com.newbies.udtf.EventJsonUDTF';

 	set hive.exec.dynamic.partition.mode=nonstrict;

	insert overwrite table "$APP".dwd_base_start_log
	PARTITION (dt)
	select
	mid_id,
	user_id,
	version_code,
	version_name,
	lang,
	source ,
	os ,
	area ,
	model ,
	brand ,
	sdk_version ,
	gmail ,
	height_width ,
	network ,
	lng ,
	lat ,
	app_time ,
	event_name ,
	event_json ,
	server_time ,
	dt
	 from
	(
	select
	split(base_analizer(line,'mid,uid,vc,vn,l,sr,os,ar,md,ba,sv,g,hw,t,nw,ln,la'),'\t')[0]   as mid_id,
	split(base_analizer(line,'mid,uid,vc,vn,l,sr,os,ar,md,ba,sv,g,hw,t,nw,ln,la'),'\t')[1]   as user_id,
	split(base_analizer(line,'mid,uid,vc,vn,l,sr,os,ar,md,ba,sv,g,hw,t,nw,ln,la'),'\t')[2]   as version_code,
	split(base_analizer(line,'mid,uid,vc,vn,l,sr,os,ar,md,ba,sv,g,hw,t,nw,ln,la'),'\t')[3]   as version_name,
	split(base_analizer(line,'mid,uid,vc,vn,l,sr,os,ar,md,ba,sv,g,hw,t,nw,ln,la'),'\t')[4]   as lang,
	split(base_analizer(line,'mid,uid,vc,vn,l,sr,os,ar,md,ba,sv,g,hw,t,nw,ln,la'),'\t')[5]   as source,
	split(base_analizer(line,'mid,uid,vc,vn,l,sr,os,ar,md,ba,sv,g,hw,t,nw,ln,la'),'\t')[6]   as os,
	split(base_analizer(line,'mid,uid,vc,vn,l,sr,os,ar,md,ba,sv,g,hw,t,nw,ln,la'),'\t')[7]   as area,
	split(base_analizer(line,'mid,uid,vc,vn,l,sr,os,ar,md,ba,sv,g,hw,t,nw,ln,la'),'\t')[8]   as model,
	split(base_analizer(line,'mid,uid,vc,vn,l,sr,os,ar,md,ba,sv,g,hw,t,nw,ln,la'),'\t')[9]   as brand,
	split(base_analizer(line,'mid,uid,vc,vn,l,sr,os,ar,md,ba,sv,g,hw,t,nw,ln,la'),'\t')[10]   as sdk_version,
	split(base_analizer(line,'mid,uid,vc,vn,l,sr,os,ar,md,ba,sv,g,hw,t,nw,ln,la'),'\t')[11]  as gmail,
	split(base_analizer(line,'mid,uid,vc,vn,l,sr,os,ar,md,ba,sv,g,hw,t,nw,ln,la'),'\t')[12]  as height_width,
	split(base_analizer(line,'mid,uid,vc,vn,l,sr,os,ar,md,ba,sv,g,hw,t,nw,ln,la'),'\t')[13]  as app_time,
	split(base_analizer(line,'mid,uid,vc,vn,l,sr,os,ar,md,ba,sv,g,hw,t,nw,ln,la'),'\t')[14]  as network,
	split(base_analizer(line,'mid,uid,vc,vn,l,sr,os,ar,md,ba,sv,g,hw,t,nw,ln,la'),'\t')[15]  as lng,
	split(base_analizer(line,'mid,uid,vc,vn,l,sr,os,ar,md,ba,sv,g,hw,t,nw,ln,la'),'\t')[16]  as lat,
	split(base_analizer(line,'mid,uid,vc,vn,l,sr,os,ar,md,ba,sv,g,hw,t,nw,ln,la'),'\t')[17]  as ops,
	split(base_analizer(line,'mid,uid,vc,vn,l,sr,os,ar,md,ba,sv,g,hw,t,nw,ln,la'),'\t')[18]  as server_time,
	dt
	from "$APP".ods_start_log where dt='$log_date'  and base_analizer(line,'mid,uid,vc,vn,l,sr,os,ar,md,ba,sv,g,hw,t,nw,ln,la')<>''
	) sdk_log lateral view flat_analizer(ops) tmp_k as event_name, event_json;

	insert overwrite table "$APP".dwd_base_event_log
	PARTITION (dt)
	select
	mid_id,
	user_id,
	version_code,
	version_name,
	lang,
	source ,
	os ,
	area ,
	model ,
	brand ,
	sdk_version ,
	gmail ,
	height_width ,
	network ,
	lng ,
	lat ,
	app_time ,
	event_name ,
	event_json ,
	server_time ,
	dt
	 from
	(
	select
	split(base_analizer(line,'mid,uid,vc,vn,l,sr,os,ar,md,ba,sv,g,hw,t,nw,ln,la'),'\t')[0]   as mid_id,
	split(base_analizer(line,'mid,uid,vc,vn,l,sr,os,ar,md,ba,sv,g,hw,t,nw,ln,la'),'\t')[1]   as user_id,
	split(base_analizer(line,'mid,uid,vc,vn,l,sr,os,ar,md,ba,sv,g,hw,t,nw,ln,la'),'\t')[2]   as version_code,
	split(base_analizer(line,'mid,uid,vc,vn,l,sr,os,ar,md,ba,sv,g,hw,t,nw,ln,la'),'\t')[3]   as version_name,
	split(base_analizer(line,'mid,uid,vc,vn,l,sr,os,ar,md,ba,sv,g,hw,t,nw,ln,la'),'\t')[4]   as lang,
	split(base_analizer(line,'mid,uid,vc,vn,l,sr,os,ar,md,ba,sv,g,hw,t,nw,ln,la'),'\t')[5]   as source,
	split(base_analizer(line,'mid,uid,vc,vn,l,sr,os,ar,md,ba,sv,g,hw,t,nw,ln,la'),'\t')[6]   as os,
	split(base_analizer(line,'mid,uid,vc,vn,l,sr,os,ar,md,ba,sv,g,hw,t,nw,ln,la'),'\t')[7]   as area,
	split(base_analizer(line,'mid,uid,vc,vn,l,sr,os,ar,md,ba,sv,g,hw,t,nw,ln,la'),'\t')[8]   as model,
	split(base_analizer(line,'mid,uid,vc,vn,l,sr,os,ar,md,ba,sv,g,hw,t,nw,ln,la'),'\t')[9]   as brand,
	split(base_analizer(line,'mid,uid,vc,vn,l,sr,os,ar,md,ba,sv,g,hw,t,nw,ln,la'),'\t')[10]   as sdk_version,
	split(base_analizer(line,'mid,uid,vc,vn,l,sr,os,ar,md,ba,sv,g,hw,t,nw,ln,la'),'\t')[11]  as gmail,
	split(base_analizer(line,'mid,uid,vc,vn,l,sr,os,ar,md,ba,sv,g,hw,t,nw,ln,la'),'\t')[12]  as height_width,
	split(base_analizer(line,'mid,uid,vc,vn,l,sr,os,ar,md,ba,sv,g,hw,t,nw,ln,la'),'\t')[13]  as app_time,
	split(base_analizer(line,'mid,uid,vc,vn,l,sr,os,ar,md,ba,sv,g,hw,t,nw,ln,la'),'\t')[14]  as network,
	split(base_analizer(line,'mid,uid,vc,vn,l,sr,os,ar,md,ba,sv,g,hw,t,nw,ln,la'),'\t')[15]  as lng,
	split(base_analizer(line,'mid,uid,vc,vn,l,sr,os,ar,md,ba,sv,g,hw,t,nw,ln,la'),'\t')[16]  as lat,
	split(base_analizer(line,'mid,uid,vc,vn,l,sr,os,ar,md,ba,sv,g,hw,t,nw,ln,la'),'\t')[17]  as ops,
	split(base_analizer(line,'mid,uid,vc,vn,l,sr,os,ar,md,ba,sv,g,hw,t,nw,ln,la'),'\t')[18]  as server_time,
	dt
	from "$APP".ods_event_log where dt='$log_date'  and base_analizer(line,'mid,uid,vc,vn,l,sr,os,ar,md,ba,sv,g,hw,t,nw,ln,la')<>''
	) sdk_log lateral view flat_analizer(ops) tmp_k as event_name, event_json;
"

$hive -e "$sql"
2)增加脚本执行权限
[newbies@hadoop102 bin]$ chmod 777 dwd_base.sh3)脚本使用
[newbies@hadoop102 module]$ dwd_base.sh 2019-02-114)查询导入结果
hive (gmall)>
select * from dwd_base_start_log where dt='2019-02-11' limit 2;
select * from dwd_base_event_log where dt='2019-02-11' limit 2;
5)脚本执行时间
企业开发中一般在每日凌晨30分~1点
3.4 DWD层
3.4.1 商品点击表

1)建表语句
hive (gmall)>
drop table if exists dwd_display_log;
CREATE EXTERNAL TABLE `dwd_display_log`(
`mid_id` string,
`user_id` string,
`version_code` string,
`version_name` string,
`lang` string,
`source` string,
`os` string,
`area` string,
`model` string,
`brand` string,
`sdk_version` string,
`gmail` string,
`height_width` string,
`app_time` string,
`network` string,
`lng` string,
`lat` string,
action string,
newsid string,
place string,
extend1 string,
category string,
`server_time` string
)
PARTITIONED BY (dt string)
location '/warehouse/gmall/dwd/dwd_display_log/';
2)导入数据
hive (gmall)>
set hive.exec.dynamic.partition.mode=nonstrict;

insert overwrite table dwd_display_log
PARTITION (dt)
select
mid_id,
user_id,
version_code,
version_name,
lang,
source,
os,
area,
model,
brand,
sdk_version,
gmail,
height_width,
app_time,
network,
lng,
lat,
get_json_object(event_json,'$.kv.action') action,
get_json_object(event_json,'$.kv.newsid') newsid,
get_json_object(event_json,'$.kv.place') place,
get_json_object(event_json,'$.kv.extend1') extend1,
get_json_object(event_json,'$.kv.category') category,
server_time,
dt
from dwd_base_event_log
where dt='2019-02-10' and event_name='display';
3)测试
hive (gmall)> select * from dwd_display_log limit 2;3.4.2 商品详情页表
1)建表语句
hive (gmall)>
drop table if exists dwd_newsdetail_log;
CREATE EXTERNAL TABLE `dwd_newsdetail_log`(
`mid_id` string,
`user_id` string,
`version_code` string,
`version_name` string,
`lang` string,
`source` string,
`os` string,
`area` string,
`model` string,
`brand` string,
`sdk_version` string,
`gmail` string,
`height_width` string,
`app_time` string,
`network` string,
`lng` string,
`lat` string,
entry string,
action string,
newsid string,
showtype string,
news_staytime string,
loading_time string,
type1 string,
category string,
`server_time` string)
PARTITIONED BY (dt string)
location '/warehouse/gmall/dwd/dwd_newsdetail_log/';
2)导入数据
hive (gmall)>
set hive.exec.dynamic.partition.mode=nonstrict;

insert overwrite table dwd_newsdetail_log
PARTITION (dt)
select
mid_id,
user_id,
version_code,
version_name,
lang,
source,
os,
area,
model,
brand,
sdk_version,
gmail,
height_width,
app_time,
network,
lng,
lat,
get_json_object(event_json,'$.kv.entry') entry,
get_json_object(event_json,'$.kv.action') action,
get_json_object(event_json,'$.kv.newsid') newsid,
get_json_object(event_json,'$.kv.showtype') showtype,
get_json_object(event_json,'$.kv.news_staytime') news_staytime,
get_json_object(event_json,'$.kv.loading_time') loading_time,
get_json_object(event_json,'$.kv.type1') type1,
get_json_object(event_json,'$.kv.category') category,
server_time,
dt
from dwd_base_event_log
where dt='2019-02-10' and event_name='newsdetail';
3)测试
hive (gmall)> select * from dwd_newsdetail_log limit 2;3.4.3 商品列表页表
1)建表语句
hive (gmall)>
drop table if exists dwd_loading_log;
CREATE EXTERNAL TABLE `dwd_loading_log`(
`mid_id` string,
`user_id` string,
`version_code` string,
`version_name` string,
`lang` string,
`source` string,
`os` string,
`area` string,
`model` string,
`brand` string,
`sdk_version` string,
`gmail` string,
`height_width` string,
`app_time` string,
`network` string,
`lng` string,
`lat` string,
action string,
loading_time string,
loading_way string,
extend1 string,
extend2 string,
type string,
type1 string,
`server_time` string)
PARTITIONED BY (dt string)
location '/warehouse/gmall/dwd/dwd_loading_log/';
2)导入数据
hive (gmall)>
set hive.exec.dynamic.partition.mode=nonstrict;

insert overwrite table dwd_loading_log
PARTITION (dt)
select
mid_id,
user_id,
version_code,
version_name,
lang,
source,
os,
area,
model,
brand,
sdk_version,
gmail,
height_width,
app_time,
network,
lng,
lat,
get_json_object(event_json,'$.kv.action') action,
get_json_object(event_json,'$.kv.loading_time') loading_time,
get_json_object(event_json,'$.kv.loading_way') loading_way,
get_json_object(event_json,'$.kv.extend1') extend1,
get_json_object(event_json,'$.kv.extend2') extend2,
get_json_object(event_json,'$.kv.type') type,
get_json_object(event_json,'$.kv.type1') type1,
server_time,
dt
from dwd_base_event_log
where dt='2019-02-10' and event_name='loading';
3)测试
hive (gmall)> select * from dwd_loading_log limit 2;3.4.4 广告表
1)建表语句
hive (gmall)>
drop table if exists dwd_ad_log;
CREATE EXTERNAL TABLE `dwd_ad_log`(
`mid_id` string,
`user_id` string,
`version_code` string,
`version_name` string,
`lang` string,
`source` string,
`os` string,
`area` string,
`model` string,
`brand` string,
`sdk_version` string,
`gmail` string,
`height_width` string,
`app_time` string,
`network` string,
`lng` string,
`lat` string,
entry string,
action string,
content string,
detail string,
ad_source string,
behavior string,
newstype string,
show_style string,
`server_time` string)
PARTITIONED BY (dt string)
location '/warehouse/gmall/dwd/dwd_ad_log/';
2)导入数据
hive (gmall)>
set hive.exec.dynamic.partition.mode=nonstrict;

insert overwrite table dwd_ad_log
PARTITION (dt)
select
mid_id,
user_id,
version_code,
version_name,
lang,
source,
os,
area,
model,
brand,
sdk_version,
gmail,
height_width,
app_time,
network,
lng,
lat,
get_json_object(event_json,'$.kv.entry') entry,
get_json_object(event_json,'$.kv.action') action,
get_json_object(event_json,'$.kv.content') content,
get_json_object(event_json,'$.kv.detail') detail,
get_json_object(event_json,'$.kv.source') ad_source,
get_json_object(event_json,'$.kv.behavior') behavior,
get_json_object(event_json,'$.kv.newstype') newstype,
get_json_object(event_json,'$.kv.show_style') show_style,
server_time,
dt
from dwd_base_event_log
where dt='2019-02-10' and event_name='ad';
3)测试
hive (gmall)> select * from dwd_ad_log limit 2;3.4.5 消息通知表
1)建表语句
hive (gmall)>
drop table if exists dwd_notification_log;
CREATE EXTERNAL TABLE `dwd_notification_log`(
`mid_id` string,
`user_id` string,
`version_code` string,
`version_name` string,
`lang` string,
`source` string,
`os` string,
`area` string,
`model` string,
`brand` string,
`sdk_version` string,
`gmail` string,
`height_width` string,
`app_time` string,
`network` string,
`lng` string,
`lat` string,
action string,
noti_type string,
ap_time string,
content string,
`server_time` string
)
PARTITIONED BY (dt string)
location '/warehouse/gmall/dwd/dwd_notification_log/';
2)导入数据
hive (gmall)>
set hive.exec.dynamic.partition.mode=nonstrict;

insert overwrite table dwd_notification_log
PARTITION (dt)
select
mid_id,
user_id,
version_code,
version_name,
lang,
source,
os,
area,
model,
brand,
sdk_version,
gmail,
height_width,
app_time,
network,
lng,
lat,
get_json_object(event_json,'$.kv.action') action,
get_json_object(event_json,'$.kv.noti_type') noti_type,
get_json_object(event_json,'$.kv.ap_time') ap_time,
get_json_object(event_json,'$.kv.content') content,
server_time,
dt
from dwd_base_event_log
where dt='2019-02-10' and event_name='notification';
3)测试
hive (gmall)> select * from dwd_notification_log limit 2;3.4.6 用户前台活跃表
1)建表语句
hive (gmall)>
drop table if exists dwd_active_foreground_log;
CREATE EXTERNAL TABLE `dwd_active_foreground_log`(
`mid_id` string,
`user_id` string,
`version_code` string,
`version_name` string,
`lang` string,
`source` string,
`os` string,
`area` string,
`model` string,
`brand` string,
`sdk_version` string,
`gmail` string,
`height_width` string,
`app_time` string,
`network` string,
`lng` string,
`lat` string,
active_source string,
`server_time` string)
PARTITIONED BY (dt string)
location '/warehouse/gmall/dwd/dwd_foreground_log/';
2)导入数据
hive (gmall)>
set hive.exec.dynamic.partition.mode=nonstrict;

insert overwrite table dwd_active_foreground_log
PARTITION (dt)
select
mid_id,
user_id,
version_code,
version_name,
lang,
source,
os,
area,
model,
brand,
sdk_version,
gmail,
height_width,
app_time,
network,
lng,
lat,
get_json_object(event_json,'$.kv.active_source') active_source,
server_time,
dt
from dwd_base_event_log
where dt='2019-02-10' and event_name='active_foreground';
3)测试
hive (gmall)> select * from dwd_active_foreground_log limit 2;3.4.7 用户后台活跃表
1)建表语句
hive (gmall)>
drop table if exists dwd_active_background_log;
CREATE EXTERNAL TABLE `dwd_active_background_log`(
`mid_id` string,
`user_id` string,
`version_code` string,
`version_name` string,
`lang` string,
`source` string,
`os` string,
`area` string,
`model` string,
`brand` string,
`sdk_version` string,
`gmail` string,
 `height_width` string,
`app_time` string,
`network` string,
`lng` string,
`lat` string,
active_source string,
`server_time` string
)
PARTITIONED BY (dt string)
location '/warehouse/gmall/dwd/dwd_background_log/';
2)导入数据
hive (gmall)>
set hive.exec.dynamic.partition.mode=nonstrict;

insert overwrite table dwd_active_background_log
PARTITION (dt)
select
mid_id,
user_id,
version_code,
version_name,
lang,
source,
os,
area,
model,
brand,
sdk_version,
gmail,
height_width,
app_time,
network,
lng,
lat,
get_json_object(event_json,'$.kv.active_source') active_source,
server_time,
dt
from dwd_base_event_log
where dt='2019-02-10' and event_name='active_background';
3)测试
hive (gmall)> select * from dwd_active_background_log limit 2;3.4.8 评论表
1)建表语句
hive (gmall)>
drop table if exists dwd_comment_log;
CREATE EXTERNAL TABLE `dwd_comment_log`(
`mid_id` string,
`user_id` string,
`version_code` string,
`version_name` string,
`lang` string,
`source` string,
`os` string,
`area` string,
`model` string,
`brand` string,
`sdk_version` string,
`gmail` string,
`height_width` string,
`app_time` string,
`network` string,
`lng` string,
`lat` string,
comment_id int,
userid int,
p_comment_id int,
content string,
addtime string,
other_id int,
praise_count int,
reply_count int,
`server_time` string
)
PARTITIONED BY (dt string)
location '/warehouse/gmall/dwd/dwd_comment_log/';
2)导入数据
hive (gmall)>
set hive.exec.dynamic.partition.mode=nonstrict;

insert overwrite table dwd_comment_log
PARTITION (dt)
select
mid_id,
user_id,
version_code,
version_name,
lang,
source,
os,
area,
model,
brand,
sdk_version,
gmail,
height_width,
app_time,
network,
lng,
lat,
get_json_object(event_json,'$.kv.comment_id') comment_id,
get_json_object(event_json,'$.kv.userid') userid,
get_json_object(event_json,'$.kv.p_comment_id') p_comment_id,
get_json_object(event_json,'$.kv.content') content,
get_json_object(event_json,'$.kv.addtime') addtime,
get_json_object(event_json,'$.kv.other_id') other_id,
get_json_object(event_json,'$.kv.praise_count') praise_count,
get_json_object(event_json,'$.kv.reply_count') reply_count,
server_time,
dt
from dwd_base_event_log
where dt='2019-02-10' and event_name='comment';
3)测试
hive (gmall)> select * from dwd_comment_log limit 2;3.4.9 收藏表
1)建表语句
hive (gmall)>
drop table if exists dwd_favorites_log;
CREATE EXTERNAL TABLE `dwd_favorites_log`(
`mid_id` string,
`user_id` string,
`version_code` string,
`version_name` string,
`lang` string,
`source` string,
`os` string,
`area` string,
`model` string,
`brand` string,
`sdk_version` string,
`gmail` string,
`height_width` string,
`app_time` string,
`network` string,
`lng` string,
`lat` string,
id int,
course_id int,
userid int,
add_time string,
`server_time` string
)
PARTITIONED BY (dt string)
location '/warehouse/gmall/dwd/dwd_favorites_log/';
2)导入数据
hive (gmall)>
set hive.exec.dynamic.partition.mode=nonstrict;

insert overwrite table dwd_favorites_log
PARTITION (dt)
select
mid_id,
user_id,
version_code,
version_name,
lang,
source,
os,
area,
model,
brand,
sdk_version,
gmail,
height_width,
app_time,
network,
lng,
lat,
get_json_object(event_json,'$.kv.id') id,
get_json_object(event_json,'$.kv.course_id') course_id,
get_json_object(event_json,'$.kv.userid') userid,
get_json_object(event_json,'$.kv.add_time') add_time,
server_time,
dt
from dwd_base_event_log
where dt='2019-02-10' and event_name='favorites';
3)测试
hive (gmall)> select * from dwd_favorites_log limit 2;3.4.10 点赞表
1)建表语句
hive (gmall)>
drop table if exists dwd_praise_log;
CREATE EXTERNAL TABLE `dwd_praise_log`(
`mid_id` string,
`user_id` string,
`version_code` string,
`version_name` string,
`lang` string,
`source` string,
`os` string,
`area` string,
`model` string,
`brand` string,
`sdk_version` string,
`gmail` string,
`height_width` string,
`app_time` string,
`network` string,
`lng` string,
`lat` string,
id string,
userid string,
target_id string,
type string,
add_time string,
`server_time` string
)
PARTITIONED BY (dt string)
location '/warehouse/gmall/dwd/dwd_praise_log/';
2)导入数据
hive (gmall)>
set hive.exec.dynamic.partition.mode=nonstrict;

insert overwrite table dwd_praise_log
PARTITION (dt)
select
mid_id,
user_id,
version_code,
version_name,
lang,
source,
os,
area,
model,
brand,
sdk_version,
gmail,
height_width,
app_time,
network,
lng,
lat,
get_json_object(event_json,'$.kv.id') id,
get_json_object(event_json,'$.kv.userid') userid,
get_json_object(event_json,'$.kv.target_id') target_id,
get_json_object(event_json,'$.kv.type') type,
get_json_object(event_json,'$.kv.add_time') add_time,
server_time,
dt
from dwd_base_event_log
where dt='2019-02-10' and event_name='praise';
3)测试
hive (gmall)> select * from dwd_praise_log limit 2;3.4.11 启动日志表
1)建表语句
hive (gmall)>
drop table if exists dwd_start_log;
CREATE EXTERNAL TABLE `dwd_start_log`(
`mid_id` string,
`user_id` string,
`version_code` string,
`version_name` string,
`lang` string,
`source` string,
`os` string,
`area` string,
`model` string,
`brand` string,
`sdk_version` string,
`gmail` string,
`height_width` string,
`app_time` string,
`network` string,
`lng` string,
`lat` string,
entry string,
open_ad_type string,
action string,
loading_time string,
detail string,
extend1 string,
`server_time` string
)
PARTITIONED BY (dt string)
location '/warehouse/gmall/dwd/dwd_start_log/';
2)导入数据
hive (gmall)>
set hive.exec.dynamic.partition.mode=nonstrict;

insert overwrite table dwd_start_log
PARTITION (dt)
select
mid_id,
user_id,
version_code,
version_name,
lang,
source,
os,
area,
model,
brand,
sdk_version,
gmail,
height_width,
app_time,
network,
lng,
lat,
get_json_object(event_json,'$.kv.entry') entry,
get_json_object(event_json,'$.kv.open_ad_type') open_ad_type,
get_json_object(event_json,'$.kv.action') action,
get_json_object(event_json,'$.kv.loading_time') loading_time,
get_json_object(event_json,'$.kv.detail') detail,
get_json_object(event_json,'$.kv.extend1') extend1,
server_time,
dt
from dwd_base_start_log
where dt='2019-02-10' and event_name='start';
3)测试
hive (gmall)> select * from dwd_start_log limit 2;3.4.12 错误日志表
1)建表语句
hive (gmall)>
drop table if exists dwd_error_log;
CREATE EXTERNAL TABLE `dwd_error_log`(
`mid_id` string,
`user_id` string,
`version_code` string,
`version_name` string,
`lang` string,
`source` string,
`os` string,
`area` string,
`model` string,
`brand` string,
`sdk_version` string,
`gmail` string,
`height_width` string,
`app_time` string,
`network` string,
`lng` string,
`lat` string,
errorBrief string,
errorDetail string,
`server_time` string)
PARTITIONED BY (dt string)
location '/warehouse/gmall/dwd/dwd_error_log/';
2)导入数据
hive (gmall)>
set hive.exec.dynamic.partition.mode=nonstrict;

insert overwrite table dwd_error_log
PARTITION (dt)
select
mid_id,
user_id,
version_code,
version_name,
lang,
source,
os,
area,
model,
brand,
sdk_version,
gmail,
height_width,
app_time,
network,
lng,
lat,
get_json_object(event_json,'$.kv.errorBrief') errorBrief,
get_json_object(event_json,'$.kv.errorDetail') errorDetail,
server_time,
dt
from dwd_base_event_log
where dt='2019-02-10' and event_name='error';
3)测试
hive (gmall)> select * from dwd_error_log limit 2;3.4.13 DWD层加载数据脚本
1)在hadoop102的/home/newbies/bin目录下创建脚本
[newbies@hadoop102 bin]$ vim dwd.sh在脚本中编写如下内容
#!/bin/bash

# 定义变量方便修改
APP=gmall
hive=/opt/module/hive/bin/hive

# 如果是输入的日期按照取输入日期;如果没输入日期取当前时间的前一天
if [ -n $1 ] ;then
	log_date=$1
else
	log_date=`date  -d "-1 day"  +%F`
fi
sql="

set hive.exec.dynamic.partition.mode=nonstrict;

insert overwrite table "$APP".dwd_display_log
PARTITION (dt)
select
	mid_id,
	user_id,
	version_code,
	version_name,
	lang,
	source,
	os,
	area,
	model,
	brand,
	sdk_version,
	gmail,
	height_width,
	app_time,
	network,
	lng,
	lat,
	get_json_object(event_json,'$.kv.action') action,
	get_json_object(event_json,'$.kv.newsid') newsid,
	get_json_object(event_json,'$.kv.place') place,
	get_json_object(event_json,'$.kv.extend1') extend1,
	get_json_object(event_json,'$.kv.category') category,
	server_time,
	dt
from "$APP".dwd_base_event_log
where dt='$log_date' and event_name='display';


insert overwrite table "$APP".dwd_newsdetail_log
PARTITION (dt)
select
	mid_id,
	user_id,
	version_code,
	version_name,
	lang,
	source,
	os,
	area,
	model,
	brand,
	sdk_version,
	gmail,
	height_width,
	app_time,
	network,
	lng,
	lat,
	get_json_object(event_json,'$.kv.entry') entry,
	get_json_object(event_json,'$.kv.action') action,
	get_json_object(event_json,'$.kv.newsid') newsid,
	get_json_object(event_json,'$.kv.showtype') showtype,
	get_json_object(event_json,'$.kv.news_staytime') news_staytime,
	get_json_object(event_json,'$.kv.loading_time') loading_time,
	get_json_object(event_json,'$.kv.type1') type1,
	get_json_object(event_json,'$.kv.category') category,
	server_time,
	dt
from "$APP".dwd_base_event_log
where dt='$log_date' and event_name='newsdetail';


insert overwrite table "$APP".dwd_loading_log
PARTITION (dt)
select
	mid_id,
	user_id,
	version_code,
	version_name,
	lang,
	source,
	os,
	area,
	model,
	brand,
	sdk_version,
	gmail,
	height_width,
	app_time,
	network,
	lng,
	lat,
	get_json_object(event_json,'$.kv.action') action,
	get_json_object(event_json,'$.kv.loading_time') loading_time,
	get_json_object(event_json,'$.kv.loading_way') loading_way,
	get_json_object(event_json,'$.kv.extend1') extend1,
	get_json_object(event_json,'$.kv.extend2') extend2,
	get_json_object(event_json,'$.kv.type') type,
	get_json_object(event_json,'$.kv.type1') type1,
	server_time,
	dt
from "$APP".dwd_base_event_log
where dt='$log_date' and event_name='loading';


insert overwrite table "$APP".dwd_ad_log
PARTITION (dt)
select
	mid_id,
	user_id,
	version_code,
	version_name,
	lang,
	source,
	os,
	area,
	model,
	brand,
	sdk_version,
	gmail,
	height_width,
	app_time,
	network,
	lng,
	lat,
	get_json_object(event_json,'$.kv.entry') entry,
	get_json_object(event_json,'$.kv.action') action,
	get_json_object(event_json,'$.kv.content') content,
	get_json_object(event_json,'$.kv.detail') detail,
	get_json_object(event_json,'$.kv.source') ad_source,
	get_json_object(event_json,'$.kv.behavior') behavior,
	get_json_object(event_json,'$.kv.newstype') newstype,
	get_json_object(event_json,'$.kv.show_style') show_style,
	server_time,
	dt
from "$APP".dwd_base_event_log
where dt='$log_date' and event_name='ad';


insert overwrite table "$APP".dwd_notification_log
PARTITION (dt)
select
	mid_id,
	user_id,
	version_code,
	version_name,
	lang,
	source,
	os,
	area,
	model,
	brand,
	sdk_version,
	gmail,
	height_width,
	app_time,
	network,
	lng,
	lat,
	get_json_object(event_json,'$.kv.action') action,
	get_json_object(event_json,'$.kv.noti_type') noti_type,
	get_json_object(event_json,'$.kv.ap_time') ap_time,
	get_json_object(event_json,'$.kv.content') content,
	server_time,
	dt
from "$APP".dwd_base_event_log
where dt='$log_date' and event_name='notification';


insert overwrite table "$APP".dwd_active_foreground_log
PARTITION (dt)
select
	mid_id,
	user_id,
	version_code,
	version_name,
	lang,
	source,
	os,
	area,
	model,
	brand,
	sdk_version,
	gmail,
	height_width,
	app_time,
	network,
	lng,
	lat,
	get_json_object(event_json,'$.kv.active_source') active_source,
	server_time,
	dt
from "$APP".dwd_base_event_log
where dt='$log_date' and event_name='active_background';


insert overwrite table "$APP".dwd_active_background_log
PARTITION (dt)
select
	mid_id,
	user_id,
	version_code,
	version_name,
	lang,
	source,
	os,
	area,
	model,
	brand,
	sdk_version,
	gmail,
	height_width,
	app_time,
	network,
	lng,
	lat,
	get_json_object(event_json,'$.kv.active_source') active_source,
	server_time,
	dt
from "$APP".dwd_base_event_log
where dt='$log_date' and event_name='active_background';


insert overwrite table "$APP".dwd_comment_log
PARTITION (dt)
select
	mid_id,
	user_id,
	version_code,
	version_name,
	lang,
	source,
	os,
	area,
	model,
	brand,
	sdk_version,
	gmail,
	height_width,
	app_time,
	network,
	lng,
	lat,
	get_json_object(event_json,'$.kv.comment_id') comment_id,
	get_json_object(event_json,'$.kv.userid') userid,
	get_json_object(event_json,'$.kv.p_comment_id') p_comment_id,
	get_json_object(event_json,'$.kv.content') content,
	get_json_object(event_json,'$.kv.addtime') addtime,
	get_json_object(event_json,'$.kv.other_id') other_id,
	get_json_object(event_json,'$.kv.praise_count') praise_count,
	get_json_object(event_json,'$.kv.reply_count') reply_count,
	server_time,
	dt
from "$APP".dwd_base_event_log
where dt='$log_date' and event_name='comment';


insert overwrite table "$APP".dwd_favorites_log
PARTITION (dt)
select
	mid_id,
	user_id,
	version_code,
	version_name,
	lang,
	source,
	os,
	area,
	model,
	brand,
	sdk_version,
	gmail,
	height_width,
	app_time,
	network,
	lng,
	lat,
	get_json_object(event_json,'$.kv.id') id,
	get_json_object(event_json,'$.kv.course_id') course_id,
	get_json_object(event_json,'$.kv.userid') userid,
	get_json_object(event_json,'$.kv.add_time') add_time,
	server_time,
	dt
from "$APP".dwd_base_event_log
where dt='$log_date' and event_name='favorites';


insert overwrite table "$APP".dwd_praise_log
PARTITION (dt)
select
	mid_id,
	user_id,
	version_code,
	version_name,
	lang,
	source,
	os,
	area,
	model,
	brand,
	sdk_version,
	gmail,
	height_width,
	app_time,
	network,
	lng,
	lat,
	get_json_object(event_json,'$.kv.id') id,
	get_json_object(event_json,'$.kv.userid') userid,
	get_json_object(event_json,'$.kv.target_id') target_id,
	get_json_object(event_json,'$.kv.type') type,
	get_json_object(event_json,'$.kv.add_time') add_time,
	server_time,
	dt
from "$APP".dwd_base_event_log
where dt='$log_date' and event_name='praise';


insert overwrite table "$APP".dwd_start_log
PARTITION (dt)
select
	mid_id,
	user_id,
	version_code,
	version_name,
	lang,
	source,
	os,
	area,
	model,
	brand,
	sdk_version,
	gmail,
	height_width,
	app_time,
	network,
	lng,
	lat,
	get_json_object(event_json,'$.kv.entry') entry,
	get_json_object(event_json,'$.kv.open_ad_type') open_ad_type,
	get_json_object(event_json,'$.kv.action') action,
	get_json_object(event_json,'$.kv.loading_time') loading_time,
	get_json_object(event_json,'$.kv.detail') detail,
	get_json_object(event_json,'$.kv.extend1') extend1,
	server_time,
	dt
from "$APP".dwd_base_start_log
where dt='$log_date' and event_name='start';


insert overwrite table "$APP".dwd_error_log
PARTITION (dt)
select
	mid_id,
	user_id,
	version_code,
	version_name,
	lang,
	source,
	os,
	area,
	model,
	brand,
	sdk_version,
	gmail,
	height_width,
	app_time,
	network,
	lng,
	lat,
	get_json_object(event_json,'$.kv.errorBrief') errorBrief,
	get_json_object(event_json,'$.kv.errorDetail') errorDetail,
	server_time,
	dt
from "$APP".dwd_base_event_log
where dt='$log_date' and event_name='error';

"

$hive -e "$sql"
2)增加脚本执行权限
[newbies@hadoop102 bin]$ chmod 777 dwd.sh3)脚本使用
[newbies@hadoop102 module]$ dwd.sh 2019-02-114)查询导入结果
hive (gmall)>
select * from dwd_start_log where dt='2019-02-11' limit 2;
select * from dwd_comment_log where dt='2019-02-11' limit 2;
5)脚本执行时间
企业开发中一般在每日凌晨30分~1点
第4章 业务知识准备
4.1 业务术语
- 用户
用户以设备为判断标准,在移动统计中,每个独立设备认为是一个独立用户。Android系统根据IMEI号,IOS系统根据OpenUDID来标识一个独立用户,每部手机一个用户。
- 新增用户
首次联网使用应用的用户。如果一个用户首次打开某app,那这个用户定义为新增用户;卸载再安装的设备,不会被算作一次新增。新增用户包括日新增用户、周新增用户、月新增用户。
- 活跃用户
打开应用的用户即为活跃用户,不考虑用户的使用情况。每天一台设备打开多次会被计为一个活跃用户。
- 周(月)活跃用户
某个自然周(月)内启动过应用的用户,该周(月)内的多次启动只记一个活跃用户。
- 月活跃率
月活跃用户与截止到该月累计的用户总和之间的比例。
- 沉默用户
用户仅在安装当天(次日)启动一次,后续时间无再启动行为。该指标可以反映新增用户质量和用户与APP的匹配程度。
- 版本分布
不同版本的周内各天新增用户数,活跃用户数和启动次数。利于判断App各个版本之间的优劣和用户行为习惯。
- 本周回流用户
上周未启动过应用,本周启动了应用的用户。
- 连续n周活跃用户
连续n周,每周至少启动一次。
- 忠诚用户
连续活跃5周以上的用户
- 连续活跃用户
连续2周及以上活跃的用户
- 近期流失用户
连续n(2<= n <= 4)周没有启动应用的用户。(第n+1周没有启动过)
- 留存用户
某段时间内的新增用户,经过一段时间后,仍然使用应用的被认作是留存用户;这部分用户占当时新增用户的比例即是留存率。例如,5月份新增用户200,这200人在6月份启动过应用的有100人,7月份启动过应用的有80人,8月份启动过应用的有50人;则5月份新增用户一个月后的留存率是50%,二个月后的留存率是40%,三个月后的留存率是25%。
- 用户新鲜度
每天启动应用的新老用户比例,即新增用户数占活跃用户数的比例。
- 单次使用时长
每次启动使用的时间长度。
- 日使用时长
累计一天内的使用时间长度。
- 启动次数计算标准
IOS平台应用退到后台就算一次独立的启动;Android平台我们规定,两次启动之间的间隔小于30秒,被计算一次启动。用户在使用过程中,若因收发短信或接电话等退出应用30秒又再次返回应用中,那这两次行为应该是延续而非独立的,所以可以被算作一次使用行为,即一次启动。业内大多使用30秒这个标准,但用户还是可以自定义此时间间隔。
4.2 系统函数
4.2.1 collect_set函数
1)创建原数据表
hive (gmall)>
drop table if exists stud;
create table stud (name string, area string, course string, score int);
2)向原数据表中插入数据
hive (gmall)>
insert into table  stud  values('zhang3','bj','math',88);
insert into table  stud  values('li4','bj','math',99);
insert into table  stud  values('wang5','sh','chinese',92);
insert into table  stud  values('zhao6','sh','chinese',54);
insert into table  stud  values('tian7','bj','chinese',91);
3)查询表中数据
hive (gmall)> select * from  stud;
stud.name       stud.area       stud.course     stud.score
zhang3  bj      math    88
li4     bj      math    99
wang5   sh      chinese 92
zhao6   sh      chinese 54
tian7   bj      chinese 91
4)把同一分组的不同行的数据聚合成一个集合
hive (gmall)> select course, collect_set(area), avg(score) from stud group by course;
chinese ["sh","bj"]     79.0
math    ["bj"]  93.5
5) 用下标可以取某一个
hive (gmall)> select course, collect_set(area)[0], avg(score) from stud group by course;
chinese sh      79.0
math    bj      93.5
4.2.2 日期处理函数
1)date_format函数(根据格式整理日期)
hive (gmall)> select date_format('2019-02-10','yyyy-MM');
2019-02
2)date_add函数(加减日期)
hive (gmall)> select date_add('2019-02-10',-1);
2019-02-09
hive (gmall)> select date_add('2019-02-10',1);
2019-02-11
3)next_day函数
(1)取当前天的下一周的周一
hive (gmall)> select next_day('2019-02-12','MO')
2019-02-18
(2)取当前周的周一
hive (gmall)> select date_add(next_day('2019-02-12','MO'),-7);
2019-02-11
4)last_day函数(求当月最后一天日期)
hive (gmall)> select last_day('2019-02-10');
2019-02-28
第5章 需求一:用户活跃主题
5.1 DWS层
目标:统计当日、当周、当月活动的每个设备明细
5.1.1 每日活跃设备明细

1)建表语句
hive (gmall)>
drop table if exists dws_uv_detail_day;
create   table dws_uv_detail_day(
    `mid_id` string COMMENT '设备唯一标识',
    `user_id` string COMMENT '用户标识',
    `version_code` string COMMENT '程序版本号',
    `version_name` string COMMENT '程序版本名',
`lang` string COMMENT '系统语言',
`source` string COMMENT '渠道号',
`os` string COMMENT '安卓系统版本',
`area` string COMMENT '区域',
`model` string COMMENT '手机型号',
`brand` string COMMENT '手机品牌',
`sdk_version` string COMMENT 'sdkVersion',
`gmail` string COMMENT 'gmail',
`height_width` string COMMENT '屏幕宽高',
`app_time` string COMMENT '客户端日志产生时的时间',
`network` string COMMENT '网络模式',
`lng` string COMMENT '经度',
`lat` string COMMENT '纬度'
) COMMENT '活跃用户按天明细'
PARTITIONED BY ( `dt` string)
stored as  parquet
location '/warehouse/gmall/dws/dws_uv_detail_day/'
;
2)数据导入
以用户单日访问为key进行聚合,如果某个用户在一天中使用了两种操作系统、两个系统版本、多个地区,登录不同账号,只取其中之一
hive (gmall)>
set hive.exec.dynamic.partition.mode=nonstrict;

insert overwrite table dws_uv_detail_day  partition(dt)
select
    mid_id,
    collect_set(user_id)[0] user_id,
    collect_set(version_code)[0] version_code,
    collect_set(version_name)[0] version_name,
    collect_set(lang)[0]lang,
    collect_set(source)[0] source,
    collect_set(os)[0] os,
    collect_set(area)[0] area,
    collect_set(model)[0] model,
    collect_set(brand)[0] brand,
    collect_set(sdk_version)[0] sdk_version,
    collect_set(gmail)[0] gmail,
    collect_set(height_width)[0] height_width,
    collect_set(app_time)[0]app_time,
    collect_set(network)[0] network,
    collect_set(lng)[0]lng,
    collect_set(lat)[0]lat,
    '2019-02-10'
from dwd_start_log
where dt='2019-02-10'
group by mid_id;
3)查询导入结果
hive (gmall)> select * from dws_uv_detail_day limit 1;
hive (gmall)> select count(*) from dws_uv_detail_day;
4)思考:不同渠道来源的每日活跃数统计怎么计算?
5.1.2 每周活跃设备明细

根据日用户访问明细 ,获得周用户访问明细
1)建表语句
hive (gmall)>
drop table if exists dws_uv_detail_wk;

create table dws_uv_detail_wk(
    `mid_id` string COMMENT '设备唯一标识',
    `user_id` string COMMENT '用户标识',
    `version_code` string COMMENT '程序版本号',
    `version_name` string COMMENT '程序版本名',
`lang` string COMMENT '系统语言',
`source` string COMMENT '渠道号',
`os` string COMMENT '安卓系统版本',
`area` string COMMENT '区域',
`model` string COMMENT '手机型号',
`brand` string COMMENT '手机品牌',
`sdk_version` string COMMENT 'sdkVersion',
`gmail` string COMMENT 'gmail',
`height_width` string COMMENT '屏幕宽高',
`app_time` string COMMENT '客户端日志产生时的时间',
`network` string COMMENT '网络模式',
`lng` string COMMENT '经度',
`lat` string COMMENT '纬度',
    `monday_date` string COMMENT '周一日期',
    `sunday_date` string COMMENT  '周日日期'
) COMMENT '活跃用户按周明细'
PARTITIONED BY (`wk_dt` string)
stored as  parquet
location '/warehouse/gmall/dws/dws_uv_detail_wk/'
;
2)数据导入
hive (gmall)>
set hive.exec.dynamic.partition.mode=nonstrict;

insert  overwrite table dws_uv_detail_wk partition(wk_dt)
select
    mid_id,
    collect_set(user_id)[0] user_id,
    collect_set(version_code)[0] version_code,
    collect_set(version_name)[0] version_name,
    collect_set(lang)[0]lang,
    collect_set(source)[0] source,
    collect_set(os)[0] os,
    collect_set(area)[0] area,
    collect_set(model)[0] model,
    collect_set(brand)[0] brand,
    collect_set(sdk_version)[0] sdk_version,
    collect_set(gmail)[0] gmail,
    collect_set(height_width)[0] height_width,
    collect_set(app_time)[0]app_time,
    collect_set(network)[0] network,
    collect_set(lng)[0]lng,
    collect_set(lat)[0]lat,
   date_add(next_day('2019-02-10','MO'),-7),
   date_add(next_day('2019-02-10','MO'),-1),
   concat(date_add( next_day('2019-02-10','MO'),-7), '_' , date_add(next_day('2019-02-10','MO'),-1)
)
from dws_uv_detail_day
where dt>=date_add(next_day('2019-02-10','MO'),-7) and dt<=date_add(next_day('2019-02-10','MO'),-1)
group by mid_id;
3)查询导入结果
hive (gmall)> select * from dws_uv_detail_wk limit 1;
hive (gmall)> select count(*) from dws_uv_detail_wk;
5.1.3 每月活跃设备明细

1)建表语句
hive (gmall)>
drop table if exists dws_uv_detail_mn;

create  external table dws_uv_detail_mn(
    `mid_id` string COMMENT '设备唯一标识',
    `user_id` string COMMENT '用户标识',
    `version_code` string COMMENT '程序版本号',
    `version_name` string COMMENT '程序版本名',
`lang` string COMMENT '系统语言',
`source` string COMMENT '渠道号',
`os` string COMMENT '安卓系统版本',
`area` string COMMENT '区域',
`model` string COMMENT '手机型号',
`brand` string COMMENT '手机品牌',
`sdk_version` string COMMENT 'sdkVersion',
`gmail` string COMMENT 'gmail',
`height_width` string COMMENT '屏幕宽高',
`app_time` string COMMENT '客户端日志产生时的时间',
`network` string COMMENT '网络模式',
`lng` string COMMENT '经度',
`lat` string COMMENT '纬度'
) COMMENT '活跃用户按月明细'
PARTITIONED BY (`mn` string)
stored as  parquet
location '/warehouse/gmall/dws/dws_uv_detail_mn/'
;
2)数据导入
hive (gmall)>
set hive.exec.dynamic.partition.mode=nonstrict;

insert  overwrite table dws_uv_detail_mn  partition(mn)
select
    mid_id,
    collect_set(user_id)[0] user_id,
    collect_set(version_code)[0] version_code,
    collect_set(version_name)[0] version_name,
    collect_set(lang)[0]lang,
    collect_set(source)[0] source,
    collect_set(os)[0] os,
    collect_set(area)[0] area,
    collect_set(model)[0] model,
    collect_set(brand)[0] brand,
    collect_set(sdk_version)[0] sdk_version,
    collect_set(gmail)[0] gmail,
    collect_set(height_width)[0] height_width,
    collect_set(app_time)[0]app_time,
    collect_set(network)[0] network,
    collect_set(lng)[0]lng,
    collect_set(lat)[0]lat,
date_format('2019-02-10','yyyy-MM')
from dws_uv_detail_day
where date_format(dt,'yyyy-MM') = date_format('2019-02-10','yyyy-MM')
group by mid_id;
3)查询导入结果
hive (gmall)> select * from dws_uv_detail_mn limit 1;
hive (gmall)> select count(*) from dws_uv_detail_mn ;
5.1.4 DWS层加载数据脚本
1)在hadoop102的/home/newbies/bin目录下创建脚本
[newbies@hadoop102 bin]$ vim dws.sh在脚本中编写如下内容
#!/bin/bash

# 定义变量方便修改
APP=gmall
hive=/opt/module/hive/bin/hive

# 如果是输入的日期按照取输入日期;如果没输入日期取当前时间的前一天
if [ -n $1 ] ;then
	log_date=$1
else
	log_date=`date -d "-1 day" +%F`
fi


sql="
  set hive.exec.dynamic.partition.mode=nonstrict;

  insert overwrite table "$APP".dws_uv_detail_day partition(dt='$log_date')
  select
    mid_id,
    collect_set(user_id)[0] user_id,
    collect_set(version_code)[0] version_code,
    collect_set(version_name)[0] version_name,
    collect_set(lang)[0]lang,
    collect_set(source)[0] source,
    collect_set(os)[0] os,
    collect_set(area)[0] area,
    collect_set(model)[0] model,
    collect_set(brand)[0] brand,
    collect_set(sdk_version)[0] sdk_version,
    collect_set(gmail)[0] gmail,
    collect_set(height_width)[0] height_width,
    collect_set(app_time)[0]app_time,
    collect_set(network)[0] network,
    collect_set(lng)[0]lng,
    collect_set(lat)[0]lat
  from "$APP".dwd_start_log
  where dt='$log_date'
  group by mid_id;


  insert  overwrite table "$APP".dws_uv_detail_wk partition(wk_dt)
  select
    mid_id,
    collect_set(user_id)[0] user_id,
    collect_set(version_code)[0] version_code,
    collect_set(version_name)[0] version_name,
    collect_set(lang)[0]lang,
    collect_set(source)[0] source,
    collect_set(os)[0] os,
    collect_set(area)[0] area,
    collect_set(model)[0] model,
    collect_set(brand)[0] brand,
    collect_set(sdk_version)[0] sdk_version,
    collect_set(gmail)[0] gmail,
    collect_set(height_width)[0] height_width,
    collect_set(app_time)[0]app_time,
    collect_set(network)[0] network,
    collect_set(lng)[0]lng,
    collect_set(lat)[0]lat,
   date_add(next_day('$log_date','MO'),-7),
   date_add(next_day('$log_date','SU'),-7),
   concat(date_add( next_day('$log_date','MO'),-7), '_' , date_add(next_day('$log_date','MO'),-1)
  )
  from "$APP".dws_uv_detail_day
  where dt>=date_add(next_day('$log_date','MO'),-7) and dt<=date_add(next_day('$log_date','MO'),-1)
  group by mid_id,lang,gmail,app_time,lng,lat;


  insert overwrite table "$APP".dws_uv_detail_mn partition(mn)
  select
    mid_id,
    collect_set(user_id)[0] user_id,
    collect_set(version_code)[0] version_code,
    collect_set(version_name)[0] version_name,
    collect_set(lang)[0]lang,
    collect_set(source)[0] source,
    collect_set(os)[0] os,
    collect_set(area)[0] area,
    collect_set(model)[0] model,
    collect_set(brand)[0] brand,
    collect_set(sdk_version)[0] sdk_version,
    collect_set(gmail)[0] gmail,
    collect_set(height_width)[0] height_width,
    collect_set(app_time)[0]app_time,
    collect_set(network)[0] network,
    collect_set(lng)[0]lng,
    collect_set(lat)[0]lat,
    date_format('$log_date','yyyy-MM')
  from "$APP".dws_uv_detail_day
  where date_format(dt,'yyyy-MM') = date_format('$log_date','yyyy-MM')
  group by mid_id,lang,gmail,app_time,lng,lat;
"

$hive -e "$sql"
2)增加脚本执行权限
[newbies@hadoop102 bin]$ chmod 777 dws.sh3)脚本使用
[newbies@hadoop102 module]$ dws.sh 2019-02-114)查询结果
hive (gmall)> select count(*) from dws_uv_detail_day;
hive (gmall)> select count(*) from dws_uv_detail_wk;
hive (gmall)> select count(*) from dws_uv_detail_mn ;
5)脚本执行时间
企业开发中一般在每日凌晨30分~1点
5.2 ADS层
目标:当日、当周、当月活跃设备数
5.2.1 活跃设备数

1)建表语句
hive (gmall)>
drop table if exists ads_uv_count;
create  external table ads_uv_count(
    `dt` string COMMENT '统计日期',
    `day_count` bigint COMMENT '当日用户数量',
    `wk_count`  bigint COMMENT '当周用户数量',
    `mn_count`  bigint COMMENT '当月用户数量',
    `is_weekend` string COMMENT 'Y,N是否是周末,用于得到本周最终结果',
    `is_monthend` string COMMENT 'Y,N是否是月末,用于得到本月最终结果'
) COMMENT '每日活跃用户数量'
stored as parquet
location '/warehouse/gmall/ads/ads_uv_count_day/'
;
2)导入数据
hive (gmall)>
insert  overwrite table ads_uv_count
select
  '2019-02-10' dt,
   daycount.ct,
   wkcount.ct,
   mncount.ct,
   if(date_add(next_day('2019-02-10','MO'),-1)='2019-02-10','Y','N') ,
   if(last_day('2019-02-10')='2019-02-10','Y','N')
from
(
   select
      '2019-02-10' dt,
       count(*) ct
   from dws_uv_detail_day
   where dt='2019-02-10'
)daycount   join
(
   select
     '2019-02-10' dt,
     count (*) ct
   from dws_uv_detail_wk
   where wk_dt=concat(date_add(next_day('2019-02-10','MO'),-7),'_' ,date_add(next_day('2019-02-10','MO'),-1) )
)  wkcount  on daycount.dt=wkcount.dt
join
(
   select
     '2019-02-10' dt,
     count (*) ct
   from dws_uv_detail_mn
   where mn=date_format('2019-02-10','yyyy-MM')
)mncount on daycount.dt=mncount.dt
;
3)查询导入结果
hive (gmall)> select * from ads_uv_count ;5.2.2 ADS层加载数据脚本
1)在hadoop102的/home/newbies/bin目录下创建脚本
[newbies@hadoop102 bin]$ vim ads.sh在脚本中编写如下内容
#!/bin/bash

# 定义变量方便修改
APP=gmall
hive=/opt/module/hive/bin/hive

# 如果是输入的日期按照取输入日期;如果没输入日期取当前时间的前一天
if [ -n $1 ] ;then
	log_date=$1
else
	log_date=`date -d "-1 day" +%F`
fi

sql="
  set hive.exec.dynamic.partition.mode=nonstrict;

insert into table "$APP".ads_uv_count
select
  '$log_date' dt,
   daycount.ct,
   wkcount.ct,
   mncount.ct,
   if(date_add(next_day('$log_date','MO'),-1)='$log_date','Y','N') ,
   if(last_day('$log_date')='$log_date','Y','N')
from
(
   select
      '$log_date' dt,
       count(*) ct
   from "$APP".dws_uv_detail_day
   where dt='$log_date'
)daycount   join
(
   select
     '$log_date' dt,
     count (*) ct
   from "$APP".dws_uv_detail_wk
   where wk_dt=concat(date_add(next_day('$log_date','MO'),-7),'_' ,date_add(next_day('$log_date','MO'),-1) )
)  wkcount  on daycount.dt=wkcount.dt
join
(
   select
     '$log_date' dt,
     count (*) ct
   from "$APP".dws_uv_detail_mn
   where mn=date_format('$log_date','yyyy-MM')
)mncount on daycount.dt=mncount.dt;
"

$hive -e "$sql"
2)增加脚本执行权限
[newbies@hadoop102 bin]$ chmod 777 ads.sh3)脚本使用
[newbies@hadoop102 module]$ ads.sh 2019-02-114)脚本执行时间
企业开发中一般在每日凌晨30分~1点
5)查询导入结果
hive (gmall)> select * from ads_uv_count ;第6章 需求二:用户新增主题
首次联网使用应用的用户。如果一个用户首次打开某app,那这个用户定义为新增用户;卸载再安装的设备,不会被算作一次新增。新增用户包括日新增用户、周新增用户、月新增用户。
6.1 DWS层(每日新增设备明细表)


1)建表语句
hive (gmall)>
drop table if exists  `dws_new_mid_day`;
create  table  `dws_new_mid_day`
(
    `mid_id` string COMMENT '设备唯一标识',
    `user_id` string COMMENT '用户标识',
    `version_code` string COMMENT '程序版本号',
    `version_name` string COMMENT '程序版本名',
`lang` string COMMENT '系统语言',
`source` string COMMENT '渠道号',
`os` string COMMENT '安卓系统版本',
`area` string COMMENT '区域',
`model` string COMMENT '手机型号',
`brand` string COMMENT '手机品牌',
`sdk_version` string COMMENT 'sdkVersion',
`gmail` string COMMENT 'gmail',
`height_width` string COMMENT '屏幕宽高',
`app_time` string COMMENT '客户端日志产生时的时间',
`network` string COMMENT '网络模式',
`lng` string COMMENT '经度',
`lat` string COMMENT '纬度',
    `create_date`  string  comment '创建时间'
)  COMMENT '每日新增设备信息'
stored as  parquet
location '/warehouse/gmall/dws/dws_new_mid_day/';
2)导入数据
用每日活跃用户表 left join 每日新增设备表,关联的条件是mid_id相等。如果是每日新增的设备,则在每日新增设备表中为null。
hive (gmall)>
insert into table dws_new_mid_day
select
    ud.mid_id,
    ud.user_id ,
    ud.version_code ,
    ud.version_name ,
    ud.lang ,
    ud.source,
    ud.os,
    ud.area,
    ud.model,
    ud.brand,
    ud.sdk_version,
    ud.gmail,
    ud.height_width,
    ud.app_time,
    ud.network,
    ud.lng,
    ud.lat,
    '2019-02-10'
from dws_uv_detail_day ud left join dws_new_mid_day nm on ud.mid_id=nm.mid_id
where ud.dt='2019-02-10' and nm.mid_id is null;
3)查询导入数据
hive (gmall)> select count(*) from dws_new_mid_day ;6.2 ADS层(每日新增设备表)

1)建表语句
hive (gmall)>
drop table if exists  `ads_new_mid_count`;
create  table  `ads_new_mid_count`
(
    `create_date`     string  comment '创建时间' ,
    `new_mid_count`   BIGINT comment '新增设备数量'
)  COMMENT '每日新增设备信息数量'
row format delimited  fields terminated by '\t'
location '/warehouse/gmall/ads/ads_new_mid_count/';
2)导入数据
hive (gmall)>
insert into table ads_new_mid_count
select create_date , count(*)  from dws_new_mid_day
where create_date='2019-02-10'
group by create_date ;
3)查询导入数据
hive (gmall)> select * from ads_new_mid_count;第7章 需求三:用户留存主题
7.1 需求目标
7.1.1 用户留存概念

7.1.2 需求描述

7.2 DWS层
7.3.1 DWS层(每日留存用户明细表)

1)建表语句
hive (gmall)>
drop table if exists  `dws_user_retention_day`;
create  table  `dws_user_retention_day`
(
    `mid_id` string COMMENT '设备唯一标识',
    `user_id` string COMMENT '用户标识',
    `version_code` string COMMENT '程序版本号',
    `version_name` string COMMENT '程序版本名',
`lang` string COMMENT '系统语言',
`source` string COMMENT '渠道号',
`os` string COMMENT '安卓系统版本',
`area` string COMMENT '区域',
`model` string COMMENT '手机型号',
`brand` string COMMENT '手机品牌',
`sdk_version` string COMMENT 'sdkVersion',
`gmail` string COMMENT 'gmail',
`height_width` string COMMENT '屏幕宽高',
`app_time` string COMMENT '客户端日志产生时的时间',
`network` string COMMENT '网络模式',
`lng` string COMMENT '经度',
`lat` string COMMENT '纬度',
   `create_date`       string  comment '设备新增时间',
   `retention_day`     int comment '截止当前日期留存天数'
)  COMMENT '每日用户留存情况'
PARTITIONED BY ( `dt` string)
stored as  parquet
location '/warehouse/gmall/dws/dws_user_retention_day/'
;
2)导入数据(每天计算前1天的新用户访问留存明细)
hive (gmall)>
insert  overwrite table dws_user_retention_day  partition(dt="2019-02-11")
select
    nm.mid_id,
    nm.user_id ,
    nm.version_code ,
    nm.version_name ,
    nm.lang ,
    nm.source,
    nm.os,
    nm.area,
    nm.model,
    nm.brand,
    nm.sdk_version,
    nm.gmail,
    nm.height_width,
    nm.app_time,
    nm.network,
    nm.lng,
    nm.lat,
nm.create_date,
1 retention_day
from  dws_uv_detail_day ud join dws_new_mid_day nm   on ud.mid_id =nm.mid_id
where ud.dt='2019-02-11' and nm.create_date=date_add('2019-02-11',-1);
3)查询导入数据(每天计算前1天的新用户访问留存明细)
hive (gmall)> select count(*) from dws_user_retention_day;7.3.2 DWS层(1,2,3,n天留存用户明细表)
1)导入数据(每天计算前1,2,3,n天的新用户访问留存明细)
hive (gmall)>
insert  overwrite table dws_user_retention_day  partition(dt="2019-02-11")
select
    nm.mid_id,
    nm.user_id ,
    nm.version_code ,
    nm.version_name ,
    nm.lang ,
    nm.source,
    nm.os,
    nm.area,
    nm.model,
    nm.brand,
    nm.sdk_version,
    nm.gmail,
    nm.height_width,
    nm.app_time,
    nm.network,
    nm.lng,
    nm.lat,
    nm.create_date,
    1 retention_day
from  dws_uv_detail_day ud join dws_new_mid_day nm   on ud.mid_id =nm.mid_id
where ud.dt='2019-02-11' and nm.create_date=date_add('2019-02-11',-1)

union all
select
    nm.mid_id,
    nm.user_id ,
    nm.version_code ,
    nm.version_name ,
    nm.lang ,
    nm.source,
    nm.os,
    nm.area,
    nm.model,
    nm.brand,
    nm.sdk_version,
    nm.gmail,
    nm.height_width,
    nm.app_time,
    nm.network,
    nm.lng,
    nm.lat,
    nm.create_date,
    2 retention_day
from  dws_uv_detail_day ud join dws_new_mid_day nm   on ud.mid_id =nm.mid_id
where ud.dt='2019-02-11' and nm.create_date=date_add('2019-02-11',-2)

union all
select
    nm.mid_id,
    nm.user_id ,
    nm.version_code ,
    nm.version_name ,
    nm.lang ,
    nm.source,
    nm.os,
    nm.area,
    nm.model,
    nm.brand,
    nm.sdk_version,
    nm.gmail,
    nm.height_width,
    nm.app_time,
    nm.network,
    nm.lng,
    nm.lat,
    nm.create_date,
    3 retention_day
from  dws_uv_detail_day ud join dws_new_mid_day nm   on ud.mid_id =nm.mid_id
where ud.dt='2019-02-11' and nm.create_date=date_add('2019-02-11',-3);
2)查询导入数据(每天计算前1,2,3天的新用户访问留存明细)
hive (gmall)> select retention_day , count(*) from dws_user_retention_day;7.3 ADS层
7.3.1留存用户数

1)建表语句
hive (gmall)>
drop table if exists  `ads_user_retention_day_count`;
create  table  `ads_user_retention_day_count`
(
   `create_date`       string  comment '设备新增日期',
   `retention_day`     int comment '截止当前日期留存天数',
   retention_count      bigint comment  '留存数量'
)  COMMENT '每日用户留存情况'
stored as  parquet
location '/warehouse/gmall/ads/ads_user_retention_day_count/';
2)导入数据
hive (gmall)>
insert into table ads_user_retention_day_count
select
    create_date,
    retention_day,
    count(*) retention_count
from dws_user_retention_day
where dt='2019-02-11'
group by create_date,retention_day;
3)查询导入数据
hive (gmall)> select * from ads_user_retention_day_count;7.3.2留存用户比率

1)建表语句
hive (gmall)>
drop table if exists  `ads_user_retention_day_rate`;
create  table  `ads_user_retention_day_rate`
(
     `stat_date`          string comment '统计日期',
     `create_date`       string  comment '设备新增日期',
     `retention_day`     int comment '截止当前日期留存天数',
     `retention_count`    bigint comment  '留存数量',
     `new_mid_count`     string  comment '当日设备新增数量',
     `retention_ratio`   decimal(10,2) comment '留存率'
)  COMMENT '每日用户留存情况'
stored as  parquet
location '/warehouse/gmall/ads/ads_user_retention_day_count/';
2)导入数据
hive (gmall)>
insert into table ads_user_retention_day_rate
select
    '2019-02-11' ,
    ur.create_date,
    ur.retention_day,
    ur.retention_count ,
    nc.new_mid_count,
    ur.retention_count/nc.new_mid_count*100
from
(
    select
        create_date,
        retention_day,
        count(*) retention_count
    from `dws_user_retention_day`
    where dt='2019-02-11'
    group by create_date,retention_day
)  ur join ads_new_mid_count nc on nc.create_date=ur.create_date;
3)查询导入数据
hive (gmall)>select * from ads_user_retention_day_rate;