Request
获取请求行数据
- 获取请求方式
String getMethod() - (*)获取虚拟目录
String getContextPath() - 获取Servlet路径
String getServletPath() - 获取get方式请求参数
String getQueryString() - (*)获取请求URI和URL
String getRequestURI()
StringBuffer getRequestURL() - 获取协议及版本
String getProtocol() - 获取客户机的IP地址
String getRemoteAddr()
MyServlet类
@WebServlet("/demo1")
public class MyServlet extends HttpServlet {
    @Override
    protected void doPost(HttpServletRequest req, HttpServletResponse resp) throws IOException {
        String method = req.getMethod();
        System.out.println("请求方式"+method);
        String contextPath = req.getContextPath();
        System.out.println("虚拟目录"+contextPath);
        String servletPath = req.getServletPath();
        System.out.println("servlet路径"+servletPath);
        String queryString = req.getQueryString();
        System.out.println("get方式请求参数"+queryString);
        String requestURI = req.getRequestURI();
        System.out.println("请求URI"+requestURI);
        StringBuffer requestURL = req.getRequestURL();
        System.out.println("请求URL"+requestURL);
        String protocol = req.getProtocol();
        System.out.println("协议及版本"+protocol);
        String remoteAddr = req.getRemoteAddr();
        System.out.println("客户机IP地址"+remoteAddr);
    }


    @Override
    protected void doGet(HttpServletRequest req, HttpServletResponse resp) throws IOException {
        this.doPost(req,resp);
    }
}
登录页:
<!DOCTYPE html>
<html lang="en">
<head>
    <meta charset="UTF-8">
    <title>Title</title>
</head>
<body>
    <form action="demo1" method="post">
        <input name="username" >
        <input type="submit" value="submit">
    </form>
</body>
</html>
启动tomcat服务器(虚拟目录为/root),访问login.html输入abc并提交

idea输出结果:
请求方式:  POST
虚拟目录:  /root
servlet路径:  /demo1
get方式请求参数:  null
请求URI:  /root/demo1
请求URL:  http://localhost:8080/root/demo1
协议及版本:  HTTP/1.1
客户机IP地址:  0:0:0:0:0:0:0:1
将form中post换成get方式,再次提交,结果:
请求方式:  GET
虚拟目录:  /root
servlet路径:  /demo1
get方式请求参数:  username=abc
请求URI:  /root/demo1
请求URL:  http://localhost:8080/root/demo1
协议及版本:  HTTP/1.1
客户机IP地址:  0:0:0:0:0:0:0:1
获取请求头数据
通过请求头的名称获取请求头的值
String getHeader(String name)
获取所有的请求头名称
Enumeration<String> getHeaderNames()
@WebServlet("/demo1")
public class MyServlet extends HttpServlet {
    @Override
    protected void doPost(HttpServletRequest req, HttpServletResponse resp) throws IOException {
        Enumeration<String> headerNames = req.getHeaderNames();
        while (headerNames.hasMoreElements()){
            //请求头的名称
            String requestName = headerNames.nextElement();
            System.out.print("请求头的名称:"+requestName);
            //请求头的值
            String header = req.getHeader(requestName);
            System.out.println("请求头的值:"+header);
        }

    }


    @Override
    protected void doGet(HttpServletRequest req, HttpServletResponse resp) throws IOException {
        this.doPost(req,resp);
    }
}
结果:
请求头的名称:host请求头的值:localhost:8080
请求头的名称:connection请求头的值:keep-alive
请求头的名称:upgrade-insecure-requests请求头的值:1
请求头的名称:user-agent请求头的值:Mozilla/5.0 (Windows NT 10.0; Win64; x64) AppleWebKit/537.36 (KHTML, like Gecko) Chrome/78.0.3904.87 Safari/537.36
请求头的名称:sec-fetch-user请求头的值:?1
请求头的名称:accept请求头的值:text/html,application/xhtml+xml,application/xml;q=0.9,image/webp,image/apng,*/*;q=0.8,application/signed-exchange;v=b3
请求头的名称:sec-fetch-site请求头的值:same-origin
请求头的名称:sec-fetch-mode请求头的值:navigate
请求头的名称:referer请求头的值:http://localhost:8080/root/login.html
请求头的名称:accept-encoding请求头的值:gzip, deflate, br
请求头的名称:accept-language请求头的值:zh-CN,zh;q=0.9
请求头的名称:cookie请求头的值:JSESSIONID=97917D6D1FAD1D35757576268BD7DED3; Idea-fe3516c6=7bffffd5-2036-45b3-9613-35358f80bd96; Webstorm-cca88c1f=3ab543cf-2131-4475-9a5b-d0cd0e5d216b; Hm_lvt_eaa57ca47dacb4ad4f5a257001a3457c=1573474754,1573523933,1573525590,1573526587
获取请求体数据
请求体:只有POST请求方式,才有请求体,在请求体中封装了POST请求的请求参数
步骤:
- 获取流对象
BufferedReader getReader()获取字符输入流,只能操作字符数据
ServletInputStream getInputStream()获取字节输入流,可以操作所有类型数据- 再从流对象中拿数据
注册页
<!DOCTYPE html>
<html lang="en">
<head>
    <meta charset="UTF-8">
    <title>Title</title>
</head>
<body>
    <form action="demo1" method="post">
        <input name="username" type="text" >
        <input type="submit" value="注册">
    </form>
</body>
</html>
@WebServlet("/demo1")
public class MyServlet extends HttpServlet {
    @Override
    protected void doPost(HttpServletRequest req, HttpServletResponse resp) throws IOException {
        System.out.println(req.getMethod());
        //获取字符输入流
        BufferedReader reader = req.getReader();
        String line=null;
        //读取数据输出结果
        while((line=reader.readLine())!=null){
            System.out.println(line);
        }
    }


    @Override
    protected void doGet(HttpServletRequest req, HttpServletResponse resp) throws IOException {
        this.doPost(req,resp);
    }
}
启动tomcat服务器,访问register.html注册页面,输入tkrs
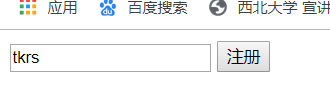
结果:
POST
username=tkrs
获取请求参数通用方式
不论get还是post请求方式都可以使用下列方法来获取请求参数
String getParameter(String name)根据参数名称获取参数值String[] getParameterValues(String name)根据参数名称获取参数值的数组Enumeration<String> getParameterNames()获取所有请求的参数名称Map<String,String[]> getParameterMap()获取所有参数的map集合
注册页:

<!DOCTYPE html>
<html lang="en">
<head>
    <meta charset="UTF-8">
    <title>Title</title>
</head>
<body>
    <form action="demo1" method="post">
        <input name="username" type="text" placeholder="姓名:"><br>
        <input name="password" type="password" placeholder="密码:"><br>
        <input type="checkbox" name="hobby" value="game">游戏
        <input type="checkbox" name="hobby" value="sport">体育<br>
        <input type="submit" value="注册">
    </form>
</body>
</html>
servlet:
@WebServlet("/demo1")
public class MyServlet extends HttpServlet {
    @Override
    protected void doPost(HttpServletRequest req, HttpServletResponse resp) throws IOException {
        //1.  `String getParameter(String name)`根据参数名称获取参数值
        String name = req.getParameter("username");
        System.out.println("username的值为: "+name);
        System.out.println("-----------------");
        //2. `String[] getParameterValues(String name)`根据参数名称获取参数值的数组
        String[] hobbies = req.getParameterValues("hobby");
        System.out.println("hobby的值为: "+ Arrays.toString(hobbies));
        System.out.println("-----------------");
        //3. `Enumeration<String> getParameterNames()`获取所有请求的参数名称
        Enumeration<String> parameterNames = req.getParameterNames();
        System.out.println("所有请求参数为: ");
        while (parameterNames.hasMoreElements()){
            String s = parameterNames.nextElement();
            System.out.println(s);
        }
        System.out.println("-----------------");
        //4. `Map<String,String[]> getParameterMap()`获取所有参数的map集合
        Map<String, String[]> parameterMap = req.getParameterMap();
        System.out.println("所有参数map集合为: ");
        Set<String> set = parameterMap.keySet();
        for(String key:set){
            System.out.println("参数:"+key);
            System.out.println("值:");
            String[] strings = parameterMap.get(key);
            for (String s : strings) {
                System.out.println(s);
            }
        }
        System.out.println("-----------------");
    }


    @Override
    protected void doGet(HttpServletRequest req, HttpServletResponse resp) throws IOException {
        this.doPost(req,resp);
    }
}
运行:
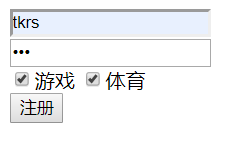
结果:
username的值为: tkrs
-----------------
hobby的值为: [game, sport]
-----------------
所有请求参数为:
username
password
hobby
-----------------
所有参数map集合为:
参数:username
值:
tkrs
参数:password
值:
123
参数:hobby
值:
game
sport
-----------------
中文乱码问题:
get方式:tomcat 8 已经将get方式乱码问题解决了
post方式:会乱码
解决:在获取参数前,设置request的编码 request.setCharacterEncoding("utf-8");
请求转发
一种在服务器内部的资源跳转方式
- 步骤:
1. 通过request对象获取请求转发器对象:
RequestDispatcher getRequestDispatcher(String path)
2. 使用RequestDispatcher对象来进行转发:
forward(ServletRequest request, ServletResponse response) - 特点:
1. 浏览器地址栏路径不发生变化
2. 只能转发到当前服务器内部资源中
3. 转发是一次请求
		@WebServlet("/demo2")
		public class MyRes2 extends HttpServlet {
		    @Override
		    protected void doPost(HttpServletRequest req, HttpServletResponse resp) throws IOException, ServletException {
		        System.out.println("demo2被访问了");
		        req.getRequestDispatcher("/demo3").forward(req,resp);
		    }

		    @Override
		    protected void doGet(HttpServletRequest req, HttpServletResponse resp) throws IOException, ServletException {
		        this.doPost(req,resp);
		    }
		}
		------------
		@WebServlet("/demo3")
		public class MyRes3 extends HttpServlet {
		    @Override
		    protected void doPost(HttpServletRequest req, HttpServletResponse resp) throws IOException, ServletException {
		        System.out.println("demo3被访问了");
		    }

		    @Override
		    protected void doGet(HttpServletRequest req, HttpServletResponse resp) throws IOException, ServletException {
		        this.doPost(req,resp);
		    }
		}
访问demo2:
demo2被访问了
demo3被访问了
共享数据
- 域对象:一个有作用范围的对象,可以在范围内共享数据
- request域:代表一次请求的范围,一般用于请求转发的多个资源中共享数据
- 方法:
- void setAttribute(String name,Object obj):存储数据
- Object getAttitude(String name):通过键获取值
- void removeAttribute(String name):通过键移除键值对
@WebServlet("/demo2")
public class MyRes2 extends HttpServlet {
    @Override
    protected void doPost(HttpServletRequest req, HttpServletResponse resp) throws IOException, ServletException {
        System.out.println("demo2被访问了");
        req.setAttribute("msg","demo2设置的消息");
        req.getRequestDispatcher("/demo3").forward(req,resp);
    }

    @Override
    protected void doGet(HttpServletRequest req, HttpServletResponse resp) throws IOException, ServletException {
        this.doPost(req,resp);
    }
}
------------------
@WebServlet("/demo3")
public class MyRes3 extends HttpServlet {
    @Override
    protected void doPost(HttpServletRequest req, HttpServletResponse resp) throws IOException, ServletException {
        System.out.println("demo3被访问了");
        Object msg = req.getAttribute("msg");
        System.out.println(msg);
    }

    @Override
    protected void doGet(HttpServletRequest req, HttpServletResponse resp) throws IOException, ServletException {
        this.doPost(req,resp);
    }
}
访问demo2,输出:
demo2被访问了
demo3被访问了
demo2设置的消息
获取ServletContext
ServletContext getServletContext()
巩固Request知识的案例:用户登陆
- 用户登录案例需求:
1.编写login.html登录页面 username & password 两个输入框
2.使用Druid数据库连接池技术,操作mysql,test数据库中user表
3.使用JdbcTemplate技术封装JDBC
4.登录成功跳转到SuccessServlet展示:登录成功!用户名,欢迎您
5.登录失败跳转到FailServlet展示:登录失败,用户名或密码错误
-
导入jar包,lib包要放在web下的WEB-INF目录内

-
在数据库test中创建user表
CREATE TABLE USER( id INT PRIMARY KEY AUTO_INCREMENT, username VARCHAR(32) UNIQUE NOT NULL, `PASSWORD` VARCHAR(32) NOT NULL ); -
创建封装数据的User类
public class User { private Integer id; private String username; private String password; public Integer getId() { return id; } public void setId(Integer id) { this.id = id; } public String getUsername() { return username; } public void setUsername(String username) { this.username = username; } public String getPassword() { return password; } public void setPassword(String password) { this.password = password; } @Override public String toString() { return "User{" + "id=" + id + ", username='" + username + '\'' + ", password='" + password + '\'' + '}'; } } -
创建JDBCUtils工具类
public class JDBCUtils {
    //使用druid连接池
    private static DataSource source = null;
    static{
        try {
            Properties pros = new Properties();
            InputStream is = new FileInputStream("druid.properties");
            pros.load(is);
            //根据提供的DruidDataSourceFactory创建对应的DataSource对象
            source = DruidDataSourceFactory.createDataSource(pros);
        } catch (Exception e) {
            e.printStackTrace();
        }
    }
    public static Connection getConnection() throws Exception {
        Connection conn = source.getConnection();
        return conn;
    }
    public static DataSource getDataSource() {
    	return source;
	}
}
properties文件:
url=jdbc:mysql://localhost:3306/test?serverTimezone=UTC&rewriteBatchedStatements=true username=root password=sjh2019 driverClassName=com.mysql.cj.jdbc.Driver initialSize=10 maxActive=20 maxWait=1000 filters=wall -
UserDao类
public class UserDao { private JdbcTemplate template = new JdbcTemplate(JDBCUtils.getDataSource()); public User login(User user) throws Exception { try{ //获取用户名 String name = user.getUsername(); //获取密码 String password = user.getPassword(); //1.编写sql String sql = "select * from user where username = ? and password = ?"; //2.调用query方法 User loginuser = template.queryForObject(sql, new BeanPropertyRowMapper<>(User.class), name, password); return loginuser; }catch (Exception e){ e.printStackTrace(); return null; } } } -
登陆的Servlet
@WebServlet("/LoginServlet") public class LoginServlet extends HttpServlet { protected void doPost(HttpServletRequest request, HttpServletResponse response) throws ServletException, IOException { //设置字符集编码 request.setCharacterEncoding("utf-8"); //获取用户输入的用户名和密码 String username = request.getParameter("username"); String password = request.getParameter("password"); User user = new User(); user.setUsername(username); user.setPassword(password); try { //查询该用户在数据库是否存在 User loginuser = new UserDao().login(user); if(loginuser!=null){ request.setAttribute("user",loginuser); request.getRequestDispatcher("/SuccessServlet").forward(request,response); }else { request.getRequestDispatcher("/FailServlet").forward(request,response); } } catch (Exception e) { e.printStackTrace(); } } protected void doGet(HttpServletRequest request, HttpServletResponse response) throws ServletException, IOException { } } -
SuccessServlet
@WebServlet("/SuccessServlet") public class SuccessServlet extends HttpServlet { protected void doPost(HttpServletRequest request, HttpServletResponse response) throws ServletException, IOException { User user = (User) request.getAttribute("user"); String name = user.getUsername(); //设置编码 response.setContentType("text/html;charset=utf-8"); //输出 response.getWriter().write("登录成功!"+name+",欢迎您"); } protected void doGet(HttpServletRequest request, HttpServletResponse response) throws ServletException, IOException { } } -
FailServlet
@WebServlet("/FailServlet") public class FailServlet extends HttpServlet { protected void doPost(HttpServletRequest request, HttpServletResponse response) throws ServletException, IOException { //设置编码 response.setContentType("text/html;charset=utf-8"); //输出 response.getWriter().write("抱歉,用户名或密码错误"); } protected void doGet(HttpServletRequest request, HttpServletResponse response) throws ServletException, IOException { } } -
测试
插入一条用户记录INSERT INTO USER VALUES (1,'fanxian','123');登陆登陆页面
输入fanxian 123
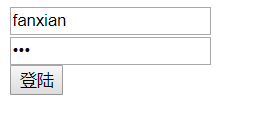
输入其他则报错:
可使用beanutils包简化数据的封装,需要导入一个beanutils的jar包
然后修改LoginServlet如下:@WebServlet("/LoginServlet") public class LoginServlet extends HttpServlet { protected void doPost(HttpServletRequest request, HttpServletResponse response) throws ServletException, IOException { //设置字符集编码 request.setCharacterEncoding("utf-8"); User user = new User(); Map<String, String[]> parameterMap = request.getParameterMap(); try { //使用beanutils封装表单提交的数据 BeanUtils.populate(user,parameterMap); //查询该用户在数据库是否存在 User loginuser = new UserDao().login(user); if(loginuser!=null){ request.setAttribute("user",loginuser); request.getRequestDispatcher("/SuccessServlet").forward(request,response); }else { request.getRequestDispatcher("/FailServlet").forward(request,response); } } catch (Exception e) { e.printStackTrace(); } } protected void doGet(HttpServletRequest request, HttpServletResponse response) throws ServletException, IOException { } }
Response
功能:设置响应消息
-
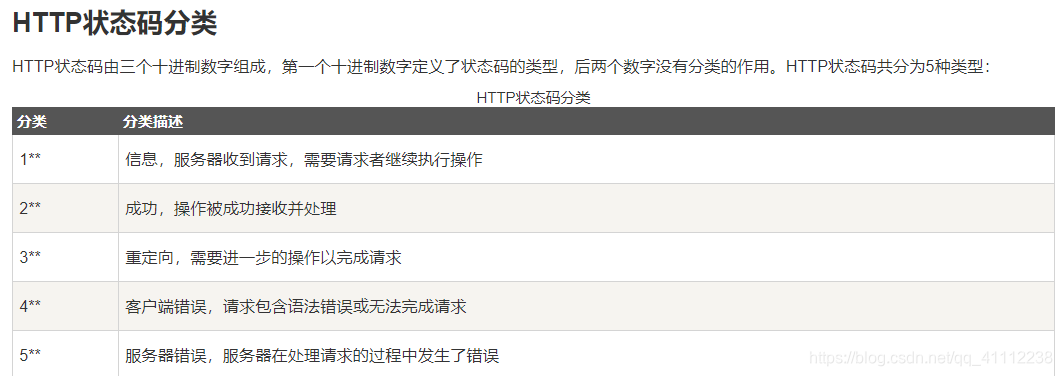
设置响应行
- 格式:HTTP/1.1 200 ok
- 设置状态码:
setStatus(int sc)
-
设置响应头:setHeader(String name, String value)
-
设置响应体:
- 获取输出流
字符输出流:PrintWriter getWriter()
字节输出流:ServletOutputStream getOutputStream() - 使用输出流,将数据输出到客户端浏览器
- 获取输出流
重定向案例
请求的Servlet
@WebServlet("/RequestServlet")
public class RequestServlet extends HttpServlet {
    protected void doPost(HttpServletRequest request, HttpServletResponse response) throws ServletException, IOException {
        //第一种方法 设置状态码和响应头
        //response.setStatus(302);
        //response.setHeader("location","ResponseServlet");//相对路径 相当于./ResponseServlet
        //或者response.setHeader("location","/root/ResponseServlet");(/root是我的虚拟目录)绝对路径


        //第二种方法
        response.sendRedirect("ResponseServlet");
        System.out.println("准备进行重定向");
    }

    protected void doGet(HttpServletRequest request, HttpServletResponse response) throws ServletException, IOException {
        this.doPost(request,response);
    }
}
响应的Servlet
@WebServlet("/ResponseServlet")
public class ResponseServlet extends HttpServlet {
    protected void doPost(HttpServletRequest request, HttpServletResponse response) throws ServletException, IOException {
        System.out.println("重定向成功");
    }

    protected void doGet(HttpServletRequest request, HttpServletResponse response) throws ServletException, IOException {
        this.doPost(request,response);
    }
}
在浏览器访问

结果:

控制台输出:

-
重定向的特点:redirect
地址栏发生变化
重定向可以访问其他站点(服务器)的资源
重定向是两次请求。不能使用request对象来共享数据 -
转发的特点:forward
转发地址栏路径不变
转发只能访问当前服务器下的资源
转发是一次请求,可以使用request对象来共享数据
路径写法:
- 路径分类
- 相对路径:通过相对路径不可以确定唯一资源
如:./index.html
不以/开头,以.开头路径
规则:找到当前资源和目标资源之间的相对位置关系
./:当前目录
…/:后退一级目录 - 绝对路径:通过绝对路径可以确定唯一资源
- 如:http://localhost/day15/responseDemo2 /day15/responseDemo2
- 以/开头的路径
- 相对路径:通过相对路径不可以确定唯一资源
- 规则:判断定义的路径是给谁用的?判断请求将来从哪儿发出
-
给客户端浏览器使用:需要加虚拟目录(项目的访问路径)
- 建议虚拟目录动态获取:request.getContextPath()
- <a> , 重定向…
之前的重定向例子请求servlet代码可改为
String contextPath = request.getContextPath(); response.sendRedirect(contextPath+"/ResponseServlet"); System.out.println("准备进行重定向"); -
给服务器使用:不需要加虚拟目录
转发路径
见上文Request中的转发案例
-
服务器输出字符数据到浏览器
- 步骤:
- 获取字符输出流
- 输出数据
- 乱码问题:
- PrintWriter pw = response.getWriter();获取的流的默认编码是ISO-8859-1
- 设置该流的默认编码
- 告诉浏览器响应体使用的编码
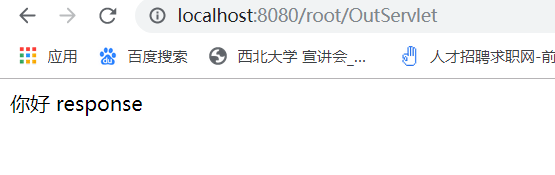
@WebServlet("/OutServlet")
public class OutServlet extends HttpServlet {
    protected void doPost(HttpServletRequest request, HttpServletResponse response) throws ServletException, IOException {

        //1.设置浏览器编码格式
        //方式一:response.setHeader("content-type","text/html;charset=utf-8");
        //方式二:
        response.setContentType("text/html;charset=utf-8");
        //3.获取输出流
        PrintWriter writer = response.getWriter();
        //4.输出
        writer.write("你好 response");

    }

    protected void doGet(HttpServletRequest request, HttpServletResponse response) throws ServletException, IOException {
        this.doPost(request,response);
    }
}
服务器输出字节数据到浏览器
- 步骤:
- 获取字节输出流
- 输出数据
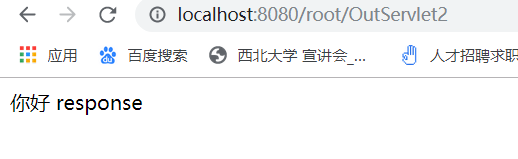
@WebServlet("/OutServlet2")
public class OutServlet2 extends HttpServlet {
    protected void doPost(HttpServletRequest request, HttpServletResponse response) throws ServletException, IOException {

        //1.设置浏览器编码格式
        //方式一:response.setHeader("content-type","text/html;charset=utf-8");
        //方式二:
        response.setContentType("text/html;charset=utf-8");
        //3.获取输出流
        ServletOutputStream writer = response.getOutputStream();
        //4.输出
        writer.write("你好 response".getBytes(StandardCharsets.UTF_8));

    }

    protected void doGet(HttpServletRequest request, HttpServletResponse response) throws ServletException, IOException {
        this.doPost(request,response);
    }
}
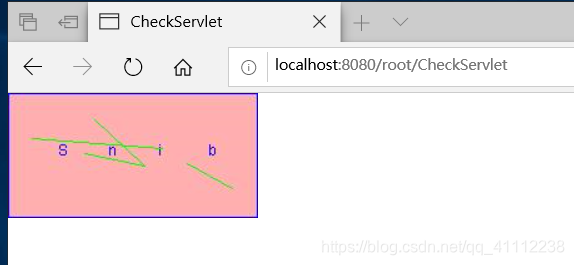
验证码实例:
@WebServlet("/CheckServlet")
public class CheckServlet extends HttpServlet {
    protected void doPost(HttpServletRequest request, HttpServletResponse response) throws ServletException, IOException {
        //获取图片对象
        int width=200;//宽
        int height=100;//高
        BufferedImage image=new BufferedImage(width,height,BufferedImage.TYPE_INT_RGB);
        //设置背景色
        Graphics graphics = image.getGraphics();//得到画笔
        graphics.setColor(Color.PINK);//设置颜色
        graphics.fillRect(0,0,width-1,height-1);//填充颜色
        //画边
        graphics.setColor(Color.blue);
        graphics.drawRect(0,0,width-1,height-1);
        //加验证码
        Random random = new Random();
        String s="qwertyuioplkjhgfdsazxcvbnmQWERTYUIOPLKJHGFDSAZXCVBNM0123456789";
        for (int i = 1; i <=4 ; i++) {
            int index = random.nextInt(s.length());
            char c = s.charAt(index);
            graphics.drawString(c+"",width/5*i,height/2);
        }
        //加干扰线
        graphics.setColor(Color.green);
        for (int i = 1; i <=4 ; i++) {
            int x1=random.nextInt(width);
            int x2=random.nextInt(width);
            int y1=random.nextInt(height);
            int y2=random.nextInt(height);
            graphics.drawLine(x1,y1,x2,y2);
        }
        //输出图片
        ImageIO.write(image,"jpg",response.getOutputStream());
    }

    protected void doGet(HttpServletRequest request, HttpServletResponse response) throws ServletException, IOException {
        this.doPost(request, response);
    }
}
ServletContext
获取
两种方式:
this.getServletContext()
request.getServletContext()
@WebServlet("/Get")
public class Get extends HttpServlet {
    protected void doPost(HttpServletRequest request, HttpServletResponse response) throws ServletException, IOException {
        ServletContext servletContext = this.getServletContext();
        ServletContext servletContext1 = request.getServletContext();
        System.out.println(servletContext==servletContext1);
    }

    protected void doGet(HttpServletRequest request, HttpServletResponse response) throws ServletException, IOException {
        this.doPost(request, response);
    }
}
打印结果为true
获取MIME类型
- MIME类型:在互联网通信过程中定义的一种文件数据类型
- 格式: 大类型/小类型
- text/html
- image/jpeg
- 获取:
String getMimeType(String file)
@WebServlet("/Get")
public class Get extends HttpServlet {
    protected void doPost(HttpServletRequest request, HttpServletResponse response) throws ServletException, IOException {
        ServletContext servletContext = this.getServletContext();
        String filename="test.jpeg";
        String mimeType = servletContext.getMimeType(filename);
        System.out.println(mimeType);
    }

    protected void doGet(HttpServletRequest request, HttpServletResponse response) throws ServletException, IOException {
        this.doPost(request, response);
    }
}
访问

结果:
域对象
共享数据
setAttribute(String name,Object value)设置数据
getAttribute(String name)获取数据
removeAttribute(String name)移除数据
作用范围:所有用户所有请求的数据
@WebServlet("/Set")
public class Set extends HttpServlet {
    protected void doPost(HttpServletRequest request, HttpServletResponse response) throws ServletException, IOException {
        ServletContext servletContext = this.getServletContext();
        servletContext.setAttribute("msg","肖战是肖恩的孙子");
    }

    protected void doGet(HttpServletRequest request, HttpServletResponse response) throws ServletException, IOException {
        this.doPost(request, response);
    }
}
@WebServlet("/Get")
public class Get extends HttpServlet {
    protected void doPost(HttpServletRequest request, HttpServletResponse response) throws ServletException, IOException {
        ServletContext servletContext = this.getServletContext();
        String msg = (String) servletContext.getAttribute("msg");
        response.setContentType("text/html;charset=utf-8");
        response.getWriter().write(msg);
    }

    protected void doGet(HttpServletRequest request, HttpServletResponse response) throws ServletException, IOException {
        this.doPost(request, response);
    }
}


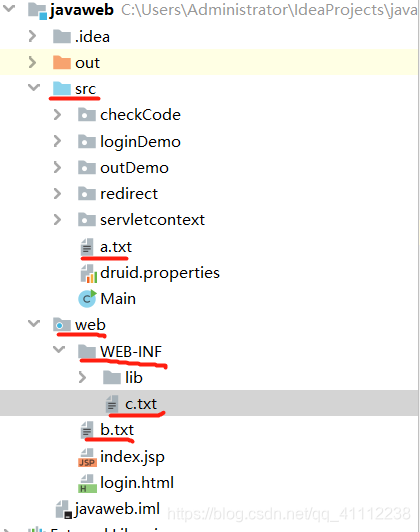
获取文件的真实(服务器)路径
@WebServlet("/Get")
public class Get extends HttpServlet {
protected void doPost(HttpServletRequest request, HttpServletResponse response) throws ServletException, IOException {
ServletContext servletContext = this.getServletContext();
String bPath = servletContext.getRealPath("/b.txt");
System.out.println("b.txt的真实路径: "+bPath);
String cPath = servletContext.getRealPath("/WEB-INF/c.txt");
System.out.println("c.txt的真实路径: "+cPath);
String aPath = servletContext.getRealPath("/WEB-INF/classes/a.txt");
System.out.println("a.txt的真实路径: "+aPath);
}
protected void doGet(HttpServletRequest request, HttpServletResponse response) throws ServletException, IOException {
this.doPost(request, response);
}
}
访问

控制台输出:

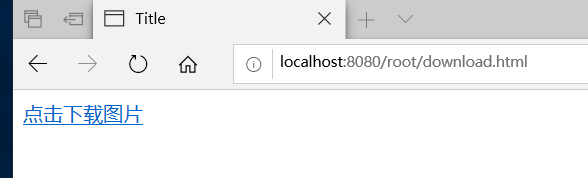
文件下载综合案例
在web目录下创建一个images目录存放一张图片

download.html
<!DOCTYPE html>
<html lang="en">
<head>
    <meta charset="UTF-8">
    <title>Title</title>
</head>
<body>
    <a href="/root/DownloadServlet?filename=a.jpg">点击下载图片</a>
</body>
</html>
DownloadServlet
@WebServlet("/DownloadServlet")
public class DownloadServlet extends HttpServlet {
    protected void doPost(HttpServletRequest request, HttpServletResponse response) throws ServletException, IOException {
        //获取文件名
        String filename = request.getParameter("filename");
        //利用servlet对象获取图片真实路径
        ServletContext servletContext = this.getServletContext();
        String realPath = servletContext.getRealPath("/images/"+filename);
        //输入流读取文件
        FileInputStream inputStream = new FileInputStream(realPath);
        //设置响应方式
        String mimeType = servletContext.getMimeType(filename);//获取文件mime类型
        response.setContentType(mimeType);
        response.setHeader("content-disposition","attachment;filename="+filename);//附件下载
        //输出流写出文件
        ServletOutputStream outputStream = response.getOutputStream();
        byte[] bytes=new byte[1024];
        int len=0;
        while((len=inputStream.read(bytes))!=-1){
            outputStream.write(bytes,0,len);
        }
        inputStream.close();//关闭输入流
    }

    protected void doGet(HttpServletRequest request, HttpServletResponse response) throws ServletException, IOException {
        this.doPost(request, response);
    }
}
打开页面