1、创建SpringBoot项目
项目名fastdfs-springboot
githun地址:
导入 fastdfs-client 依赖,记得导入web依赖
<dependency>
    <groupId>com.github.tobato</groupId>
    <artifactId>fastdfs-client</artifactId>
    <version>1.26.7</version>
</dependency>
修改application.yml
IP地址记得修改为自己的。
fdfs:
  so-timeout: 2500       # 读取时间
  connect-timeout: 600   # 连接超时时间
  thumb-image:           # 缩略图
    width: 100
    height: 100
  tracker-list:          # tracker服务配置地址列表
    - 192.168.202.128:22122
upload:
    base-url: http://192.168.202.128/
    #配置允许的文件的类型
    allow-types:
      - image/jpeg
      - image/png
      - image/bmp
注:
- 服务器地址,记得修改
- 查看文件的类型,
Mini Type参考手册
https://www.w3school.com.cn/media/media_mimeref.asp
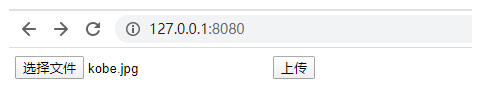
2、创建前端页面 static/index.html
<!DOCTYPE html>
<html lang="en">
<head>
    <meta charset="UTF-8">
    <title>FastDFS 测试</title>
</head>
<body>
    <form action="/upload/doUpload" method="post" enctype="multipart/form-data">
        <input type="file" name="mf"/>
        <input type="submit" value="上传"/>
    </form>
</body>
</html>
3、创建配置类
@Component
@ConfigurationProperties(prefix = "upload")
@Data
public class UploadProperties {
    private String baseUrl;
    private List<String> allowTypes;
}
4,创建服务类
注入FastFileStorageClient后,可以直接调用其uploadFile()。
比上一种方法省去了手动设置配置信息,也不需要自己建立tracker连接、获取storage、再获得storageClient这些准备工作。
@Service
@EnableConfigurationProperties(UploadProperties.class)
public class UploadService {
        private Log log= LogFactory.getLog(UploadService.class);
        @Autowired
        private FastFileStorageClient storageClient;
        @Autowired
        private UploadProperties prop;
        public String uploadImage(MultipartFile file) {
            // 1、校验文件类型
            String contentType = file.getContentType();
            if (!prop.getAllowTypes().contains(contentType)) {
                throw new RuntimeException("文件类型不支持");
            }
            // 2、校验文件内容
            try {
                BufferedImage image = ImageIO.read(file.getInputStream());
                if (image == null || image.getWidth() == 0 || image.getHeight() == 0) {
                    throw new RuntimeException("上传文件有问题");
                }
            } catch (IOException e) {
                log.error("校验文件内容失败....{}", e);
                throw new RuntimeException("校验文件内容失败"+e.getMessage());
            }
            try {
                // 3、上传到FastDFS
                // 3.1、获取扩展名
                String extension = StringUtils.substringAfterLast(file.getOriginalFilename(), ".");
                // 3.2、上传
                StorePath storePath = storageClient.uploadFile(file.getInputStream(), file.getSize(), extension, null);
                // 返回路径
                return prop.getBaseUrl() + storePath.getFullPath();
            } catch (IOException e) {
                log.error("【文件上传】上传文件失败!....{}", e);
                throw  new RuntimeException("【文件上传】上传文件失败!"+e.getMessage());
            }
        }
    }
5,创建UploadController
@RestController
@RequestMapping("upload")
public class UploadController {
   @Autowired
   private UploadService uploadService;
    @RequestMapping("doUpload")
    @ResponseBody
    public Map<String,Object> doUpload(MultipartFile mf){
        System.out.println(mf.getOriginalFilename());
        Map<String, Object> upload =new HashMap<>();
        String filePath= this.uploadService.uploadImage(mf);
        upload.put("path",filePath);
        return upload;
    }
}
6、测试