第九章目录
Django入门:第九章、查看博客文章
回顾
上一章(Django入门:第八章、模板引擎设置)中,我们成功的把博客标题显示出来,那么如何才能查看文章内容,从功能上来说,点击文章标题后呈现其详细内容。
因此,文章标题需要做一个超链接,对象就是文章详情页。
修改home.html
templates/home.html
<!DOCTYPE html>
<html>
    <head>
        <meta charset="UTF-8">
        <title>我的博客</title>
    </head>
    <body>
    <h1>我的博客</h1>
    {% for blog in blogs %}
        <li><a href="{{ blog.id }}">{{ blog.title }} </a></li> <br>
    {% endfor %}
    </body>
</html>
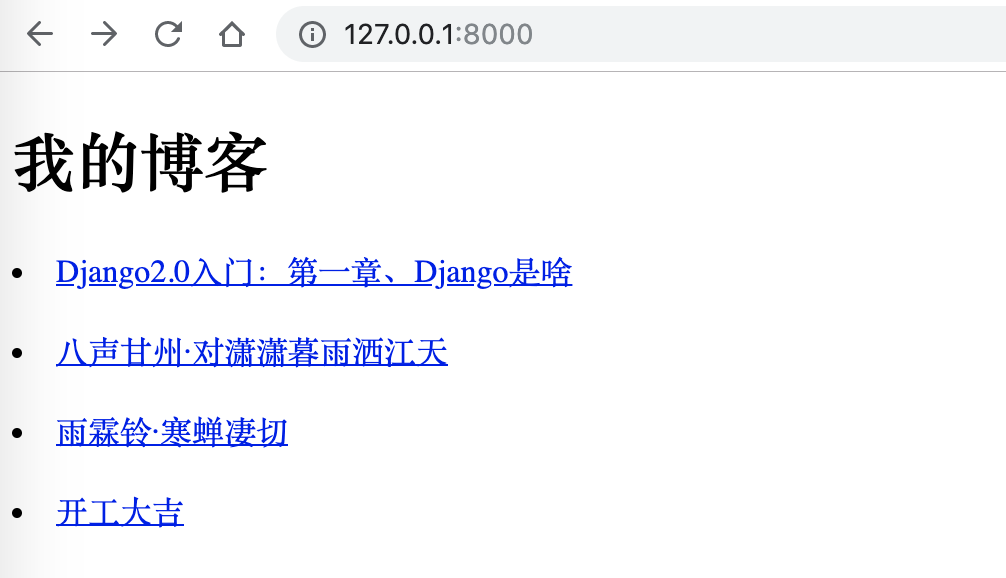
修改完成后,我们刷新页面,发现每个标题就是一个超链接,当然,此时单击,并不能显示其详情。如图:
编辑./blog/views.py
./blog/views.py
我们增加响应查看博客文章内容请求的函数blog_article():
from django.shortcuts import render
from .models import BlogArticles


# Create your views here.
def home(request):
    blogs = BlogArticles.objects.all()
    return render(request, "home.html", {"blogs": blogs})


def blog_article(request, article_id):
    article = BlogArticles.objects.get(id=article_id)
    publish_time = article.publish
    return render(request, "content.html", {"article": article, "publish": publish_time})
在函数blog_ariticle(request, article_id)中,article_id参数的目的是为了获得URL中每篇博客文章的id
创建./templates/content.html
在templates目录下,创建一个content.html文件,并写入如下代码:
./templates/content.html
<!DOCTYPE html>
<html>
    <head>
        <meta charset="UTF-8">
        <title>
            {{ article.title }}
        </title>
    </head>

    <body>
    <h1 style="text-align: center">
        {{ article.title }}
    </h1>

    <div style="text-align: center">
        {{ article.author.username }}
        <span style="margin-left: 20px">
            {{ article.publish }}
        </span>
    </div>
    <div>
        {{ article.body }}
    </div>

    </body>
</html>
配置URL
在myblog/urls.py中增加新的URL路径:
myblog/urls.py*
from django.contrib import admin
from django.urls import path
from django.conf.urls import url
from blog import views


urlpatterns = [
    path('admin/', admin.site.urls),
    url(r'^$', views.home, name='home'),
    path('<int:article_id>/', views.blog_article),  # 新增
]
测试
我们此时此刻再单击一下其中一个文章题目,比如雨霖铃·寒蝉凄切,可以看到如下页面:

注意
如果我们修改最后代表文章id的数字,如果改成9,将会出现如下页面:
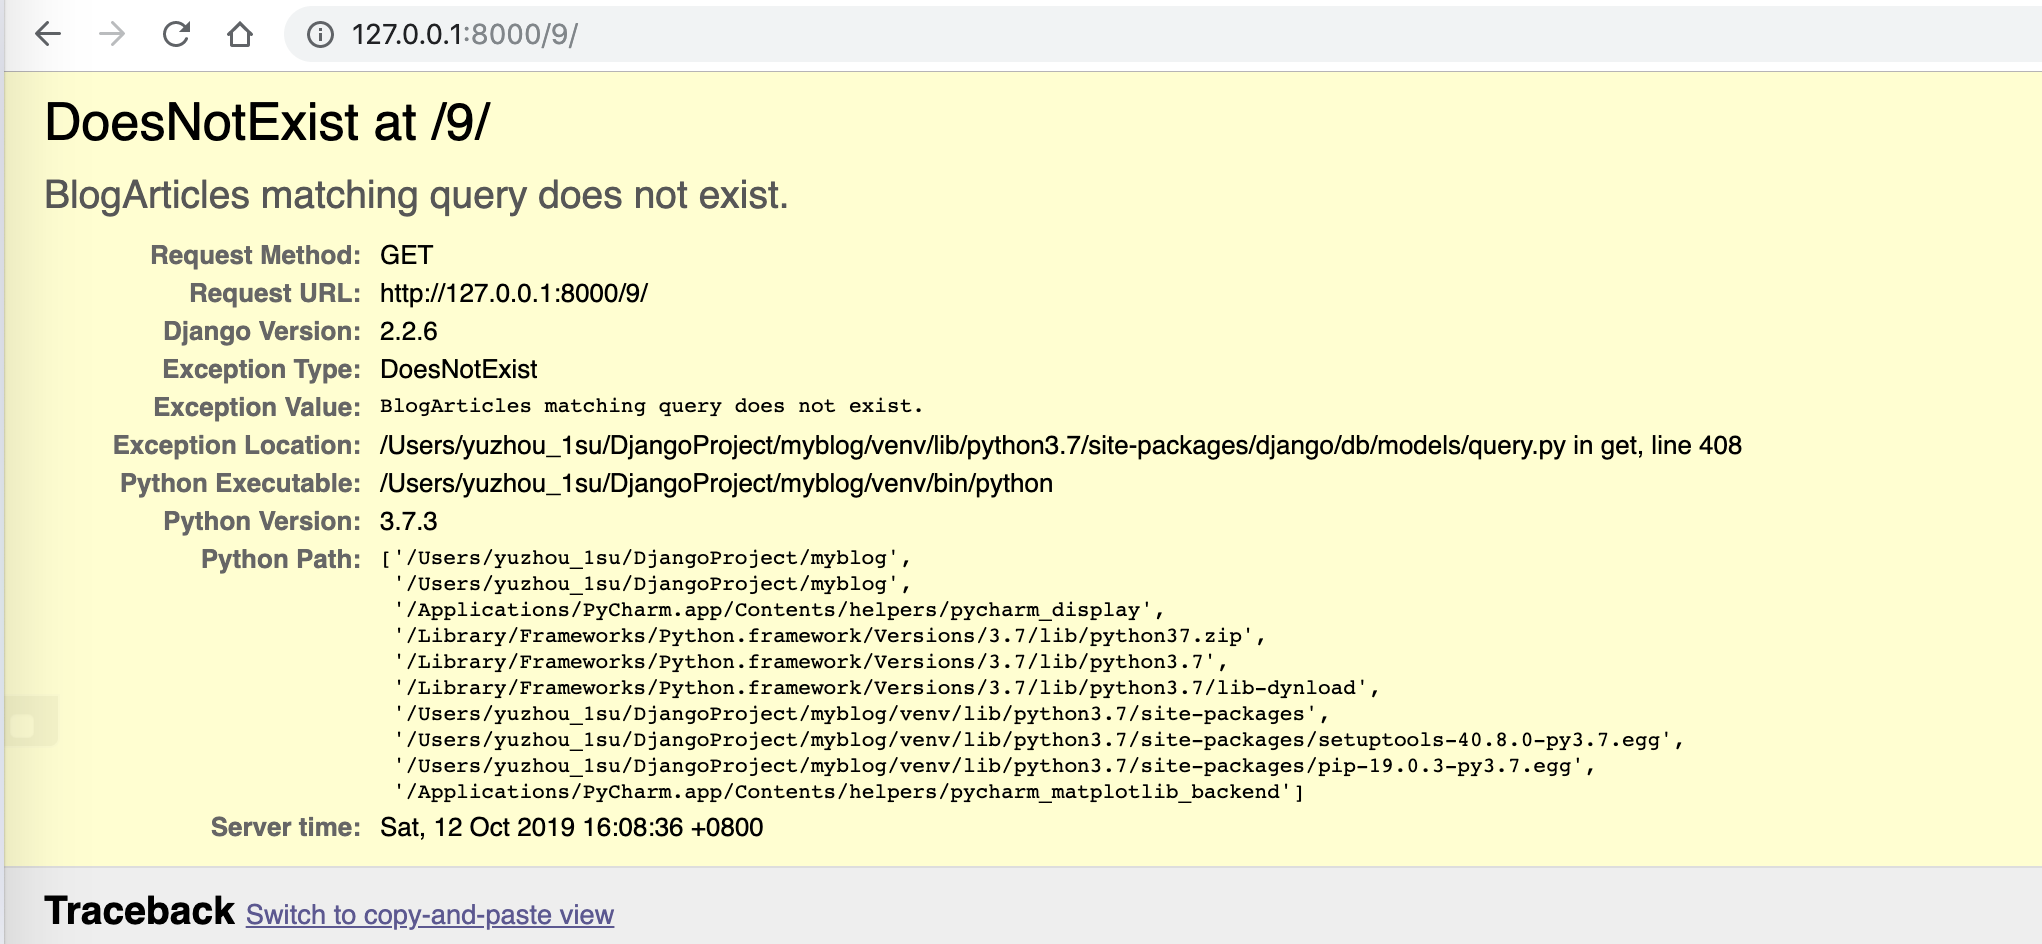
因为不存id为9的文章,所以报错,而且显示了错误的完整信息。
为了避免出现上诉错误,我们应该在响应此请求的函数中对这种异常请求进行处理。适当修改./blog/view.py中的blog_article()函数。
from django.shortcuts import render, get_object_or_404
from .models import BlogArticles


# Create your views here.
def home(request):
    blogs = BlogArticles.objects.all()
    return render(request, "home.html", {"blogs": blogs})


def blog_article(request, article_id):
    # article = BlogArticles.objects.get(id=article_id)
    article = get_object_or_404(BlogArticles, id=article_id)
    publish_time = article.publish
    return render(request, "content.html", {"article": article, "publish": publish_time})
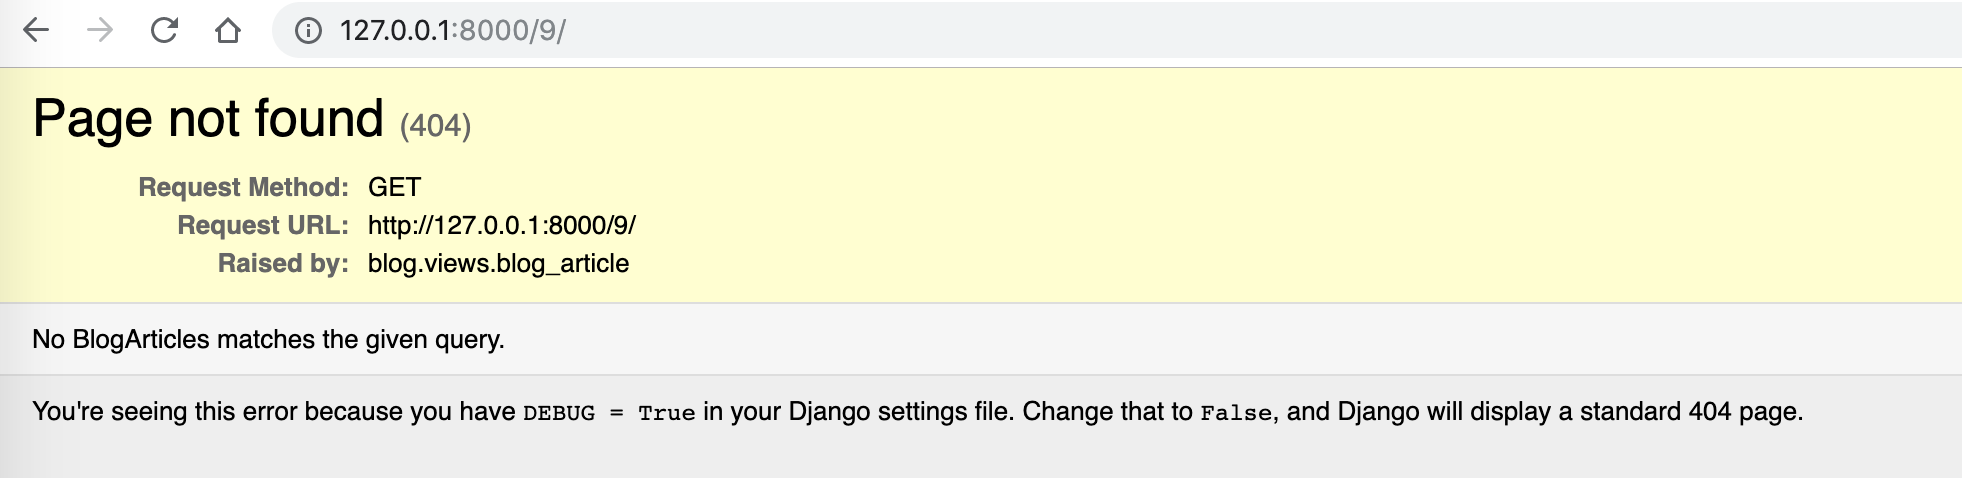
再次请求http://127.0.0.1:8000/9/,我们会发现在Debug模式下的(404)错误:
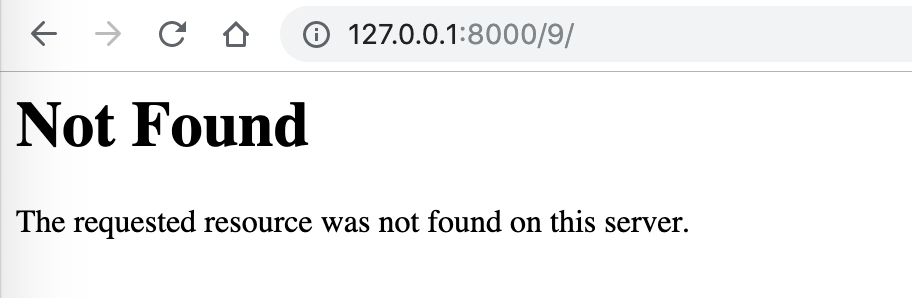
如果我们把 myblog/settings.py中的DEBUG = True,改为 DEBUG = False,并且设置 ALLOWED_HOSTS = [‘127.0.0.1’],类似下图:
myblog/settings.py
DEBUG = False

ALLOWED_HOSTS = ['127.0.0.1']
再重新刷新这个页面,将会看一个标准的404页面,如图:
总结
Django入门笔记到这一步,简单的博客就搭建完成,虽然很简陋,页面不美观,但显示了Django在网站开发中的最基本结构。
我们学会了创建一个简单的HelloWorld视图,创建了第一个模型、迁移了数据库,试用了Model API。同时还配置了Django模板引擎,希望大家多多练习,熟悉这个过程。
我们的优秀博客终于能向大家展示了,希望你能喜欢。
注:点Django入门笔记汇总博客查看目前已经更新的文章
