使用@Configuration和@Bean注解,代替在Spring的.xml配置文件中配置Bean
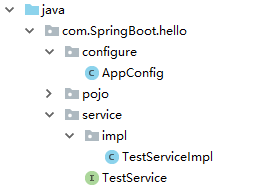
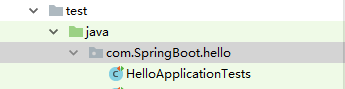
一.目录结构
二.相关代码
TestService.java
package com.SpringBoot.hello.service;

public interface TestService {
    public void test();
}
TestServiceImpl.java
package com.SpringBoot.hello.service.impl;
import com.SpringBoot.hello.service.TestService;
public class TestServiceImpl implements TestService {
    @Override
    public void test() {
        System.out.println("TestService");
    }
}
AppConfig
package com.SpringBoot.hello.configure;


import com.SpringBoot.hello.service.TestService;
import com.SpringBoot.hello.service.impl.TestServiceImpl;
import org.springframework.context.annotation.Bean;
import org.springframework.context.annotation.Configuration;

/**
 * spring4.x支持用@Configuration和@Bean
 * 代替之前的xml配置
 * 代码相当于之前的
 * <beans>
 *     <bean id="myService" class="com.SpringBoot.hello.service.impl.TestServiceImpl"/>
 * </beans>
 */
@Configuration
public class AppConfig {
    //这里的方法名就是之前xml中需要配置的id
    @Bean
    public TestService myService(){
        System.out.println("配置类");
      return new TestServiceImpl();
  }
}
测试的类:
package com.SpringBoot.hello;
import com.SpringBoot.hello.service.TestService;
import org.junit.Test;
import org.junit.runner.RunWith;
import org.springframework.beans.factory.annotation.Autowired;
import org.springframework.boot.test.context.SpringBootTest;
import org.springframework.context.ApplicationContext;
import org.springframework.test.context.junit4.SpringRunner;

/**
 * 单元测试
 * 为了提前发现缺陷并且在后续开发中避免
 */
@RunWith(SpringRunner.class)
@SpringBootTest
public class HelloApplicationTests {
	@Autowired
	ApplicationContext ioc;
	@Test
	public void contextLoads() {
		//是否包含id名为myService的Bean
		boolean flag=ioc.containsBean("myService");
		System.out.println(flag);
		// 在Spring容器中获取Bean对象
		TestService testService=ioc.getBean(TestService.class);
		testService.test();
	}

}
三.运行测试类,并且在控制台查看结果

打印的结果说明我们已经成功的将bean拿到,代替了传统的需要xml中配置bean的方式。
关注公众号,获取更多资源

每天进步一点点,开心也多一点点
