检查环境(关闭防火墙和改变SELinux状态,保证外界可以访问):
[root@chenliang ~]# iptables -F //-F代表无论如何都关闭防火墙,生产环境不建议
[root@chenliang ~]# iptables -vnL
Chain INPUT (policy ACCEPT 5 packets, 448 bytes)
pkts bytes target prot opt in out source destinationChain FORWARD (policy ACCEPT 0 packets, 0 bytes)
pkts bytes target prot opt in out source destinationChain OUTPUT (policy ACCEPT 4 packets, 496 bytes)
pkts bytes target prot opt in out source destination
[root@chenliang ~]# getenforce
Enforcing
[root@chenliang ~]# setenforce 0
[root@chenliang ~]# getenforce
Permissive
保证mariadb服务(在CentOS7中使用mariadb)开启
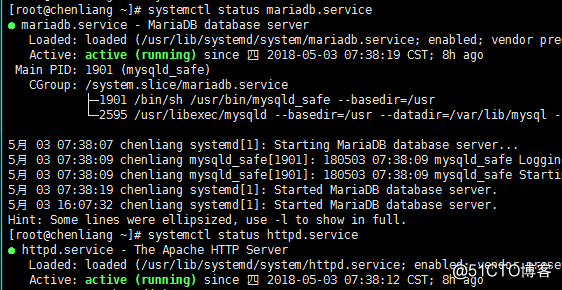
采用LAMP组合的快速架构搭建:Linux+Apache(httpd)+mariadb+PHP
1.安装需要的程序包:
[root@chenliang ~]# yum install httpd php php-mysql mariadb.service
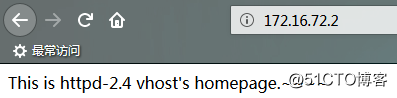
2.创建虚拟主机:创建虚拟主机并为主机提供一个测试页面
[root@chenliang ~]# cd /etc/httpd/conf.d
[root@chenliang conf.d]# ls
autoindex.conf manual.conf php.conf README ssl.conf userdir.conf welcome.conf
[root@chenliang conf.d]# vim vhost.conf
<VirtualHost 172.16.72.2:80>
DocumentRoot /var/www/vhost
ServerName www.clvhost.com
<Directory "/var/www/vhost">
Options None
AllowOverride None
Require all granted
</Directory>
</VirtualHost>
[root@chenliang conf.d]# mkdir -pv /var/www/vhost
mkdir: 已创建目录 "/var/www/vhost"
[root@chenliang conf.d]# echo "This is httpd-2.4 vhost's homepage." >> /var/www/vhost/index.html[root@chenliang conf.d]# vim vhost.conf
[root@chenliang conf.d]# systemctl restart httpd.service
开始测试虚拟机创建的结果如下图,成功创建虚拟机并显示测试界面:
3.在MySQL中创建并授权用于测试的用户账户,进行php连接数据库测试(要保证mysql服务开启:systemctl restart mariadb.service):
[root@chenliang conf.d]# cd /var/www/vhost
[root@chenliang vhost]# ls
index.html
[root@chenliang vhost]# mv index.html index.php
[root@chenliang vhost]# vim index.php
This is httpd-2.4 vhost's homepage.~~~~ </br>
<?php
$conn = mysql_connect('172.16.72.2','chenliang','123456');
if($conn)
echo "Connect successful.";
else
echo "Connect failed.";
?>
在服务器数据库中先授权一个用户chenliang,用来数据库连接测试: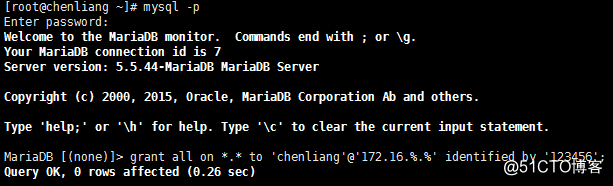
测试结果如下,连接数据库成功: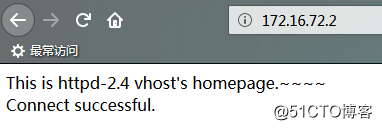
4.部署应用程序:
首先将wordpress博客系统、Discuz!论坛系统(仅需放置一个名为upload的目录)及phpMyAdmin应用程序放置于/etc/httpd/conf.d/vhost/下:
解压并更名(更名是为了方便在地址框键入地址):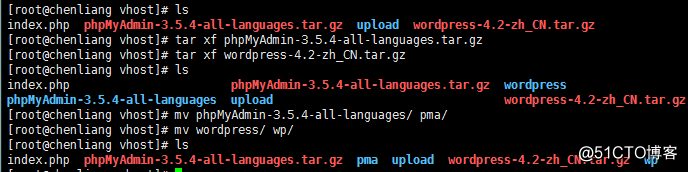
掉了一个bbs目录,补上:[root@chenliang vhost]# mv upload/ bbs/
(1)搭建Discuz!论坛系统
解决乱码问题:
[root@chenliang vhost]# vim /etc/httpd/conf/httpd.conf
#AddDefaultCharset UTF-8 //仅仅是注释掉,方便以后操作
AddDefaultCharset GB2312
记得重启httpd服务:
[root@chenliang vhost]# systemctl restart httpd.service
刷新: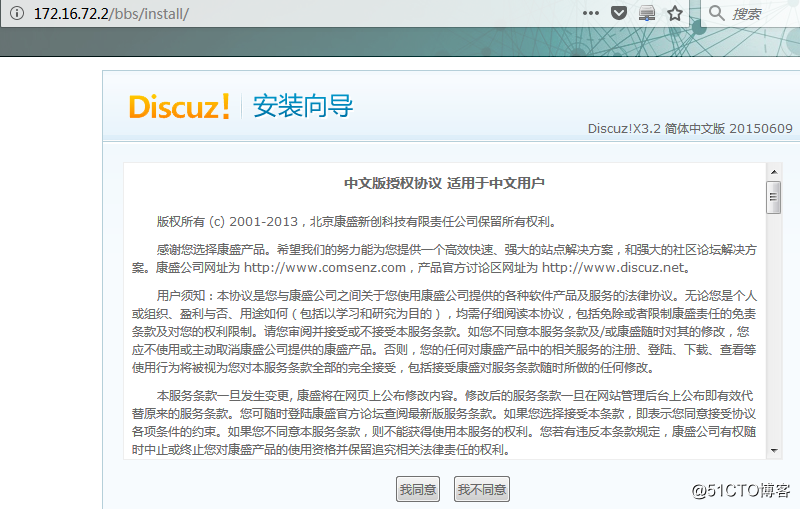
同意后在服务器端更改目录读写权限: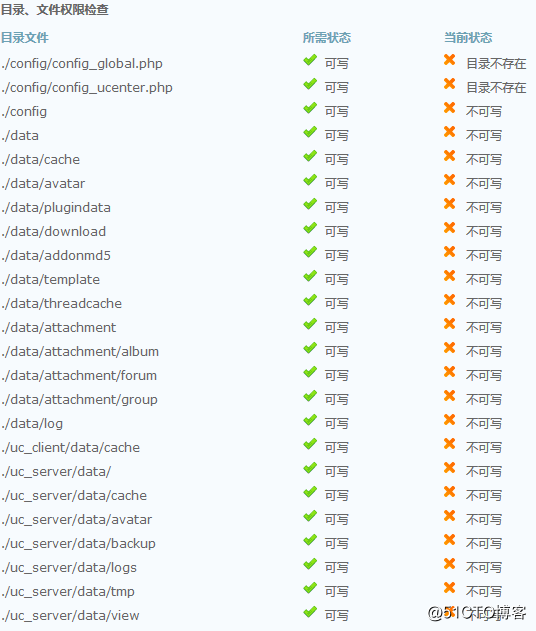
更改目录权限操作:
刷新,下一步,按提示键入设置,设置会在安装过程中新建到服务器端数据库中: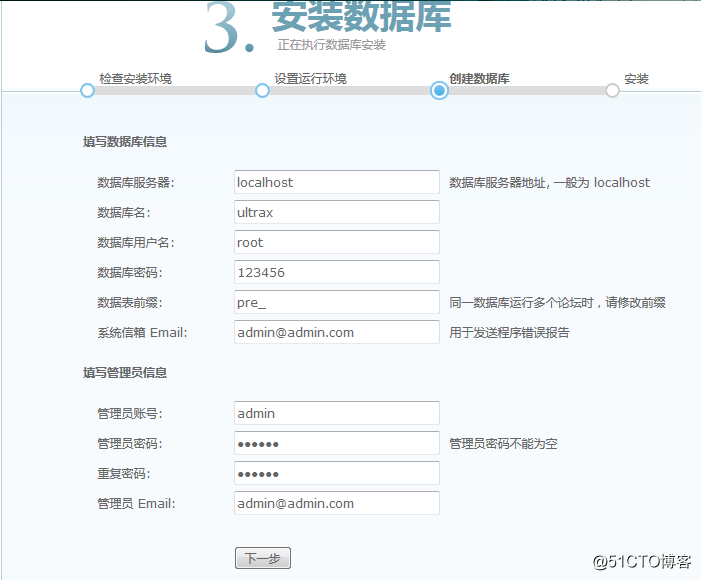
安装成功:
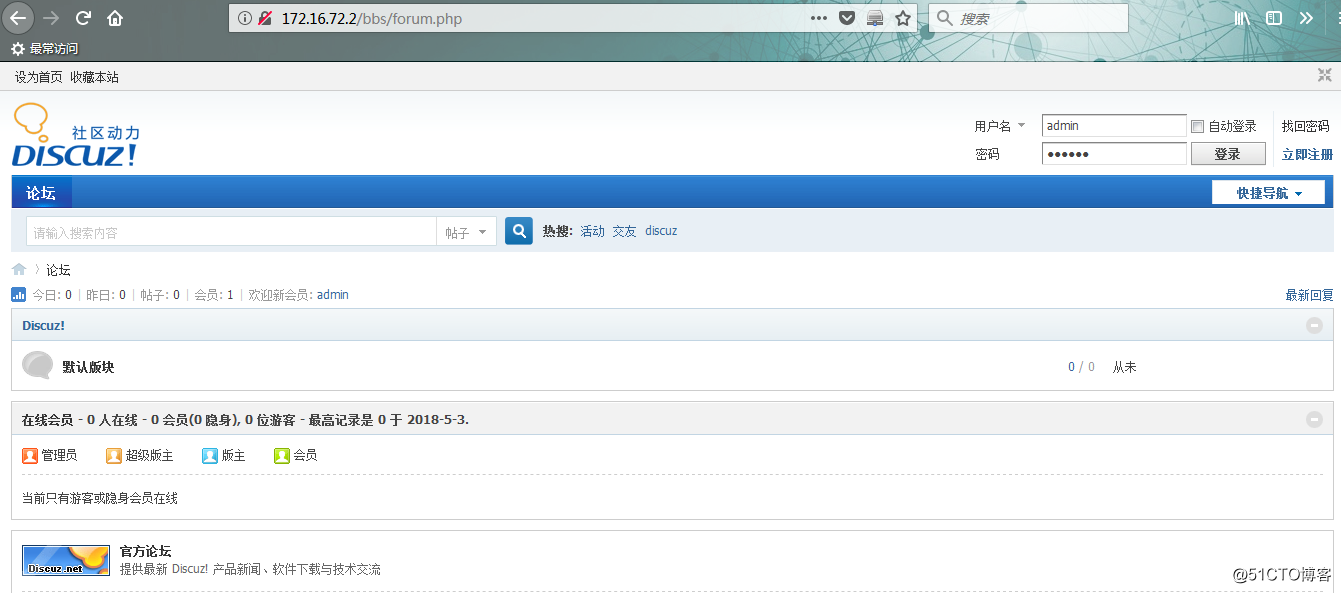
在主页中注册的用户以及信息会自动录入到服务器的数据库中;
至此,Discuz!论坛系统初始布置完成。
(2)wordpress博客系统
进入本地浏览器主页打开WordPress首页: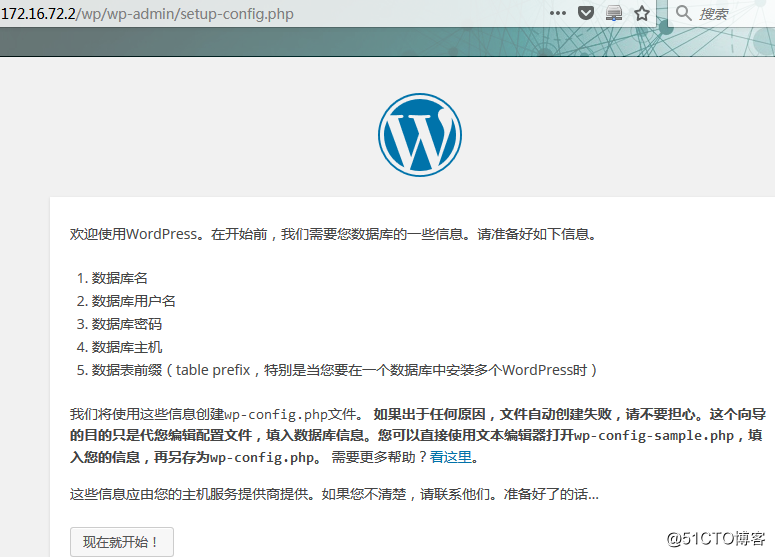
如上图所示,我们需要先一步在服务器端准备所需要的数据库名、数据库用户名、数据库密码、数据库主机,并授权权限:
新建数据库(mysql命令):
MariaDB [(none)]> create database wpdb character set =utf8;
Query OK, 1 row affected (0.01 sec)
在配置文件中wp-config-sample.php 作如下图配置:
[root@chenliang wp]# vim wp-config-sample.php 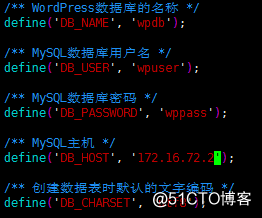
使用mysql命令赋予数据库用户对数据库wpdb的权限:
MariaDB [(none)]>grant all on wpdb.* to 'wpuser'@'172.16.%.%' identified by '123456';
根据下图提示,在wp目录下新建配置文件 wp-config.php: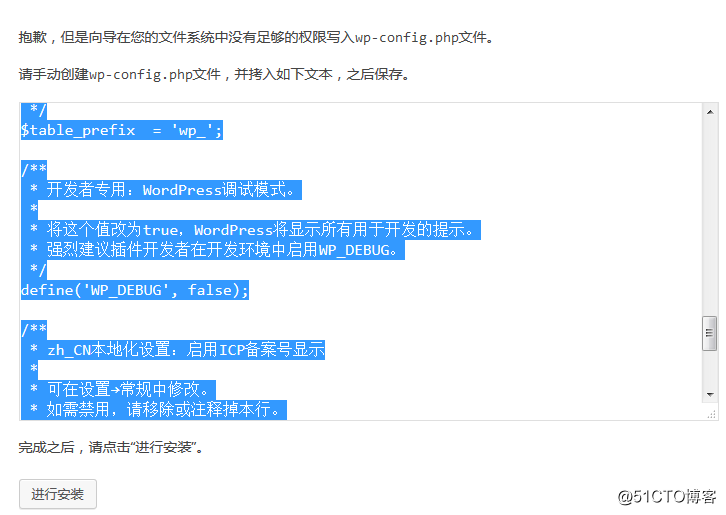
之后,按要求设定管理员账号和密码,最后进入登录界面: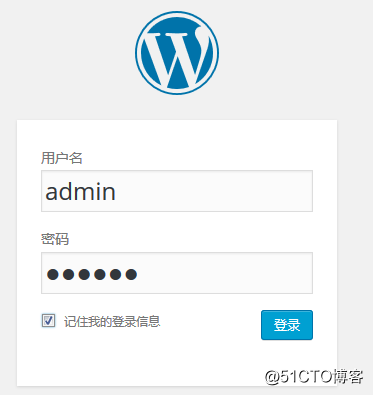
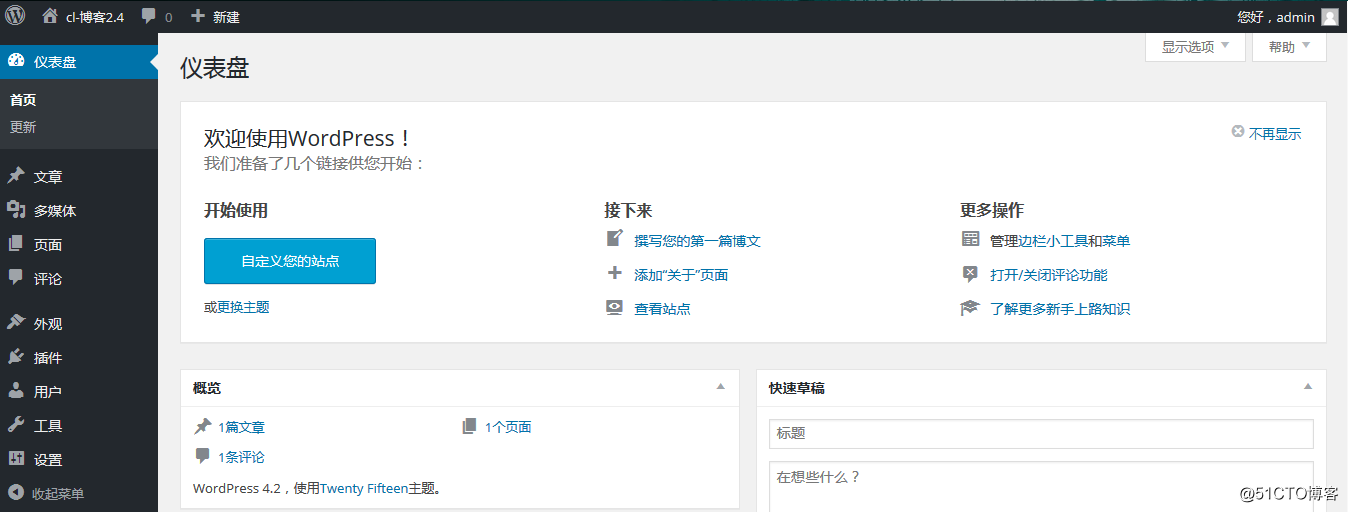
至此,配置wordpress博客系统成功。
(3)安装phpMyAdmin应用程序,用来图形化显示和管理服务器端的数据库:
进入首页: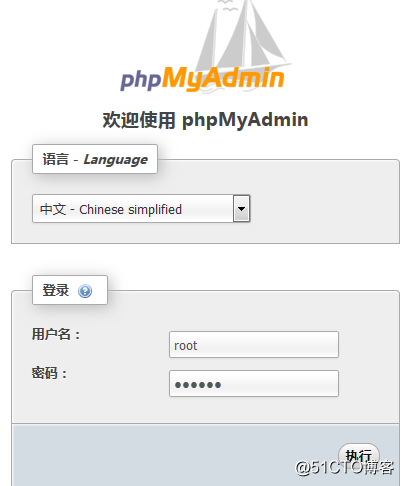
root超级管理员才能登录,密码使用在服务器端设置的数据库管理员密码,登录后可以看到之前配置产生的数据库wpdb和ultrax: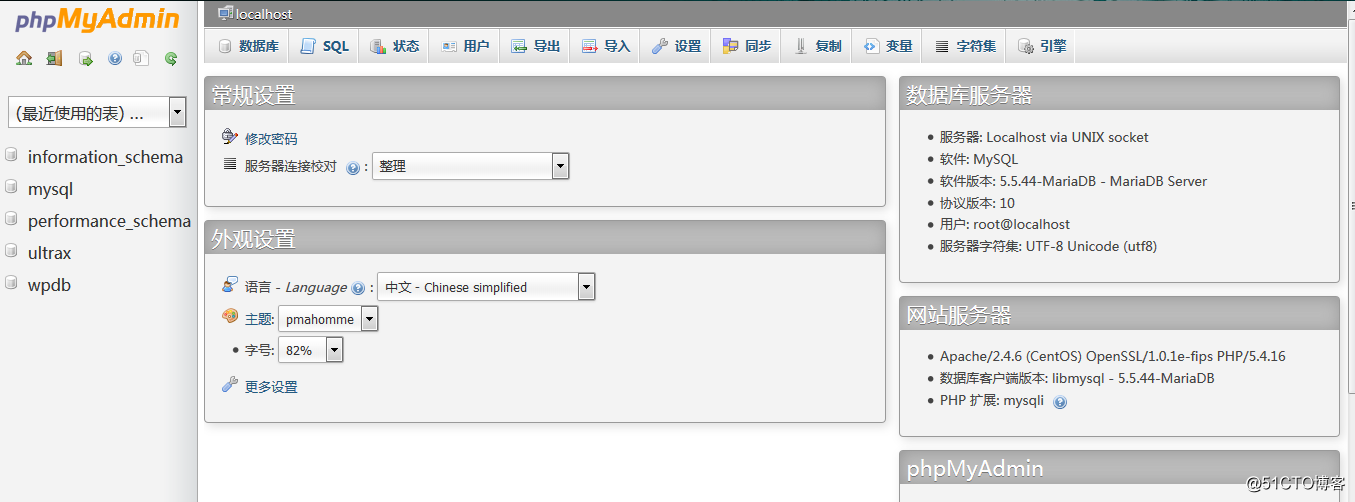
至此,安装phpMyAdmin应用程序成功。
至此,httpd-2.4部署Discuz!论坛系统、wordpress博客系统和phpMyAdmin程序,成功。