我们之前介绍的WebSocket集成于SpringBoot中进行实现的,这里我们来看一看WebSocket在Netty中是如何使用的,其实也是比较的简单,首先我们可以依据之前 使用Netty实现Http服务器及客户端,我们把一个简单的页面用于给客户端进行请求,其页面内容如下:

非常的简单,就是一个div区域用于展示信息,下方一个输入框及按钮,用于发送消息,然后我们就是该页面中还有相关WebSocket的方法,这里我们在 原生WebSocket API实现聊天工具 中也介绍过,这里主要就是在onmessage方法中,接受到消息时,在页面上显示出来,如下:
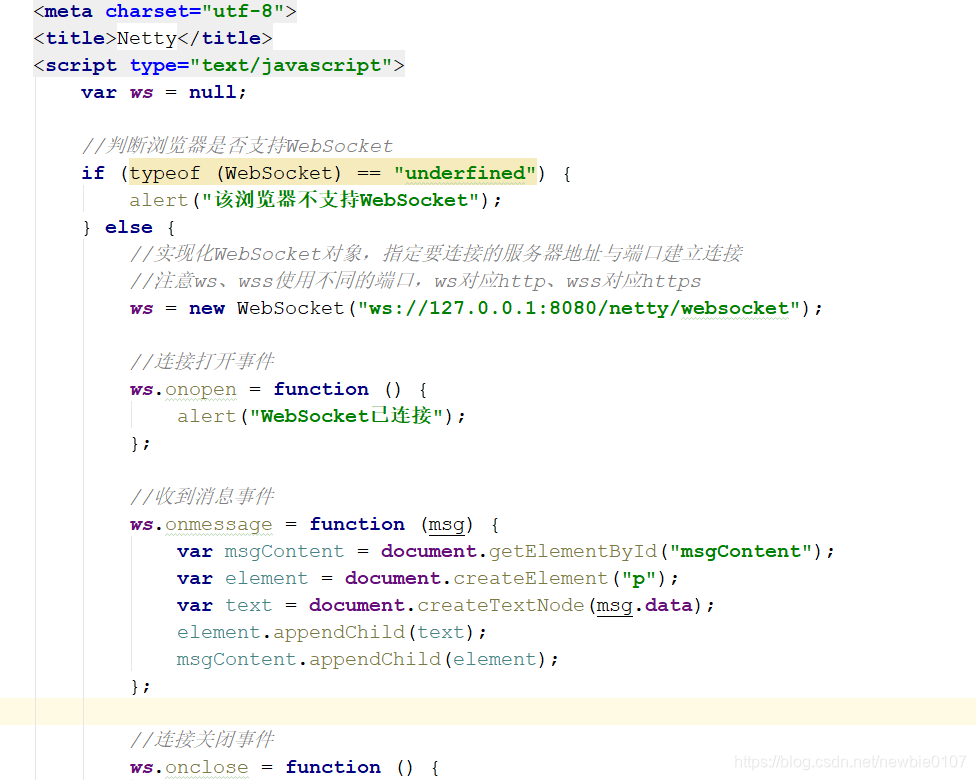
然后我们就是我们的发送消息事件了,如下:

上述就是chat.html 的全部内容了,我们将其放置项目之中,我们就可以在页面进行请求了
然后服务端就是标准的Netty启动流程,在启动加了些SSL的相关支持,这个我们在实现Http服务器的时候,也有相关的介绍,如下:
public final class WebSocketServer {

    private static boolean SSL = false;
    public static final int PORT = SSL ? 8443 : 8080;

    private void start() throws Exception {
        final SslContext sslContext;
        if (SSL) {
            SelfSignedCertificate signedCertificate = new SelfSignedCertificate();
            sslContext = SslContextBuilder.forServer(signedCertificate.certificate(),
                    signedCertificate.privateKey()).build();
        } else {
            sslContext = null;
        }

        EventLoopGroup boss = new NioEventLoopGroup();
        EventLoopGroup work = new NioEventLoopGroup();
        ServerBootstrap serverBootstrap = new ServerBootstrap();
        try {
            serverBootstrap.group(boss, work)
                    .channel(NioServerSocketChannel.class)
                    .option(ChannelOption.SO_BACKLOG, 512)
                    .childHandler(new WebSocketServerInitializer(sslContext));

            ChannelFuture channelFuture = serverBootstrap.bind(PORT).sync();
            channelFuture.channel().closeFuture().sync();
        } finally {
            boss.shutdownGracefully();
            work.shutdownGracefully();
        }
    }

    public static void main(String[] args) throws Exception {
        WebSocketServer server = new WebSocketServer();
        server.start();
    }
}
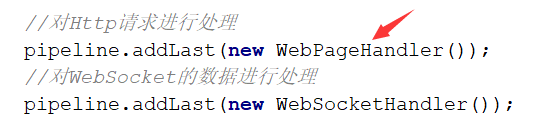
然后我们就需要看一看我们添加在相关的Handler了,其中就需要添加相关SSL支持和Http的支持,之前也说过WebSocket是基于Http进行建立的嘛,然后我们还设置了WebSocket的路径,这里的路径和我们在JS中请求的路径是一致的,然后就是添加相关的WebSocket的支持,如下:
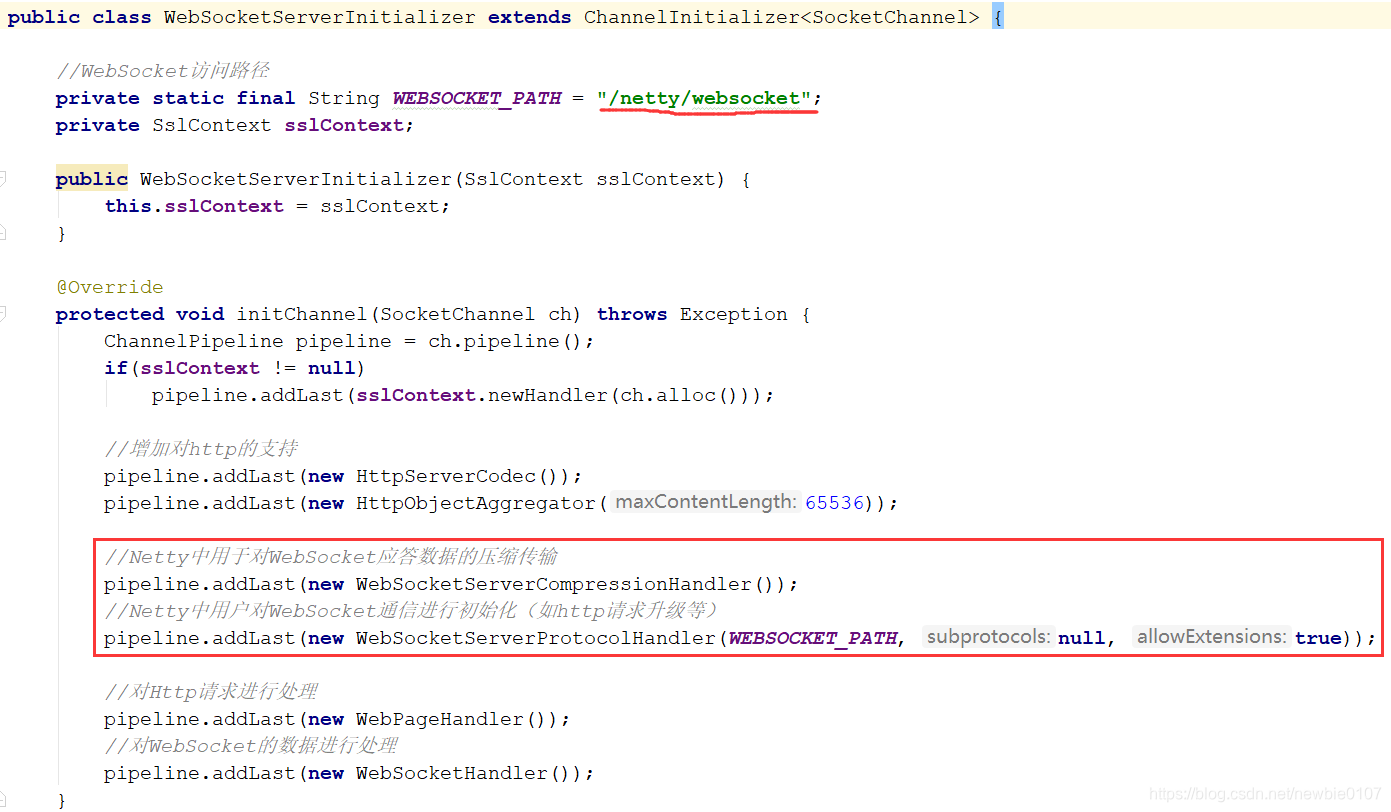

然后就是我们需要针对Http请求以及WebSocket的请求进行相应的处理,这里针对于Http的请求,主要就是将chat.html 页面返回给浏览器进行展示,这里和 使用Netty实现Http服务器及客户端 中是差不多一致的
public class WebPageHandler extends SimpleChannelInboundHandler<FullHttpRequest> {
    @Override
    protected void channelRead0(ChannelHandlerContext ctx, FullHttpRequest request) throws Exception {
        // 状态为1xx的话,继续请求
        if(HttpUtil.is100ContinueExpected(request)){
            FullHttpResponse response = new DefaultFullHttpResponse(HttpVersion.HTTP_1_1, HttpResponseStatus.CONTINUE);
            ctx.writeAndFlush(response);
        }

        //处理错误或者无法解析的http请求
        if (!request.decoderResult().isSuccess()) {
            FullHttpResponse response = new DefaultFullHttpResponse(HttpVersion.HTTP_1_1, HttpResponseStatus.BAD_REQUEST,
                    Unpooled.copiedBuffer("请求失败", CharsetUtil.UTF_8));

            response.headers().set(HttpHeaderNames.CONTENT_TYPE, "text/plain;charset=UTF-8");
            ctx.writeAndFlush(response).addListener(ChannelFutureListener.CLOSE);
        }

        //只允许GET请求
        if (request.method() != HttpMethod.GET) {
            DefaultFullHttpResponse response = new DefaultFullHttpResponse(HttpVersion.HTTP_1_1, HttpResponseStatus.FORBIDDEN);

            ByteBuf byteBuf = Unpooled.copiedBuffer("只允许GET请求", CharsetUtil.UTF_8);
            response.content().writeBytes(byteBuf);
            byteBuf.release();

            HttpUtil.setContentLength(response, response.content().readableBytes());
            ctx.channel().writeAndFlush(response).addListener(ChannelFutureListener.CLOSE);
        }

        if ("/chat".equals(request.uri())) {
            String path = this.getClass().getClassLoader().getResource("static/chat.html").getPath();
            RandomAccessFile file = new RandomAccessFile(path, "r");

            HttpResponse response = new DefaultHttpResponse(request.protocolVersion(), HttpResponseStatus.OK);
            response.headers().set(HttpHeaderNames.CONTENT_TYPE, "text/html;charset=UTF-8");

            if (HttpUtil.isKeepAlive(request)) {
                response.headers().set(HttpHeaderNames.CONTENT_LENGTH, file.length());
                response.headers().set(HttpHeaderNames.CONNECTION, HttpHeaderValues.KEEP_ALIVE);
            }
            ctx.write(response);

            if (ctx.pipeline().get(SslHandler.class) == null) {
                ctx.write(new DefaultFileRegion(file.getChannel(), 0, file.length()));
            } else {
                ctx.write(new ChunkedNioFile(file.getChannel()));
            }

            ChannelFuture channelFuture = ctx.writeAndFlush(LastHttpContent.EMPTY_LAST_CONTENT);
            if (!HttpUtil.isKeepAlive(request)) {
                channelFuture.addListener(ChannelFutureListener.CLOSE);
            }
        } else {
            FullHttpResponse response = new DefaultFullHttpResponse(HttpVersion.HTTP_1_1, HttpResponseStatus.NOT_FOUND,
                    Unpooled.copiedBuffer("访问路径错误", CharsetUtil.UTF_8));

            response.headers().set(HttpHeaderNames.CONTENT_TYPE, "text/plain;charset=UTF-8");
            ctx.writeAndFlush(response).addListener(ChannelFutureListener.CLOSE);
        }
    }
}
最后我们主要需要看一下相关的WebSocket请求的处理,如下:

public class WebSocketHandler extends SimpleChannelInboundHandler<WebSocketFrame> {

    @Override
    protected void channelRead0(ChannelHandlerContext ctx, WebSocketFrame msg) throws Exception {
        if (msg instanceof TextWebSocketFrame) {
            //判断是否为文本帧,若是则进行处理
            String data = ((TextWebSocketFrame) msg).text();
            ctx.channel().writeAndFlush(new TextWebSocketFrame(data));
        }
    }
}
这里我们简单介绍一下 TextWebSocketFrame ,由IETF 发布的WebSocket RFC,定义了6 种帧,Netty 为它们每种都提供了一个POJO 实现,下面我们来看一下 WebSocketFrame 六种不同的类型,前三种为数据帧,后三种为控制帧,其中最后两种帧为心跳报文,ping发起心跳,pong回应心跳。
| 帧类型 | 描述 |
|---|---|
| BinaryWebSocketFrame | 包含了二进制数据 |
| TextWebSocketFrame | 包含了文本数据 |
| ContinuationWebSocketFrame | 包含属于上一个BinaryWebSocketFrame或者TextWebSocketFrame的文本数据或者二进制数据 |
| CloseWebSocketFrame | 表示一个CLOSE请求,包含一个关闭的状态码和关闭的原因 |
| PingWebSocketFrame | 请求传输一个PongWebSocketFrame |
| PongWebSocketFrame | 作为一个对于PingWebSocketFrame的响应被发送 |
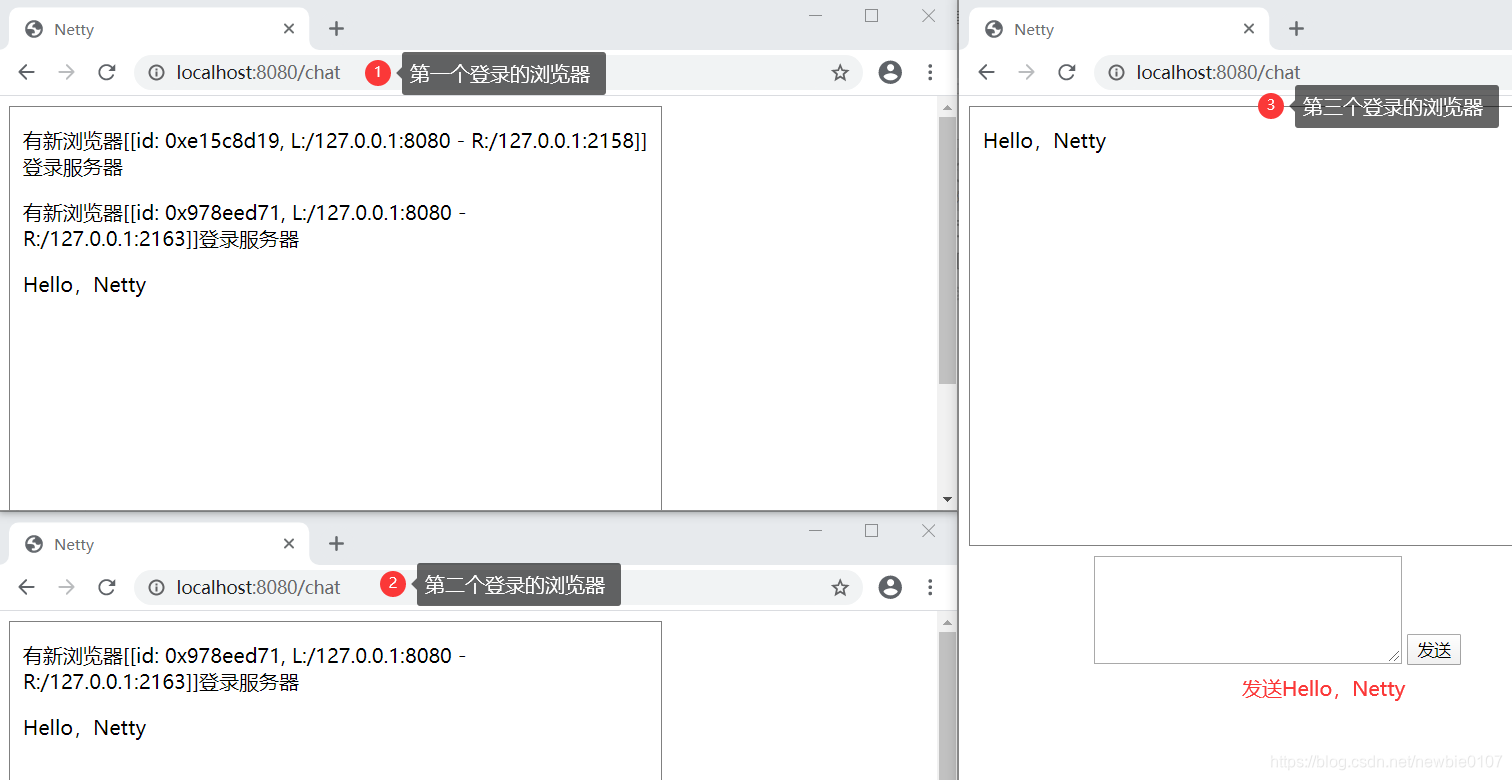
下面就是其运行结果,输入框中输入相关信息,点击发送,就会通过WebSocket发送给服务器,然后服务器又会返回该消息,如下图:
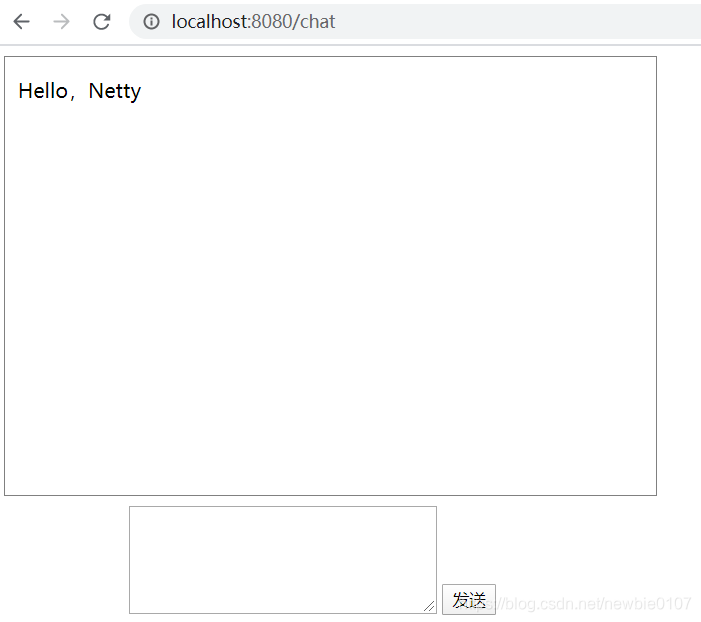
上述实现的功能虽然和我们之前实现的效果是一直的,但是其实现方式是不同的,我们可以通过前端的JS代码,也能发现,该显示的消息是通过WebSoket进行实现的

下面我们进行简单的修改,还可以实现群发的功能,我们还定义了一个事件,用于提醒其他客户端,有新的客户端登录进行来,如下: