过滤器:
<p>{{ date|date:"Y-m-d" }}</p>
{#2018-05-28,date是当前时间#}

<p>{{ l|length }}</p>
{# 4   l=[1,2,3,4]#}

<p>{{ size|filesizeformat }}</p>
{#9.8M  size=10240000#}

<p>{{ sentence|slice:"2:-1" }}</p>
{#  llo worl  sentence="hello world" 切分#}

<p>{{ flase|default:'nothing' }}</p>
{# nothing   如果一个变量是false或者为空,使用给定的默认值。否则,使用变量的值#}

<p>{{ value|truncatechars:5 }}</p>
{#  zh...    value='zhouyiming' #}

“Django的模板中会对HTML标签和JS等语法标签进行自动转义,原因显而易见,这样是为了安全。但是有的时候我们可能不希望这些HTML元素被转义,
比如我们做一个内容管理系统,后台添加的文章中是经过修饰的,这些修饰可能是通过一个类似于FCKeditor编辑加注了HTML修饰符的文本,
如果自动转义的话显示的就是保护HTML标签的源文件。为了在Django中关闭HTML的自动转义有两种方式,如果是一个单独的变量我们可以
通过过滤器“|safe”的方式告诉Django这段代码是安全的不必转义”


{{ test_content|safe}}
模版中的标签:
for标签
{% for k,j in dic1.items %}
    <p>{{ k }}:{{ j }}</p>
    <p>{{ forloop.counter }}</p>
{% endfor %}
{# a:zyma 1 b:zymb 2 c:zymc 3  dic1={"a":"zyma","b":"zymb","c":"zymc"}#}
!!!循环的序号可以通过forloop来控制,下面是控制的参数。

forloop.counter         The current iteration of the loop (1-indexed)
forloop.counter0    The current iteration of the loop (0-indexed)
forloop.revcounter  The number of iterations from the end of the loop (1-indexed)
forloop.revcounter0 The number of iterations from the end of the loop (0-indexed)
forloop.first           True if this is the first time through the loop
forloop.last            True if this is the last time through the loop
for ... empty
for 标签带有一个可选的{% empty %} 从句,以便在给出的组是空的或者没有被找到时,可以有所操作。


{% for person in person_list %}
    <p>{{ person.name }}</p>

{% empty %}
    <p>sorry,no person here</p>
{% endfor %}
if 标签
{% if %}会对一个变量求值,如果它的值是“True”(存在、不为空、且不是boolean类型的false值),对应的内容块会输出。
复制代码

{% if num > 100 or num < 0 %}
    <p>无效</p>
{% elif num > 80 and num < 100 %}
    <p>优秀</p>
{% else %}
    <p>凑活吧</p>
{% endif %}
with标签
使用一个简单地名字缓存一个复杂的变量,当你需要使用一个“昂贵的”方法(比如访问数据库)很多次的时候是非常有用的

例如:

{% with total=business.employees.count %}
    {{ total }} employee{{ total|pluralize }}
{% endwith %}
csrf_token
用户crsf中间件,在使用post请求的时候,django的crsf中间件会进行验证,会报403错误。加上 csrf_token进行跨站请求伪造保护
自定义标签和过滤器
1.在settings中的INSTALLED_APPS配置当前app,不然django无法找到自定义的simple_tag
2.在app中创建templatetags模块(模块名只能是templatetags)
3.创建任意 .py 文件,如:my_tags.py
filter是过滤器,simple_tag是标签。
from django import template
from django.utils.safestring import mark_safe

register = template.Library()   #register的名字是固定的,不可改变


@register.filter
def filter_multi(v1,v2):
    return  v1 * v2
<br>
@register.simple_tag
def simple_tag_multi(v1,v2):
    return  v1 * v2
<br>
@register.simple_tag
def my_input(id,arg):
    result = "<input type='text' id='%s' class='%s' />" %(id,arg,)
    return mark_safe(result)

4.在使用自定义simple_tag和filter的html文件中导入之前创建的 my_tags.py
在html的开头添加
{% load my_tags %}
5.使用simple_tag和filter(如何调用)
-------------------------------.html
{% load xxx %}

# num=12
{{ num|filter_multi:2 }} #24

{{ num|filter_multi:"[22,333,4444]" }}

{% simple_tag_multi 2 5 %}  参数不限,但不能放在if for语句中
{% simple_tag_multi num 5 %}

6.区别
注意:filter可以用在if等语句(控制语句)后,simple_tag不可以
filter最多能传两个参数,simple_tag不限。
include标签
在html中写入标签{% include 'include.html' %} 相当于插入的作用。
include.html
<div>
    <p style="color: darkgrey">hello world</p>
    <p style="background-color: #2aabd2">hi yuan</p>
</div>
inclusion_tag标签
在做个人界面的时候,会有不变的地方比如博客园的分类和标签之类的,但是这样的地方还需要数据来渲染。
有两种方法解决:
第一种利用模版继承,将你需要的数据写入一个函数内,返回一个字典,需要的时候调用。
第二种使用标签inclusion_tag来实现,相当于将你想要不变的地方,做成一个组件的形式,而且保证数据和html在一块。即取即用。
根据上面的自定义标签来创建templatetags文件夹,创建一个py的文件(你自己的),这里是my_tags.py,然后创建你的menu.html文件,样式写再里面
from django import template
from django.db.models import Count
from blogs import models
register=template.Library() #实例化

@register.inclusion_tag("menu.html")  #“menu.html”是关联html文件,
def get_menu(username):
    user=models.UserInfo.objects.filter(username=username).first()
    print(type(user))
    print(user)
    blog=user.blog
    category = models.Category.objects.filter(blog=blog).annotate(count=Count("article")).values_list('title', "count")
    tag = models.Tag.objects.filter(blog=blog).annotate(count=Count("article")).values_list('title', 'count')
    date_list = models.Article.objects.filter(user=user).extra(
        select={"archive_date": "strftime('%%Y-%%m',create_time)"}).values('archive_date').annotate(
        count=Count("nid")).values_list("archive_date", 'count')

    return {"username":username,'category':category,"tag":tag,'date_list':date_list}
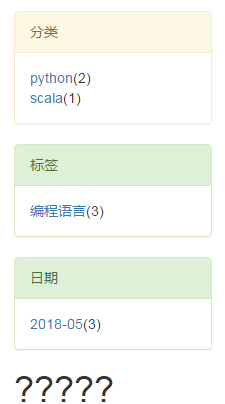
menu.html文件
<div>
<div class="panel panel-warning">
                <div class="panel-heading">分类</div>
                <div class="panel-body">
                    {% for foo in category %}
                        <div><a href="/blogs/{{ username }}/cate/{{ foo.0 }}/">{{ foo.0 }}</a>({{ foo.1 }})</div>


                    {% endfor %}

                </div>
            </div>

            {#标签 #}
            <div class="panel panel-success">
                <div class="panel-heading">标签</div>
                <div class="panel-body">
                    {% for foo in tag %}
                        <div><a href="/blogs/{{ username }}/tag/{{ foo.0 }}/">{{ foo.0 }}</a>({{ foo.1 }})</div>

                    {% endfor %}

                </div>


            </div>

            {# 日期归档 #}
            <div class="panel panel-success">
                <div class="panel-heading">日期</div>
                <div class="panel-body">
                    {% for foo in date_list %}
                        <div><a href="/blogs/{{ username }}/date/{{ foo.0 }}/">{{ foo.0 }}</a>({{ foo.1 }})</div>

                    {% endfor %}

                </div>


            </div>

</div>
主html文件:
第一行加入:{% load my_tags %}
再在你想要添加的位置,{% get_menu username %} ,get_menu是my_tags.py中的函数,username是你传进去的参数。
执行顺序是先子啊模版渲染前执行这个函数,并传入参数。下方结果
xxx