url: 协议://域名(IP)+端口(80)/路径?参数(a=1&b=2)
请求协议格式:
(1)请求首行 -- 请求方式url(路径?get请求参数) 协议/版本号
(2)请求头 -- key:value
(3)请求体 -- 数据(只有post请求才会有请求体)
响应协议格式:
(1)响应首行--协议/版本号 状态码 状态码译文
(2)响应头--Content-Type:text/html
(3)响应体--<h1>Hello,xiaokeai!</h1>
MVC模型:

(1)M-model: 与数据库打交道
(2)V-views:视图(html文件)
(3)C-controller:控制器(url的分发与视图函数)
MTV模型:
(1)M-model: 与数据库打交道
(2)T-temlates: 存放html文件
(3)V-views: 视图函数(逻辑处理)
使用web框架流程:
(1)urls 定义映射关系 ("timer",timer)
(2)创建视图函数:
def timer(evsion):
业务逻辑
return 文件(templates文件夹中存着)
(3)一旦涉及数据库操作,使用models
1、项目实践
2、项目代码
manage.py文件
#coding:utf-8
from wsgiref.simple_server import make_server
from urllib.parse import parse_qs
import pymysql

def application(environ,start_response):
    print("environ",environ)
    print("PATH_INFO",environ.get("PATH_INFO"))
    path = environ.get("PATH_INFO")
    data =b"404!"
    if path=="/login":
        #当数据库中没有搜索到时,即可显示404
        with open("login.html","rb") as f:
            data = f.read()
    elif path=="/auto":
        #登录认证
        #1、获取用户输入的用户名和密码
        request_body_size = int(environ.get("CONTENT_LENGTH",0))
        print("request_body_size",request_body_size)#user=xiaokeai&pwd=123
        request_body = environ["wsgi.input"].read(request_body_size)
        request_data = parse_qs(request_body)#用户名和密码列表{b'user': [b'bobo'], b'pwd': [b'123']}

        user = (request_data.get(b"user")[0]).decode("utf8")
        pwd = (request_data.get(b"pwd")[0]).decode("utf8")
        print("====>",user,pwd)
        #2、去数据库做校验,查看提交用户是否符合
        #连接数据库

        conn = pymysql.connect(
            host="localhost",
            user="root",
            password="",
            database="web",
            port=3306,
            charset='utf8'
        )
        #创建游标
        cur = conn.cursor()
        sql = "select * from userinfo WHERE name='%s' AND password='%s'"%(user,pwd)
        cur.execute(sql)
        # print("cur.fetchone",cur.fetchone())
        if cur.fetchone():
            #验证成功
            data = "验证成功!".encode("gbk")
        else:
            #验证失败
            data = "验证失败!".encode("gbk")

    start_response("200 OK",[("Content-Type","text/html"),("k1","v1")])
    return [data]


httpd = make_server("",8808,application)

print("Serving HTTP on port 8080...")
#开始监听HTTP请求:
httpd.serve_forever()
代码优化=============================》》》》》》》》》》》》》
manage.py
#coding:utf-8
from wsgiref.simple_server import make_server
from app.urls import urlpattens

def application(environ,start_response):
    print("environ",environ)
    print("PATH_INFO",environ.get("PATH_INFO"))
    path = environ.get("PATH_INFO")
    data =b"404!"

    # #url与视图函数的映射关系
    # urlpattens = [
    #     ("/login",login),
    #     ("/auto",auto),
    #     ("/favicon.ico",favicon),
    #     ("/",index)
    # ]


    #方案一
    # if path=="/login":
    #     data = login(environ)
    # elif path=="/auto":
    #     data = data(environ)

    #方案二
    func = None
    for item in urlpattens:
        if item[0] == path:
            func = item[1]
            break

    if not func:
        data = b"<h1>404</h1>"

    else:
        data = func(environ)

    start_response("200 OK",[("Content-Type","text/html"),("k1","v1")])
    return [data]


httpd = make_server("",8808,application)

print("Serving HTTP on port 8080...")
#开始监听HTTP请求:
httpd.serve_forever()
views.py
#coding:utf-8
from urllib.parse import parse_qs
import pymysql

def login(environ):
    with open("htmls/login.html","rb") as f:
        data = f.read()
    return data

def auto(environ):
    # 登录认证
    # 1、获取用户输入的用户名和密码
    request_body_size = int(environ.get("CONTENT_LENGTH", 0))
    print("request_body_size", request_body_size)  # user=xiaokeai&pwd=123
    request_body = environ["wsgi.input"].read(request_body_size)
    request_data = parse_qs(request_body)  # 用户名和密码列表{b'user': [b'bobo'], b'pwd': [b'123']}

    user = (request_data.get(b"user")[0]).decode("utf8")
    pwd = (request_data.get(b"pwd")[0]).decode("utf8")
    print("====>", user, pwd)
    # 2、去数据库做校验,查看提交用户是否符合
    # 连接数据库

    conn = pymysql.connect(
        host="localhost",
        user="root",
        password="",
        database="web",
        port=3306,
        charset='utf8'
    )
    # 创建游标
    cur = conn.cursor()
    sql = "select * from userinfo WHERE name='%s' AND password='%s'" % (user, pwd)
    cur.execute(sql)
    # print("cur.fetchone",cur.fetchone())
    if cur.fetchone():
        # 验证成功
        data = "验证成功!".encode("gbk")
    else:
        # 验证失败
        data = "验证失败!".encode("gbk")
    return data

def favicon(environ):
    with open("htmls/favicon.ico","rb") as f:
        data = f.read()
    return data

def index(environ):
    with open("htmls/index.html","rb") as f:
        data = f.read()
    return data

def timer(environ):
    import datetime
    now = datetime.datetime.now()
    return str(now).encode("utf8")
urls.py
#coding:utf-8
from app.views import login,auto,favicon,index,timer

#url与视图函数的映射关系
urlpattens = [
    ("/timer",timer),
    ("/login",login),
    ("/auto",auto),
    ("/favicon.ico",favicon),
    ("/",index)
]
inde.html
<!DOCTYPE html>
<html lang="en">
<head>
    <meta charset="UTF-8">
    <title>index</title>
</head>
<body>
<h3>index文件</h3>
</body>
</html>
login.html
<!DOCTYPE html>
<html lang="en">
<head>
<meta charset="UTF-8">
<title>登录界面</title>
</head>
<body>
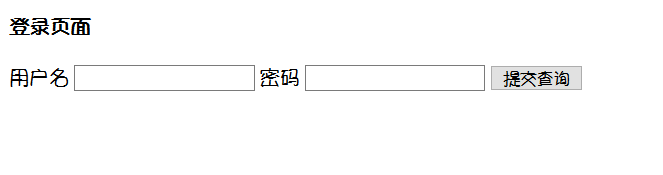
<h4>登录页面</h4>
<form action="http://192.168.191.1:8808/auto" method="post">
用户名 <input type="text" name="user">
密码 <input type="text" name="pwd">
<input type="submit">
</form>
</body>
</html>运行结果:
3、第一行Django代码
(1)下载django : pip3 install django
(2)创建一个djando项目
在cmd中输入:django-admin startproject DIY_03

(3)项目结构
|--manage.py:启动文件,与项目交互命令文件
|--项目名称:
|---settings.py:配置信息
|---urls:路径与视图函数的映射
|---wsgi:封装socket
app01
|---models:存放与该app相关的表结构
|---view:存放与改app相关的视图函数(处理http请求的函数--视图函数)
|---tests.py:写测试代码的文件
|---admin.py:网站后台管理相关的文件
建立应用与项目之间的联系,需要应用进行注册。
修改settings.py的INSTALLED_APPS
INSTALLED_APPS = [
    'django.contrib.admin',
    'django.contrib.auth',
    'django.contrib.contenttypes',
    'django.contrib.sessions',
    'django.contrib.messages',
    'django.contrib.staticfiles',
    'app03',#进行用户的注册
]
运行开发web服务器命令
要通过类和对象就可以对数据表进行操作。
设计类:模型类
ORM另外一个作用:根据设计的类生成数据库中的表
执行迁移生成表:python manage.py migrate
根据迁移文件生成表。
生成表明的默认格式:应用名_模型类小写
(4)项目应用
python3 manage.py startapp app名称

运行结果

(5)启动项目
输入:python manage.py runserver 8080

运行结果:

4、pyCharm创建django项目

生成项目视图:

运行时:遇到问题进行解决

解决方法:加上在路径后/

遇到问题如下:

解决问题:进行注释

此时再进行运行出现

对代码进行修改如下:
manage.py
#!/usr/bin/env python
"""Django's command-line utility for administrative tasks."""
import os
import sys


def main():
    os.environ.setdefault('DJANGO_SETTINGS_MODULE', 'mysite.settings')
    try:
        from django.core.management import execute_from_command_line
    except ImportError as exc:
        raise ImportError(
            "Couldn't import Django. Are you sure it's installed and "
            "available on your PYTHONPATH environment variable? Did you "
            "forget to activate a virtual environment?"
        ) from exc
    execute_from_command_line(sys.argv)


if __name__ == '__main__':
    main()
urls.py
"""mysite URL Configuration

The `urlpatterns` list routes URLs to views. For more information please see:
    https://docs.djangoproject.com/en/2.2/topics/http/urls/
Examples:
Function views
    1. Add an import:  from my_app import views
    2. Add a URL to urlpatterns:  path('', views.home, name='home')
Class-based views
    1. Add an import:  from other_app.views import Home
    2. Add a URL to urlpatterns:  path('', Home.as_view(), name='home')
Including another URLconf
    1. Import the include() function: from django.urls import include, path
    2. Add a URL to urlpatterns:  path('blog/', include('blog.urls'))
"""
from django.contrib import admin
from django.urls import path
from app01 import views

urlpatterns = [
    path('admin/', admin.site.urls),
    path("timer/", views.timer),
    path("login/", views.login),
    path("auth/", views.auth),
]
views.py
#coding:utf-8
from django.shortcuts import render,HttpResponse
import datetime
# Create your views here.
def timer(request):
now = datetime.datetime.now().strftime("%Y-%m-%d")
return HttpResponse(now)
def login(request):
return render(request,"login.html")
def auth(request):
print(request.POST)#<QueryDict: {'user': ['xiaokeai'], 'pwd': ['123']}>
user=request.POST.get("user")#字典方式获取键值
pwd=request.POST.get("pwd")
print(user,pwd)
#判断账号密码是否正确
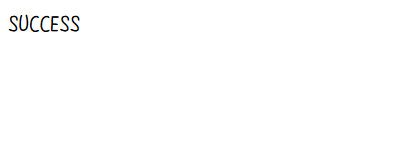
if user=="xiaokeai" and pwd=="123":
return HttpResponse("SUCCESS")
return HttpResponse("FAIL")
# return HttpResponse("OK")
settings.py
"""
Django settings for mysite project.

Generated by 'django-admin startproject' using Django 2.2.4.

For more information on this file, see
https://docs.djangoproject.com/en/2.2/topics/settings/

For the full list of settings and their values, see
https://docs.djangoproject.com/en/2.2/ref/settings/
"""

import os

# Build paths inside the project like this: os.path.join(BASE_DIR, ...)
BASE_DIR = os.path.dirname(os.path.dirname(os.path.abspath(__file__)))


# Quick-start development settings - unsuitable for production
# See https://docs.djangoproject.com/en/2.2/howto/deployment/checklist/

# SECURITY WARNING: keep the secret key used in production secret!
SECRET_KEY = '0nu-htp!gk(cttf4q88ec0-8+sis_-=1i_56x=-wchdieqd_l9'

# SECURITY WARNING: don't run with debug turned on in production!
DEBUG = True

ALLOWED_HOSTS = []


# Application definition

INSTALLED_APPS = [
    'django.contrib.admin',
    'django.contrib.auth',
    'django.contrib.contenttypes',
    'django.contrib.sessions',
    'django.contrib.messages',
    'django.contrib.staticfiles',
    'app01',
]

MIDDLEWARE = [
    'django.middleware.security.SecurityMiddleware',
    'django.contrib.sessions.middleware.SessionMiddleware',
    'django.middleware.common.CommonMiddleware',
    # 'django.middleware.csrf.CsrfViewMiddleware',
    'django.contrib.auth.middleware.AuthenticationMiddleware',
    'django.contrib.messages.middleware.MessageMiddleware',
    'django.middleware.clickjacking.XFrameOptionsMiddleware',
]

ROOT_URLCONF = 'mysite.urls'

TEMPLATES = [
    {
        'BACKEND': 'django.template.backends.django.DjangoTemplates',
        'DIRS': [os.path.join(BASE_DIR,"templates")],#此处是对文件路径进行拼接
        'APP_DIRS': True,
        'OPTIONS': {
            'context_processors': [
                'django.template.context_processors.debug',
                'django.template.context_processors.request',
                'django.contrib.auth.context_processors.auth',
                'django.contrib.messages.context_processors.messages',
            ],
        },
    },
]

WSGI_APPLICATION = 'mysite.wsgi.application'


# Database
# https://docs.djangoproject.com/en/2.2/ref/settings/#databases

DATABASES = {
    'default': {
        'ENGINE': 'django.db.backends.sqlite3',
        'NAME': os.path.join(BASE_DIR, 'db.sqlite3'),
    }
}


# Password validation
# https://docs.djangoproject.com/en/2.2/ref/settings/#auth-password-validators

AUTH_PASSWORD_VALIDATORS = [
    {
        'NAME': 'django.contrib.auth.password_validation.UserAttributeSimilarityValidator',
    },
    {
        'NAME': 'django.contrib.auth.password_validation.MinimumLengthValidator',
    },
    {
        'NAME': 'django.contrib.auth.password_validation.CommonPasswordValidator',
    },
    {
        'NAME': 'django.contrib.auth.password_validation.NumericPasswordValidator',
    },
]


# Internationalization
# https://docs.djangoproject.com/en/2.2/topics/i18n/

LANGUAGE_CODE = 'en-us'

TIME_ZONE = 'UTC'

USE_I18N = True

USE_L10N = True

USE_TZ = True


# Static files (CSS, JavaScript, Images)
# https://docs.djangoproject.com/en/2.2/howto/static-files/

STATIC_URL = '/static/'
login.html
<!DOCTYPE html>
<html lang="en">
<head>
<meta charset="UTF-8">
<title>登录页面</title>
</head>
<body>
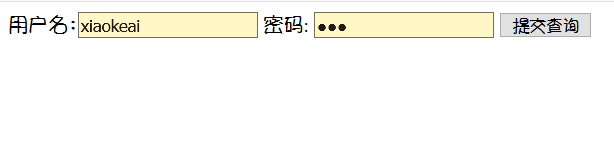
<form action="http://127.0.0.1:8080/auth/" method="post">
用户名:<input type="text" name="user">
密码: <input type="password" name="pwd">
<input type="submit">
</form>
</body>
</html>auth.html
<!DOCTYPE html>
<html lang="en">
<head>
    <meta charset="UTF-8">
    <title>验证页面</title>
</head>
<body>
    <h3>验证页面</h3>
</body>
</html>
运行结果如下:
继续修改代码:
views:
#coding:utf-8
from django.shortcuts import render,HttpResponse
import datetime
# Create your views here.

def timer(request):
    now = datetime.datetime.now().strftime("%Y-%m-%d %X")
    return HttpResponse(now)

def login(request):
    print("method", request.method)
    if request.method == "GET":
        # with open("templates/login.html","r",encoding="utf8") as f:
        #     data = f.read()
        # return HttpResponse(data)
        return render(request,"app01/login.html")

    else:
        print("method",request.method)
        print(request.POST)#<QueryDict: {'user': ['xiaokeai'], 'pwd': ['123']}>
        user=request.POST.get("user")#字典方式获取键值
        pwd=request.POST.get("pwd")
        print(user,pwd)

        #判断账号密码是否正确
        if user=="xiaokeai" and pwd=="123":
            return HttpResponse("SUCCESS")
        return HttpResponse("FAIL")

        # return HttpResponse("OK")
urls.py
from django.contrib import admin
from django.urls import path
from app01 import views

urlpatterns = [
    path('admin/', admin.site.urls),
    path("timer/", views.timer),
    path("login/", views.login),

]
login.html
<!DOCTYPE html>
<html lang="en">
<head>
    <meta charset="UTF-8">
    <title>登录页面</title>
</head>
<body>
<form action="" method="post">
    用户名:<input type="text" name="user">
    密码: <input type="password" name="pwd">
    <input type="submit">
</form>
</body>
</html>
本期学习到此结束,欢迎关注交流指教。
