spring boot和shiro的代码实战
首先说明一下,这里不是基础教程,需要有一定的shiro知识,随便百度一下,都能找到很多的博客叫你基础,所以这里我只给出代码。
官方文档:http://shiro.apache.org/spring-boot.html
shiro的使用其实很简单的,配置也不麻烦,所以不要有任何畏惧。
扫描二维码关注公众号,回复:
10954370 查看本文章

正文开始
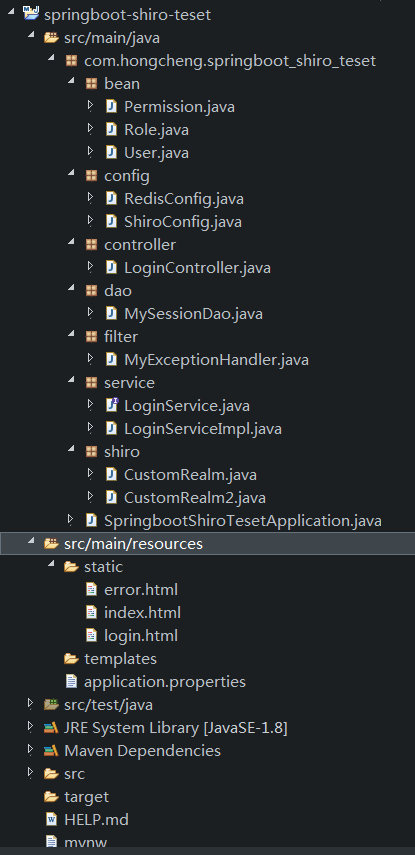
项目结构:
pom.xml
<?xml version="1.0" encoding="UTF-8"?>
<project xmlns="http://maven.apache.org/POM/4.0.0"
    xmlns:xsi="http://www.w3.org/2001/XMLSchema-instance"
    xsi:schemaLocation="http://maven.apache.org/POM/4.0.0 https://maven.apache.org/xsd/maven-4.0.0.xsd">
    <modelVersion>4.0.0</modelVersion>
    <parent>
        <groupId>org.springframework.boot</groupId>
        <artifactId>spring-boot-starter-parent</artifactId>
        <version>2.2.6.RELEASE</version>
        <relativePath /> <!-- lookup parent from repository -->
    </parent>
    <groupId>com.hongcheng</groupId>
    <artifactId>springboot-shiro-teset</artifactId>
    <version>0.0.1-SNAPSHOT</version>
    <name>springboot-shiro-teset</name>
    <description>springboot的shiro项目demo</description>

    <properties>
        <java.version>1.8</java.version>
    </properties>

    <dependencies>


        <dependency>
            <groupId>org.springframework.boot</groupId>
            <artifactId>spring-boot-starter-data-redis</artifactId>
        </dependency>

        <dependency>
            <groupId>com.alibaba</groupId>
            <artifactId>fastjson</artifactId>
            <version>1.2.47</version>
        </dependency>


        <dependency>
            <groupId>org.projectlombok</groupId>
            <artifactId>lombok</artifactId>
            <optional>true</optional>
        </dependency>
        <dependency>
            <groupId>org.apache.shiro</groupId>
            <artifactId>shiro-spring</artifactId>
            <version>1.4.0</version>
        </dependency>


        <dependency>
            <groupId>org.springframework.boot</groupId>
            <artifactId>spring-boot-starter-web</artifactId>
        </dependency>

        <dependency>
            <groupId>org.springframework.boot</groupId>
            <artifactId>spring-boot-devtools</artifactId>
            <scope>runtime</scope>
            <optional>true</optional>
        </dependency>
        <dependency>
            <groupId>org.springframework.boot</groupId>
            <artifactId>spring-boot-configuration-processor</artifactId>
            <optional>true</optional>
        </dependency>
        <dependency>
            <groupId>org.springframework.boot</groupId>
            <artifactId>spring-boot-starter-test</artifactId>
            <scope>test</scope>
            <exclusions>
                <exclusion>
                    <groupId>org.junit.vintage</groupId>
                    <artifactId>junit-vintage-engine</artifactId>
                </exclusion>
            </exclusions>
        </dependency>
    </dependencies>

    <build>
        <plugins>
            <plugin>
                <groupId>org.springframework.boot</groupId>
                <artifactId>spring-boot-maven-plugin</artifactId>
            </plugin>
        </plugins>
    </build>

</project>
启动类:
package com.hongcheng.springboot_shiro_teset;

import org.springframework.boot.SpringApplication;
import org.springframework.boot.autoconfigure.SpringBootApplication;


@SpringBootApplication
public class SpringbootShiroTesetApplication {
    public static void main(String[] args) {
        SpringApplication.run(SpringbootShiroTesetApplication.class, args);
    }
}
3个JavaBean
package com.hongcheng.springboot_shiro_teset.bean;

import java.util.Set;

import lombok.AllArgsConstructor;
import lombok.Getter;
import lombok.Setter;
import lombok.ToString;
/**
 *     用户
 * */
@Getter
@Setter
@ToString
@AllArgsConstructor
public class User {
    private String id;
    private String userName;
    private String password;
    /**
     * 用户对应的角色集合
     */
    private Set<Role> roles;
}
package com.hongcheng.springboot_shiro_teset.bean;

import java.util.Set;

import lombok.AllArgsConstructor;
import lombok.Getter;
import lombok.Setter;
import lombok.ToString;

/**
 *     角色
 * */
@Getter
@Setter
@ToString
@AllArgsConstructor
public class Role {

    private String id;
    private String roleName;
    /**
     * 角色对应权限集合
     */
    private Set<Permission> permissions;
}
package com.hongcheng.springboot_shiro_teset.bean;


import lombok.AllArgsConstructor;
import lombok.Getter;
import lombok.Setter;
import lombok.ToString;
/**
 *     权限,shiro的权限,其实也只是一种资源的标识符,你拥有这个权限,就说明你有这个标识符,那你就可以访问这个资源
 * */
@Getter
@Setter
@ToString
@AllArgsConstructor
public class Permission {
    private String id;
    private String permissionName;
}
ShiroConfig
package com.hongcheng.springboot_shiro_teset.config;

import java.util.HashMap;
import java.util.LinkedList;
import java.util.List;
import java.util.Map;

import org.apache.shiro.authc.credential.HashedCredentialsMatcher;
import org.apache.shiro.authc.pam.AtLeastOneSuccessfulStrategy;
import org.apache.shiro.authc.pam.ModularRealmAuthenticator;
import org.apache.shiro.crypto.hash.Md5Hash;
import org.apache.shiro.mgt.SecurityManager;
import org.apache.shiro.realm.Realm;
import org.apache.shiro.session.mgt.eis.JavaUuidSessionIdGenerator;
import org.apache.shiro.spring.security.interceptor.AuthorizationAttributeSourceAdvisor;
import org.apache.shiro.spring.web.ShiroFilterFactoryBean;
import org.apache.shiro.web.mgt.DefaultWebSecurityManager;
import org.apache.shiro.web.session.mgt.DefaultWebSessionManager;
import org.springframework.aop.framework.autoproxy.DefaultAdvisorAutoProxyCreator;
import org.springframework.boot.autoconfigure.condition.ConditionalOnMissingBean;
import org.springframework.context.annotation.Bean;
import org.springframework.context.annotation.Configuration;
import org.springframework.data.redis.core.RedisTemplate;

import com.hongcheng.springboot_shiro_teset.dao.MySessionDao;
import com.hongcheng.springboot_shiro_teset.shiro.CustomRealm;
import com.hongcheng.springboot_shiro_teset.shiro.CustomRealm2;

@Configuration
public class ShiroConfig {

    /**
     *     启动代理  <br>
     *     作用就是让controller中的@RequiresRoles("admin")、@RequiresPermissions("add")这些权限注解生效  <br>
     *     如果不用注解权限,这里可以删掉  <br>
     * */
    @Bean
    @ConditionalOnMissingBean
    public DefaultAdvisorAutoProxyCreator defaultAdvisorAutoProxyCreator() {
        DefaultAdvisorAutoProxyCreator defaultAAP = new DefaultAdvisorAutoProxyCreator();
        defaultAAP.setProxyTargetClass(true);
        return defaultAAP;
    }

    /**
     *     加入注解的使用,不加入这个注解不生效    <br>
     *     作用就是让controller中的@RequiresRoles("admin")、@RequiresPermissions("add")这些权限注解生效  <br>
     *     如果不用注解权限,这里可以删掉  <br>
     * */
    @Bean
    public AuthorizationAttributeSourceAdvisor authorizationAttributeSourceAdvisor(SecurityManager securityManager) {
        AuthorizationAttributeSourceAdvisor authorizationAttributeSourceAdvisor = new AuthorizationAttributeSourceAdvisor();
        authorizationAttributeSourceAdvisor.setSecurityManager(securityManager);
        return authorizationAttributeSourceAdvisor;
    }


    /**
     *     将自己的验证方式加入容器     <br>
     *     Realm接口是shiro的一个重要接口,主要负责获取认证和授权信息
     * */
    @Bean
    public CustomRealm myShiroRealm() {
        CustomRealm customRealm = new CustomRealm();
        /** 密码比较器,shiro有定义了不少hash类型的密码比较器,我们也可以自己重写个自定义的密码比较器,只需要
         * 继承SimpleCredentialsMatcher这个类,同时重写doCredentialsMatch()这个方法就好了
         * shiro会在org.apache.shiro.realm.AuthenticatingRealm.assertCredentialsMatch(AuthenticationToken, AuthenticationInfo)这个方法里面
           * 调用这个密码比较器进行密码的比较
           * */
        // 如果不用自定义密码比较,md5CredentialsMatcher可以删掉
        HashedCredentialsMatcher md5CredentialsMatcher = new HashedCredentialsMatcher();
        md5CredentialsMatcher.setHashIterations(20);
        md5CredentialsMatcher.setHashAlgorithmName(Md5Hash.ALGORITHM_NAME);
        customRealm.setCredentialsMatcher(md5CredentialsMatcher);
        return customRealm;
    }


    /**
     *     Realm可以有对多个,shiro可以根据不同的认证策略,搭配多个Realm进行认证  <br>
     *     如果不用多realm验证,这里可以删掉 <br>
     * */
    @Bean
    public CustomRealm2 myShiroRealm2() {
        CustomRealm2 customRealm = new CustomRealm2();
        return customRealm;
    }

    /**
     *     权限管理,配置主要是Realm的管理认证     <br>
     *     SecurityManager是shiro的一个重要接口,负责管理整个shiro的权限控制      <br>
     *     所以我们需要给SecurityManager进行个性化配置
     * */
    @Bean
    public SecurityManager securityManager(RedisTemplate<String, Object> redisTemplate) {
        DefaultWebSecurityManager securityManager = new DefaultWebSecurityManager();
        /***
         *     多realm验证
         * */
        List<Realm> realmList = new LinkedList<Realm>();
        realmList.add(myShiroRealm());
        realmList.add(myShiroRealm2());
        securityManager.setRealms(realmList);
        ModularRealmAuthenticator authenticator = new ModularRealmAuthenticator();
        /**
         *     认证策略不管选择哪种,都会全部执行完,然后判断是否通过认证
         * */
        authenticator.setAuthenticationStrategy(new AtLeastOneSuccessfulStrategy());
        authenticator.setRealms(realmList);
        securityManager.setAuthenticator(authenticator);
        /**
         *     session管理
         *     sessionManager如果不需要自定义,可以忽略,使用默认的
         * */
        DefaultWebSessionManager sessionManager = new DefaultWebSessionManager();
        sessionManager.setSessionIdUrlRewritingEnabled(true);        // 允许sessionId进行url重写
        /**
         *     shiro的session是会定期进行删除的
         *     详情可以看这里:org.apache.shiro.session.mgt.AbstractValidatingSessionManager.enableSessionValidation()
         *     org.apache.shiro.session.mgt.ExecutorServiceSessionValidationScheduler.enableSessionValidation()
         * */
        sessionManager.setGlobalSessionTimeout(10000);                // session超时时长
        sessionManager.setDeleteInvalidSessions(true);                // 删除失效session
        sessionManager.setSessionValidationSchedulerEnabled(true);    // 允许定期删除
        sessionManager.setSessionValidationInterval(15000);            // session定期删除时间
        /**
         *     session保存进redis里
         *     sessionDao如果不需要,可以删掉
         * */
        MySessionDao sessionDao = new MySessionDao(redisTemplate);
        sessionDao.setSessionIdGenerator(new JavaUuidSessionIdGenerator());        // sessionId生成器
        sessionManager.setSessionDAO(sessionDao);

        securityManager.setSessionManager(sessionManager);

        return securityManager;
    }

    /**
     *     Filter工厂,设置对应的过滤条件和跳转条件。shiro的权限控制,就是通过filter来控制的
详情看org.apache.shiro.web.filter.mgt.DefaultFilter

Filter Name            Class
anon                org.apache.shiro.web.filter.authc.AnonymousFilter
authc                org.apache.shiro.web.filter.authc.FormAuthenticationFilter
authcBasic            org.apache.shiro.web.filter.authc.BasicHttpAuthenticationFilter
authcBearer            org.apache.shiro.web.filter.authc.BearerHttpAuthenticationFilter
logout                org.apache.shiro.web.filter.authc.LogoutFilter
noSessionCreation    org.apache.shiro.web.filter.session.NoSessionCreationFilter
perms                org.apache.shiro.web.filter.authz.PermissionsAuthorizationFilter
port                org.apache.shiro.web.filter.authz.PortFilter
rest                org.apache.shiro.web.filter.authz.HttpMethodPermissionFilter
roles                org.apache.shiro.web.filter.authz.RolesAuthorizationFilter
ssl                    org.apache.shiro.web.filter.authz.SslFilter
user                org.apache.shiro.web.filter.authc.UserFilter
     * */
    @Bean
    public ShiroFilterFactoryBean shiroFilterFactoryBean(SecurityManager securityManager) {
        /**
         *     请求资源的过滤
         *     这一块是必须的,不能去掉
         * */
        ShiroFilterFactoryBean shiroFilterFactoryBean = new ShiroFilterFactoryBean();
        shiroFilterFactoryBean.setSecurityManager(securityManager);
        Map<String, String> map = new HashMap<>();
        //登出
        map.put("/logout", "logout");
        // 对login这个地址匿名访问
        map.put("/login*", "anon");
        map.put("/error*", "anon");
        //对所有用户认证
        map.put("/**", "authc");
        //登录
        shiroFilterFactoryBean.setLoginUrl("/login.html");
        //首页
        shiroFilterFactoryBean.setSuccessUrl("/index.html");
        //错误页面,认证不通过跳转
        shiroFilterFactoryBean.setUnauthorizedUrl("/error.html");
        shiroFilterFactoryBean.setFilterChainDefinitionMap(map);
        return shiroFilterFactoryBean;
    }
}
Realm
package com.hongcheng.springboot_shiro_teset.shiro;

import org.apache.shiro.authc.AuthenticationException;
import org.apache.shiro.authc.AuthenticationInfo;
import org.apache.shiro.authc.AuthenticationToken;
import org.apache.shiro.authc.SimpleAuthenticationInfo;
import org.apache.shiro.authc.UnknownAccountException;
import org.apache.shiro.authz.AuthorizationInfo;
import org.apache.shiro.authz.SimpleAuthorizationInfo;
import org.apache.shiro.realm.AuthorizingRealm;
import org.apache.shiro.subject.PrincipalCollection;
import org.apache.shiro.util.ByteSource;
import org.springframework.beans.factory.annotation.Autowired;

import com.hongcheng.springboot_shiro_teset.bean.Permission;
import com.hongcheng.springboot_shiro_teset.bean.Role;
import com.hongcheng.springboot_shiro_teset.bean.User;
import com.hongcheng.springboot_shiro_teset.service.LoginService;

public class CustomRealm extends AuthorizingRealm {

    /**
     *     这里可以用@Autowired,因为CustomRealm是在ShiroConfig里面通过@Bean交由spring进行管理的
     * */
    @Autowired
    private LoginService loginService;


    /**
     *     授权
     * */
    @Override
    protected AuthorizationInfo doGetAuthorizationInfo(PrincipalCollection principals) {
        //获取登录用户名
        String name = (String) principals.getPrimaryPrincipal();
        //根据用户名去数据库查询用户信息
        User user = loginService.getUserByName(name);
        //添加角色和权限
        SimpleAuthorizationInfo simpleAuthorizationInfo = new SimpleAuthorizationInfo();
        for (Role role : user.getRoles()) {
            //添加角色
            simpleAuthorizationInfo.addRole(role.getRoleName());
            //添加权限
            for (Permission permission : role.getPermissions()) {
                simpleAuthorizationInfo.addStringPermission(permission.getPermissionName());
            }
        }
        return simpleAuthorizationInfo;
    }

    /***
     *     认证,这里只是根据前端获取到的账号密码,让你去别的地方,如数据库,查找他的认证信息        <br>
     *     密码的对比并不在这里,SimpleCredentialsMatcher的doCredentialsMatch()方法才是密码对比    <br>
     *     如果用户不存在、或者用户被锁定,这里就应该抛出响应的错误<br>
     *     <br>
     *     <br>
     *     如果使用Token令牌,controller处使用了EasyTypeToken这个类,记得自己去解析token,然后获取相应的用户信息
     * */
    @Override
    protected AuthenticationInfo doGetAuthenticationInfo(AuthenticationToken authenticationToken) throws AuthenticationException {
         //加这一步的目的是在Post请求的时候会先进认证,然后在到请求
        if (authenticationToken.getPrincipal() == null) {
            return null;
        }
        //获取用户信息
        String name = authenticationToken.getPrincipal().toString();
        User user = loginService.getUserByName(name);
        if (user == null) {
            //这里返回后会报出对应异常
            throw new UnknownAccountException("账号不存在");
        } else {
            //这里验证authenticationToken和simpleAuthenticationInfo的信息
            ByteSource salt = ByteSource.Util.bytes(name);        // 加密用的盐
            /**
             *     SimpleAuthenticationInfo这玩意就是你自己保存的用户认证信息,doGetAuthenticationInfo方法主要目的就是通过用户名、或者token去获取这个用户认证信息。
             *     以便在后面给密码匹配器进行验证。
             *     注意两个名词:
             *         principal:用户的主体、当事人,按官方的文档说法就是用户的唯一标识,不管你是账号,还是userId,还是身份证,只要唯一就行。
             *         credentials: 凭证,也就是密码,或者密钥,是可以证明用户身份的东西。
             * */
            SimpleAuthenticationInfo simpleAuthenticationInfo = new SimpleAuthenticationInfo(name, user.getPassword().toString(), salt, getName());
            return simpleAuthenticationInfo;
        }
    }

}
package com.hongcheng.springboot_shiro_teset.shiro;

import org.apache.shiro.authc.AccountException;
import org.apache.shiro.authc.AuthenticationException;
import org.apache.shiro.authc.AuthenticationInfo;
import org.apache.shiro.authc.AuthenticationToken;
import org.apache.shiro.authc.SimpleAuthenticationInfo;
import org.apache.shiro.authz.AuthorizationInfo;
import org.apache.shiro.authz.SimpleAuthorizationInfo;
import org.apache.shiro.realm.AuthorizingRealm;
import org.apache.shiro.subject.PrincipalCollection;

/**
 *     这个是用来多多realm验证的
 * */
public class CustomRealm2 extends AuthorizingRealm {
    /**
     *     授权
     * */
    @Override
    protected AuthorizationInfo doGetAuthorizationInfo(PrincipalCollection principals) {
        //添加角色和权限
        SimpleAuthorizationInfo simpleAuthorizationInfo = new SimpleAuthorizationInfo();
            //添加角色
        simpleAuthorizationInfo.addRole("admin");
        simpleAuthorizationInfo.addStringPermission("add");
        return simpleAuthorizationInfo;
    }

    /***
     *     认证
     * */
    @Override
    protected AuthenticationInfo doGetAuthenticationInfo(AuthenticationToken authenticationToken) throws AuthenticationException {
        String username = authenticationToken.getPrincipal().toString();
        if(!"123".equals(username)) {
            throw new AccountException("账号找不到");
        }
        char[] password = (char[]) authenticationToken.getCredentials();
        SimpleAuthenticationInfo simpleAuthenticationInfo = new SimpleAuthenticationInfo(username,password,username);
        return simpleAuthenticationInfo;
    }

}
SessionDAO
package com.hongcheng.springboot_shiro_teset.dao;

import java.io.Serializable;
import java.util.Collection;
import java.util.List;

import org.apache.shiro.session.Session;
import org.apache.shiro.session.mgt.eis.EnterpriseCacheSessionDAO;
import org.springframework.data.redis.core.RedisTemplate;

/**
 *     对session的一个持久化处理。<br>
 *     将默认的ecache缓存换成了redis,可以作为一个分布式session共享实现
 * */
public class MySessionDao extends EnterpriseCacheSessionDAO{


    private RedisTemplate<String, Object> redisTemplate;


    /**
     *     这里需要通过传值,将redisTemplate传入。    <br>
     *     用@autowried注入是会不行的,因为MySessionDao   <br>
     *     是由我们自己new的,所以spring不会处理他的属性,另外,这里用applicationContent的getBean()  <br>
     *     也是会出现问题的,MySessionDao是在shiroConfig中的一个bean中创建的,他的创建顺序可能先于    <br>
     *     applicationContent的注入。
     * */
    public MySessionDao (RedisTemplate<String, Object> redisTemplate) {
        setCacheManager(null);
        this.redisTemplate = redisTemplate;
    }

    /**
     *     从redis里面取
     * */
    protected Session doReadSession(Serializable sessionId) {
        System.err.println("获取Session" + sessionId);
        Object object = redisTemplate.opsForHash().get("shiro-session", sessionId.toString());
        return object == null?null:(Session)object;
    }

    /**
     *     更新redis
     * */
    protected void doUpdate(Session session) {
        System.err.println("更新Session" + session.getId());
        Serializable sessionId = session.getId();
        redisTemplate.opsForHash().put("shiro-session", sessionId.toString(),session);
    }

    /**
     *     删除redis
     * */
    protected void doDelete(Session session) {
        System.err.println("删除Session" + session.getId());
        Serializable sessionId = session.getId();
        redisTemplate.opsForHash().delete("shiro-session", sessionId.toString());
    }


    /**
     *     获取全部session,判断是否过期,如果过期,删除    <br>
     *     默认实现:org.apache.shiro.session.mgt.eis.CachingSessionDAO.getActiveSessions()    <br>
     *     默认实现是从CacheManager得缓存里面取的,但是我们这里的没有设置CacheManager,所以一直为空    <br>
     *     导致redis中已经过期了的session一直没有被清理,所以这里我们要重写
     * */
    @SuppressWarnings({ "unchecked", "rawtypes" })
    public Collection<Session> getActiveSessions() {
        List values = redisTemplate.opsForHash().values("shiro-session");
        return values;
    }

}
RedisConfig
package com.hongcheng.springboot_shiro_teset.config;

import org.springframework.context.annotation.Bean;
import org.springframework.context.annotation.Configuration;
import org.springframework.data.redis.connection.RedisConnectionFactory;
import org.springframework.data.redis.core.RedisTemplate;
import org.springframework.data.redis.serializer.RedisSerializer;
import org.springframework.data.redis.serializer.StringRedisSerializer;

@Configuration
public class RedisConfig {
    /**
     *     redisTemplate 序列化使用的jdkSerializeable, 存储二进制字节码, 所以自定义序列化类
     *     如果没有用的redis,那么这个类可以删掉
     */
    @Bean
    public RedisTemplate<String, Object> redisTemplate(RedisConnectionFactory redisConnectionFactory) {
        RedisTemplate<String, Object> redisTemplate = new RedisTemplate<>();
        redisTemplate.setConnectionFactory(redisConnectionFactory);
        // 设置value的序列化规则和 key的序列化规则
        /**
         *     如果用GenericJackson2JsonRedisSerializer来序列号shiro的session,会出现反序列化失败的情况
         *     可以考虑使用别的方法进行序列化,session应该要进行加密在保存
         *     我这里为了方便,直接用jdk的序列化
         * */
        redisTemplate.setKeySerializer(new StringRedisSerializer());
        redisTemplate.setValueSerializer(RedisSerializer.java());
        redisTemplate.setHashKeySerializer(new StringRedisSerializer());
        redisTemplate.setHashValueSerializer(RedisSerializer.java());
        redisTemplate.afterPropertiesSet();
        return redisTemplate;
    }


}
LoginController
package com.hongcheng.springboot_shiro_teset.controller;

import javax.servlet.http.HttpSession;

import org.apache.shiro.SecurityUtils;
import org.apache.shiro.authc.AuthenticationException;
import org.apache.shiro.authc.UsernamePasswordToken;
import org.apache.shiro.authz.AuthorizationException;
import org.apache.shiro.authz.annotation.RequiresPermissions;
import org.apache.shiro.authz.annotation.RequiresRoles;
import org.apache.shiro.session.Session;
import org.apache.shiro.subject.Subject;
import org.springframework.web.bind.annotation.RequestMapping;
import org.springframework.web.bind.annotation.RestController;

import com.hongcheng.springboot_shiro_teset.bean.User;

@RestController
public class LoginController {

    @RequestMapping("/login")
    public String login(User user) {

        //添加用户认证信息
        Subject subject = SecurityUtils.getSubject();
        /**
         *     如果是账号密码类型,可以创建一个UsernamePasswordToken。
         *     如果使用Token令牌,可以使用EasyTypeToken这个类,相对于UsernamePasswordToken,只是把密码视为空串,username视为token。
         *     如果用EasyTypeToken,记得要自己去解析token,然后获取相应的用户信息
         * */
        UsernamePasswordToken usernamePasswordToken = new UsernamePasswordToken(
                user.getUserName(),
                user.getPassword()
        );
        try {
            //进行验证,这里可以捕获异常,然后返回对应信息
            subject.login(usernamePasswordToken);
            // 判断有没有角色
            subject.checkRole("admin");
            // 判断有没有权限
            subject.checkPermissions("query", "add");
        } catch (AuthenticationException e) {
            e.printStackTrace();
            return "账号或密码错误!";
        } catch (AuthorizationException e) {
            e.printStackTrace();
            return "没有权限";
        }
        return "login success";
    }
     //注解验角色和权限
    @RequiresRoles("admin")
    @RequiresPermissions("add")
    @RequestMapping("/index")
    public String index(HttpSession httpsession) {
        Session session = SecurityUtils.getSubject().getSession();
        System.err.println(session);
        System.err.println(httpsession);

        /***
         *     shiro的session和request和response,其实就是HttpServletSession、HttpServletRequest、HttpServletResponse的子类
         *     org.apache.shiro.web.session.mgt.ServletContainerSessionManager.getSession(SessionKey)可以看到这个结论
         * */
        httpsession.setAttribute("http", "httpsession测试");
        Object attribute = session.getAttribute("http");
        System.err.println(attribute);
        return "index!";
    }
}
Service
package com.hongcheng.springboot_shiro_teset.service;

import com.hongcheng.springboot_shiro_teset.bean.User;

public interface LoginService {
    User getUserByName(String getMapByName) ;
}
package com.hongcheng.springboot_shiro_teset.service;

import java.util.HashMap;
import java.util.HashSet;
import java.util.Map;
import java.util.Set;

import org.apache.shiro.crypto.hash.Md5Hash;
import org.apache.shiro.crypto.hash.SimpleHash;
import org.springframework.stereotype.Service;

import com.hongcheng.springboot_shiro_teset.bean.Permission;
import com.hongcheng.springboot_shiro_teset.bean.Role;
import com.hongcheng.springboot_shiro_teset.bean.User;

@Service
public class LoginServiceImpl implements LoginService {
    @Override
    public User getUserByName(String getMapByName) {
        //模拟数据库查询,正常情况此处是从数据库或者缓存查询。
        return getMapByName(getMapByName);
    }

    /**
     * 模拟数据库查询
     * @param userName
     * @return
     */
    private User getMapByName(String userName){
        //共添加两个用户,两个用户都是admin一个角色,
        //chc有query和add权限,zhangsan只有一个query权限
        Set<Permission> permissionsSet = new HashSet<>();
        permissionsSet.add(new Permission("1","query"));
        permissionsSet.add(new Permission("2","add"));

        Set<Role> roleSet = new HashSet<>();
        roleSet.add(new Role("1","admin",permissionsSet));

        User user = new User("1","chc",encrypt("123456","chc"),roleSet);
        Map<String ,User> map = new HashMap<>();
        map.put(user.getUserName(), user);


        Set<Permission> permissionsSet1 = new HashSet<>();
        permissionsSet1.add(new Permission("3","query"));


        Set<Role> roleSet1 = new HashSet<>();
        roleSet1.add(new Role("2","user",permissionsSet1));


        User user1 = new User("2","zhangsan",encrypt("123456","zhangsan"),roleSet1);
        map.put(user1.getUserName(), user1);


        return map.get(userName);
    }


    /***
     *     模拟加密
     * */
    private String encrypt(String password,String name) {
        String algorithmName = Md5Hash.ALGORITHM_NAME;    // 加密算法
        String credentials = password;                        // 密码
        String salt = name;                                    // 加密盐值
        int hashIterations = 20;                            // 加密次数
        SimpleHash simpleHash = new SimpleHash(algorithmName, credentials, salt, hashIterations);
        return simpleHash.toString();
    }


}
application.properties
# REDIS (RedisProperties)
# Redis数据库索引(默认为0)
spring.redis.database=0
# Redis服务器地址
spring.redis.host=localhost
# Redis服务器连接端口
spring.redis.port=6379
# Redis服务器连接密码(默认为空)
spring.redis.password=
# 连接池最大连接数(使用负值表示没有限制)
spring.redis.pool.max-active=8
# 连接池最大阻塞等待时间(使用负值表示没有限制)
spring.redis.pool.max-wait=-1
# 连接池中的最大空闲连接
spring.redis.pool.max-idle=8
# 连接池中的最小空闲连接
spring.redis.pool.min-idle=0
# 连接超时时间(毫秒)
spring.redis.timeout=10000
login.html
<!DOCTYPE html>
<html>
<head>
<meta charset="UTF-8">
<title>Insert title here</title>
</head>
<body>
    <form action="/login">
        用户名:<input name = "userName">
        <br>
        密码:<input name = "password">
        <button>提交</button>
    </form>
</body>
</html>
index.html
<!DOCTYPE html>
<html>
<head>
<meta charset="UTF-8">
<title>Insert title here</title>
</head>
<body>
    成功登陆
    <br>
    <a href="logout">退出</a>
</body>
</html>
error.html
<!DOCTYPE html>
<html>
<head>
<meta charset="UTF-8">
<title>Insert title here</title>
</head>
<body>
    错误
    <br>
    <a href="/login.html">登陆</a>
</body>
</html>
MyExceptionHandler
package com.hongcheng.springboot_shiro_teset.filter;

import org.apache.shiro.authz.AuthorizationException;
import org.springframework.web.bind.annotation.ControllerAdvice;
import org.springframework.web.bind.annotation.ExceptionHandler;
import org.springframework.web.bind.annotation.ResponseBody;

import lombok.extern.slf4j.Slf4j;

/**
 *     对controller的一个切面增强,可以只针对部分controller
 *     这个用不用都无所谓
 * */
@ControllerAdvice(basePackages = "com.hongcheng.springboot_shiro_teset.controller")
@Slf4j
public class MyExceptionHandler {

    /**
     *     统一异常处理
     * */
    @ExceptionHandler()
    @ResponseBody
    public String ErrorHandler(AuthorizationException e) {
        log.error("没有通过权限验证!", e);
        return "没有通过权限验证!";
    }
}
启动访问localhost:8080,就可以自己看了