说明:接上篇Ansible自动化运维(1),本篇主要讲解常用模块使用。
一、Ansible-doc用法
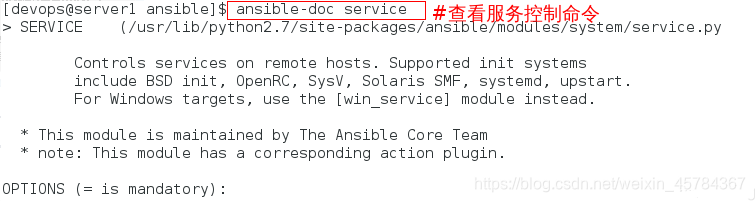
ansible的模块非常多,Ansible也提供了类似与man功能的help说明工具ansible-doc。
1、Ansible-doc命令
ansible-doc -l #显示所有可用模块
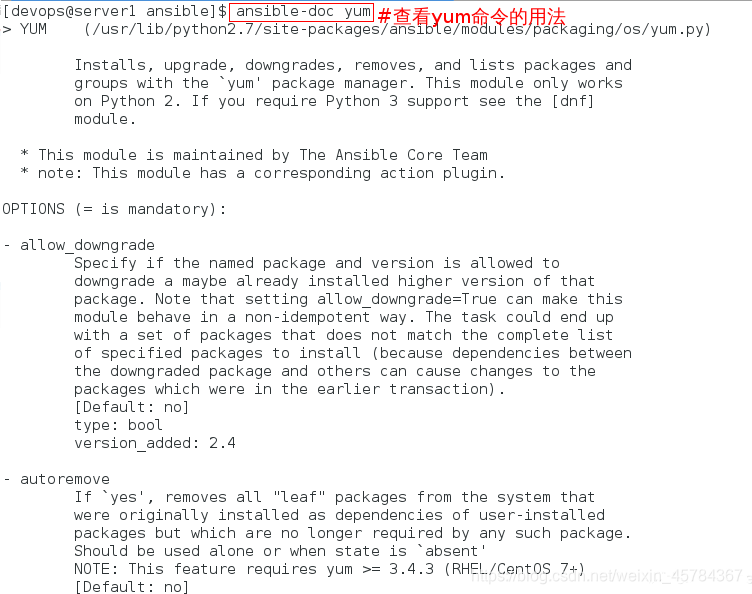
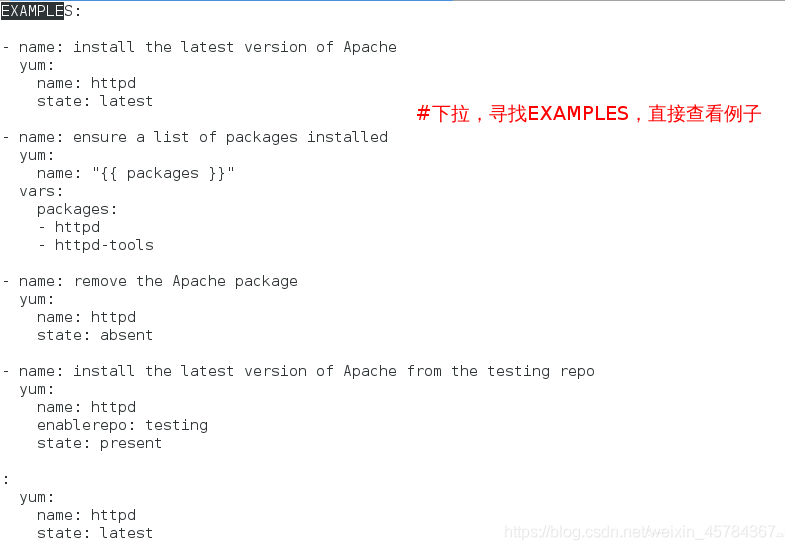
ansible-doc yum #获取yum模块使用帮助

二、常用模块的用法
yum模块
- ansible webservers -m yum -a “name=httpd stste=present”
- ansible webservers -m yum -a “name=http://172.25.1.250/rhel7.3/x86_64/dvd/Packages/vsftpd-3.0.2-21.e17.x86_64.rpm state=present” #在线安装
- ansible webservers -m yum -a “name=/mnt/vsftpd-3.0.2-21.e17.x86_64.rpm state=present” #本地安装
- ansible webservers -m yum -a “name=httpd state=absent” #卸载软件
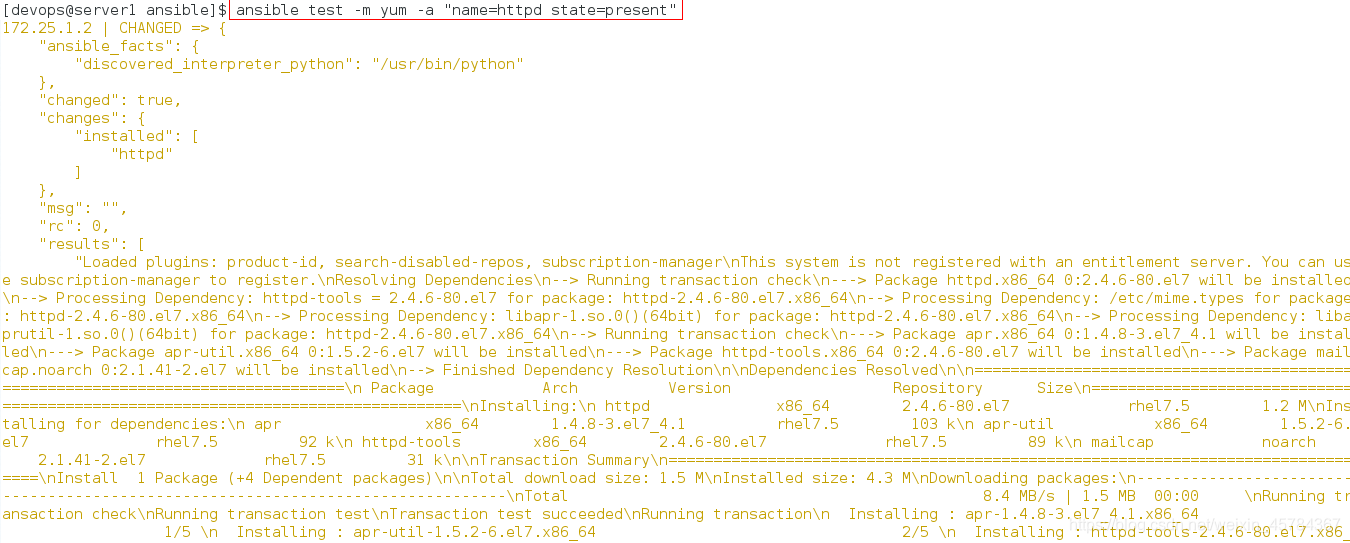
(1)在hosts主机上安装apache服务
ansible-doc yum
ansible test -m yum -a "name=httpd state=present" #在线安装

state:状态(present-安装,absent-卸载,latest-安装最新的)
安装时在server2可以看到进程,安装完成,进程结束。
安装时:

安装完毕:

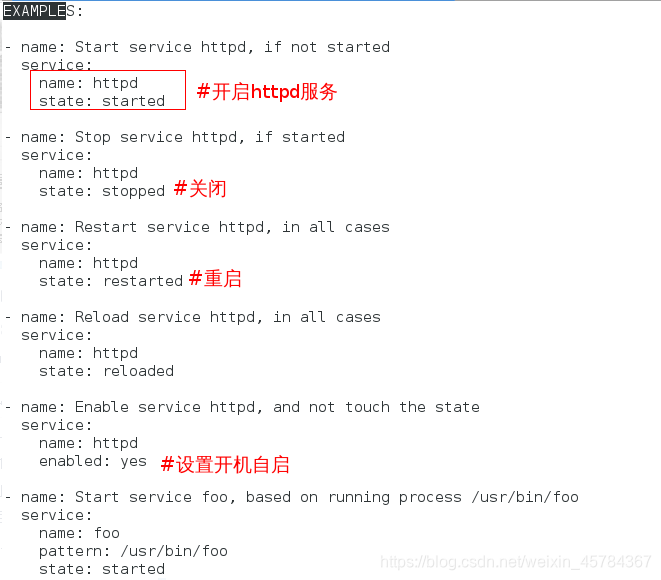
2.service模块
ansible webservers -m service -a “name=httpd state=started”
ansible webservers -m service -a “name=httpd state=restarted”
ansible webservers -m service -a “name=httpd state=stopped”
(2)开启hosts主机上的apache服务
ansible-doc service
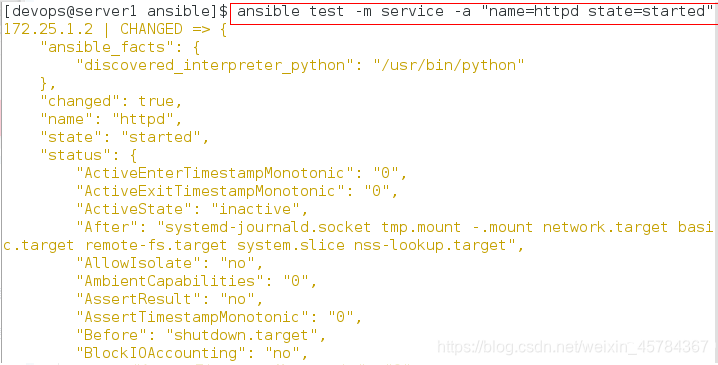
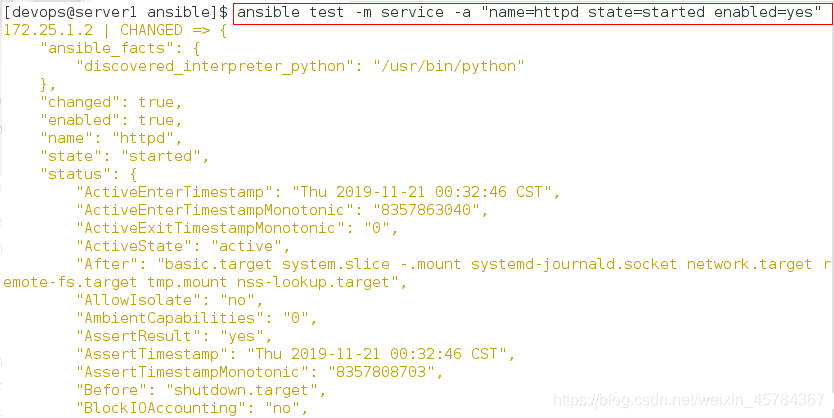
ansible test -m service -a "name=httpd state=started" #开启httpd服务
ansible test -m service -a "name=httpd state=started enabled=yes" #开机自启
在ansible上控制server2主机开启httpd:
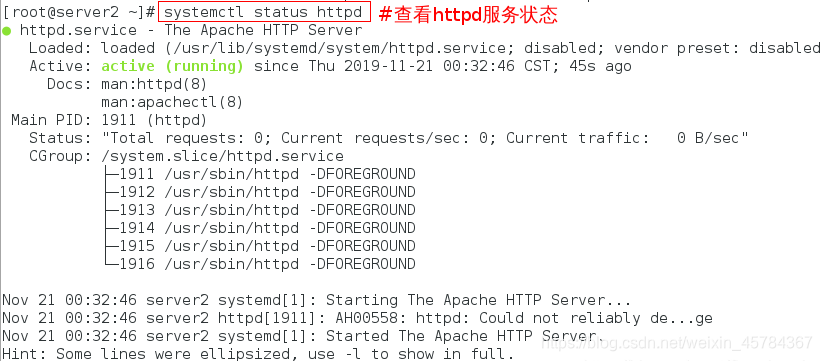
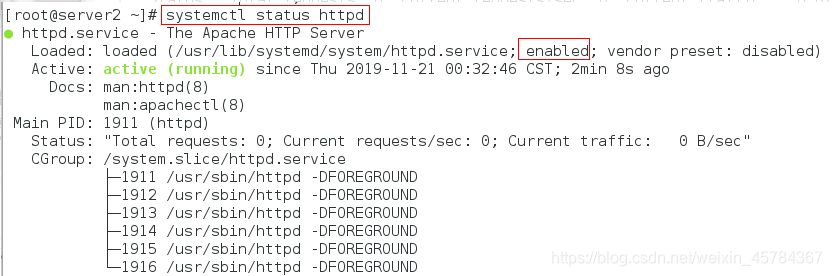
server2主机上查看httpd状态:
在ansible上控制server2主机的httpd服务开机自启:
 server2主机上查看httpd状态:
firewalld模块
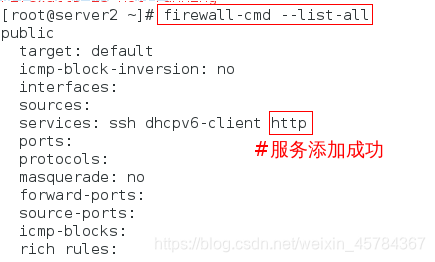
(3)在防火墙上添加http服务
ansible-doc firewalld
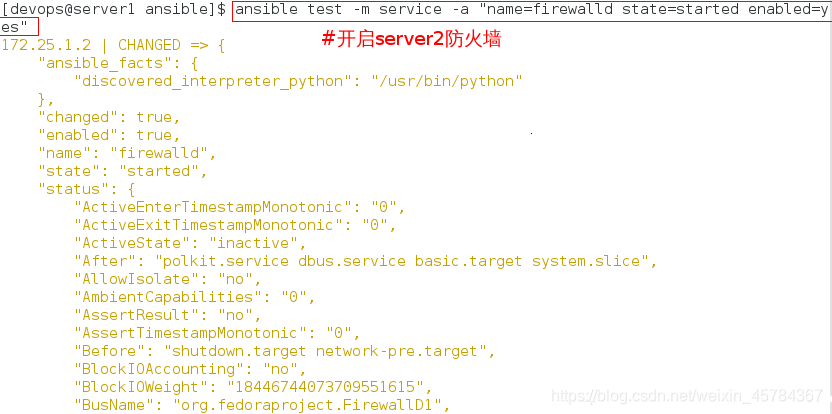
ansible test -m service -a "name=firewalld state=started enabled=yes" #开启firewalld防火墙
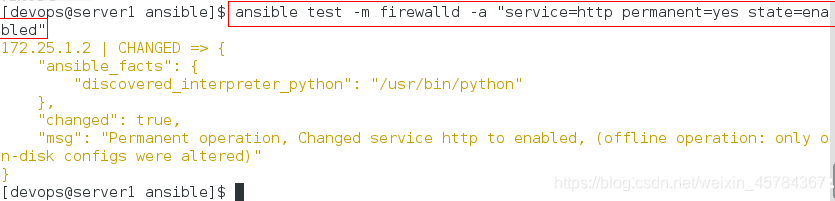
ansible test -m firewalld -a "service=http permanent=yes state=enabled" #在防火墙上添加http服务


设置永久添加:
测试:
在server2上查看防火墙策略:
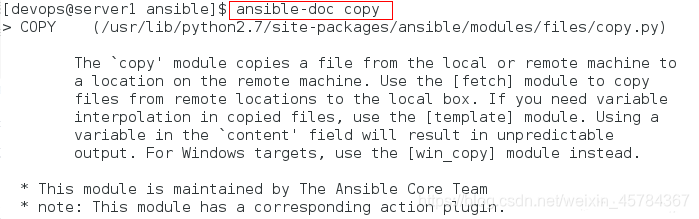
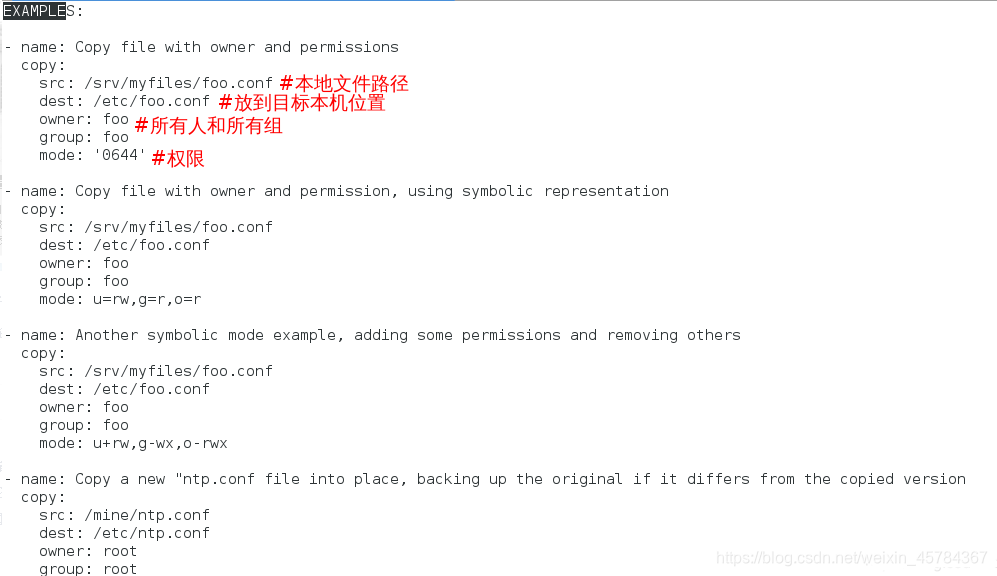
copy模块
ansible webservers -m copy -a “src=/etc/hosts dest=/tmp/hosts”
copy模块用于将本地或远程机器上的文件拷贝到远程主机上。
(4)给远程主机apache默认发布目录下传输默认发布文件
ansible test -m copy -a "src=apache/index.html dest=/var/www/html/"
 uri模块
uri模块
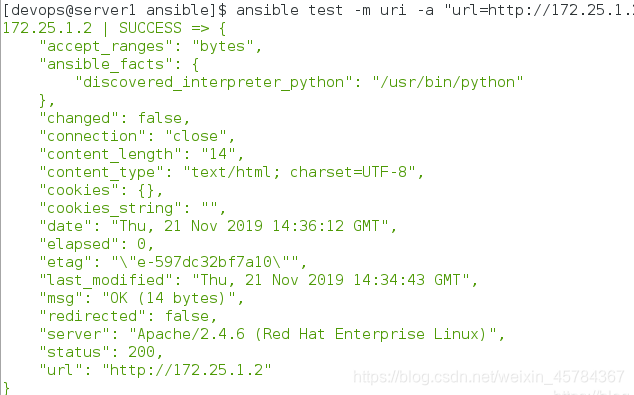
uri模块主要用于发送HTTP协议,通过使用uri模块,可以让目标主机向指定的网站发送如Get、Post这样的HTTP请求,并且能得到返回的状态码。
在WWW上,每一信息资源都有统一的且在网上唯一的地址,该地址就叫URL(Uniform Resource Locator,统一资源定位符),它是WWW的统一资源定位标志,就是指网络地址。

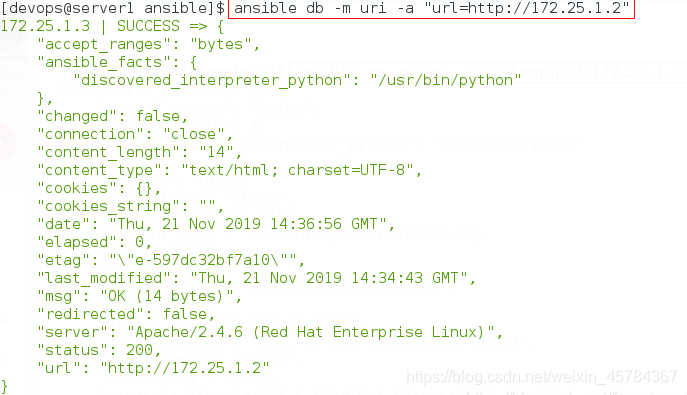
(5)调用目标主机server3向指定的网站server2发送HTTP请求
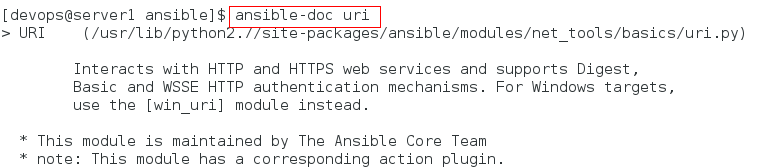
ansible-doc uri
ansible db -m uri -a "url=http://172.25.1.2"
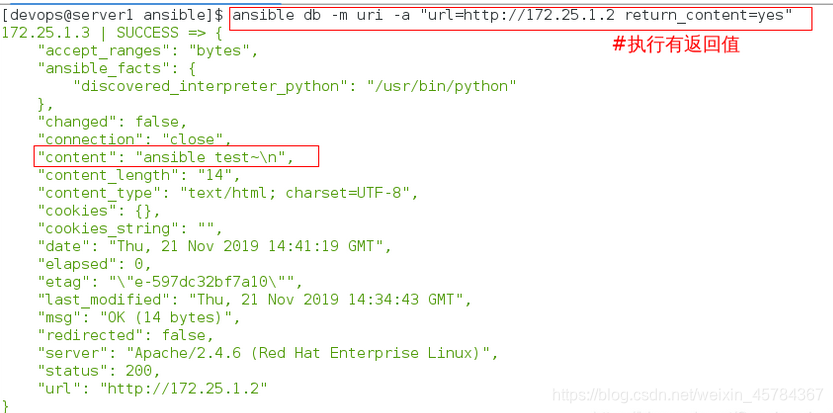
ansible db -m uri -a "url=http://172.25.1.2 return_content=yes" #执行有返回值
file模块
ansible webservers -m copy -a “dest=/tmp/hosts mode=600 owner=root group=root” #修改文件权限和属性
ansible webservers -m file -a “dest=/tmp/dir1/dir2 mode=755 owner=root group=root state=directory” #递归创建
ansible webservers -m file -a “dest=/tmp/dir1/dir2 state=absent” #远程删除文件
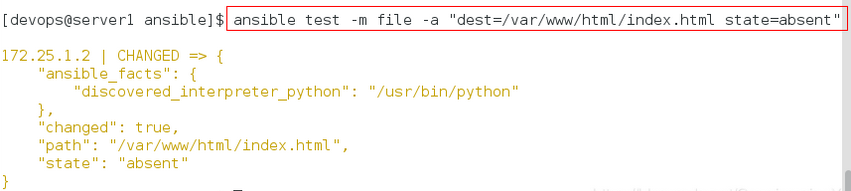
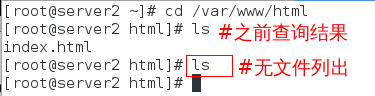
(6)删除目标主机server2的指定文件
ansible test -m file -a "dest=/var/www/html/index.html state=absent"
查看server2上目标文件是否存在:

执行删除操作:
再次查看server2上目标文件是否存在:
mysql_user模块
ansible webservers -m mysql_user -a “name=wxh password=testpass priv=* .*:select host=’%’ state=present” #远程主机需要安装My
SQL-python
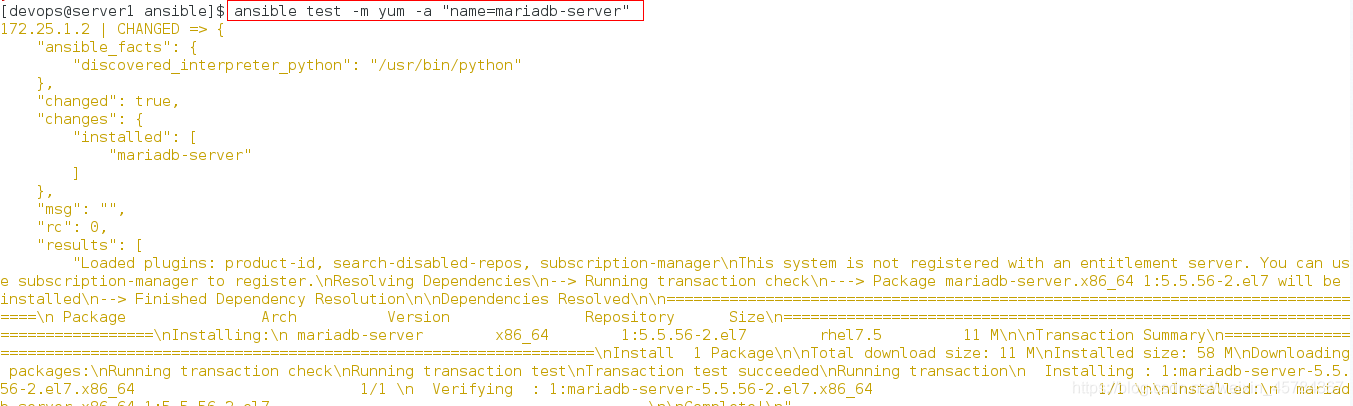
(1)ansible命令实现在server2主机上安装数据库mariadb-server
ansible test -m yum -a "name=mariadb-server"
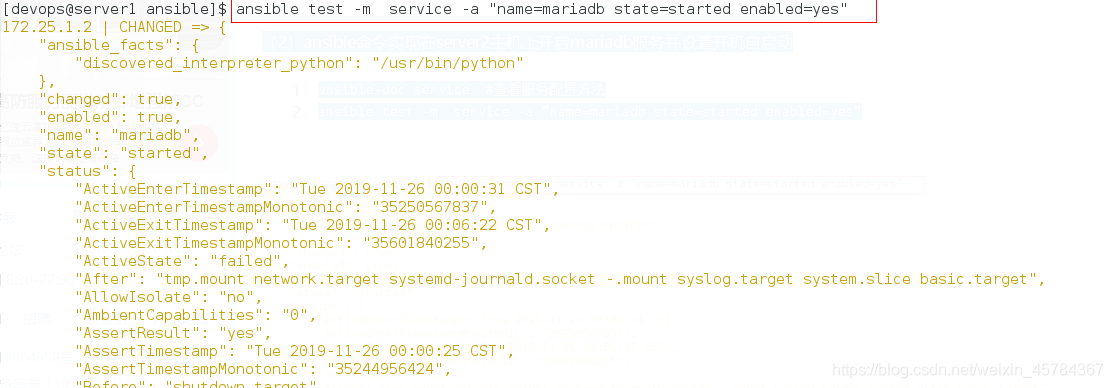
(2)ansible命令实现在server2主机上开启mariadb服务并设置开机自启动
ansible-doc service  #查看服务配置方法
ansible test -m  service -a "name=mariadb state=started enabled=yes"
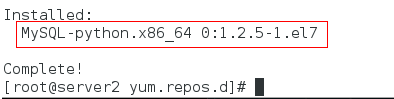
(3)手动在server2上安装MySQL-python.x86_64,再利用ansible实现server2主机上创建数据库
server2主机:
yum install MySQL-python.x86_64 -y
server1主机:
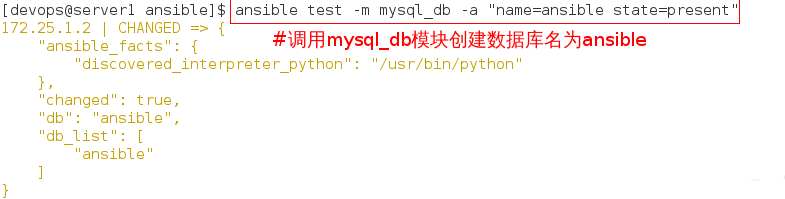
ansible-doc -l | grep mysql  #查看mysql有哪些服务模块
ansible test -m mysql_db -a "name=ansible state=present" #安装数据库
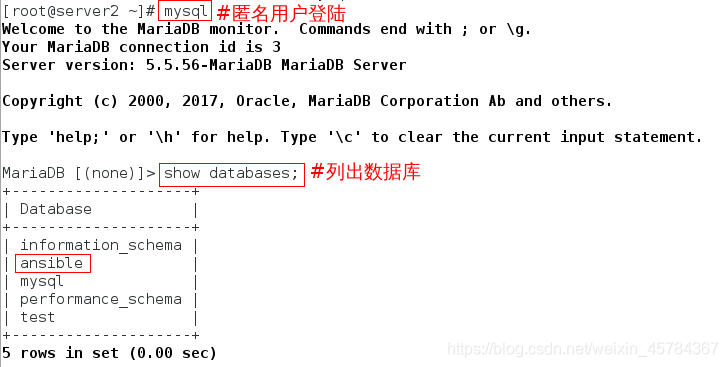
server2主机上测试:
(4)创建用户并授权
ansible test -m mysql_user -a "name=nover password=nover priv='ansible.*:ALL' state=present"

测试:
server2数据库主机:
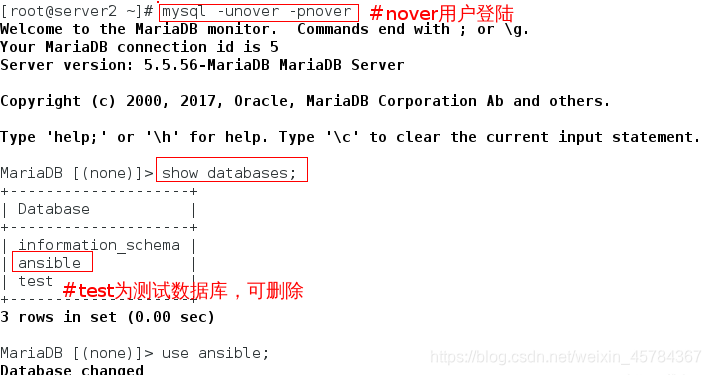
server2上查看nover用户登陆权限:
mysql #匿名用户登陆
select * from mysql.user where user='nover'\G;

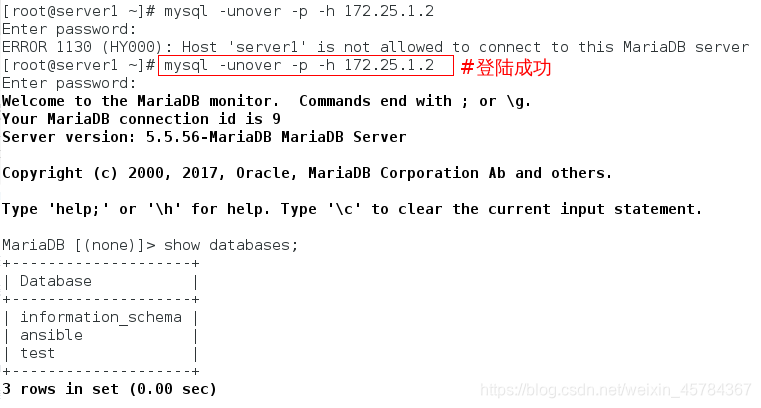
任意远程主机上使用nover用户登陆(此处为选择我的server1主机):
mysql -unover -p -h 172.25.1.2 #远程连接数据库

可以看出这种方式是只允许nover用户在本机登陆数据库,远程主机连接不到,可设置任意远程主机登陆,方法如下。
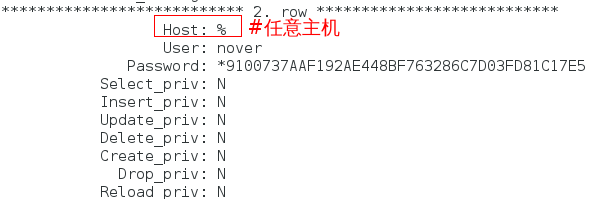
(5)设置任意远程主机使用nover用户登陆数据库
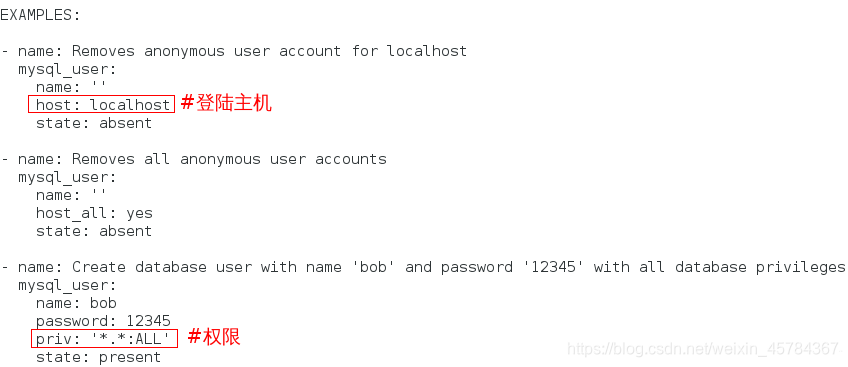
ansible-doc mysql_user
ansible test -m mysql_user -a "name=nover password=nover priv='ansible.*:ALL' state=present host='%'"

测试:
server2数据库主机:
mysql #匿名用户登陆

select * from mysql.user where user='nover'\G;
任意远程主机(server1主机):
mysql -unover -p -h 172.25.1.2
show databases;