上一篇博文,已经准备好了自己的数据集,本博文主要记录如何训练自己的数据集。
参考博文
https://www.cnblogs.com/qcloud1001/p/7677661.html
一、准备预训练模型
1、各种预训练模型下载地址 本博文选择 ssd_mobilenet_v1_coco模型
解压压缩文件,得到如图所示的5个文件。

在data所在目录下创建training文件夹,在里面新建dataset目录,将以上5个文件/文件夹拷贝到data/training/dataset目录下。
2、在training目录下创建文件夹ssd_mobilenet_v1_whsyxt文件夹,然后创建label map文件,我的label map文件为whsyxt_label_map.pbtxt,内容为:
item {
  id: 2
  name: 'person'
}

item {
  id: 1
  name: 'car'
}
3、在.\models-master\research\object_detection\samples\configs目录下,复制ssd_mobilenet_v1_coco.config文件到training\mobilenet_v1_coco目录下,并做如下修改:
(1)修改类别为2
num_classes: 2
(2)修改路劲为:
train_input_reader: {
  tf_record_input_reader {
    input_path: "data/whsyxt_train.tfrecord"
  }
  label_map_path: "training/ssd_mobilenet_v1_whsyxt/whsyxt_label_map.pbtxt"
}

eval_input_reader: {
  tf_record_input_reader {
    input_path: "data/whsyxt_validation.tfrecord"
  }
  label_map_path: "training/ssd_mobilenet_v1_whsyxt/whsyxt_label_map.pbtxt"
  shuffle: false
  num_readers: 1
  num_epochs: 1
}
(3)修改预训练模型地址为:参考博文
fine_tune_checkpoint: "training/dataset/model.ckpt"
二、开始训练
1、我的训练命令为:
python train.py --train_dir=mymodel/objectDetectionTest/result --pipeline_config_path=mymodel/objectDetectionTest/training/ssd_mobilenet_v1_whsyxt/ssd_mobilenet_v1_coco.config
2、各种报错:
(1)
 File "Anaconda3\lib\site-packages\object_detection-0.1-py3.6.egg\object_detection\trainer.py", line 33, in <module>
from deployment import model_deploy
ModuleNotFoundError: No module named 'deployment'
解决办法:需要把research/slim加入到PYTHONPATH环境变量中
(2)还遇到了其他莫名其妙的报错,是因为tf版本与models版本不匹配,解决办法:把tf升级到1.6.0版本。models用当下master版本。tf从1.4.0升级到1.6.0
(3)
INFO:tensorflow:Error reported to Coordinator: <class 'tensorflow.python.framework.errors_impl.InvalidArgumentError'>, Shape mismatch in tuple component 16. Expected [1,?,?,3], got [1,497,754,1] [[Node: batch/padding_fifo_queue_enqueue = QueueEnqueueV2[Tcomponents=[DT_STRING, DT_INT32, DT_FLOAT, DT_INT32, DT_FLOAT, ..., DT_INT32, DT_INT32, DT_INT32, DT_STRING, DT_INT32], timeout_ms=-1, _device="/job:localhost/replica:0/task:0/device:CPU:0"](batch/padding_fifo_queue, IteratorGetNext, Shape_3, IteratorGetNext:1, Shape_5, Merge_1, Shape_4, Merge_2, Shape_10, IteratorGetNext:4, Shape_7, IteratorGetNext:5, Shape_8, IteratorGetNext:6, Shape_6, IteratorGetNext:7, Shape_9, ExpandDims_1, Shape, IteratorGetNext:9, Shape_3, IteratorGetNext:10, Shape_3, IteratorGetNext:11, Shape_3)]]解决办法: 一定要保证源图片都是jpg格式的,再转换成tfrecord格式
(4)
INFO:tensorflow:Error reported to Coordinator: <class 'tensorflow.python.framework.errors_impl.ResourceExhaustedError'>, OOM when allocating tensor with shape[24,1,1966,2069,3] and type float on /job:localhost/replica:0/task:0/device:CPU:0 by allocator cpu解决办法: 内存报错问题
3、评估模型
输入命令为:
python eval.py --checkpoint_dir=mymodel/voc2012/result --pipeline_config_path=mymodel/voc2012/tfrecord/ssd_mobilenet_v1_coco.config --eval_dir=mymodel/voc2012/eval
4、遇到了报错
   from pycocotools import coco
ModuleNotFoundError: No module named 'pycocotools'
解决办法:windows10编译 Pycocotools出错解决方案 实际情况是暂未解决。
三、保存训练的模型
1、输入指令为:
python export_inference_graph.py --input_type=image_tensor --pipeline_config_path=mymodel/voc2012/tfrecord/ssd_mobilenet_v1_coco.config --trained_checkpoint_prefix=mymodel/voc2012/result/model.ckpt-200 --output_directory=mymodel/voc2012/result/savedmodel
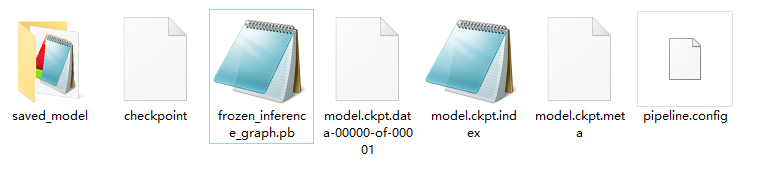
2、运行完成后,在指定目录得到如下图所示的文件