注意:Nginx本身不支持HTTPS正向代理,需要安装ngx_http_proxy_connect_module模块后才可以支持HTTPS正向代理,否则会遇到HTTP 400错误。
准备A,B两台主机
1,在主机A上部署服务端,安装nginx和模块以及依赖
[root@ c7-41 ~] yum -y install zlib zlib-devel gcc-c++ libtool openssl openssl-devel wget pcre pcre-devel git
[root@ c7-41 ~] git clone https://github.com/chobits/ngx_http_proxy_connect_module.git
[root@ c7-41 ~] wget http://nginx.org/download/nginx-1.14.2.tar.gz #从官网下载nginx安装包
[root@ c7-41 ~] tar -xzvf nginx-1.14.2.tar.gz #解压
[root@ c7-41 nginx-1.17.8] cd nginx-1.14.2/
[root@ c7-41 nginx-1.14.2] patch -p1 <../ngx_http_proxy_connect_module/patch/proxy_connect_1014.patch #添加补丁
[root@ c7-41 nginx-1.14.2] ./configure  --with-http_stub_status_module --with-http_ssl_module --add-module=../ngx_http_proxy_connect_module  #检测环境指定模块等,默认安装路径/usr/local/nginx
[root@ c7-41 nginx-1.14.2] make && make install # 编译,安装
2,修改配置文件
[root@ c7-41 ~] mkdir -p /usr/local/nginx/conf/conf.d/ #创建子配置文件目录
[root@ c7-41 ~] vim /usr/local/nginx/conf/nginx.conf
[root@ c7-41 ~] cat /usr/local/nginx/conf/nginx.conf
user  nobody; #取消注释,定义用户
worker_processes  1;
events {
    worker_connections  1024;
}
http {
    include       mime.types;
    default_type  application/octet-stream;
    keepalive_timeout  65;
    include /usr/local/nginx/conf/conf.d/*.conf; #添加配置文件
}
添加子配置文件
[root@ c7-41 ~] cat>/usr/local/nginx/conf/conf.d/ngx.conf<<\EOF
server {
        listen 90;
        server_name 10.0.0.90;
        resolver 223.5.5.5;
        proxy_connect;
        proxy_connect_allow            443 563;
        proxy_connect_connect_timeout  10s;
        proxy_connect_read_timeout     10s;
        proxy_connect_send_timeout     10s;
location / {
        proxy_pass http://$host;
        proxy_set_header Host $host;
        }
}
EOF
3,启动nginx,并查看端口
[root@ c7-41 nginx-1.14.2]# /usr/local/nginx/sbin/nginx
[root@ c7-41 nginx-1.14.2]# netstat -anpt|grep nginx
tcp        0      0 0.0.0.0:90              0.0.0.0:*               LISTEN      5072/nginx: master
4,在主机B上部署客户端
[root@ c7-42 ~] cat>>/etc/profile<<\EOF
#全局的代理设置
export http_proxy=http://10.0.0.41:90
export https_proxy=http://10.0.0.41:90
export ftp_proxy=http://10.0.0.41:90
EOF
[root@ c7-42 ~] source /etc/profile
[root@ c7-42 ~] sed -i '12a proxy=http://http://10.0.0.41:90' /etc/yum.conf #yum的代理设置
#wget的代理设置
[root@ c7-42 ~] cat>>/etc/wgetrc<<\EOF
http_proxy=http://10.0.0.41:90
ftp_proxy=http://10.0.0.41:90
EOF
5,在客户端测试
[root@ c7-42 ~] curl -I --proxy 10.0.0.41:90 http://www.baidu.com
HTTP/1.1 200 OK
Server: nginx/1.14.2
Date: Sat, 25 Apr 2020 09:04:33 GMT
Content-Type: text/html
Content-Length: 277
Connection: keep-alive
Accept-Ranges: bytes
Cache-Control: private, no-cache, no-store, proxy-revalidate, no-transform
Etag: "575e1f60-115"
Last-Modified: Mon, 13 Jun 2016 02:50:08 GMT
Pragma: no-cache
[root@ c7-42 ~] curl -I --proxy 10.0.0.41:90 https://www.baidu.com
HTTP/1.1 200 Connection Established
Proxy-agent: nginx

HTTP/1.1 200 OK
Accept-Ranges: bytes
Cache-Control: private, no-cache, no-store, proxy-revalidate, no-transform
Connection: keep-alive
Content-Length: 277
Content-Type: text/html
Date: Sat, 25 Apr 2020 09:05:00 GMT
Etag: "575e1f60-115"
Last-Modified: Mon, 13 Jun 2016 02:50:08 GMT
Pragma: no-cache
Server: bfe/1.0.8.18
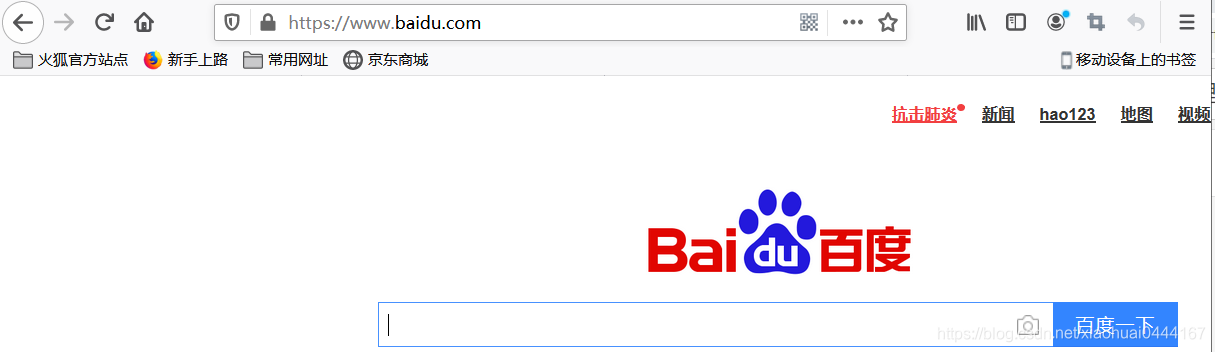
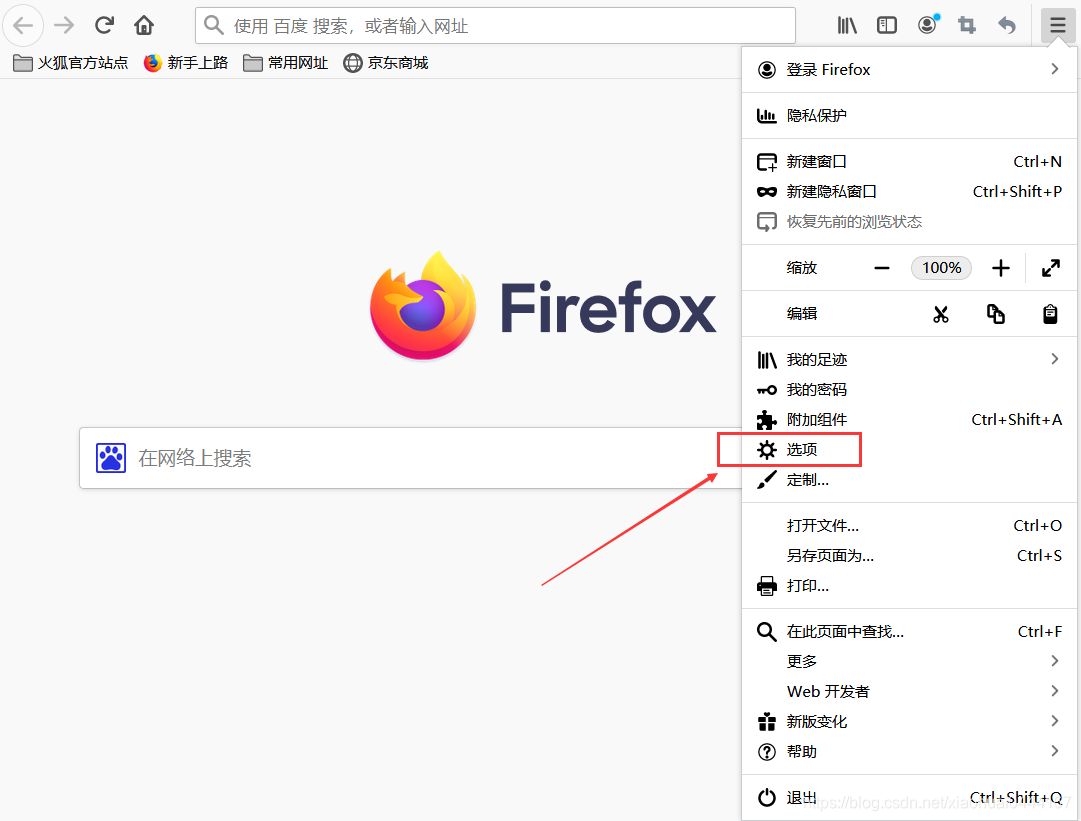
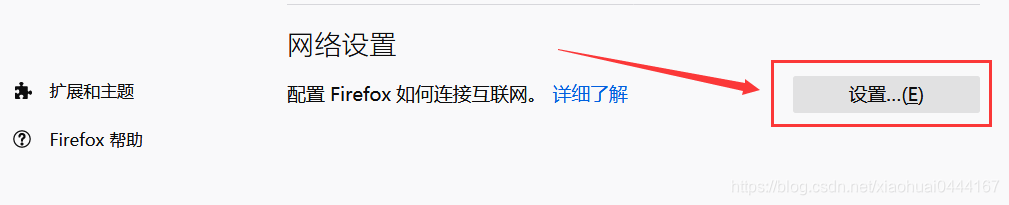
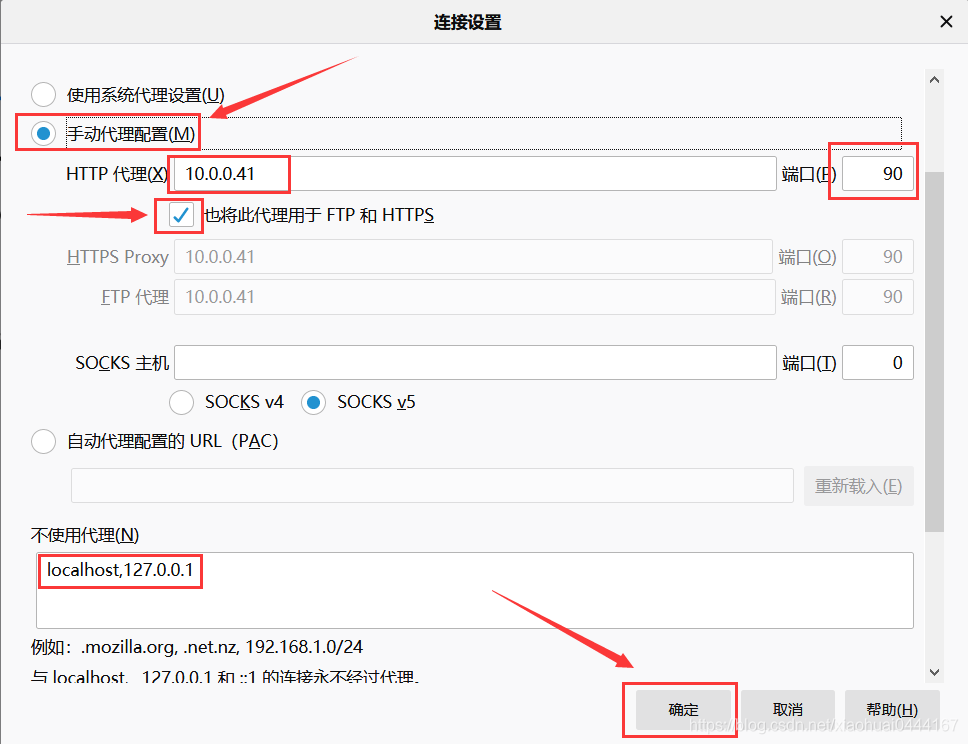
6,在filefox浏览器上设置
宕掉nginx服务后就会显示如下
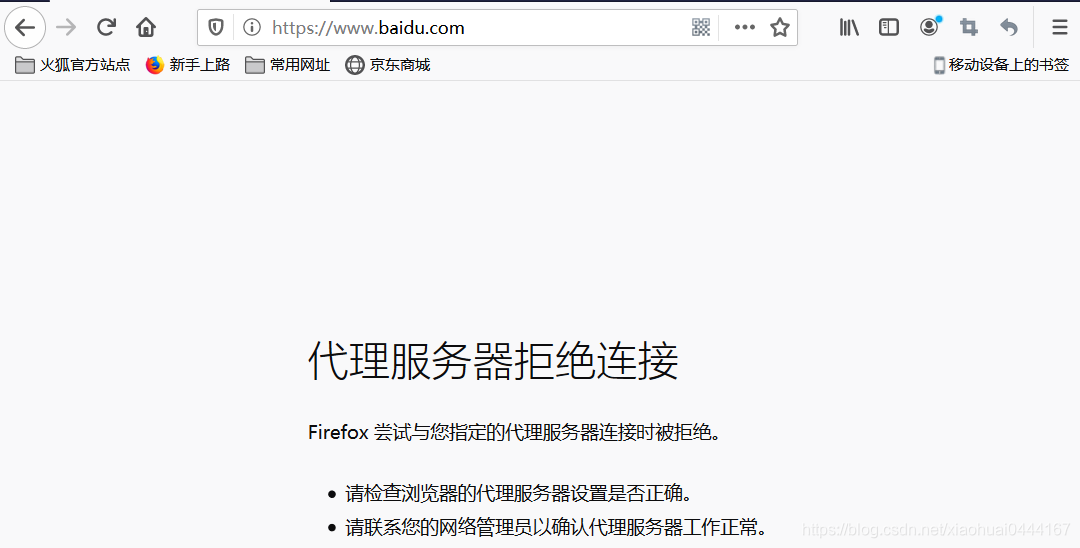
重启nginx后就可以使用上网服务