简述
学会写playbook剧本,使用ansible-playbook执行可以实现的就是自动化运维,playbook由一个或多个模块组成,完成统一的目的,实现自动化操作,
剧本编写遵循yaml语法
配置文件的概述
playbook配置文件使用YAML语法,具有简洁 明了,结构清晰等特点,playbook配置文件类似于shell脚本,是一个YAML格式的文件,用于保存对特定的需求的人物列表。YAML的文件扩展名通常是.yaml或.yml
yaml的三要素
缩进:两个字符,默认的tab键是四个字符,所以要使用tab键,需要修改.vimrc
   vim /root/.vimrc
				添加:
				set tabstop=2
				保存退出
冒号:冒号后面需要

空格: 除非以冒号结尾

短横杠: 列表项,后面跟空格
playbook的核心元素
hosts:任务的目标主机,多个主机用冒号分隔,一般/etc/ansible/hosts分组信息
remote_user:远程主机 上,运行此任务的身份默认为root
tasks:任务,自定义的具体任务
handlers:触发器,可通过“notify”通知给相应的handlers进行触发执行
roles:角色,由tasks,handlers等所一组特定的集合
templates:存放模板文件的目录
vars:存放变量的目录
files:存放由copy或script等模块调用的文件
对于playbook怎末学,都看多练就是好方法,就跟shell脚本类似,灵活掌握好他能使用的模块。
下面以安装httpd为例介绍:
---
- hosts: web    #针对web群组的操作

  tasks:                       #任务列表
    - name: install httpd      #任务名称
      yum: name=httpd state=latest   #任务:yum安装最新httpd

    - name: httpd config
      copy: src=/etc/httpd/conf/httpd.conf     #任务:复制配置文件,其中端口改成了8080 dest=/etc/httpd/conf/httpd.conf
      notify: restart httpd       #设置触发条件,即完成该剧本任务后,调用"restart httpd "的触发器

    - name: start httpd
      service: name=httpd state=started   #保证能开启服务

  handlers:                        #触发器
    - name: restart httpd
      service: name=httpd state=restarted
测试剧本,不会发生改变:
ansible-playbook -C 绝对路径 httpd.yaml
执行剧本:
ansible-playbook 绝对路径 httpd.yaml
[root@localhost roles]# ansible-playbook  ./httpd.yaml

PLAY [web] ***********************************************************************

TASK [Gathering Facts] ***********************************************************
ok: [node1]

TASK [install httpd] *************************************************************
ok: [node1]

TASK [httpd config] **************************************************************
changed: [node1]

TASK [start httpd] ***************************************************************
changed: [node1]

RUNNING HANDLER [restart httpd] **************************************************
changed: [node1]

PLAY RECAP ***********************************************************************
node1                      : ok=5    changed=3    unreachable=0    failed=0    skirescued=0    ignored=0
部署nginx例子:
分开里面的核心组件进行编写playbook,更通俗易懂每个组件是干嘛的;将多种不同的tasks的文件集中存储在某个目录下,这个目录就是角色,角色存放在/etc/ansible/roles目录,roles可以有很多子目录,每个子目录对应一个角色,每个角色有自己的目录结构。
在roles目录下建立nginx目录和自己的目录结构,如下图:

编写主剧本tasks/main.yaml
---
- name: install nginx packge
  yum: name={{ item }} state=latest  #定义一个item的变量,yum要安装的东西
  with_items:
  - epel-release
  - nginx

- name: copy index.html
  copy: src=index.html dest=/usr/share/nginx/html/

- name: copy nginx.conf tempalte
  template: src=nginx.conf.j2 dest=/etc/nginx/nginx.conf  #调用nginx.conf.j2这个模板
  notify: restart nginx   #任务执行完成后开始执行restart nginx的触发器

- name: make sure nginx service running
  service: name=nginx state=started enabled=yes
准备模板文件
[root@localhost roles]# cp /etc/nginx/nginx.conf /etc/ansible/roles/nginx/templates/
[root@localhost roles]#
[root@localhost roles]# cd nginx/templates/
[root@localhost templates]# ls
nginx.conf
[root@localhost templates]# mv nginx.conf nginx.conf.j2
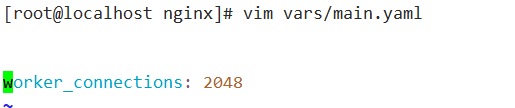
在模板文件添加设置变量
worker_processes {{ansible_processor_cores}}; 为系统变量,值取决于你的设备
worker_connections {{worker_connections}}; 自定义变量
自定义变量需要修改/var/main.yaml文件
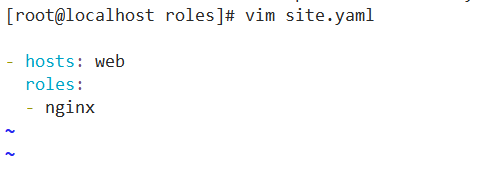
编辑触发器文件

最后site.yaml就像是开关一样,只要编辑完后执行,nginx就会安装上来;
hosts:定义目标主机
roles:就是定义的nginx角色
以后可能会有装有很多角色,一部分装nginx,一部分装 nfs ,一部分装mysql等等,都分别建好目录,方便区分和管理
ansible-playbook执行剧本

例:playbook配置web–nfs–rsync架构环境
搭建rsync服务器,使其web客户端在发生变化时能快速的备份到rsync服务器,nfs服务器负责同步数据到各个web节点,保证数据的一致性
web节点搭建参考第一个例子
nfs搭建
nfs详细学习参考博文:
https://editor.csdn.net/md/?articleId=105769837
编写playbook剧本

nfs服务器搭建非常简单,用不到很多组件和参数,只需把一份样例文件copy过去就好
---
- name: install nfs-utils rpcbind
yum: name={{ item }} state=installed
with_items:
- rpcbind
- nfs-utils
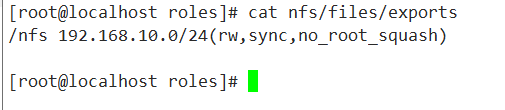
- name: copy exports
copy: src=exports dest=/etc/exports
- name: create share_directory
file: path=/nfs state=directory recurse=yes owner=root group=root mode=755
- name: start rpcbind
service: name=rpcbind state=restarted
- name: start nfs
service: name=nfs state=restarted
在files目录放置需要copy或script文件会直接调用或者使用绝对路径指定位置
因为Centos7的图形化界面会默认自带rpcbind,不需要手动下载了,
其他的web节点可以直接挂载使用,若是最小化安装,需要安装rpcbind才能访问
最小化安装的也可以使用ansible批量安装一下:
ansible web -m shell -a 'yum -y install rpcbind nfs-utils'
开启rpcbind,nfs服务:
ansible web -m shell -a 'systemctl start rpcbind nfs'
在web 节点查看共享目录

web节点批量挂载共享目录
ansible web -m shell -a 'mount 192.168.10.7:/nfs /var/www/html'

搭建rsync+inotify实时同步备份
详细了解参考:
https://editor.csdn.net/md/?articleId=105788030
使用ansible搭建多台rsync备份服务器,在web端安装上inotify工具,会根据自己的变动向rsync服务器发送同步,结合nfs在web端的作用,实现全网备份数据。
rsync剧本结构:

check_rsync.sh脚本是web客户端要使用的实时监测脚本
rsync剧本参考如下:
[root@localhost roles]# cat rsync/tasks/main.yaml
---
  - name: install rsync
    yum: name=rsync state=installed

  - name: config rsync.conf
    template: src=rsync.conf.j2 dest=/etc/rsync.conf
    notify: restart rsync

  - name: create rsync_directory
    file: path=/rsync state=directory

  - name: start rsync
    service: name=rsyncd state=started enabled=yes
模板文件如下:
[root@localhost roles]# cat rsync/templates/rsync.conf.j2
    uid = nobody
	gid = nobody
	port 873
	address = 192.168.10.4
	hosts allow = 192.168.10.0/24
	max connections = 4
	pid file = /var/run/rsyncd.pid
	timeout = 900
	dont compress   = *.gz *.tgz *.zip *.z *.Z *.rpm *.deb *.bz2
	[rsync]
		path = /rsync
		read only = yes
触发器和调用总剧本文件

检测没有错误后
配置web端
编写实时同步剧本
---
- hosts: web

  tasks:
    - name: install inotify-tools
      yum: name=inotify-tools state=installed

    - name: copy script
      copy: src=/root/check_rsync.sh dest=/root/

    - name: chmod
      shell: chmod +x /root/check_rsync.sh

    - name: run script
      shell: sh /root/check_rsync.sh &  #放到后台运行
把在/rsync里面的脚本拷贝到/root目录下
脚本内容为
#!/bin/bash
#2020年4月27日15:28:39
#Slave to master script
inotifywait -mrq -e create,delete,modify,move /var/www/html/ | while read a b c #将检测到的结果赋值给变量aaa,当成功后开始循环do...done内容
do
        rsync -avz --delete /var/www/html [email protected]:/rsync
done
执行剧本

此时,我们在web节点上的网页根目录/var/www/html下创建删除文件,观察rsync服务器的/rsync目录和nfs服务器/nfs目录
rsync的备份目录

nfs的共享目录和所有web节点目录一致,因为rsync的存在从而实现了全网备份,

