今天主要讲一下几个控件
- CheckBox
<LinearLayout
        android:layout_width="match_parent"
        android:layout_height="wrap_content"
        android:orientation="horizontal">

        <CheckBox
            android:id="@+id/acMainCbJava"
            android:layout_width="wrap_content"
            android:layout_height="wrap_content"
            android:text="Java" />

        <CheckBox
            android:id="@+id/acMainCbC"
            android:layout_width="wrap_content"
            android:layout_height="wrap_content"
            android:text="C" />

        <CheckBox
            android:id="@+id/acMainCbCPP"
            android:layout_width="wrap_content"
            android:layout_height="wrap_content"
            android:text="C++" />

        <CheckBox
            android:id="@+id/acMainCbOC"
            android:layout_width="wrap_content"
            android:layout_height="wrap_content"
            android:text="ObjectC" />

        <CheckBox
            android:id="@+id/acMainCbKotlin"
            android:layout_width="wrap_content"
            android:layout_height="wrap_content"
            android:text="Kotlin" />
    </LinearLayout>
效果:

代码中获取状态:
acMainCbJava.isChecked = true//设置是否选中
        if (acMainCbJava.isChecked){
            Log.d("AActivity", "onCreate 选中")
        }else{
            Log.d("AActivity", "onCreate 未选中")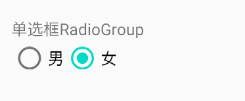
}- RadioGroup
<RadioGroup
        android:id="@+id/acMainRG"
        android:layout_width="wrap_content"
        android:layout_height="wrap_content"
        android:orientation="horizontal">

        <RadioButton
            android:id="@+id/acMainRbMan"
            android:layout_width="wrap_content"
            android:layout_height="wrap_content"
            android:text="男" />

        <RadioButton
            android:id="@+id/acMainRbWomen"
            android:layout_width="wrap_content"
            android:layout_height="wrap_content"
            android:text="女" />
    </RadioGroup>
效果:
代码中获取状态
acMainRG.setOnCheckedChangeListener { group, checkedId ->
            when(checkedId){
                R.id.acMainRbMan-> Log.d("AActivity", "onCreate 选中男")
                R.id.acMainRbWomen-> Log.d("AActivity", "onCreate 选中女")
            }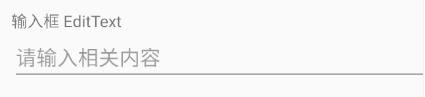
}- EditText
<EditText
        android:id="@+id/acMainEt"
        android:layout_width="match_parent"
        android:layout_height="wrap_content"
        android:hint="请输入相关内容" />
效果图:
代码中获取输入内容:
扫描二维码关注公众号,回复:
11289275 查看本文章

acMainEt.text.toString()- ProgressBar
    <TextView
        android:layout_width="wrap_content"
        android:layout_height="wrap_content"
        android:layout_marginTop="30dp"
        android:text="带进度的进度条" />

    <ProgressBar
        android:id="@+id/acMainPbHor"
        style="@android:style/Widget.Holo.ProgressBar.Horizontal"
        android:layout_width="match_parent"
        android:layout_height="wrap_content" />

    <TextView
        android:layout_width="wrap_content"
        android:layout_height="wrap_content"
        android:layout_marginTop="30dp"
        android:text="转圈进度条" />

    <ProgressBar
        android:id="@+id/acMainPbV"
        android:layout_width="match_parent"
        android:layout_height="wrap_content" />
效果图:
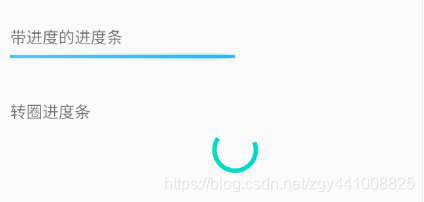
进度条分2种,带进图值的表示有明确的进度,从1到100%。另外一种是圆形转圈的,表示没有明确进度值,一般用来表示后台进行耗时操作,前台等待的状态。
代码中设置进度:
有进度值的直接使用 acMainPbHor.progress = 50来设置当前进度
这些控件的基本使用方法就差不多这些了。下面主要讲一下EditText的一些特殊属性
先来看一下界面:
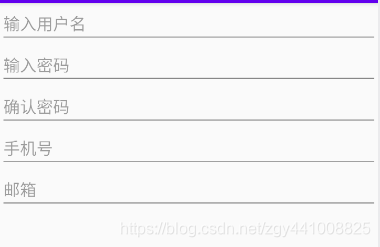
这是一个很常见的注册界面,需要我们输入各种不同的信息。正常情况我们肯定是需要对输入内容做一个基本的校验看看信息是不是正确的,做这个校验一般有2中方法,先对输入内容进行一个限定,然后再获取到输入内容进行我们自己定的一个规则校验。比如用户名长度不能超过20,密码只能是数字字母。
EditView有一个非常实用的属性可以在用户点击输入框弹窗的输入法上就帮我们做好这个限定的第一步,下面来看看:
    <EditText
        android:hint="输入用户名"
        android:maxLength="20"
        android:layout_width="match_parent"
        android:layout_height="wrap_content"/>
    <EditText
        android:hint="输入密码"
        android:inputType="textPassword"
        android:maxLength="20"
        android:layout_width="match_parent"
        android:layout_height="wrap_content"/>
    <EditText
        android:hint="确认密码"
        android:inputType="textPassword"
        android:maxLength="20"
        android:layout_width="match_parent"
        android:layout_height="wrap_content"/>
    <EditText
        android:hint="手机号"
        android:inputType="phone"
        android:layout_width="match_parent"
        android:layout_height="wrap_content"/>
    <EditText
        android:hint="邮箱"
        android:inputType="textEmailAddress"
        android:layout_width="match_parent"
        android:layout_height="wrap_content"/>
这里跟上面代码的差别主要就是多了2个属性:inputType、maxLength。看名字大概就知道是做什么用的了。
inputType:限定输入框的输入类型,取值有很多种,常用的密码、数值、手机号,邮箱等等,大家都可以试试看。
maxLength:限定输入框最多能输入的字符个数。

大家可以看到现在是在密码输入框,显示的只有字符和数字。而且输入的字符是看不见的。
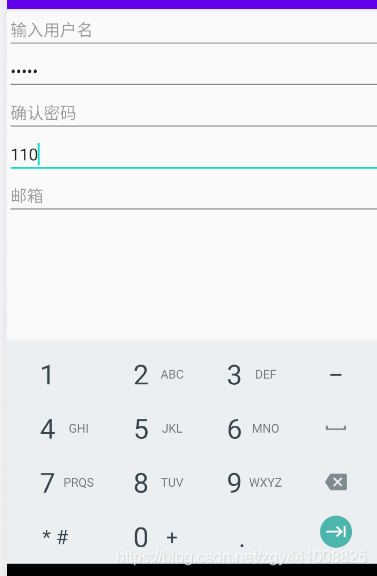
现在在手机号这里,键盘就会只显示数字。
这样就能很方便的限定输入类型了,并且在输入到我们设置的最大长度后再按下键盘是不会有任何字符被输入的。