!git clone https: // github. com/ AlexeyAB/ darknet
Cloning into 'darknet'...
remote: Enumerating objects: 5, done.�[K
remote: Counting objects: 100% (5/5), done.�[K
remote: Compressing objects: 100% (5/5), done.�[K
remote: Total 13503 (delta 0), reused 1 (delta 0), pack-reused 13498�[K
Receiving objects: 100% (13503/13503), 12.07 MiB | 6.55 MiB/s, done.
Resolving deltas: 100% (9222/9222), done.
% cd / content/ darknet
!sed - i 's/OPENCV=0/OPENCV=1/' Makefile
!sed - i 's/GPU=0/GPU=1/' Makefile
!sed - i 's/CUDNN=0/CUDNN=1/' Makefile
/content/darknet
!/ usr/ local/ cuda/ bin / nvcc - - version
nvcc: NVIDIA (R) Cuda compiler driver
Copyright (c) 2005-2019 NVIDIA Corporation
Built on Sun_Jul_28_19:07:16_PDT_2019
Cuda compilation tools, release 10.1, V10.1.243
!make
mkdir -p ./obj/
mkdir -p backup
chmod +x *.sh
g++ -std=c++11 -std=c++11 -Iinclude/ -I3rdparty/stb/include -DOPENCV `pkg-config --cflags opencv4 2> /dev/null || pkg-config --cflags opencv` -DGPU -I/usr/local/cuda/include/ -DCUDNN -Wall -Wfatal-errors -Wno-unused-result -Wno-
(后面删了)
from google. colab import drive
drive. mount( '/content/mydrive' )
Go to this URL in a browser: https://accounts.google.com/o/oauth2/auth?client_id=947318989803-6bn6qk8qdgf4n4g3pfee6491hc0brc4i.apps.googleusercontent.com&redirect_uri=urn%3aietf%3awg%3aoauth%3a2.0%3aoob&response_type=code&scope=email%20https%3a%2f%2fwww.googleapis.com%2fauth%2fdocs.test%20https%3a%2f%2fwww.googleapis.com%2fauth%2fdrive%20https%3a%2f%2fwww.googleapis.com%2fauth%2fdrive.photos.readonly%20https%3a%2f%2fwww.googleapis.com%2fauth%2fpeopleapi.readonly

Enter your authorization code:
··········
Mounted at /content/mydrive
!ls / content/ mydrive/ My\ Drive/ yolo
!ln - s / content/ mydrive/ My\ Drive/ / mydrive
1111.jpg			   obj.zip
backup				   train.txt
Gao_ship_hh_02016082545020305.jpg  yolo_1.ipynb
generate_train.py		   yolo.ipynb
myData				   yolov4.conv.137
obj_1.zip			   yolov4-custom2.cfg
obj.data			   yolov4.weights
obj.names			   ZHCAMRAW_ERR_20190817173627_512453.jpg
!cp / mydrive/ yolo/ yolov4. weights . /
def imShow ( path) :
import cv2
import matplotlib. pyplot as plt
% matplotlib inline
image = cv2. imread( path)
height, width = image. shape[ : 2 ]
resized_image = cv2. resize( image, ( 3 * width, 3 * height) , interpolation = cv2. INTER_CUBIC)
fig = plt. gcf( )
fig. set_size_inches( 18 , 10 )
plt. axis( "off" )
plt. imshow( cv2. cvtColor( resized_image, cv2. COLOR_BGR2RGB) )
plt. show( )
!. / darknet detector test cfg/ coco. data cfg/ yolov4. cfg yolov4. weights data/ dog. jpg
CUDA-version: 10010 (10010), cuDNN: 7.6.5, GPU count: 1
OpenCV version: 3.2.0
0 : compute_capability = 370, cudnn_half = 0, GPU: Tesla K80
net.optimized_memory = 0
mini_batch = 1, batch = 8, time_steps = 1, train = 0
layer filters size/strd(dil) input output
0 conv 32 3 x 3/ 1 608 x 608 x 3 -> 608 x 608 x 32 0.639 BF
1 conv 64 3 x 3/ 2 608 x 608 x 32 -> 304 x 304 x 64 3.407 BF
2 conv 64 1 x 1/ 1 304 x 304 x 64 -> 304 x 304 x 64 0.757 BF
3 route 1 -> 304 x 304 x 64
4 conv 64 1 x 1/ 1 304 x 304 x 64 -> 304 x 304 x 64 0.757 BF
5 conv 32 1 x 1/ 1 304 x 304 x 64 -> 304 x 304 x 32 0.379 BF
6 conv 64 3 x 3/ 1 304 x 304 x 32 -> 304 x 304 x 64 3.407 BF
7 Shortcut Layer: 4, wt = 0, wn = 0, outputs: 304 x 304 x 64 0.006 BF
8 conv 64 1 x 1/ 1 304 x 304 x 64 -> 304 x 304 x 64 0.757 BF
9 route 8 2 -> 304 x 304 x 128
10 conv 64 1 x 1/ 1 304 x 304 x 128 -> 304 x 304 x 64 1.514 BF
。。。(省略)
[yolo] params: iou loss: ciou (4), iou_norm: 0.07, cls_norm: 1.00, scale_x_y: 1.05
nms_kind: greedynms (1), beta = 0.600000
Total BFLOPS 128.459
avg_outputs = 1068395
Allocate additional workspace_size = 6.65 MB
Loading weights from yolov4.weights...
seen 64, trained: 32032 K-images (500 Kilo-batches_64)
Done! Loaded 162 layers from weights-file
data/dog.jpg: Predicted in 171.094000 milli-seconds.
bicycle: 92%
dog: 98%
truck: 92%
pottedplant: 33%
Unable to init server: Could not connect: Connection refused
(predictions:1474): Gtk-�[1;33mWARNING�[0m **: �[34m02:53:27.076�[0m: cannot open display:
imShow( 'predictions.jpg' )
obj.zip: 要包含如下两个文件夹,
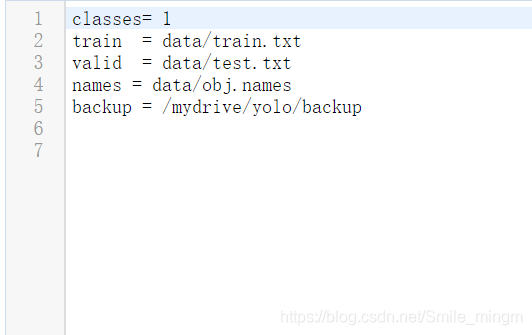
obj.data:路径与种类数以及训练好的权重所存放的位置等信息
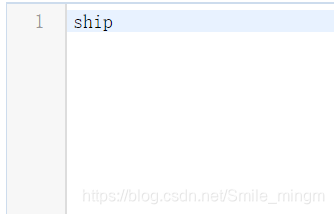
obj.names:存放种类的信息
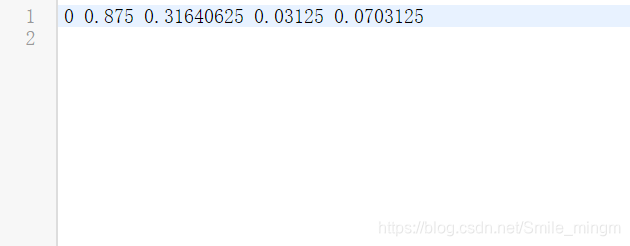
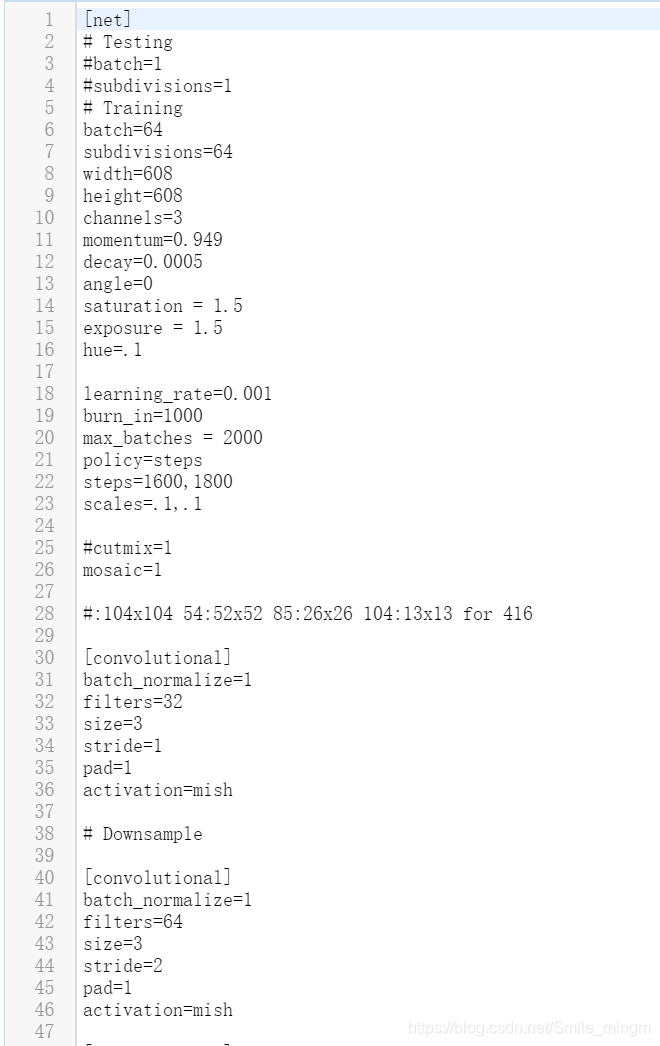
yolov4-custom2.cfg:
batch = 64 subdivisions = 16,如果有错,可将subdivisions改为32或64
max_batches= ?:为自己数据集种类个数*2000
steps=?,? :分别为max_batches的80%和90%
将每一个【yolo】(有三个)下的classes修改为自己的种类数
将每一个【yolo】(有三个)上面的【convolutional】中fiters改为(5+classes)x3
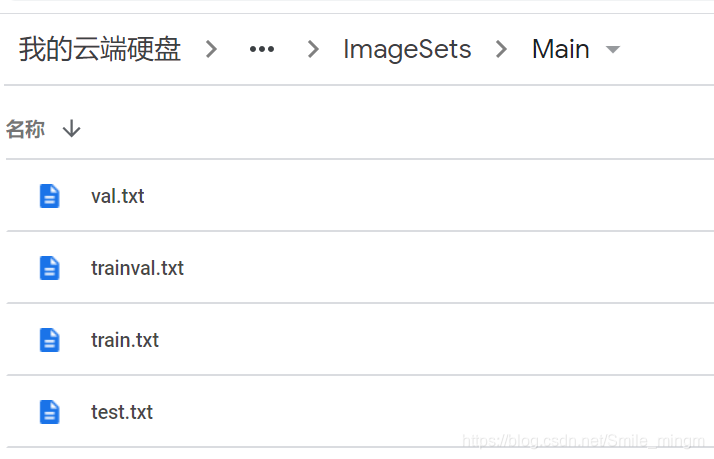
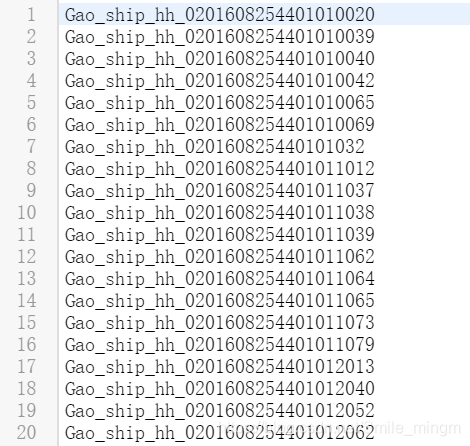
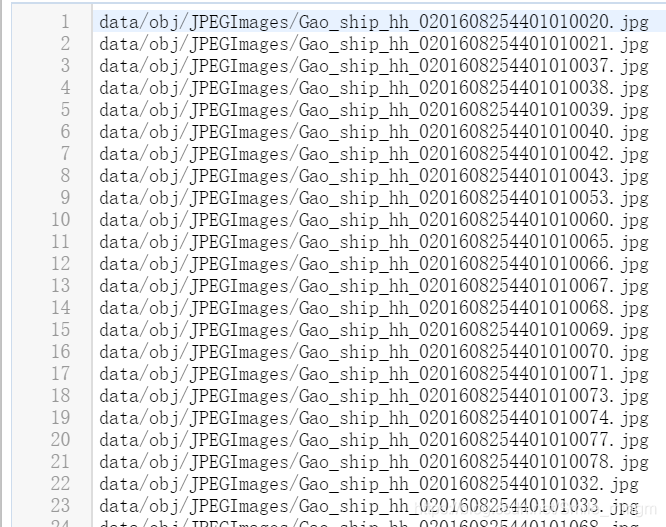
train.txt:里面存放了训练图片的绝对路径,可用generate_train.py生成:
import os
image_files = [ ]
for filename in os. listdir( r'E:\file\bupt\satellite\xudata\JPEGImages' ) :
if filename. endswith( ".jpg" ) :
image_files. append( "data/obj/JPEGImages/" + filename)
with open ( "train.txt" , "w" ) as outfile:
for image in image_files:
outfile. write( image)
outfile. write( "\n" )
outfile. close( )
!cp / mydrive/ yolo/ obj. zip . . /
!unzip . . / obj. zip - d data/
!cp / mydrive/ yolo/ yolov4- custom2. cfg . / cfg
!cp / mydrive/ yolo/ obj. data . / data
!cp / mydrive/ yolo/ obj. names . / data
!cp / mydrive/ yolo/ train. txt . / data
!cp / mydrive/ yolo/ yolov4. conv. 137 . /
!. / darknet detector train data/ obj. data cfg/ yolov4- custom2. cfg yolov4. conv. 137 - dont_show
% cd cfg
!sed - i 's/batch=1/batch=64/' yolov4- custom2. cfg
!sed - i 's/subdivisions=1/subdivisions=64/' yolov4- custom2. cfg
% cd . .
!. / darknet detector test data/ obj. data cfg/ yolov4- custom2. cfg / mydrive/ yolo/ backup/ yolov4- ship_final. weights - thresh 0.02
imShow( 'predictions.jpg' )