#本文章仅用于记录本人学习过程,当作笔记来用,如有侵权请及时告知,谢谢!
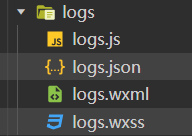
logs页面有四个文件

接下来我们一个一个文件分析:
首先是logs.js:
//logs.js
const util = require('../../utils/util.js')

Page({
  data: {
    logs: []
  },
  getlogs:function(){
    //从缓存中获取用户信息
    const that = this
    const ui = wx.getStorageSync("userinfo")
    if(!ui.openid){
      //如果用户没有登录
      wx.switchTab({
        url: '/pages/me/me',
      })
    }else{
      wx.cloud.callFunction({
        //调用getlogs云函数
        name: "getlogs",
        data: {
          openid:ui.openid
        },
        success:res=>{
          console.log("res",res)
          that.setData({
            logs:res.result.data.map(log=>{
              //将日期变得正常可懂的形式
              var date = util.formatTime(new Date(log.date))
              log.date = date
              return log
            })
          })
        },
        fail: res => {
          console.log("res", res)
        }
      })
    }
  },
  //onLoad 页面首次加载的时候执行
  //onShow 页面每次切换的时候执行
  //通过onshow生命周期函数,调用getlogs方法,这样每次切换到日志界面,都会调用getlogs方法
  //在首页点击加减按钮后,切换到日志界面,新增的日志记录就会自动更新,提升用户体验
  onShow:function(){
    this.getlogs()
  }
})
logs.json
{
  "navigationBarTitleText": "查看启动日志",
  "usingComponents": {}
}
logs.wxml
<!--logs.wxml-->
<block wx:for="{{logs}}" wx:key="key">
  <view class="log-item">
    日期:{{item.date}} 分数:{{item.add}}
  </view>
</block>
logs.wxss
.log-list {
  display: flex;
  flex-direction: column;
  padding: 40rpx;
}
.log-item {
  margin: 10rpx;
}