一、前言
到现在,我们可以看出来,如果我们想用一些功能,基本上都是通过添加spring-boot-starter的方式来使用的,因为各种各样的功能都被封装成了starter,然后把相关服务注入到容器中去,那么如果我们想用一下自己的某些功能呢,那就也要编写一个自定义的starter,所以今天我们就来看看,怎么编写自己的starter,来实现在springboot中实现自己想要的一些功能。
二、原理
回想一下, 当我们使用一个官方的starter的时候,只需要将相应的starter依赖包添加到pom.xml中去就可以了,然后maven自动下载依赖包,并且springboot在启动后会自动配置相关的服务,然后注入的到容器中去。那么springboot是如何知道要去调用哪些方法,加载哪些配置,并注入哪些bean呢?
基本步骤如下:
1.首先,springboot在启动的时候会去找starter包下resources/META-INF/spring.factories文件,然后根据文件中配置的自动配置类运行,加载autoconfigure类。
2.根据@Conditional注解的条件,决定Bean是否要注入的容器中去。
3.然后我们一般用的就是这个Bean,来使用其中的一些功能。
三、编写自己的Starter
3.1 创建maven项目
首先我们创建一个maven项目,按照如下名字起名,其实starter说白了也只是一个jar:
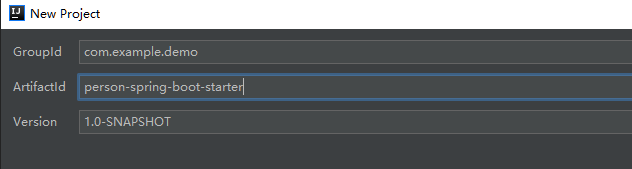
一般的,官方的starter命名方式是spring-boot-start-xxx的形式,为了区分,我们自定义的starter用xxx-spring-boot-starter的命名方式。
1.添加springboot的依赖,因为要成为一个spring-boot-starter是需要依赖springboot的这套流程的,所以我们引入以下依赖:
 1 <project xmlns='http://maven.apache.org/POM/4.0.0'
 2          xmlns:xsi='http://www.w3.org/2001/XMLSchema-instance'
 3          xsi:schemaLocation='http://maven.apache.org/POM/4.0.0 http://maven.apache.org/xsd/maven-4.0.0.xsd'>
 4     <modelVersion>4.0.0</modelVersion>
 5
 6     <groupId>com.example.demo</groupId>
 7     <artifactId>person-spring-boot-starter</artifactId>
 8     <version>1.0-SNAPSHOT</version>
 9     <packaging>jar</packaging>
10
11     <dependencies>
12         <dependency>
13             <groupId>org.springframework.boot</groupId>
14             <artifactId>spring-boot-autoconfigure</artifactId>
15             <version>2.0.0.RELEASE</version>
16         </dependency>
17         <dependency>
18             <groupId>org.springframework.boot</groupId>
19             <artifactId>spring-boot-configuration-processor</artifactId>
20             <version>2.0.0.RELEASE</version>
21             <optional>true</optional>
22         </dependency>
23     </dependencies>
24
25 </project>
2.添加配置类PersonProperties,主要来从配置文件中读取配置绑定到这个类上:
 1 package com.example.demo;
 2
 3 import org.springframework.boot.context.properties.ConfigurationProperties;
 4
 5 @ConfigurationProperties(prefix = 'spring.person')
 6 public class PersonProperties {
 7     private  String name;
 8
 9     private  Integer age;
10
11     public String getName() {
12         return name;
13     }
14
15     public void setName(String name) {
16         this.name = name;
17     }
18
19     public Integer getAge() {
20         return age;
21     }
22
23     public void setAge(Integer age) {
24         this.age = age;
25     }
26 }
3.添加我们的核心服务类,这里边是我们主要提供的功能,假设我们提供了一个sayHello方法,返回一段话:
 1 package com.example.demo;
 2
 3 public class PersonService {
 4     private PersonProperties personProperties;
 5
 6     public PersonService(PersonProperties personProperties) {
 7         this.personProperties = personProperties;
 8     }
 9     public String sayHello() {
10         return '大家好,我叫: ' + personProperties.getName() + ', 今年' + personProperties.getAge() + '岁';
11     }
12 }
4.添加自动配置类,这个类主要是给springboot来用的,springboot会用这个类来启动,激活我们的服务,注册都容器中去:
 1 @Configuration
 2 @EnableConfigurationProperties(PersonProperties.class)
 3 @ConditionalOnClass(PersonService.class)
 4 @ConditionalOnProperty(prefix = 'spring.person', value = 'enabled', matchIfMissing = true)
 5 public class PersonServiceAutoConfiguration {
 6     @Autowired
 7     private  PersonProperties personProperties;
 8
 9     @Bean
10     public  PersonService personService(){
11         return new PersonService(personProperties);
12     }
13 }
解释一下代码中用到的几个注解:
- @ConditionalOnClass,当classpath下发现该类的情况下进行自动配置。
- @ConditionalOnMissingBean,当Spring Context中不存在该Bean时。
- @ConditionalOnProperty(prefix = 'srping.person',value = 'enabled',havingValue = 'true'),当配置文件中spring.perons.enabled=true时。如果没有,使用matchIfMissing的值,也为true。
- @Bean,把返回的PersonService对象添加的spring容器中去,这样我们再使用的使用就可以直接装配了。
其他注解:
- @ConditionalOnBean:当容器中有指定的Bean的条件下
- @ConditionalOnClass:当类路径下有指定的类的条件下
- @ConditionalOnExpression:基于SpEL表达式作为判断条件
- @ConditionalOnJava:基于JVM版本作为判断条件
- @ConditionalOnJndi:在JNDI存在的条件下查找指定的位置
- @ConditionalOnMissingBean:当容器中没有指定Bean的情况下
- @ConditionalOnMissingClass:当类路径下没有指定的类的条件下
- @ConditionalOnNotWebApplication:当前项目不是Web项目的条件下
- @ConditionalOnProperty:指定的属性是否有指定的值
- @ConditionalOnResource:类路径下是否有指定的资源
- @ConditionalOnSingleCandidate:当指定的Bean在容器中只有一个,或者在有多个Bean的情况下,用来指定首选的Bean
- @ConditionalOnWebApplication:当前项目是Web项目的条件下
5. 在resources下添加spring.factories文件,目录结构如下/resources/META-INF/spring.factories,springboot会自动识别这个文件,加载运行我们的PersonServiceAutoConfiguration类。

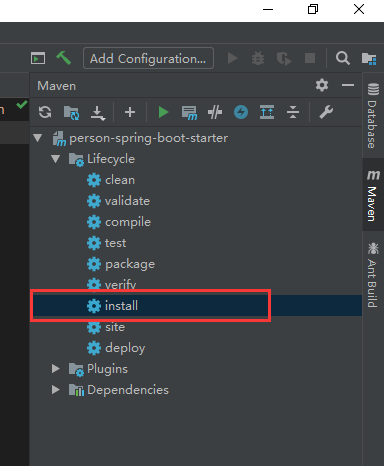
6.编译运行,用maven install安装jar,默认会安装的maven的仓库里边,用于后来我们使用。
3.2 创建springboot项目测试
这一步简单就不说了,直接按模板创建一个springboot的web项目就行了,然后我们在pom.xml中添加我们刚才写好的person-spring-boot-starter:
1  <dependency>
2      <groupId>com.example.demo</groupId>
3      <artifactId>person-spring-boot-starter</artifactId>
4      <version>1.0-SNAPSHOT</version>
5  </dependency>
配置文件中添加starter的配置项:
spring.person.age=12
spring.person.name=songlin
添加一个控制器测试:
 1 @RestController
 2 public class HelloController {
 3
 4     @Autowired
 5     PersonService personService;
 6
 7     @GetMapping('/hello')
 8     public String hello(){
 9         String s = personService.sayHello();
10         return s;
11     }
12 }
访问http://localhost:8080/hello,显示如下:

四、总结
当我们想往springboot集成一个功能的时候,就可以用这种方式了,关于starter的写法,大家还可以参看源码,理解了源码我们就能写出更好用的starter了。springboot的基本入门系列就先到这了,往后我们就开始学习springboot集成高级功能了。