Android开发中很多情况下需要从图册或者相机中获取到图片,
下面就分享一个小栗子。
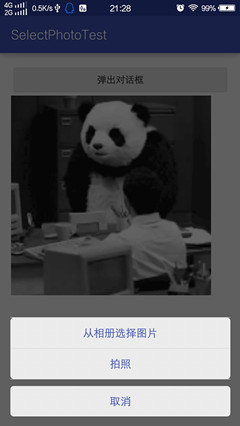
效果为从相册或者拍照获得的图片然后设置给界面中的ImageView。
至于对话框的弹出方式这里就不赘述了,请自行参考:
在最底下会给出APK和源码。
<?xml version="1.0" encoding="utf-8"?>
<LinearLayout xmlns:android="http://schemas.android.com/apk/res/android"
    xmlns:tools="http://schemas.android.com/tools"
    android:layout_width="match_parent"
    android:layout_height="match_parent"
    android:orientation="vertical"
    android:paddingBottom="@dimen/activity_vertical_margin"
    android:paddingLeft="@dimen/activity_horizontal_margin"
    android:paddingRight="@dimen/activity_horizontal_margin"
    android:paddingTop="@dimen/activity_vertical_margin"
    tools:context="com.example.dialogtest.MainActivity">

    <Button
        android:id="@+id/btn_show_dialog"
        android:layout_width="match_parent"
        android:layout_height="wrap_content"
        android:text="@string/show_dialog" />

    <ImageView
        android:id="@+id/img"
        android:layout_width="300dp"
        android:layout_height="300dp" />
</LinearLayout>
主界面中只有一个按钮和一个显示图片的控件。
此Demo采用了比较简单的MVP模式(Model-View-Presenter),
在View中写抽象接口,然后主要在presenter中写逻辑事件,在这个
Demo中没用到模型Model。
public interface IHeaderView {
    //用于图片获取成功设置给ImageView
    void setHeaderBitmap(Bitmap bitmap);
}
点击按钮弹出选择对话框:
@Override
    public void onClick(View v) {
        switch (v.getId()) {
            case R.id.btn_show_dialog:
                headerPresenter.showHeadDialog();
                break;
        }
    }
HeaderPresenter:
package mvp.presenter;

import android.app.Activity;
import android.app.Dialog;
import android.content.Context;
import android.content.Intent;
import android.graphics.Bitmap;
import android.net.Uri;
import android.os.Bundle;
import android.os.Environment;
import android.provider.MediaStore;
import android.view.LayoutInflater;
import android.view.View;
import android.view.ViewGroup;
import android.view.Window;
import android.view.WindowManager;
import android.widget.Toast;

import com.hcc.selectphototest.R;

import java.io.File;

import mvp.view.IHeaderView;

/**
 * Created by ${hcc} on 2016/10/17.
 */
public class HeaderPresenter {
    private IHeaderView iHeaderView;
    private Context context;

    public HeaderPresenter(IHeaderView iHeaderView, Context context) {
        this.iHeaderView = iHeaderView;
        this.context = context;
    }

    /*设置并显示Dialog*/
    public void showHeadDialog() {
        View view = LayoutInflater.from(context).inflate(R.layout.head_dialog, null);
        final Dialog dialog = new Dialog(context, R.style.transparentFrameWindowStyle);
        dialog.setContentView(view, new ViewGroup.LayoutParams(ViewGroup.LayoutParams.MATCH_PARENT, ViewGroup.LayoutParams.WRAP_CONTENT));
        Window window = dialog.getWindow();
        window.setWindowAnimations(R.style.anim_style);
        WindowManager.LayoutParams layoutParams = window.getAttributes();
        layoutParams.x = 0;
        layoutParams.y = ((Activity) context).getWindowManager().getDefaultDisplay().getHeight();
        layoutParams.width = ViewGroup.LayoutParams.MATCH_PARENT; //保证dialog窗体可以水平铺满
        layoutParams.height = ViewGroup.LayoutParams.WRAP_CONTENT;

        dialog.onWindowAttributesChanged(layoutParams);//设置dialog的摆放位置
        dialog.setCanceledOnTouchOutside(true);//设置点击dialog以为的区域dialog消失
        dialog.show();

/*相册选择*/      dialog.findViewById(R.id.tv_select_photo).setOnClickListener(new View.OnClickListener() {
            @Override
            public void onClick(View v) {
                selectFromAlbum();
                if (dialog.isShowing()) {
                    dialog.dismiss();
                }
            }
        });

/*拍照*/     dialog.findViewById(R.id.tv_take_photo).setOnClickListener(new View.OnClickListener() {
            @Override
            public void onClick(View v) {
                takePhoto();
                if (dialog.isShowing()) {
                    dialog.dismiss();
                }
            }
        });

        dialog.findViewById(R.id.tv_cancel).setOnClickListener(new View.OnClickListener() {
            @Override
            public void onClick(View v) {
                dialog.dismiss();
            }
        });
    }

    //从相册获取
    private void selectFromAlbum() {
        Intent intent = new Intent(Intent.ACTION_PICK, null);
        intent.setDataAndType(MediaStore.Images.Media.EXTERNAL_CONTENT_URI, "image/*");
        ((Activity) context).startActivityForResult(intent, 2);
    }

    //拍照
    private void takePhoto() {
        String state = Environment.getExternalStorageState();
        /*判断是否有SD卡*/
        if (state.equals(Environment.MEDIA_MOUNTED)) {
            Intent intent = new Intent(MediaStore.ACTION_IMAGE_CAPTURE);
            intent.putExtra(MediaStore.EXTRA_OUTPUT, Uri.fromFile(
                    new File(Environment.getExternalStorageDirectory(), "iMon.jpg")));
            ((Activity) context).startActivityForResult(intent, 3);
        } else {
            Toast.makeText(context, "内存卡不存在", Toast.LENGTH_LONG).show();
        }
    }

    //裁剪图片
    public void startPhotoZoom(Uri uri) {
        Intent intent = new Intent("com.android.camera.action.CROP");
        intent.setDataAndType(uri, "image/*");
        //下面这个crop=true是设置在开启的Intent中设置显示的VIEW可裁剪
        intent.putExtra("crop", "true");
        // aspectX aspectY 是宽高的比例
        intent.putExtra("aspectX", 1);
        intent.putExtra("aspectY", 1);
        // outputX outputY 是裁剪图片宽高
        intent.putExtra("outputX", 150);
        intent.putExtra("outputY", 150);
        intent.putExtra("return-data", true);
        if (context instanceof Activity) {
            ((Activity) context).startActivityForResult(intent, 4);
        }
    }

    //设置给视图
    public void setView(Intent date) {
        Bundle bundle = date.getExtras();
        Bitmap bitmap = bundle.getParcelable("data");
        iHeaderView.setHeaderBitmap(bitmap);
    }
}
从图册、拍照和裁剪分别有一个请求码,然后主要从MainActivity
中接收,重写onActivityResult,根据不同的请求码做出不同的响
应。
@Override
protected void onActivityResult(int requestCode, int resultCode, Intent data) {
        super.onActivityResult(requestCode, resultCode, data);
        // 点击取消按钮
        if (resultCode == RESULT_CANCELED) {
            return;
        }

        switch (requestCode) {
            case 2:
                Uri uri = data.getData();
                headerPresenter.startPhotoZoom(uri);
                break;
            case 3:
                File file = new File(Environment.getExternalStorageDirectory() + "/" + "iMon.jpg");
                headerPresenter.startPhotoZoom(Uri.fromFile(file));
                break;
            case 4:
                if (data != null) {
                    headerPresenter.setView(data);
                }
                break;
        }
    }
case 4代表剪裁完成,剪裁完成后将Intent类型的date传给setView,
然后获取到bitmap对象设置给ImageView控件。
public void setView(Intent date) {
        Bundle bundle = date.getExtras();
        Bitmap bitmap = bundle.getParcelable("data");
        iHeaderView.setHeaderBitmap(bitmap);
}
@Override
public void setHeaderBitmap(Bitmap bitmap) {
img.setImageBitmap(bitmap);
}这样就能实现从相册和相机中获取图片了。