本人是一名即将进入大三的物联网工程专业的学生,写博客即是为了记录自己的学习历程,又希望能够帮助到很多和自己一样处于起步阶段的萌新。
临渊羡鱼,不如退而结网。一起加油!
博客主页:https://blog.csdn.net/qq_44895397
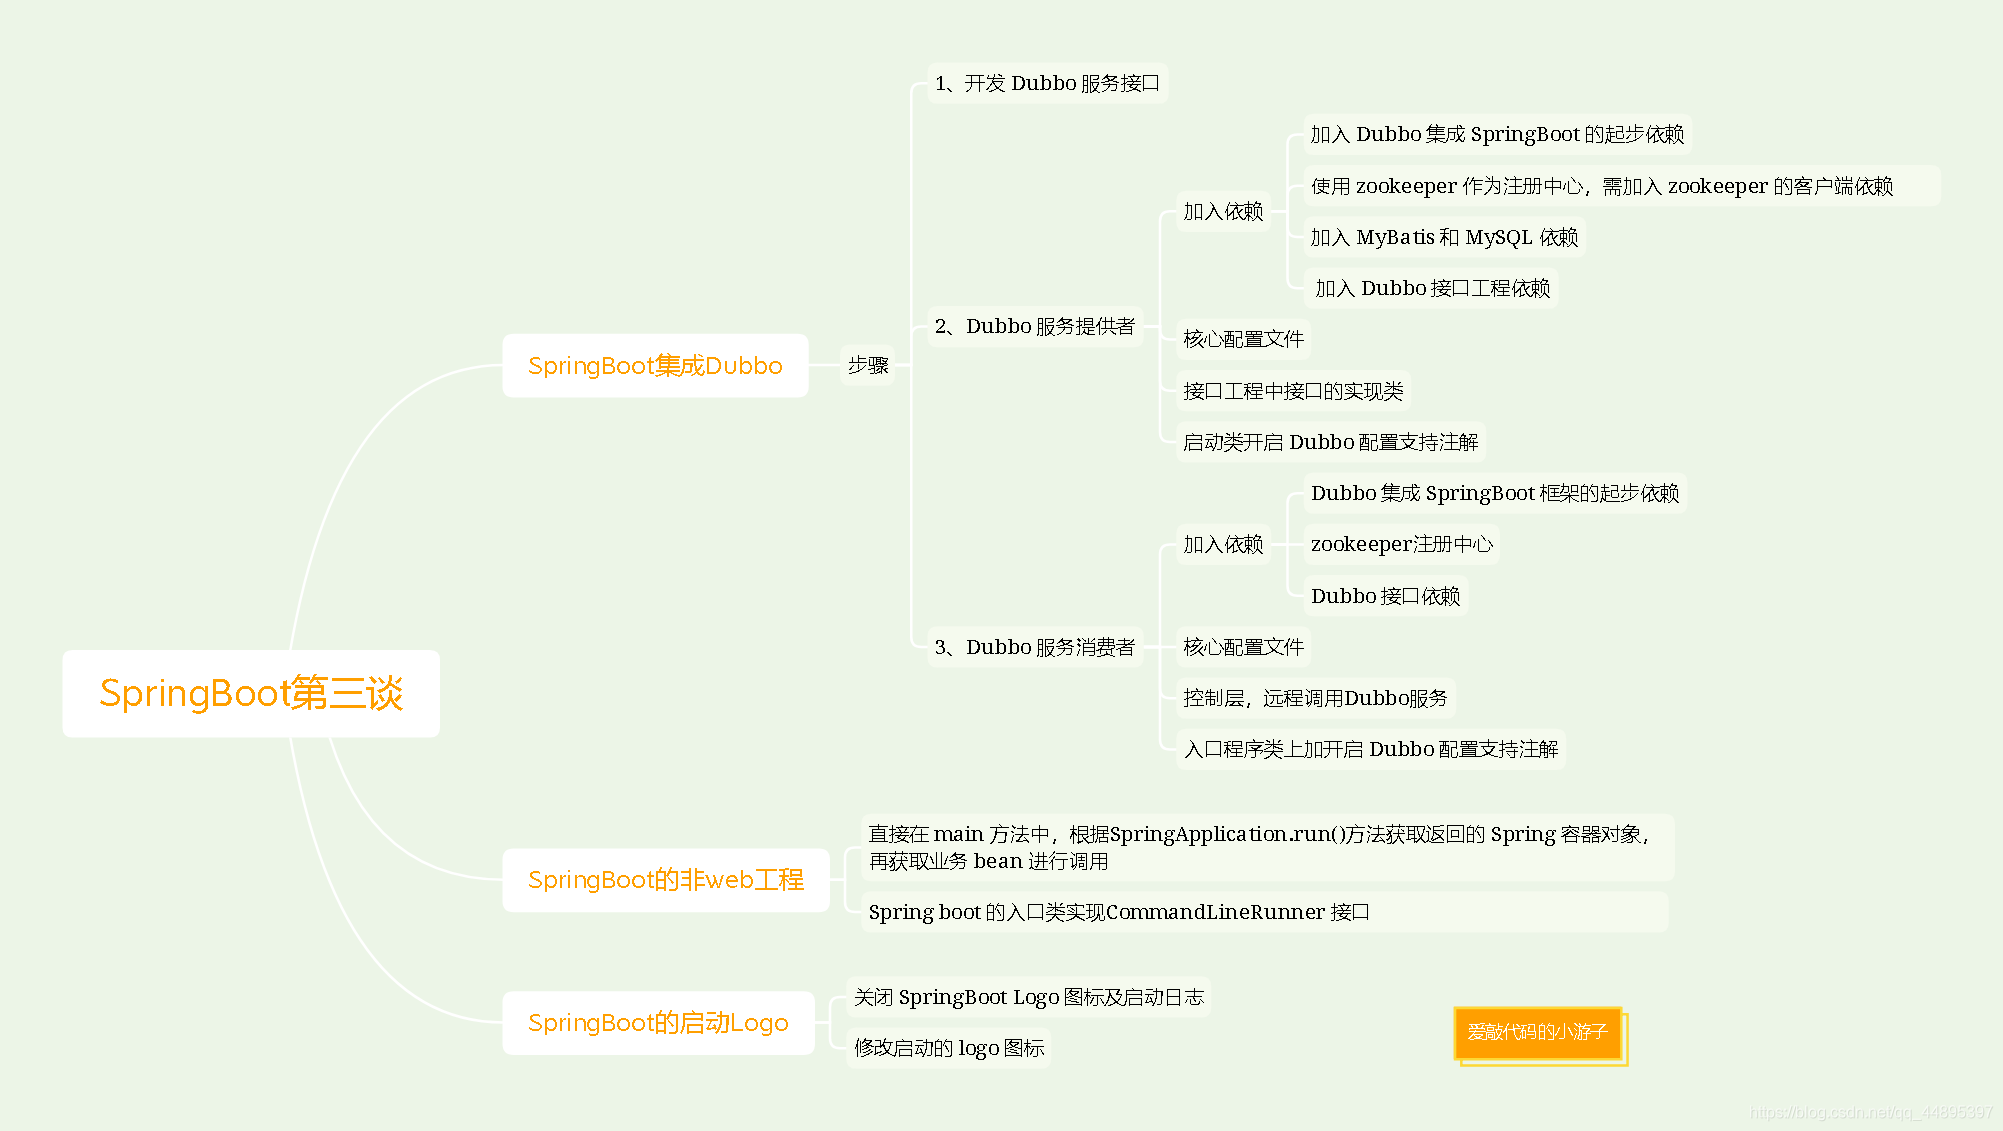
Spring Boot 集成 Dubbo
1、开发 Dubbo 服务接口
创建普通 Maven 项目,dubbo 服务接口工程
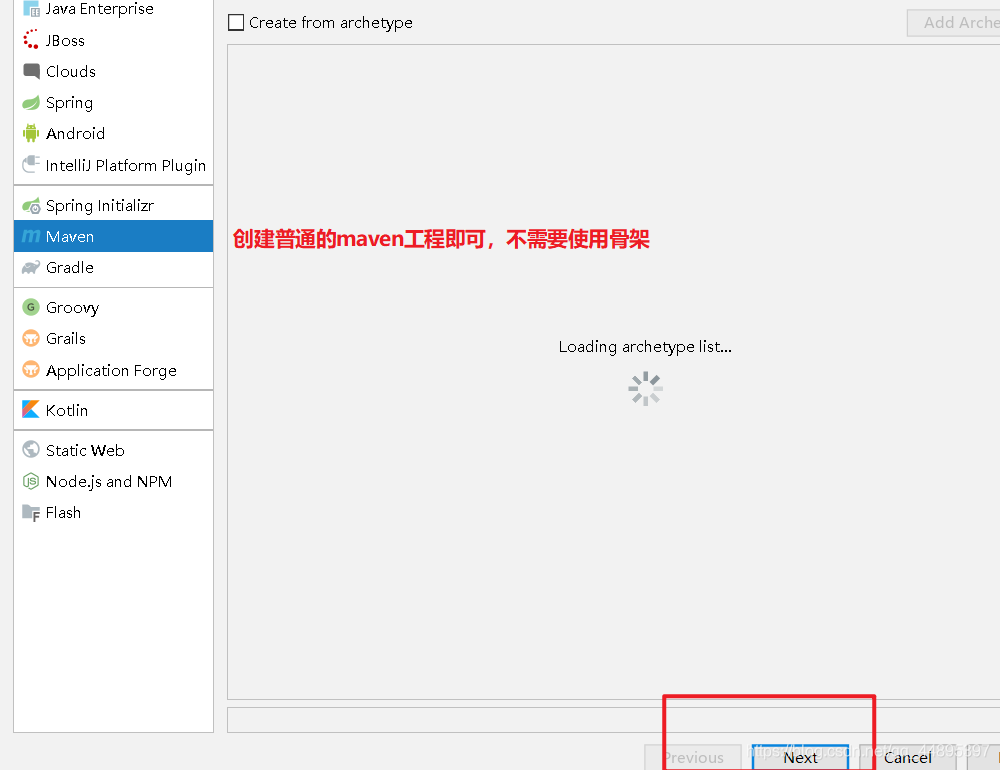
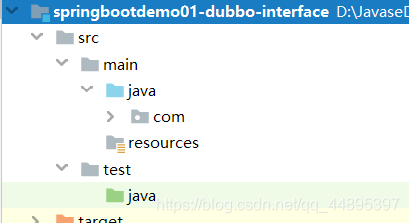
创建一个接口:
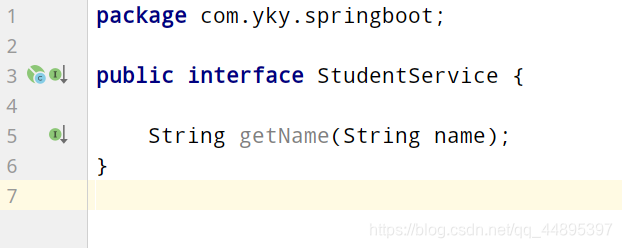
public interface StudentService {

    String getName(String name);
}
2、开发 Dubbo 服务提供者
创建 SpringBoot 框架的 WEB 项目
1)加入依赖
- Dubbo 集成 SpringBoot 框架起步依赖
<dependency>
	<groupId>com.alibaba.spring.boot</groupId>
	<artifactId>dubbo-spring-boot-starter</artifactId>
	<version>2.0.0</version>
</dependency>
- Zookeeper 客户端依赖
<dependency>
	<groupId>com.101tec</groupId>
	<artifactId>zkclient</artifactId>
	<version>0.10</version>
</dependency>
- mysql驱动
<dependency>
	<groupId>mysql</groupId>
	<artifactId>mysql-connector-java</artifactId>
</dependency>
- Mybatis整合spring boot的起步依赖
<dependency>
	<groupId>org.mybatis.spring.boot</groupId>
	<artifactId>mybatis-spring-boot-starter</artifactId>
	<version>2.0.0</version>
</dependency>
- redis依赖
<dependency>
	<groupId>org.springframework.boot</groupId>
	<artifactId>spring-boot-starter-data-redis</artifactId>
</dependency>
- 接口工程
<dependency>
	<groupId>com.yky.springboot</groupId>
	<artifactId>springbootdemossminterface</artifactId>
	<version>1.0-SNAPSHOT</version>
</dependency>
2)核心配置文件
- tomcat的配置
#tomcat的配置
server.port=8090
server.servlet.context-path=/
- mysql的配置
spring.datasource.driver-class-name=com.mysql.cj.jdbc.Driver
spring.datasource.url=jdbc:mysql://localhost:3306/springboot?serverTimezone=UTC&characterEncoding=utf-8
spring.datasource.username=root
spring.datasource.password=yky
- redis的配置
spring.redis.host=localhost
spring.redis.port=6379
#spring.redis.password=yky #密码
- 指定mapper中映射文件存放的位置
mybatis.mapper-locations=classpath:mapper/*.xml
- dubbo的配置
#服务名称
spring.application.name=springbootdemossmprivoder
#设置当前工程为服务提供者
spring.dubbo.server=true
#设置注册中心
spring.dubbo.registry=zookeeper://localhost:2181
3)编写 Dubbo 的接口实现类
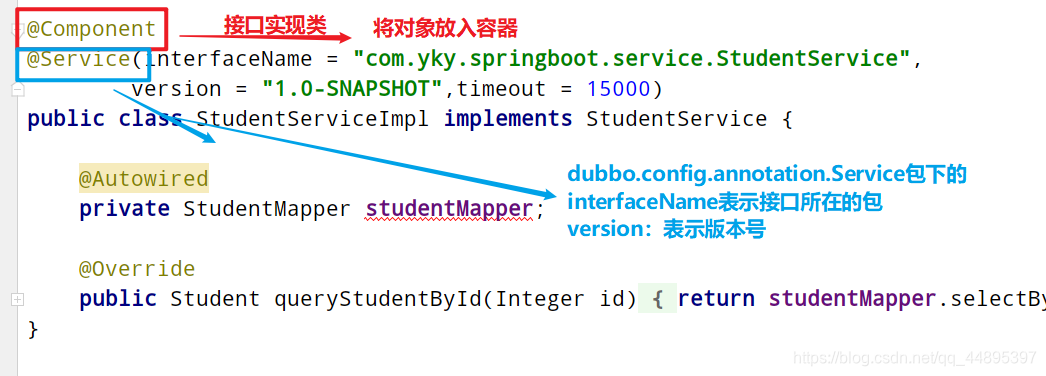
@Component
@Service(interfaceName = "com.yky.springboot.service.StudentService",
        version = "1.0-SNAPSHOT",timeout = 15000)
public class StudentServiceImpl implements StudentService {

    @Autowired
    private StudentMapper studentMapper;

    @Override
    public Student queryStudentById(Integer id) {
        return studentMapper.selectByPrimaryKey(id);
    }
}
4)启动类上添加@MapperScan@EnableDubboConfiguration注解
-
@MapperScan(basePackages = “com.yky.springboot.mapper”):扫描mapper文件
-
@EnableDubboConfiguration:加开启 Dubbo 配置
@SpringBootApplication
@MapperScan(basePackages = "com.yky.springboot.mapper")
@EnableDubboConfiguration
public class SpringbootdemossmprivoderApplication {

	public static void main(String[] args) {
		SpringApplication.run(SpringbootdemossmprivoderApplication.class, args);
	}

}
3、开发 Dubbo 服务消费者

<resources>
	<resource>
		<directory>src/main/java</directory>
		<includes>
			<include>**/*.*</include>
		</includes>
	</resource>
	<resource>
		<directory>src/main/resources</directory>
		<includes>
			<include>**/*.*</include>
		</includes>
	</resource>
</resources>
1)添加依赖
- Dubbo 集成 SpringBoot 框架起步依赖
- Zookeeper 客户端依赖
- spring boot内嵌的jsp依赖,解析jsp页面
- 接口工程
<!--dubbo,jsp-->
	<!--Dubbo 集成 SpringBoot 框架起步依赖-->
	<dependency>
		<groupId>com.alibaba.spring.boot</groupId>
		<artifactId>dubbo-spring-boot-starter</artifactId>
		<version>2.0.0</version>
	</dependency>
	<!--Zookeeper 客户端依赖-->
	<dependency>
		<groupId>com.101tec</groupId>
		<artifactId>zkclient</artifactId>
		<version>0.10</version>
	</dependency>
	<!--spring boot内嵌的jsp依赖,解析jsp页面-->
	<dependency>
		<groupId>org.apache.tomcat.embed</groupId>
		<artifactId>tomcat-embed-jasper</artifactId>
	</dependency>
	<!--接口工程-->
	<dependency>
		<groupId>com.yky.springboot</groupId>
		<artifactId>springbootdemossminterface</artifactId>
		<version>1.0-SNAPSHOT</version>
	</dependency>
2)核心配置文件
- tomcat的配置
- 视图解析器
- dubbo服务消费者的配置
#tomcat
server.port=8080
server.servlet.context-path=/

#视图解析器
spring.mvc.view.prefix=/
spring.mvc.view.suffix=.jsp

#dubbo服务消费者的配置
#设置dubbo的配置
spring.application.name=springbootdemossmconsumer
#设置注册中心
spring.dubbo.registry=zookeeper://localhost:2181
3)控制层的编写
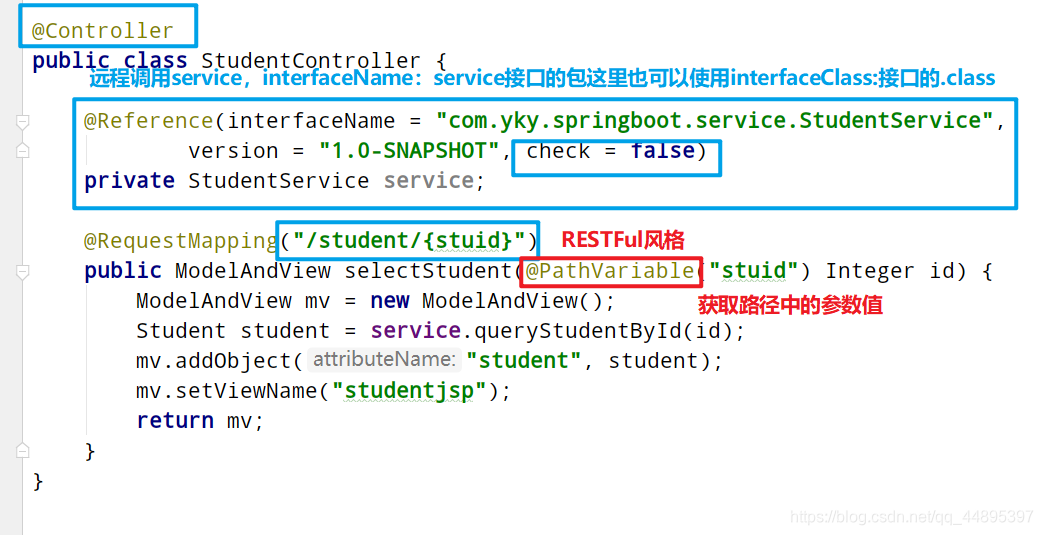
@Controller
public class StudentController {

    @Reference(interfaceName = "com.yky.springboot.service.StudentService",
            version = "1.0-SNAPSHOT", check = false)
    private StudentService service;

    @RequestMapping("/student/{stuid}")
    public ModelAndView selectStudent(@PathVariable("stuid") Integer id) {
        ModelAndView mv = new ModelAndView();
        Student student = service.queryStudentById(id);
        mv.addObject("student", student);
        mv.setViewName("studentjsp");
        return mv;
    }
}
4)启动类上添加@EnableDubboConfiguration
Spring Boot 非 web 应用程序
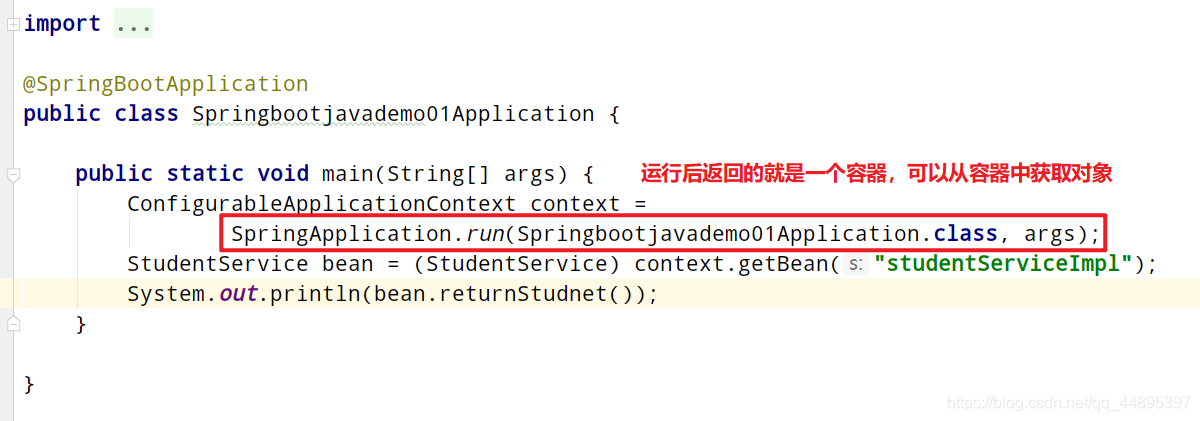
方式一:直接在 main 方法中,根据 SpringApplication.run()方 法获取返回的 Spring 容器对象,再获取业务 bean 进行调用
- SpringBoot 程序启动后,返回值是
ConfigurableApplicationContext,它也是一个
Spring 容器对象 - 它其它相当于原来 Spring 中启动容器
ClassPathXmlApplicationContext context = new ClassPathXmlApplicationContext("");
方式二:Spring boot 的入口类实现 CommandLineRunner 接口
- 第一步:SpringBoot 的启动程序,会初始化 spring 容器
- 第二步:通过容器获取 bean,并注入给 userService
- 第三步:容器启动后调用 run 方法,在该方法中调用业务方法
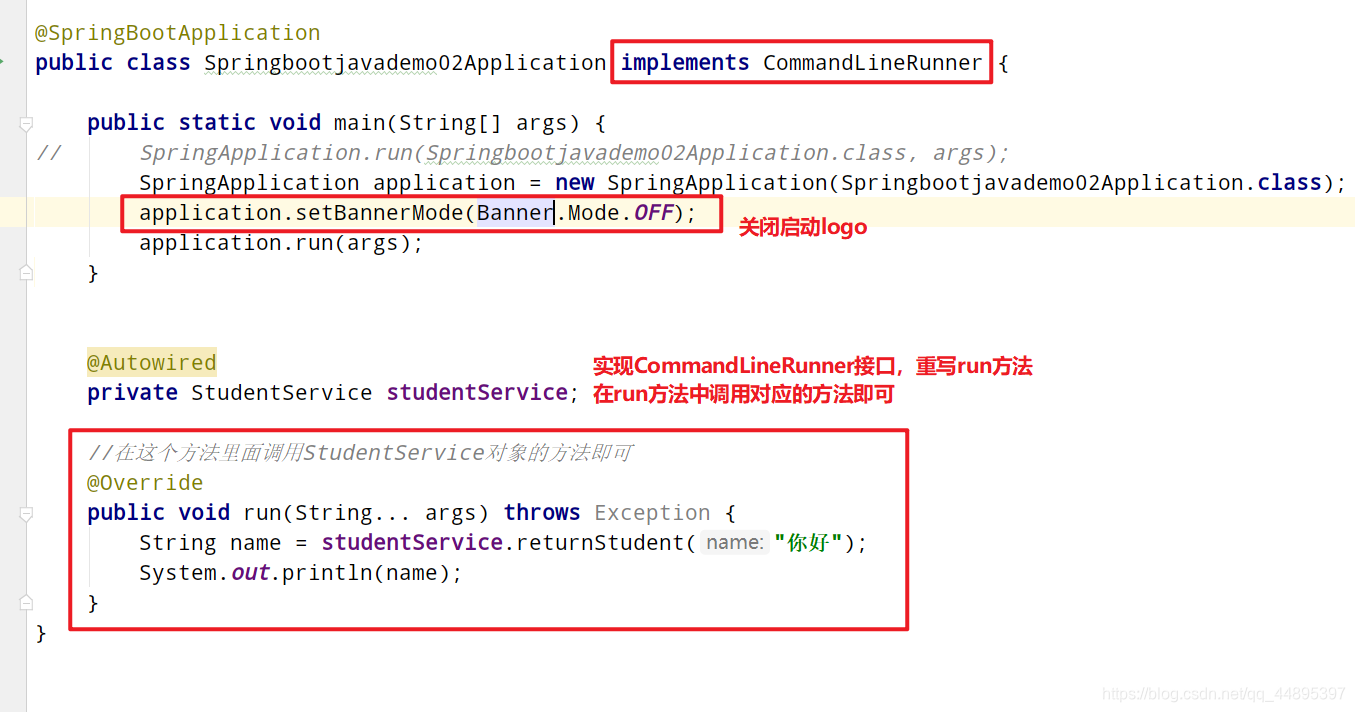
SpringBoot 启动Logo的修改或关闭
关闭 SpringBoot Logo 图标及启动日志
@SpringBootApplication
public class Application {
public static void main(String[] args) {
SpringApplication springApplication = new SpringApplication(Application.class);
//关闭启动 logo 的输出
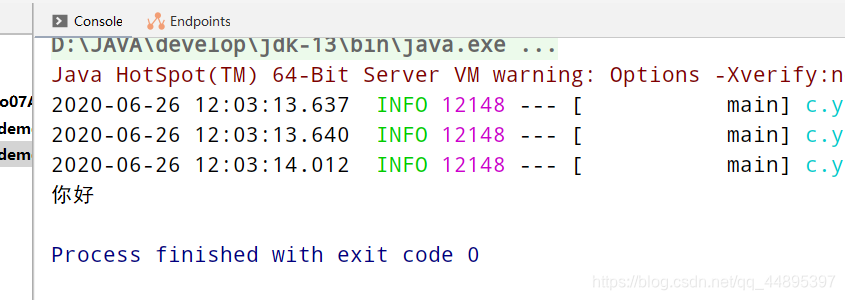
springApplication.setBannerMode(Banner.Mode.OFF);
springApplication.run(args);
} }
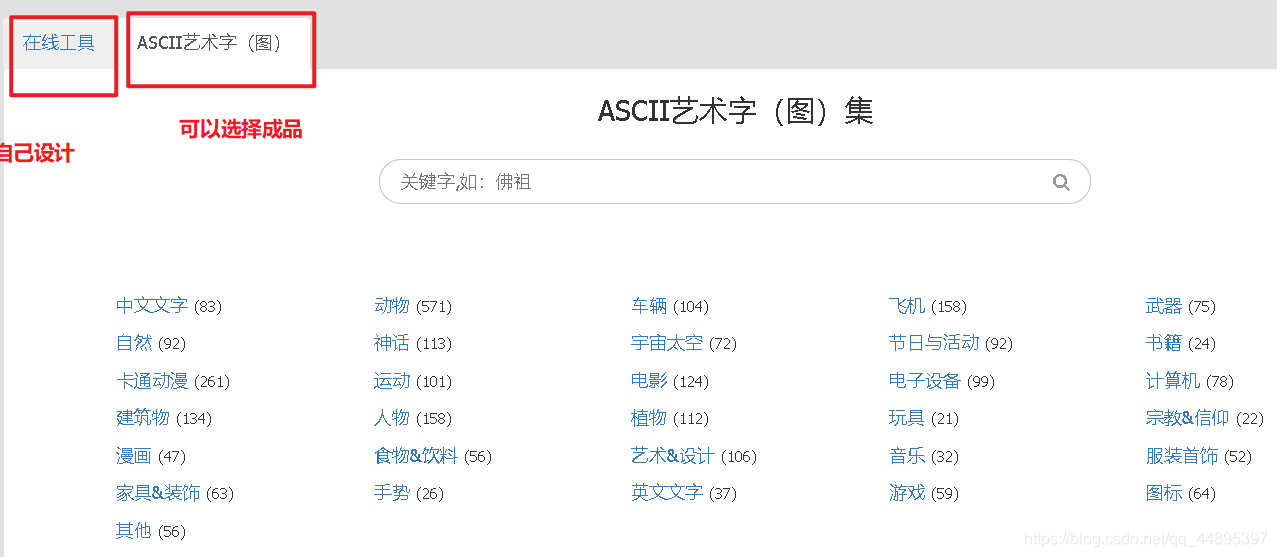
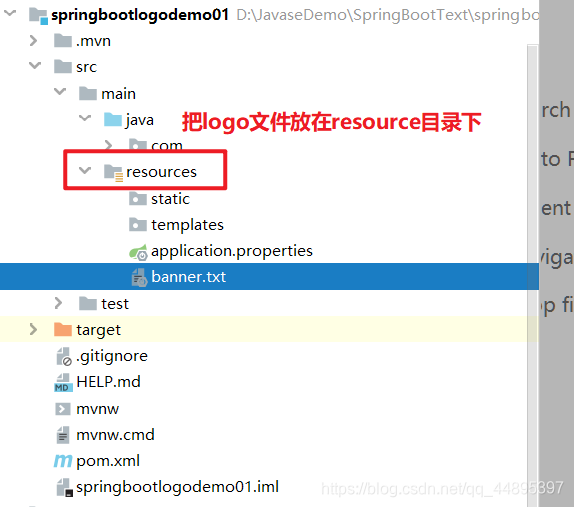
修改启动的 logo 图标
在 src/main/resources 放入 banner.txt 文件
可以利用网站生成图标: https://www.bootschool.net/ascii
启动