CVAT 用户指南
- 用户指南
- 入门
- 标注工具的界面
- 基本导航
- 形状类型(基础)
- Shape mode (basics)
- Track mode (basics)
- Attribute annotation mode (basics)
- 下载标注
- 同步存储库任务
- 词汇
- 工作区
- 设置
- Top Panel
- 控件边栏
- 对象提要栏
- Shape mode (advanced)
- Track mode (advanced)
- Attribute annotation mode (advanced)
- Annotation with rectangle by 4 points
- 带多边形的标注
- Annotation with polylines
- Annotation with points
- Annotation with cuboids
- 带标记的标注
- 自动标注
- Shape grouping
- 过滤器
- Analytics
- 快捷键
用户指南
计算机视觉标注工具(CVAT)是基于 Web 为计算机视觉算法标注视频和图像的在线工具。
它的灵感来自Vatic免费的、在线的、交互式的视频注释工具。
CVAT有许多强大的功能:
- 在关键帧之间插入边界框
- 使用深度学习模型自动标注
- 大多数关键行动的捷径
- 带有注释任务列表的仪表板
- LDAP和基本授权
- 等……
它是为一个专业的数据注释团队创建和使用的。
特别针对我们团队开发的计算机视觉任务进行了用户体验和用户界面优化。
入门
授权
- 首先,您必须登录到CVAT工具。

- 要注册新用户,请按“创建帐户”

-
您可以注册用户,但在默认情况下,新用户无权查看任务列表。因此,您应该创建一个超级用户。超级用户可以使用Django管理面板为用户分配正确的组。请使用以下命令创建管理员帐户:
docker exec -it cvat bash -ic '/usr/bin/python3 ~/manage.py createsuperuser' -
如果您想创建一个非管理员帐户,您可以使用下面登录页面上的链接来创建。别忘了在“管理”面板中修改新用户的权限。有几个组(又称角色):管理员、用户、标注员、质检员。

管理面板
转到Django管理面板。在这里您可以:
- 创建/编辑/删除用户
- 控制用户的权限和对工具的访问。

创建标注任务
-
点击主页面上的
Create new task按钮创建标注任务。

-
指定任务的参数:
基本配置
Name 要创建的任务的名称。

Labels. 使用标签有两种方法:-
Constructor是添加和调整标签的简单方法。要添加新标签,请单击Add label按钮。
可以在Label name字段中设置标签的名称。

如有必要,您可以通过单击Add an attribute来添加属性并设置其属性:
此处提供以下操作:- 设置属性的名称。
- 选择显示属性的方式:
- Select — 下拉列表选值
- Radio — 从建议的几个选项中只选择一个时使用
- Checkbox — 从建议的选项中选择任意数量的选项时使用
- Text — 属性作为文本输入,默认属性
- Number — 属性作为数字输入
- 为属性设置值。按
Enter键可以分隔这些值。输入的值显示为一个单独的元素,可以通过按Backspace或单击“关闭”按钮(x)来删除该元素。
如果指定的属性显示方式是文本或数字,则默认情况下输入的值将显示为文本。 - 复选框
Mutable确定属性是否将被逐帧更改。 - 可以通过单击
关闭按钮(x)删除该属性。
单击Continue按钮添加更多标签。
如果需要取消添加标签-请按Cancel按钮。
添加完所有必要的标签后,单击Done按钮。
单击Done后,添加的标签将显示为不同颜色的单独元素。
您可以通过单击Update attributes或Delete label来编辑或删除标签。
-
Raw是高级用户使用标签的一种方式。
Raw以 json 格式显示标签数据,并提供了编辑和复制标签作为文本的选项。
Done按钮应用更改,Reset按钮取消更改。

在Raw和Constructor模式下,可以按“Copy”按钮复制标签列表。
Select files. 点击
My computer从您的电脑中选择一些要添加批注的文件。
如果点击Connected file share,则可以从网络中选择要标注的文件。
如果选择Remote source,您将看到一个字段,您可以在其中输入URL列表(每行一个URL)。

高级配置

Z-Order. 定义绘制多边形的顺序。选中启用分层显示复选框。
Use zip chunks. 强制使用压缩块作为压缩数据。实际只用于视频。
Image Quality. 使用此选项可指定上载图像的质量。
该选项有助于更快地加载高分辨率数据集。
使用从1(完全压缩的图像)到95(几乎不是压缩图像)的值。Overlap Size. 使用此选项可生成重叠段。
该选项使轨迹从一个线段连续到另一个线段。
将其用于插值模式。使用该参数有几个选项:- 用于插值任务(视频序列)。
如果在两个相邻的线段上标注边界框,它们将合并为一个边界框。
如果重叠等于零或标注在转储的标注文件中的相邻段上较差,则将有多个轨迹,每个段对应一个对象。 - 标注(独立图像)。
如果一个对象存在于重叠的线段上,重叠大于零,并且相邻线段上的标注足够好,则该对象将自动合并为一个对象。
如果重叠等于零或标注在转储标注文件内的相邻段上较差,则同一对象将有多个边界框。
因此,可以在第一个线段上注释对象。
在第二个线段上标注同一个对象,如果您做得对,标注中就有一个轨迹。
如果不同段(重叠框架上)上的标注非常不同,则同一对象将有两个形状。
此功能仅适用于边界框。
多边形、多段线、点不支持重叠段上的自动合并,即使重叠参数不为零,相邻线段上相应形状之间的匹配也非常完美。
Segment size. 使用此选项可以将一个巨大的数据集分成几个较小的段。
例如,一个作业不能由多个贴标器标注(不支持)。
因此,使用"segment size"可以为同一注释任务创建多个作业。
它将有助于您并行数据标注过程。Start frame. 任务中的视频开始的帧。
Stop frame. 任务中的视频结束的帧。
Frame Step. 使用此选项可过滤视频帧。
例如,输入“25”可在视频中每隔二十五帧或每二十五幅图像保留一次。Chunk size. 定义从客户端发送到服务器时要打包在块中的帧数。
如果为空,服务器将自动定义。推荐值:
- 1080p or less: 36
- 2k or less: 8 - 16
- 4k or less: 4 - 8
- More: 1 - 4
Dataset Repository. 存储库的URL链接可选地指定存储库的路径 (
default: annotation / <dump_file_name> .zip).
支持注解的.zip和.xml文件扩展名。
Field format:URL [PATH]example:https://github.com/project/repos.git [1/2/3/4/annotation.xml]支持的URL格式:
https://github.com/project/repos[.git]github.com/project/repos[.git][email protected]:project/repos[.git]
如果标注与存储库不同步,则创建后任务将以红色突出显示。
Use LFS. 如果标注文件很大,可以使用LFS创建一个存储库支持。
Issue tracker. 如果需要,请指定问题跟踪程序的完整URL。
按
Submit按钮,它将被添加到注释任务列表中。
然后,创建的任务将显示在仪表板上:

-
-
仪表板包含元素,每个元素都与单独的任务相关。它们按创建顺序排序。
每个元素包含:任务名称、预览、进度条、按钮“打开”和菜单“操作”。
每个按钮负责菜单内“操作”特定功能:Dump Annotation和Export as a dataset—下载特定格式的批注或批注和图像。以下格式可用:- CVAT for video
如果任务具有插值模式,则突出显示。 - CVAT for images
如果任务具有批注模式,则突出显示。 - PASCAL VOC
- (VOC) Segmentation mask —
archive包含png格式的每个帧的类和实例掩码,以及一个文本文件,其中包含每个颜色的值。 - YOLO
- COCO
- TFRecord
- MOT
- LabelMe 3.0
- Datumaro
- CVAT for video
Upload annotation的格式与Dump annotation中的格式相同。- CVAT 同时接受视频和图像子格式。
Automatic Annotation—使用OpenVINO toolkit进行自动注释。
存在性取决于如何构建CVAT实例。Open bug tracker— 打开指向问题跟踪程序的链接。Delete— 删除任务。
按
Open按钮转到任务详细信息。 -
任务详细信息是一个任务页面,其中包含预览、进度条、任务的详细信息(在创建任务时指定)和“作业”部分。
[外链图片转存失败,源站可能有防盗链机制,建议将图片保存下来直接上传(img-t0hODpHu-1596171611932)(static/documentation/images/image131_detrac.jpg)]
- 此页上提供了以下操作:
- 更改任务的标题
- 打开“Actions”菜单
- 更改问题跟踪程序或打开问题跟踪程序(如果已指定)
- 更换标签。
可以在原始模式或构造函数模式下为现有标签添加新标签或添加属性。
单击Copy可将标签复制到剪贴板。 - Assigned to — 用于将任务分配给某人。开始输入被派遣人的姓名和/或从下拉列表中选择合适的人。
Jobs— 是特定任务的所有作业的列表。在这里您可以找到下一个数据:- 带有超链接的作业名称。
- Frames — 帧间隔。
- 任务的状态。 状态由用户在任务内的菜单中指定。
有三种类型的状态:标注、质检或已完成。
作业的状态是根据任务的进度条变化的。 - Started on — 此任务的开始日期。
- Duration — 是任务的时间量。
- Assignee是正在处理任务的用户。
你可以开始输入被派遣人的姓名和/或从下拉列表中选择合适的人。 Copy. 单击“复制”可将作业列表复制到剪贴板。
任务列表包含指向任务的直接链接。
- 此页上提供了以下操作:
-
按照“作业”部分中的链接开始标注过程。
在某些情况下,可以有多个链接。它取决于任务的大小以及“重叠大小”和“段大小”参数。为了提高用户体验,只会加载几个帧的第一个块,并且您可以对第一个图像进行注释。其他帧将在后台加载。

模型
在“模型”页面上,您可以管理为自动标注而上载的深度学习(DL)模型。
使用该功能,您可以上载、更新或删除特定的DL模型。
要打开模型管理器,请单击导航栏上的“模型”按钮。
“模型”页面包含有关所有现有模型的信息。
模型列表分为两部分:
- Primary — 包含默认的CVAT模型。每个模型都是一个单独的元素。
它包含模型的名称、模型所基于的框架和“支持的标签”(所有支持标签的下拉列表)。 - Uploaded by a user — 包含用户上载的模型。
用户模型列表中有其他列,其中包含以下信息:
上传模型的用户名以及上传日期。
在这里,您可以在“操作”菜单中删除模型。

要添加模型,请单击“创建新模型”。
输入模型名称,然后使用“选择文件”按钮选择模型文件。
要使用自定义模型标注任务,您需要准备4个文件:
Model config(*.xml) - 具有网络配置的文本文件。Model weights(*.bin) - 经过训练的权重的二进制文件。Label map(*.json) - 一个简单的json文件,带有label_map的字典,类似于一个带有标签号字符串值的对象。Interpretation script(*.py) - 用于将网络输出层转换为可由CVAT处理的预定义结构的文件。
了解有关创建模型文件的详细信息可以阅读:自动标注
如果希望每个人都能使用模型,请选中“全局加载”。
单击“提交”按钮提交模型。

上传完成后,您的模型可以在“由用户上载”部分找到。
使用“Auto annotation”按钮使用您的一个DL模型对任务进行预注释。
搜索
对于搜索有几个选项。
- 在所有字段中搜索(所有者、代理人、任务名称、任务状态、任务模式)。
在搜索字段中输入搜索字符串执行。 - 如何执行搜索特定字段:
owner: admin- 由名称中有子字符串“admin”的用户创建的所有任务assignee: employee- 分配给名称中有子字符串“employee”的用户的所有任务name: mighty- 所有名称中带有子字符串“mighty”的任务mode: annotationormode: interpolation- 所有带有图像或视频的任务。status: annotationorstatus: validationorstatus: completed- 按状态搜索id: 5- id=5的任务。
- Multiple filters. 可以使用关键字
AND组合筛选器(标识符除外):mode: interpolation AND owner: adminmode: annotation and status: annotation
搜索不区分大小写。

标注工具的界面
该工具包括:
Header- 用于导航CVAT部分和帐户设置的固定标题;Top panel— 包含导航按钮、主要功能和菜单访问;Workspace— 显示图像的空间;Controls sidebar— 包含用于导航图像、缩放、创建形状和编辑轨迹的工具(合并、拆分、分组)Objects sidebar— 包含标签过滤器,两个列表:
对象(帧上的)和标签(帧上对象的)和外观设置。

基本导航
-
使用下面的箭头移动到下一帧/上一帧。
使用滚动条滑块在帧之间滚动。
几乎每个按钮都有一个快捷方式。
To get a hint about a shortcut, just move your mouse pointer over an UI element.

-
要导航图像,请使用控件侧栏上的按钮。
Another way an image can be moved/shifted is by holding the left mouse button inside an area without annotated objects.
If theMouse Wheelis pressed, then all annotated objects are ignored. Otherwise the a highlighted bounding box will be moved instead of the image itself.

-
You can use the button on the sidebar controls to zoom on a region of interest.
Use the buttonFit the imageto fit the image in the workspace.
You can also use the mouse wheel to scale the image
(the image will be zoomed relatively to your current cursor position).[外链图片转存失败,源站可能有防盗链机制,建议将图片保存下来直接上传(img-o5BIPvtu-1596171611945)(static/documentation/images/image137.jpg)]
形状类型(基础)
有五种形状可以为图像添加标注:
RectangleorBounding boxPolygonPolylinePointsCuboidTag
它们看起来都是这样的:


Tag - 工作区中没有形状,但显示在对象侧栏中。
Shape mode (basics)
Usage examples:
- Create new annotations for a set of images.
- Add/modify/delete objects for existing annotations.
-
You need to select
Rectangleon the controls sidebar:[外链图片转存失败,源站可能有防盗链机制,建议将图片保存下来直接上传(img-hX31gUy6-1596171611961)(static/documentation/images/image082.jpg)]
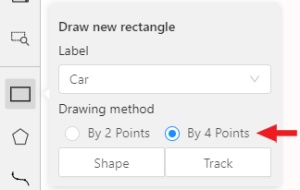
Before you start, select the correct
Label(should be specified by you when creating the task)
andDrawing Method(by 2 points or by 4 points):[外链图片转存失败,源站可能有防盗链机制,建议将图片保存下来直接上传(img-oBMeqNKi-1596171611962)(static/documentation/images/image080.jpg)]
-
Creating a new annotation in
Shape mode:-
Create a separate
Rectangleby clicking onShape.[外链图片转存失败,源站可能有防盗链机制,建议将图片保存下来直接上传(img-JY9BG4Xy-1596171611964)(static/documentation/images/image081.jpg)]
-
Choose the opposite points. Your first rectangle is ready!
[外链图片转存失败,源站可能有防盗链机制,建议将图片保存下来直接上传(img-TWoz3R3j-1596171611965)(static/documentation/images/image011_detrac.jpg)]
-
To learn about creating a rectangle using the by 4 point drawing method, (read here).
-
It is possible to adjust boundaries and location of the rectangle using a mouse.
Rectangle’s size is shown in the top right corner , you can check it by clicking on any point of the shape.
You can also undo your actions usingCtrl+Zand redo them withShift+Ctrl+ZorCtrl+Y.
-
-
You can see the
Object cardin the objects sidebar or open it by right-clicking on the object.
You can change the attributes in the details section.
You can perform basic operations or delete an object by clicking on the action menu button.[外链图片转存失败,源站可能有防盗链机制,建议将图片保存下来直接上传(img-Aj3n3B7a-1596171611967)(static/documentation/images/image012.jpg)]
-
The following figure is an example of a fully annotated frame with separate shapes.
[外链图片转存失败,源站可能有防盗链机制,建议将图片保存下来直接上传(img-oRxUV641-1596171611968)(static/documentation/images/image013_detrac.jpg)]
Read more in the section shape mode (advanced).
Track mode (basics)
Usage examples:
- Create new annotations for a sequence of frames.
- Add/modify/delete objects for existing annotations.
- Edit tracks, merge several rectangles into one track.
-
Like in the
Shape mode, you need to select aRectangleon the sidebar,
in the appearing form, select the desiredLabeland theDrawing method.[外链图片转存失败,源站可能有防盗链机制,建议将图片保存下来直接上传(img-YmEspkiX-1596171611969)(static/documentation/images/image083.jpg)]
-
Creating a track for an object (look at the selected car as an example):
-
Create a
RectangleinTrack modeby clicking onTrack.[外链图片转存失败,源站可能有防盗链机制,建议将图片保存下来直接上传(img-SueIrtw8-1596171611970)(static/documentation/images/image014.jpg)]
-
In
Track modethe rectangle will be automatically interpolated on the next frames. -
The cyclist starts moving on frame #2270. Let’s mark the frame as a key frame.
You can pressKfor that or click thestarbutton (see the screenshot below).[外链图片转存失败,源站可能有防盗链机制,建议将图片保存下来直接上传(img-8XFejoDU-1596171611971)(static/documentation/images/image016.jpg)]
-
If the object starts to change its position, you need to modify the rectangle where it happens.
It isn’t necessary to change the rectangle on each frame, simply update several keyframes
and the frames between them will be interpolated automatically. -
Let’s jump 30 frames forward and adjust the boundaries of the object. See an example below:
[外链图片转存失败,源站可能有防盗链机制,建议将图片保存下来直接上传(img-xiedw6RV-1596171611972)(static/documentation/images/image017_detrac.jpg)]
-
After that the rectangle of the object will be changed automatically on frames 2270 to 2300:
[外链图片转存失败,源站可能有防盗链机制,建议将图片保存下来直接上传(img-bwvIrfna-1596171611973)(static/documentation/images/gif019_detrac.gif)]
-
-
When the annotated object disappears or becomes too small, you need to
finish the track. You have to chooseOutside Property, shortcutO.[外链图片转存失败,源站可能有防盗链机制,建议将图片保存下来直接上传(img-9FX70dWo-1596171611975)(static/documentation/images/image019.jpg)]
-
If the object isn’t visible on a couple of frames and then appears again,
you can use theMergefeature to merge several individual tracks
into one.[外链图片转存失败,源站可能有防盗链机制,建议将图片保存下来直接上传(img-nxg8MdWG-1596171611977)(static/documentation/images/image020.jpg)]
-
Create tracks for moments when the cyclist is visible:
[外链图片转存失败,源站可能有防盗链机制,建议将图片保存下来直接上传(img-a9DNXklL-1596171611979)(static/documentation/images/gif001_detrac.gif)]
-
Click
Mergebutton or press keyMand click on any rectangle of the first track
and on any rectangle of the second track and so on:[外链图片转存失败,源站可能有防盗链机制,建议将图片保存下来直接上传(img-ISGPgo4d-1596171611980)(static/documentation/images/image162_detrac.jpg)]
-
Click
Mergebutton or pressMto apply changes.[外链图片转存失败,源站可能有防盗链机制,建议将图片保存下来直接上传(img-wqXg6XXv-1596171611982)(static/documentation/images/image020.jpg)]
-
The final annotated sequence of frames in
Interpolationmode can
look like the clip below:[外链图片转存失败,源站可能有防盗链机制,建议将图片保存下来直接上传(img-lJEPfF0l-1596171611983)(static/documentation/images/gif003_detrac.gif)]
Read more in the section track mode (advanced).
-
Attribute annotation mode (basics)
-
In this mode you can edit attributes with fast navigation between objects and frames using a keyboard.
Open the drop-down list in the top panel and select Attribute annotation Mode.[外链图片转存失败,源站可能有防盗链机制,建议将图片保存下来直接上传(img-picGtvCd-1596171611984)(static/documentation/images/image023_affectnet.jpg)]
-
In this mode objects panel change to a special panel :
[外链图片转存失败,源站可能有防盗链机制,建议将图片保存下来直接上传(img-YHdjT7II-1596171611986)(static/documentation/images/image026.jpg)]
-
The active attribute will be red. In this case it is
gender. Look at the bottom side panel to see all possible
shortcuts for changing the attribute. Press key2on your keyboard to assign a value (female) for the attribute
or select from the drop-down list.[外链图片转存失败,源站可能有防盗链机制,建议将图片保存下来直接上传(img-xRSVp0HG-1596171611987)(static/documentation/images/image024_affectnet.jpg)]
-
Press
Up Arrow/Down Arrowon your keyboard or click the buttons in the UI to go to the next/previous
attribute. In this case, after pressingDown Arrowyou will be able to edit theAgeattribute.[外链图片转存失败,源站可能有防盗链机制,建议将图片保存下来直接上传(img-g2CCFrv2-1596171611988)(static/documentation/images/image025_affectnet.jpg)]
-
Use
Right Arrow/Left Arrowkeys to move to the previous/next image with annotation.
To see all the hot keys available in the attribute annotation mode, press F2.
Read more in the section attribute annotation mode (advanced).
下载标注
- 要下载最新的标注,必须先保存所有更改。
单击“保存”按钮。有一个“Ctrl+S”快捷键可以快速保存标注。 - 然后,单击“菜单”按钮。
- 按“转储批注”按钮。

- 选择转储标注文件的格式.:
-
CVAT for video
如果任务具有插值模式,则突出显示。 -
CVAT for images
如果任务具有标注模式,则突出显示。

-
(VOC) Segmentation mask —
archive contains class and instance masks for each frame in the png
format and a text file with the value of each color.
-
同步存储库任务
-
At the end of the annotation process, a task is synchronized by clicking
Synchronizeon the task page. Notice: this feature
works only if a git repository was specified when the task was created.[外链图片转存失败,源站可能有防盗链机制,建议将图片保存下来直接上传(img-qB0JgPZy-1596171611991)(static/documentation/images/image106.jpg)]
-
After synchronization the button
Syncis highlighted in green. The
annotation is now in the repository in a temporary branch.[外链图片转存失败,源站可能有防盗链机制,建议将图片保存下来直接上传(img-ydYq42Nr-1596171611992)(static/documentation/images/image109.jpg)]
-
The next step is to go to the repository and manually create a pull request to the main branch.
-
After confirming the PR, when the annotation is saved in the main branch, the color of the task changes to blue.
[外链图片转存失败,源站可能有防盗链机制,建议将图片保存下来直接上传(img-lhnPaeeO-1596171611993)(static/documentation/images/image110.jpg)]
词汇
Label 是带注释对象的一种类型(例如人、车等)

Attribute 是注释对象的属性(例如颜色、模型、质量等)。有两种类型的属性:
-
Unique: 不可变,不能在帧之间更改(例如年龄、性别、颜色等)

-
Temporary: 可变,可在任何帧上更改(例如质量、姿势、截断等)

Track 是不同框架上对应于一个对象的一组形状。
轨迹是在轨迹模式下创建的
Annotation 是一组形状和轨迹。有几种类型的标注:
- Manual 是个人创造的
- Semi-automatic which is created mainly automatically, but the user provides some data (e.g. interpolation)
- Automatic which is created automatically without a person in the loop
工作区
This is the main field in which drawing and editing objects takes place.
In addition the workspace also has the following functions:
-
Right-clicking on an object calls up the
Object card- this is an element containing
the necessary controls for changing the label and attributes of the object, as well as the action menu.

-
Right-clicking a point deletes it.
-
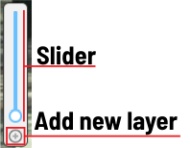
Z-axis slider- Allows you to switch annotation layers hiding the upper layers
(slider is enabled if several z layers are on a frame).
This element has a button for adding a new layer. When pressed, a new layer is added and switched to it.
You can move objects in layers using the+and-keys.
设置
要打开“设置”,请打开标题中的“用户”菜单,然后选择“设置”项。

Settings 有两个选项卡:
在Player选项卡中,您可以:
- Control step of
CandVshortcuts. - Control speed of
Space/Playbutton. - Show
Grid, change grid size, choose color and transparency:

- Show every image in full size or zoomed out like previous
(it is enabled by default for interpolation mode and disabled for annotation mode). Rotate all imagescheckbox — switch the rotation of all frames or an individual frame.- Adjust
Brightness/Contrast/Saturationof too exposed or too
dark images usingF3— color settings (changes displaying settings and not the
image itself).
Shortcuts:
-
Shift+B+=/Shift+B+-for brightness. -
Shift+C+=/Shift+C+-for contrast. -
Shift+S+=/Shift+S+-for saturation.

-
Reset color settingsto default values.
In tab Workspace you can:

-
Enable auto savecheckbox — turned off by default. -
Auto save interval (min)input box — 15 minutes by default. -
Show all interpolation trackscheckbox — shows hidden objects on the
side panel for every interpolated object (turned off by default). -
Always show object details- show text for an object on the canvas not only when the object is activated:

-
Automatic bordering- enable automatic bordering for polygons and polylines during drawing/editing.
For more information To find out more, go to the section annotation with polygons. -
Attribute annotation mode (AAM) zoom margininput box — defines margins (in px)
for shape in the attribute annotation mode. -
Press
Go backorF3to return to the annotation.
Top Panel

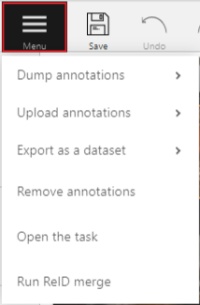
菜单按钮
它是标注工具的主菜单。它可以用来下载,上传和删除标注。
按钮分配:
Dump Annotations— 从任务下载标注。Upload Annotations— 将批注上载到任务中。Remove Annotations— 从当前作业中删除标注。Export as a dataset— 从任务下载数据集。有几种格式可用:Open the task— 打开包含任务详细信息的页面。Run ReID merge— 形状或轨迹的自动合并。
它用于在单个轨迹中组合由自动标注创建的单个对象。
更多信息请点击这里。
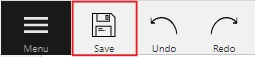
保存工作
保存当前作业的批注。该按钮指示保存过程。
撤消重做按钮
使用按钮撤消或重做操作。

Player
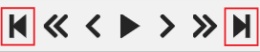
转到第一帧/最后一帧。
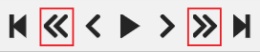
Go to the next/previous frame with a predefined step. Shortcuts:
V — step backward, C — step forward. By default the step is 10 frames
(change at Account Menu —> Settings —> Player Step).
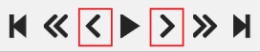
Go to the next/previous frame (the step is 1 frame). Shortcuts: D — previous, F — next.
Play the sequence of frames or the set of images.
Shortcut: Space (change at Account Menu —> Settings —> Player Speed).
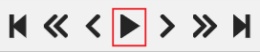
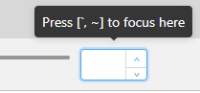
Go to a specific frame. Press ~ to focus on the element.
全屏播放器
全屏播放模式。键盘快捷键是“F11”。

Info
Open the job info.
[外链图片转存失败,源站可能有防盗链机制,建议将图片保存下来直接上传(img-Cw3RtBeZ-1596171612020)(static/documentation/images/image144_detrac.jpg)]
- Job status:
annotation,validationorcompletedtask
Overview:
Assinger- the one to whom the job is assigned.Start Frame- the number of the first frame in this job.End Frame- the number of the last frame in this job.Frames- the total number of all frames in the job.Z-Order- z-order enable indicator.
Annotations statistics:
This is a table number of created shapes, sorted by labels (e.g. vehicle, person)
and type of annotation (shape, track). As well as the number of manual and interpolated frames.
UI switcher
Switching between user interface modes.
[外链图片转存失败,源站可能有防盗链机制,建议将图片保存下来直接上传(img-yklCr3i6-1596171612022)(static/documentation/images/image145.jpg)]
控件边栏
Navigation block - 包含用于移动和旋转图像的工具。
| Icon | Description |
|---|---|
 |
Cursor (Esc)- a basic annotation pedacting tool. |
| [外链图片转存失败,源站可能有防盗链机制,建议将图片保存下来直接上传(img-tU6iHk4u-1596171612023)(static/documentation/images/image149.jpg)] | Move the image- a tool for moving around the image withoutthe possibility of editing. |
| [外链图片转存失败,源站可能有防盗链机制,建议将图片保存下来直接上传(img-Bw0lVxrL-1596171612024)(static/documentation/images/image102.jpg)] | Rotate- two buttons to rotate the current framea clockwise ( Ctrl+R) and anticlockwise (Ctrl+Shift+R).You can enable Rotate all images in the settings to rotate all the images in the job |
Zoom block - contains tools for image zoom.
| Icon | Description |
|---|---|
| [外链图片转存失败,源站可能有防盗链机制,建议将图片保存下来直接上传(img-DDYuWn0b-1596171612025)(static/documentation/images/image151.jpg)] | Fit image- fits image into the workspace size.Shortcut - double click on an image |
| [外链图片转存失败,源站可能有防盗链机制,建议将图片保存下来直接上传(img-cvEN197d-1596171612027)(static/documentation/images/image166.jpg)] | Select a region of interest- zooms in on a selected region.You can use this tool to quickly zoom in on a specific part of the frame. |
Shapes block - contains all the tools for creating shapes.
| Icon | Description | Links to section |
|---|---|---|
| [外链图片转存失败,源站可能有防盗链机制,建议将图片保存下来直接上传(img-lxhHLtW9-1596171612028)(static/documentation/images/image167.jpg)] | Rectangle |
Shape mode; Track mode; Drawing by 4 points |
| [外链图片转存失败,源站可能有防盗链机制,建议将图片保存下来直接上传(img-HJ3fmllq-1596171612029)(static/documentation/images/image168.jpg)] | Polygon |
Annotation with polygons |
| [外链图片转存失败,源站可能有防盗链机制,建议将图片保存下来直接上传(img-I4Lb4jxW-1596171612030)(static/documentation/images/image169.jpg)] | Polyline |
Annotation with polylines |
| [外链图片转存失败,源站可能有防盗链机制,建议将图片保存下来直接上传(img-elI2Xwb5-1596171612030)(static/documentation/images/image170.jpg)] | Points |
Annotation with points |
| [外链图片转存失败,源站可能有防盗链机制,建议将图片保存下来直接上传(img-CHTtzaws-1596171612031)(static/documentation/images/image176.jpg)] | Cuboid |
Annotation with cuboids |
| [外链图片转存失败,源站可能有防盗链机制,建议将图片保存下来直接上传(img-2r1dheNM-1596171612032)(static/documentation/images/image171.jpg)] | Tag |
Annotation with tagss |
Edit block - contains tools for editing tracks and shapes.
| Icon | Description | Links to section |
|---|---|---|
| [外链图片转存失败,源站可能有防盗链机制,建议将图片保存下来直接上传(img-BECK3ozg-1596171612033)(static/documentation/images/image172.jpg)] | Merge Shapes(M) — starts/stops the merging shapes mode. |
Track mode (basics) |
| [外链图片转存失败,源站可能有防盗链机制,建议将图片保存下来直接上传(img-Kceg3Cro-1596171612034)(static/documentation/images/image173.jpg)] | Group Shapes (G) — starts/stops the grouping shapes mode. |
Shape grouping |
| [外链图片转存失败,源站可能有防盗链机制,建议将图片保存下来直接上传(img-GZPRgbEJ-1596171612035)(static/documentation/images/image174.jpg)] | Split — splits a track. |
Track mode (advanced) |
对象提要栏
Hide - 该按钮隐藏对象的侧栏。
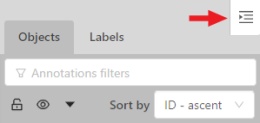
Objects
Filter input box
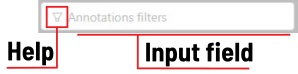
The way how to use filters is described in the advanced guide here.
List of objects
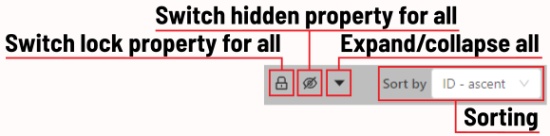
- Switch lock property for all - switches lock property of all objects in the frame.
- Switch hidden property for all - switches hide property of all objects in the frame.
- Expand/collapse all - collapses/expands the details field of all objects in the frame.
- Sorting - sort the list of objects: updated time, ID - accent, ID - descent
In the objects sidebar you can see the list of available objects on the current
frame. The following figure is an example of how the list might look like:
| Shape mode | Track mode |
|---|---|
| [外链图片转存失败,源站可能有防盗链机制,建议将图片保存下来直接上传(img-Qod8ZqOE-1596171612040)(static/documentation/images/image044.jpg)] | [外链图片转存失败,源站可能有防盗链机制,建议将图片保存下来直接上传(img-4vcy4vWx-1596171612041)(static/documentation/images/image045.jpg)] |
Objects on the side bar
The type of a shape can be changed by selecting Label property. For instance, it can look like shown on the figure below:
[外链图片转存失败,源站可能有防盗链机制,建议将图片保存下来直接上传(img-wb0mblHM-1596171612043)(static/documentation/images/image050.jpg)]
Object action menu
The action menu calls up the button:
[外链图片转存失败,源站可能有防盗链机制,建议将图片保存下来直接上传(img-DQfRhG12-1596171612044)(static/documentation/images/image047.jpg)]
The action menu contains:
-
Create object URL- puts a link to an object on the clipboard. After you open the link, this object will be filtered. -
Make a copy- copies an object. The keyboard shortcut isCtrl + CCtrl + V. -
Propagate- Сopies the form to several frames,
invokes a dialog box in which you can specify the number of copies
or the frame onto which you want to copy the object. The keyboard shortcutCtrl + B.[外链图片转存失败,源站可能有防盗链机制,建议将图片保存下来直接上传(img-6Kodjp9M-1596171612045)(static/documentation/images/image053.jpg)]
-
To background- moves the object to the background. The keyboard shortcut-,_. -
To foreground- moves the object to the foreground. The keyboard shortcut+,=. -
Remove- removes the object. The keyboard shortcutDel,Shift+Del.
A shape can be locked to prevent its modification or moving by an accident. Shortcut to lock an object: L.
[外链图片转存失败,源站可能有防盗链机制,建议将图片保存下来直接上传(img-MvfGUOW4-1596171612046)(static/documentation/images/image046.jpg)]
A shape can be Occluded. Shortcut: Q. Such shapes have dashed boundaries.
[外链图片转存失败,源站可能有防盗链机制,建议将图片保存下来直接上传(img-4rGP0SaB-1596171612047)(static/documentation/images/image048.jpg)]
[外链图片转存失败,源站可能有防盗链机制,建议将图片保存下来直接上传(img-9NajWWCM-1596171612048)(static/documentation/images/image049_detrac.jpg)]
You can change the way an object is displayed on a frame (show or hide).
[外链图片转存失败,源站可能有防盗链机制,建议将图片保存下来直接上传(img-R7xQHxdn-1596171612048)(static/documentation/images/image055.jpg)]
Switch pinned property - when enabled, a shape cannot be moved by dragging or dropping.
[外链图片转存失败,源站可能有防盗链机制,建议将图片保存下来直接上传(img-rNnliAlA-1596171612049)(static/documentation/images/image052.jpg)]
You can change an object’s color.
To do so, click on the color bar of the object and select a color from the palette that appears.
[外链图片转存失败,源站可能有防盗链机制,建议将图片保存下来直接上传(img-etCLn1m8-1596171612050)(static/documentation/images/image153.jpg)]
By clicking on the Details button you can collapse or expand the field with all the attributes of the object.
[外链图片转存失败,源站可能有防盗链机制,建议将图片保存下来直接上传(img-DEPNyTd2-1596171612051)(static/documentation/images/image154.jpg)]
Labels
You can also change the color of any object to random, to do so just hover
the mouse over the object on the frame and highlight them by clicking on a label you need.
In this tab, you can lock or hide objects of a certain label.
[外链图片转存失败,源站可能有防盗链机制,建议将图片保存下来直接上传(img-49LY3VIq-1596171612051)(static/documentation/images/image062.jpg)]
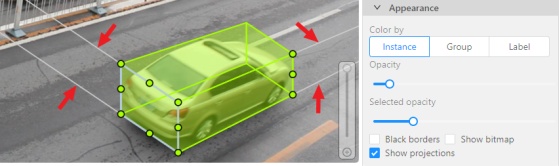
Appearance
Color By options
Change the color scheme of annotation:
-
Instance— every shape has random color[外链图片转存失败,源站可能有防盗链机制,建议将图片保存下来直接上传(img-mHqmzAQt-1596171612052)(static/documentation/images/image095_detrac.jpg)]
-
Group— every group of shape has its own random color, ungrouped shapes are white[外链图片转存失败,源站可能有防盗链机制,建议将图片保存下来直接上传(img-6SvfwThS-1596171612053)(static/documentation/images/image094_detrac.jpg)]
-
Label— every label (e.g. car, person) has its own random color[外链图片转存失败,源站可能有防盗链机制,建议将图片保存下来直接上传(img-GbkZocQQ-1596171612054)(static/documentation/images/image093_detrac.jpg)]
You can change any random color pointing to a needed box on a frame or on an
object sidebar.
Fill Opacity slider
Change the opacity of every shape in the annotation.
[外链图片转存失败,源站可能有防盗链机制,建议将图片保存下来直接上传(img-UeteOcRo-1596171612055)(static/documentation/images/image086_detrac.jpg)]
Selected Fill Opacity slider
Change the opacity of the selected object’s fill.
[外链图片转存失败,源站可能有防盗链机制,建议将图片保存下来直接上传(img-zghcnStt-1596171612055)(static/documentation/images/image089_detrac.jpg)]
Black Stroke checkbox
Changes the shape border from colored to black.
[外链图片转存失败,源站可能有防盗链机制,建议将图片保存下来直接上传(img-CIXr81rO-1596171612056)(static/documentation/images/image088_detrac.jpg)]
Show bitmap checkbox
If enabled all shapes are displayed in white and the background is black.
[外链图片转存失败,源站可能有防盗链机制,建议将图片保存下来直接上传(img-WntHqkZe-1596171612057)(static/documentation/images/image087_detrac.jpg)]
Show projections checkbox
Enables / disables the display of auxiliary perspective lines. Only relevant for cuboids
Shape mode (advanced)
Basic operations in the mode were described in section shape mode (basics).
Occluded
Occlusion is an attribute used if an object is occluded by another object or
isn’t fully visible on the frame. Use Q shortcut to set the property
quickly.
[外链图片转存失败,源站可能有防盗链机制,建议将图片保存下来直接上传(img-BnWehcKu-1596171612060)(static/documentation/images/image065.jpg)]
Example: the three cars on the figure below should be labeled as occluded.

If a frame contains too many objects and it is difficult to annotate them
due to many shapes placed mostly in the same place, it makes sense
to lock them. Shapes for locked objects are transparent, and it is easy to
annotate new objects. Besides, you can’t change previously annotated objects
by accident. Shortcut: L.

Track mode (advanced)
Basic operations in the mode were described in section track mode (basics).
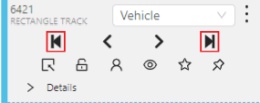
Shapes that were created in the track mode, have extra navigation buttons.
-
These buttons help to jump to the previous/next keyframe.
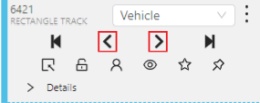
-
The button helps to jump to the initial frame and to the last keyframe.
You can use the `` Split ‘’ function to split one track into two tracks:
Attribute annotation mode (advanced)
Basic operations in the mode were described in section attribute annotation mode (basics).
It is possible to handle lots of objects on the same frame in the mode.

It is more convenient to annotate objects of the same type. In this case you can apply the appropriate filter. For example, the following filter will hide all objects except person: label=="Person".
To navigate between objects (person in this case),
use the following buttons switch between objects in the frame on the special panel:

or shortcuts:
Tab— go to the next objectShift+Tab— go to the previous object.
In order to change the zoom level, go to settings (press F3)
in the workspace tab and set the value Attribute annotation mode (AAM) zoom margin in px.
Annotation with rectangle by 4 points
It is an efficient method of bounding box annotation, proposed
here.
Before starting, you need to make sure that the drawing method by 4 points is selected.
Press Shape or Track for entering drawing mode. Click on four extreme points:
the top, bottom, left- and right-most physical points on the object.
Drawing will be automatically completed right after clicking the fourth point.
Press Esc to cancel editing.
带多边形的标注
手工绘图
一般被被用于语义分割。
如果要标注多边形,请确保启用了“创建新任务”对话框中的“Z-Order”标志。
Z-Order标志定义绘图顺序。有必要获得正确的注释蒙版而不需要额外的工作(额外的边界绘制)。
按+/-可改变Z-Order,相应地设置最大/最小Z-Order。

开始之前,您需要选择控件侧栏上的Polygon并选择正确的标签。

- 单击
Shape进入绘图模式。
有两种绘制多边形的方法:通过单击创建点,或者在按住“Shift”的同时在屏幕上拖动鼠标。
| 点击点 | 按住Shift+拖动 |
|---|---|
 |
 |
- 未按“Shift”时,您可以放大/缩小(滚动鼠标滚轮时)和移动(单击鼠标滚轮并移动鼠标时),也可以通过右键单击删除上一个点。
- 按“N”完成形状。
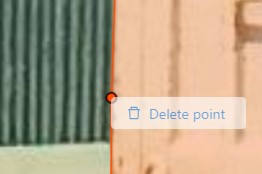
- 创建多边形后,可以通过右键单击并选择“删除点”来移动或删除这些点或者在上下文菜单中按“Ctrl”键双击。
Drawing using automatic borders
[外链图片转存失败,源站可能有防盗链机制,建议将图片保存下来直接上传(img-xVPM86Mr-1596171612075)(static/documentation/images/gif025_mapillary_vistas.gif)]
You can use auto borders when drawing a polygon. Using automatic borders allows you to automatically trace
the outline of polygons existing in the annotation.
-
To do this, go to settings -> workspace tab and enable
Automatic Bordering
or pressCtrlwhile drawing a polygon.[外链图片转存失败,源站可能有防盗链机制,建议将图片保存下来直接上传(img-ONmw5PTS-1596171612076)(static/documentation/images/image161.jpg)]
-
Start drawing / editing a polygon.
-
Points of other shapes will be highlighted, which means that the polygon can be attached to them.
-
Define the part of the polygon path that you want to repeat.
[外链图片转存失败,源站可能有防盗链机制,建议将图片保存下来直接上传(img-7qbhZXyO-1596171612079)(static/documentation/images/image157_mapillary_vistas.jpg)]
-
Click on the first point of the contour part.
[外链图片转存失败,源站可能有防盗链机制,建议将图片保存下来直接上传(img-rRyviGx0-1596171612080)(static/documentation/images/image158_mapillary_vistas.jpg)]
-
Then click on any point located on part of the path. The selected point will be highlighted in purple.
[外链图片转存失败,源站可能有防盗链机制,建议将图片保存下来直接上传(img-wcB3owkv-1596171612081)(static/documentation/images/image159_mapillary_vistas.jpg)]
-
Сlick on the last point and the outline to this point will be built automatically.
[外链图片转存失败,源站可能有防盗链机制,建议将图片保存下来直接上传(img-KUffn1b2-1596171612082)(static/documentation/images/image160_mapillary_vistas.jpg)]
Besides, you can set a fixed number of points in the Number of points field, then
drawing will be stopped automatically. To enable dragging you should right-click
inside the polygon and choose Switch pinned property.
Below you can see results with opacity and black stroke:
[外链图片转存失败,源站可能有防盗链机制,建议将图片保存下来直接上传(img-GpBr65qx-1596171612083)(static/documentation/images/image064_mapillary_vistas.jpg)]
If you need to annotate small objects, increase Image Quality to
95 in Create task dialog for your convenience.
Make AI polygon
Used to create a polygon semi-automatically.
-
Before starting, you have to make sure that the
Make AI polygonis selected.[外链图片转存失败,源站可能有防盗链机制,建议将图片保存下来直接上传(img-7C4hoVbm-1596171612084)(static/documentation/images/image114.jpg)]
-
Click
Shapeto enter drawing mode. Now you can start annotating the necessary area.
A shape must consist of 4 points minimum. You can set a fixed number of points in theNumber of pointsfield,
then drawing will be stopped automatically. You can zoom in/out and move while drawing. -
Press
Nagain to finish marking the area. At the end of Auto Segmentation,
a shape is created and you can work with it as a polygon.[外链图片转存失败,源站可能有防盗链机制,建议将图片保存下来直接上传(img-71Ym3qTH-1596171612085)(static/documentation/images/gif009_detrac.gif)]
Edit polygon
To edit a polygon you have to double-click with pressed Shift, it will open the polygon editor.
-
There you can create new points or delete part of a polygon closing the line on another point.
-
After closing the polygon, you can select the part of the polygon that you want to leave.
-
You can press
Escto cancel editing.[外链图片转存失败,源站可能有防盗链机制,建议将图片保存下来直接上传(img-2Y0Y1R3t-1596171612086)(static/documentation/images/gif007_mapillary_vistas.gif)]
Annotation with polylines
It is used for road markup annotation etc.
Before starting, you need to select the Polyline. You can set a fixed number of points
in the Number of points field, then drawing will be stopped automatically.
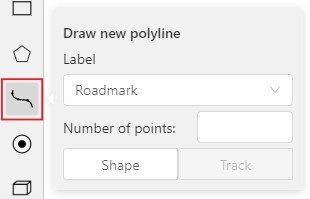
Click Shape to enter drawing mode. There are two ways to draw a polyline —
you either create points by clicking or by dragging a mouse on the screen while holding Shift.
When Shift isn’t pressed, you can zoom in/out (when scrolling the mouse wheel)
and move (when clicking the mouse wheel and moving the mouse), you can delete
previous points by right-clicking on it. Press N again to complete the shape.
You can delete a point by double-clicking on it with pressed Ctrl or right-clicking on a point
and selecting Delete point. Double-click with pressed Shift will open a polyline editor.
There you can create new points(by clicking or dragging) or delete part of a polygon closing
the red line on another point. Press Esc to cancel editing.

Annotation with points
Points in shape mode
It is used for face, landmarks annotation etc.
Before you start you need to select the Points. If necessary you can set a fixed number of points
in the Number of points field, then drawing will be stopped automatically.
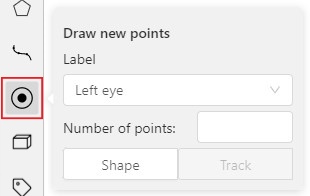
Click Shape to entering the drawing mode. Now you can start annotation of the necessary area.
Points are automatically grouped — all points will be considered linked between each start and finish.
Press N again to finish marking the area. You can delete a point by double-clicking with pressed Ctrl
or right-clicking on a point and selecting Delete point. Double-clicking with pressed Shift will open the points
shape editor. There you can add new points into an existing shape. You can zoom in/out (when scrolling the mouse wheel)
and move (when clicking the mouse wheel and moving the mouse) while drawing. You can drag an object after
it has been drawn and change the position of individual points after finishing an object.

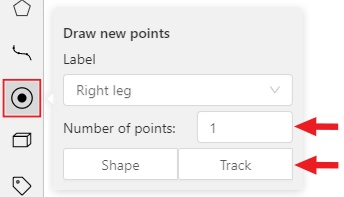
Linear interpolation with one point
You can use linear interpolation for points to annotate a moving object:
-
Before you start, select the
Points. -
Linear interpolation works only with one point, so you need to set
Number of pointsto 1. -
After that select the
Track.
-
Click
Trackto enter the drawing mode left-click to create a point and after that shape will be automatically completed.

-
Move forward a few frames and move the point to the desired position,
this way you will create a keyframe and intermediate frames will be drawn automatically.
You can work with this object as with an interpolated track: you can hide it using theOutside,
move around keyframes, etc.

-
This way you’ll get linear interpolation using the
Points.
Annotation with cuboids
It is used to annotate 3 dimensional objects such as cars, boxes, etc…
Currently the feature supports one point perspective and has the constraint
where the vertical edges are exactly parallel to the sides.
Creating the cuboid
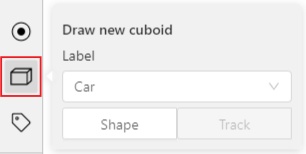
Before you start, you have to make sure that Cuboid is selected
and choose a drawing method ”from rectangle” or “by 4 points”.
Drawing cuboid by 4 points
Choose a drawing method “by 4 points” and click Shape to enter the drawing mode. There are many ways to draw a cuboid.
You can draw the cuboid by placing 4 points, after that the drawing will be completed automatically.
The first 3 points determine the plane of the cuboid while the last point determines the depth of that plane.
For the first 3 points, it is recommended to only draw the 2 closest side faces, as well as the top and bottom face.
A few examples:

从矩形画长方体
Choose a drawing method “from rectangle” and click Shape to enter the drawing mode.
When you draw using the rectangle method, you must select the frontal plane of the object using the bounding box.
The depth and perspective of the resulting cuboid can be edited.
Example:

Editing the cuboid

The cuboid can be edited in multiple ways: by dragging points, by dragging certain faces or by dragging planes.
First notice that there is a face that is painted with gray lines only, let us call it the front face.
You can move the cuboid by simply dragging the shape behind the front face.
The cuboid can be extended by dragging on the point in the middle of the edges.
The cuboid can also be extended up and down by dragging the point at the vertices.
To draw with perspective effects it should be assumed that the front face is the closest to the camera.
To begin simply drag the points on the vertices that are not on the gray/front face while holding Shift.
The cuboid can then be edited as usual.
If you wish to reset perspective effects, you may right click on the cuboid,
and select Reset perspective to return to a regular cuboid.

The location of the gray face can be swapped with the adjacent visible side face.
You can do it by right clicking on the cuboid and selecting Switch perspective orientation.
Note that this will also reset the perspective effects.

Certain faces of the cuboid can also be edited,
these faces are: the left, right and dorsal faces, relative to the gray face.
Simply drag the faces to move them independently from the rest of the cuboid.
You can also use cuboids in track mode, similar to rectangles in track mode (basics and advanced)
带标记的标注
用于标注框架,工作区中没有形状。在开始标记之前,请确保已选择。
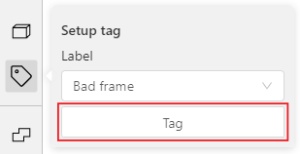
单击标记以创建。您只能在侧栏上使用Tag。
可以使用lock函数更改标签和属性。
“操作”菜单中提供了其他功能,如传播、复制和删除。

自动标注
自动标注用于创建初步标注。
要使用自动注释,您需要一个DL模型。您可以使用主模型或用户上载的模型。
You can find the list of available models in the Models section.
-
To launch automatic annotation, you should open the dashboard and find a task which you want to annotate.
Then click theActionsbutton and choose optionAutomatic Annotationfrom the dropdown menu.

-
In the dialog window select a model you need. DL models are created for specific labels, e.g.
the Crossroad model was taught using footage from cameras located above the highway and it is best to
use this model for the tasks with similar camera angles.
If it’s necessary select theClean old annotationscheckbox.
Adjust the labels so that the task labels will correspond to the labels of the DL model.
For example, let’s consider a task where you have to annotate labels “car” and “person”.
You should connect the “person” label from the model to the “person” label in the task.
As for the “car” label, you should choose the most fitting label available in the model - the “vehicle” label.
The task requires to annotate cars only and choosing the “vehicle” label implies annotation of all vehicles,
in this case using auto annotation will help you complete the task faster.
ClickSubmitto begin the automatic annotation process.

-
At runtime - you can see the percentage of completion.
You can cancel the automatic annotation by clicking on theCancelbutton.

-
The end result of an automatic annotation is an annotation with separate rectangles (or other shapes)

-
Separated bounding boxes can be edited by removing false positives, adding unlabeled objects and
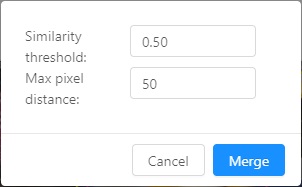
merging into tracks usingReID mergefunction. Click theReID mergebutton in the menu.
You can use the default settings (for more information click here).
To launch the merging process clickMerge. Each frame of the track will be a key frame.
-
You can remove false positives and edit tracks using
SplitandMergefunctions.
Shape grouping
This feature allows us to group several shapes.
You may use the Group Shapes button or shortcuts:
G— start selection / end selection in group modeEsc— close group modeShift+G— reset group for selected shapes
You may select shapes clicking on them or selecting an area.
Grouped shapes will have group_id filed in dumped annotation.
Also you may switch color distribution from an instance (default) to a group.
You have to switch Color By Group checkbox for that.
Shapes that don’t have group_id, will be highlighted in white.


过滤器

使用此功能的原因如下:
- 使用过滤器时,与过滤器不匹配的对象将被隐藏。
- 在具有感兴趣对象的帧之间快速导航。Use
Left Arrow/Right Arrowkeys for this purpose. If there are no objects matching the filter,
the will go to arrows the previous/next frames which contains any objects. - 该列表包含常用和最近使用的筛选器。
要使用该函数,只需在“Filter”文本中指定一个值就足够了字段并按“回车”键。之后,将应用过滤器。
Supported properties:
| Properties | Supported values | Description |
|---|---|---|
width |
number of px or height |
shape width |
height |
number of px or width |
shape height |
label |
"text" or ["text"] |
label name |
serverID |
number | ID of the object on server (You can find out by forming a link to the object through the Action menu) |
clientID |
number | ID of the object in your client (indicated on the objects sidebar) |
type |
"shape", "track", "tag" |
type of object |
shape |
"rectangle","polygon", "polyline","points" |
type of shape |
occluded |
true or false |
occluded properties |
attr |
"text" |
attribute name |
Supported operators:
== - Equally; != - Not equal; > - More; >= - More or equal; < - Less; <= - Less or equal;
() - Brackets; & - And; |- Or.
If you have double quotes in your query string, please escape them using backslash: \" (see the latest example)
All properties and values are case-sensitive. CVAT uses json queries to perform search.
Examples filters
label=="car" | label==["road sign"]- this filter will show only objects with the car or road sign label.shape == "polygon"- this filter will show only polygons.width >= height- this filter will show only those objects whose width will be greater than
or equal to the height.attr["color"] == "black"- this filter will show objects whose color attribute is black.clientID == 50- this filter will show the object with id equal to 50 (e.g. rectangle 50).(label=="car" & attr["parked"]==true) | (label=="pedestrian" & width > 150)- this filter will display objects
with the “car” label and the parking attribute enabled or objects with the “pedestrian” label with a height of more
than 150 pixels(( label==["car \"mazda\""]) | (attr["parked"]==true & width > 150)) & (height > 150 & (clientID == serverID)))-
This filter will show objects with the label “car” mazda “” or objects that have the parked attribute turned on
and have a width of more than 150 pixels, and those listed should have a height of more than 150 pixels
and their clientID is equal to serverID.
Filter history
[外链图片转存失败,源站可能有防盗链机制,建议将图片保存下来直接上传(img-z5h5awyU-1596171612114)(static/documentation/images/image175.jpg)]
You can add previously entered filters and combine them. To do so, click on the input field and a list of previously
entered filters will open. Click on the filters to add them to the input field.
Combined filters occur with the “or” operator.
Analytics
If your CVAT instance was created with analytics support, you can press the Analytics button in the dashboard
and analytics and journals will be opened in a new tab.
[外链图片转存失败,源站可能有防盗链机制,建议将图片保存下来直接上传(img-wpMVgLCz-1596171612114)(static/documentation/images/image113.jpg)]
The analytics allows you to see how much time every user spends on each task
and how much work they did over any time range.
[外链图片转存失败,源站可能有防盗链机制,建议将图片保存下来直接上传(img-f2ahenQn-1596171612115)(static/documentation/images/image097.jpg)]
It also has an activity graph which can be modified with a number of users shown and a timeframe.
[外链图片转存失败,源站可能有防盗链机制,建议将图片保存下来直接上传(img-Y5H8ZBQW-1596171612116)(static/documentation/images/image096.jpg)]
快捷键
许多UI元素都有快捷方式提示。将指针指向必需的元素以查看它。

| 快捷键 | 功能 |
|---|---|
| 主要功能 | |
F2 |
打开/隐藏可用快捷键列表 |
F3 |
转到“设置”页或返回 |
Ctrl+S |
转到“设置”页或返回 |
Ctrl+Z |
取消与对象相关的最新操作 |
Ctrl+Shift+Z or Ctrl+Y |
取消撤消操作 |
Hold Mouse Wheel |
To move an image frame (for example, while drawing) |
| Player | |
F |
Go to the next frame |
D |
Go to the previous frame |
V |
Go forward with a step |
C |
Go backward with a step |
Right |
Search the next frame that satisfies to the filters or next frame which contain any objects |
Left |
Search the previous frame that satisfies to the filters or previous frame which contain any objects |
Space |
Start/stop automatic changing frames |
` or ~ |
Focus on the element to change the current frame |
| Modes | |
N |
Repeat the latest procedure of drawing with the same parameters |
M |
Activate or deactivate mode to merging shapes |
G |
Activate or deactivate mode to grouping shapes |
Shift+G |
Reset group for selected shapes (in group mode) |
Esc |
Cancel any active canvas mode |
| Image operations | |
Ctrl+R |
Change image angle (add 90 degrees) |
Ctrl+Shift+R |
Change image angle (substract 90 degrees) |
Shift+B+= |
Increase brightness level for the image |
Shift+B+- |
Decrease brightness level for the image |
Shift+C+= |
Increase contrast level for the image |
Shift+C+- |
Decrease contrast level for the image |
Shift+S+= |
Increase saturation level for the image |
Shift+S+- |
Increase contrast level for the image |
Shift+G+= |
Make the grid more visible |
Shift+G+- |
Make the grid less visible |
Shift+G+Enter |
Set another color for the image grid |
| Operations with objects | |
Ctrl |
Switch automatic bordering for polygons and polylines during drawing/editing |
Hold Ctrl |
When the shape is active and fix it |
Ctrl+Double-Click on point |
Deleting a point (used when hovering over a point of polygon, polyline, points) |
Shift+Double-Click on point |
Editing a shape (used when hovering over a point of polygon, polyline or points) |
Right-Click on shape |
Display of an object element from objects sidebar |
T+L |
Change locked state for all objects in the sidebar |
L |
Change locked state for an active object |
T+H |
Change hidden state for objects in the sidebar |
H |
Change hidden state for an active object |
Q or / |
Change occluded property for an active object |
Del or Shift+Del |
Delete an active object. Use shift to force delete of locked objects |
- or _ |
Put an active object “farther” from the user (decrease z axis value) |
+ or = |
Put an active object “closer” to the user (increase z axis value) |
Ctrl+C |
Copy shape to CVAT internal clipboard |
Ctrl+V |
Paste a shape from internal CVAT clipboard |
Hold Ctrl while pasting |
When pasting shape from the buffer for multiple pasting. |
Crtl+B |
Make a copy of the object on the following frames |
| Operations are available only for track | |
K |
Change keyframe property for an active track |
O |
Change outside property for an active track |
R |
Go to the next keyframe of an active track |
E |
Go to the previous keyframe of an active track |
| Attribute annotation mode | |
Up Arrow |
Go to the next attribute (up) |
Down Arrow |
Go to the next attribute (down) |
Tab |
Go to the next annotated object in current frame |
Shift+Tab |
Go to the previous annotated object in current frame |
<number> |
Assign a corresponding value to the current attribute |