昨夜西风凋碧树,独上高楼。望尽天涯路。
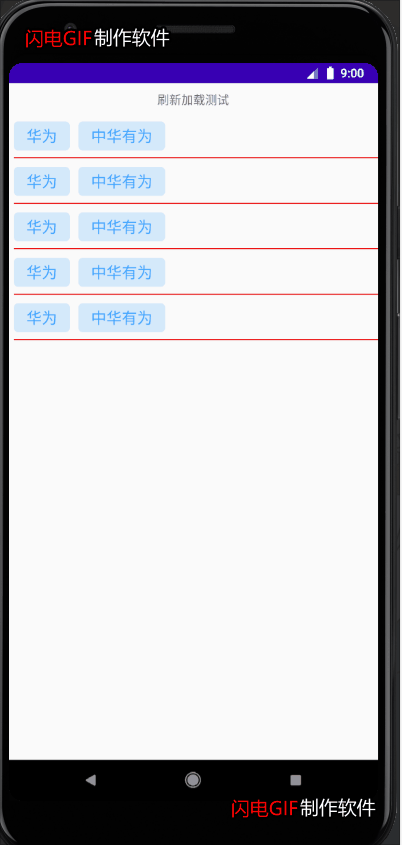
二更,之前一直在忙,本来说更新一下关于RecyclerView 的东西,但是给耽误了,下次一定要补上,今天所做的东西主要是我们在APP中经常用到的刷新功能和加载更多功能,在此之前需要了解SmartRefreshLayout,由于这个知识点很多,有时间再单独写一篇博客,这里默认你已经了解过并且知道怎么用了,了解SmartRefreshLayout请自行百度搜索。这篇文章主要记录一下实现刷新和加载的一个简单例子,代码很简单。先上效果图:
下面开始贴代码,首先是需要添加的依赖。
    //recyclerview的依赖
    implementation "androidx.recyclerview:recyclerview:1.1.0"
    // For control over item selection of both touch and mouse driven selection
    implementation "androidx.recyclerview:recyclerview-selection:1.1.0-rc01"

    //smartrefresh以及经典的头部和尾部
    implementation 'com.scwang.smartrefresh:SmartRefreshLayout:1.1.0'
    implementation  'com.scwang.smart:refresh-header-classics:2.0.1'
然后是Mainactivity的布局代码
<LinearLayout
    xmlns:android="http://schemas.android.com/apk/res/android"
    xmlns:app="http://schemas.android.com/apk/res-auto"
    xmlns:tools="http://schemas.android.com/tools"
    android:layout_width="match_parent"
    android:orientation="vertical"
    android:layout_height="match_parent"
    tools:context=".MainActivity">

    <TextView
        android:layout_marginTop="10dp"
        android:layout_width="wrap_content"
        android:layout_height="wrap_content"
        android:text="刷新加载测试"
        android:layout_gravity="center"
         />

    <com.scwang.smartrefresh.layout.SmartRefreshLayout
        android:id="@+id/smart"
        android:layout_width="match_parent"
        android:layout_height="match_parent"
        android:layout_marginTop="6dp">

        <com.scwang.smartrefresh.layout.header.ClassicsHeader
            android:layout_width="match_parent"
            android:layout_height="wrap_content" />

        <androidx.recyclerview.widget.RecyclerView
            android:id="@+id/test_rlv"
            android:layout_width="match_parent"
            android:layout_height="match_parent" />

        <com.scwang.smartrefresh.layout.footer.ClassicsFooter
            android:layout_width="match_parent"
            android:layout_height="wrap_content" />

    </com.scwang.smartrefresh.layout.SmartRefreshLayout>


</LinearLayout>
再来看看MainActivity的代码
public class MainActivity extends Activity {

    private SmartRefreshLayout smartRefreshLayout;
    private RecyclerView recyclerView;
    private MyAdapter myAdapter;
    private ArrayList<Data> list;

    @Override
    protected void onCreate(Bundle savedInstanceState) {
        super.onCreate(savedInstanceState);
        setContentView(R.layout.activity_main);

        list=new ArrayList<>();
        initData();
        myAdapter=new MyAdapter(MainActivity.this,list);
        recyclerView=findViewById(R.id.test_rlv);
        recyclerView.setLayoutManager(new LinearLayoutManager(MainActivity.this));
        recyclerView.setAdapter(myAdapter);

        smartRefreshLayout=findViewById(R.id.smart);
        smartRefreshLayout.setEnableLoadMore(true);

		//监听下拉动作(也就是刷新)的监听器
        smartRefreshLayout.setOnRefreshListener(new OnRefreshListener() {
            @Override
            public void onRefresh(@NonNull RefreshLayout refreshLayout) {
				//刷新的逻辑是,每次触发刷新的动作时便重新请求一遍后端接口更新数据,
				//本例中由于数据不是从后端动态获取的故不再刷新,直接结束刷新
                smartRefreshLayout.finishRefresh();
            }
        });

		//监听上滑动作(也就是加载更多)的监听器
        smartRefreshLayout.setOnLoadMoreListener(new OnLoadMoreListener() {
            @Override
            public void onLoadMore(@NonNull RefreshLayout refreshLayout) {
                for (int i=0;i<1;i++){
                    list.add(list.size(),new Data("Apple","SSSSSSSS"));
                }
                //同样由于数据是自己写的,故直接每次加载添加一个数据项到列表的结尾,经过试验
                //同时加载好多项也可以实现,就是把for循环改多一些
                myAdapter.notifyItemInserted(list.size());
                myAdapter.notifyDataSetChanged();
                smartRefreshLayout.finishLoadMore();
            }
        });

    }

    private  void initData() {
        for (int i=0;i<5;i++){
            Data data1=new Data("华为","中华有为");
            list.add(data1);
        }
    }
}
最后是MyAdapter的代码(其他的比如Data实体类的代码和recyclerView子项的布局代码就省略啦),适配器的代码也非常简单。
public class MyAdapter extends RecyclerView.Adapter {

    private Activity activity;
    private ArrayList<Data> list;

    public MyAdapter(Activity activity,ArrayList<Data> list){
        this.activity=activity;
        this.list=list;
    }

    @NonNull
    @Override
    public RecyclerView.ViewHolder onCreateViewHolder(@NonNull ViewGroup parent, int viewType) {
        return new MyViewHolder(LayoutInflater.from(activity).inflate(R.layout.item_view,parent,false));
    }

    @Override
    public void onBindViewHolder(@NonNull RecyclerView.ViewHolder holder, int position) {

        ((MyViewHolder)holder).name.setText(list.get(position).getName());
        ((MyViewHolder)holder).info.setText(list.get(position).getInfo());
    }

    @Override
    public int getItemCount() {
        return list.size();
    }

    public class MyViewHolder extends RecyclerView.ViewHolder{

        public TextView name,info;

        public MyViewHolder(@NonNull View itemView) {
            super(itemView);
            name=itemView.findViewById(R.id.str1);
            info=itemView.findViewById(R.id.str2);
        }
    }
}
写完收工,今天比较赶时间。