适用于vue-cli3以上版本搭建的项目
一、接口基址(单个接口地址)
如果你的项目只有一个服务器访问地址(接口地址),不调用别的接口地址的话可以直接在src下的main.js中设置axios的默认基址
//main.js中
import axios from 'axios'
Vue.prototype.$axios = axios
axios.defaults.baseURL='http://localhost:3000';//设置基址
例子如下
//example.vue
<template>
  <div></div>
</template>

<script>
export default {
  name: 'example',
  data(){
    return{
    }
  },
  mounted(){
   this.login()
  },
  methods:{
    //登录接口
    login(){
      this.$axios.post('/login',{
          id:111,
          psw:'1111111'
      }).then(res=>{
        console.log(res)
      })

    }
  }
}
</script>
二、代理接口地址
如果你的项目需要访问多个地址,即调用多个不同的接口来进行数据的交互,这个时候应该设置代理地址
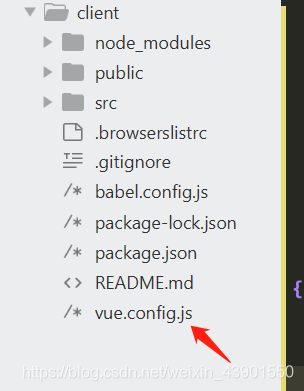
在项目根目录下新建一个vue.config.js文件
//vue.config.js
module.exports = {
   devServer: {
    host: 'localhost',
    port: 8080,//本地运行的端口
    open: true, //配置自动启动浏览器
    hotOnly:false,
    //接口代理
      proxy: {
        '/news': {
          target: 'http://v.juhe.cn/toutiao',//设置要代理访问的接口---这是头条的接口
          changeOrigin: true,
          pathRewrite: {
            '^/news': ''//重写访问地址,在请求时可以省略target的地址,直接以/news开头
          }
        },
        '/api': {
          target: 'http://localhost:3000',//设置要代理访问的接口----这是我自己的接口
          changeOrigin: true,
          pathRewrite: {
            '^/api': ''  //重写访问地址,在请求时可以省略target的地址,直接以/api开头
          }
        }
      }
   },
例子如下
//example.vue
<template>
  <div></div>
</template>

<script>
export default {
  name: 'example',
  data(){
    return{
    }
  },
  mounted(){
   this.login()
   this.getnews();
  },
  methods:{
    getnews(){
      //获取头条信息
      this.$axios.get('/news/index',{params:{
        key:'d2f47f5d5981c66091cfa284cecfd781',
        type:'头条'
      }}).then(res=>{
        console.log(res)
      })
    },
    //登录接口
    login(){
      this.$axios.post('/api/login',{
          id:111,
          psw:'111111'
      }).then(res=>{
        console.log(res)
      })

    }
  }
}
</script>