打算把这篇博客记录完之后,写一篇使用深度学习完成图像风格转换的博客,先立个标志,这篇博客希望能在春节期间完成,年后估计还有的忙。
目录
保存和载入模型,使用谷歌的图像识别网络成立以来,V3进行图像识别
saver_save
保存模型
import tensorflow as tf
from tensorflow.examples.tutorials.mnist import input_data
#载入数据集
mnist = input_data.read_data_sets("MNIST_data",one_hot=True)
#每个批次100张照片
batch_size = 100
#计算一共有多少个批次
n_batch = mnist.train.num_examples
#定义两个placeholder
x = tf.placeholder(tf.float32,[None,784])
y = tf.placeholder(tf.float32,[None,10])
#创建一个简单的神经网络,输入层784个神经元,输出层10个神经元
W = tf.Variable(tf.zeros([784,10]))
b = tf.Variable(tf.zeros([10]))
prediction = tf.nn.softmax(tf.matmul(x,W)+b)
#二次代价函数
# loss = tf.reduce_mean(tf.square(y-prediction))
loss = tf.reduce_mean(tf.nn.softmax_cross_entropy_with_logits(labels=y,logits=prediction))
#使用梯度下降法
train_step = tf.train.GradientDescentOptimizer(0.2).minimize(loss)
#初始化变量
init = tf.global_variables_initializer()
#结果存放在一个布尔型列表中
correct_prediction = tf.equal(tf.argmax(y,1),tf.argmax(prediction,1))#argmax返回一维张量中最大的值所在的位置
#求准确率
accuracy = tf.reduce_mean(tf.cast(correct_prediction,tf.float32))
####
saver = tf.train.Saver()
with tf.Session() as sess:
sess.run(init)
for epoch in range(11):
for batch in range(n_batch):
batch_xs,batch_ys = mnist.train.next_batch(batch_size)
sess.run(train_step,feed_dict={x:batch_xs,y:batch_ys})
acc = sess.run(accuracy,feed_dict={x:mnist.test.images,y:mnist.test.labels})
print("Iter " + str(epoch) + ",Testing Accuracy " + str(acc))
#保存模型
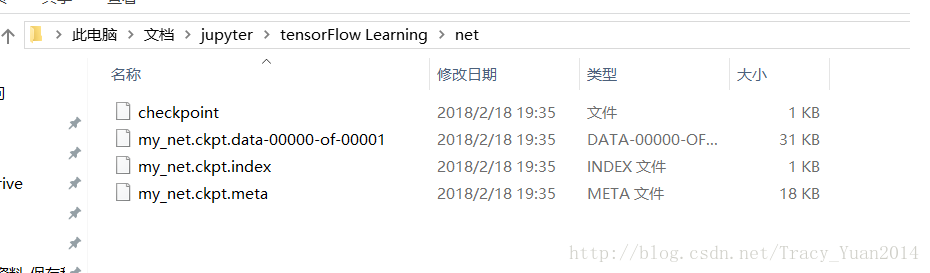
saver.save(sess,'net/my_net.ckpt')
- 1
- 2
- 3
- 4
- 五
- 6
- 7
- 8
- 9
- 10
- 11
- 12
- 13
- 14
- 15
- 16
- 17
- 18
- 19
- 20
- 21
- 22
- 23
- 24
- 25
- 26
- 27
- 28
- 29
- 三十
- 31
- 32
- 33
- 34
- 35
- 36
- 37
- 38
- 39
- 40
- 41
- 42
- 43
- 44
- 45
- 46
此时在当前路径会生成模型文件
save_restore
加载模型
import tensorflow as tf
from tensorflow.examples.tutorials.mnist import input_data
#载入数据集
mnist = input_data.read_data_sets("MNIST_data",one_hot=True)
#每个批次100张照片
batch_size = 100
#计算一共有多少个批次
n_batch = mnist.train.num_examples
#定义两个placeholder
x = tf.placeholder(tf.float32,[None,784])
y = tf.placeholder(tf.float32,[None,10])
#创建一个简单的神经网络,输入层784个神经元,输出层10个神经元
W = tf.Variable(tf.zeros([784,10]))
b = tf.Variable(tf.zeros([10]))
prediction = tf.nn.softmax(tf.matmul(x,W)+b)
#二次代价函数
# loss = tf.reduce_mean(tf.square(y-prediction))
loss = tf.reduce_mean(tf.nn.softmax_cross_entropy_with_logits(labels=y,logits=prediction))
#使用梯度下降法
train_step = tf.train.GradientDescentOptimizer(0.2).minimize(loss)
#初始化变量
init = tf.global_variables_initializer()
#结果存放在一个布尔型列表中
correct_prediction = tf.equal(tf.argmax(y,1),tf.argmax(prediction,1))#argmax返回一维张量中最大的值所在的位置
#求准确率
accuracy = tf.reduce_mean(tf.cast(correct_prediction,tf.float32))
saver = tf.train.Saver()
with tf.Session() as sess:
sess.run(init)
print(sess.run(accuracy,feed_dict={x:mnist.test.images,y:mnist.test.labels}))
saver.restore(sess,'net/my_net.ckpt')
print(sess.run(accuracy,feed_dict={x:mnist.test.images,y:mnist.test.labels}))
- 1
- 2
- 3
- 4
- 五
- 6
- 7
- 8
- 9
- 10
- 11
- 12
- 13
- 14
- 15
- 16
- 17
- 18
- 19
- 20
- 21
- 22
- 23
- 24
- 25
- 26
- 27
- 28
- 29
- 三十
- 31
- 32
- 33
- 34
- 35
- 36
- 37
- 38
提取MNIST_data \ train-images-idx3-ubyte.gz
提取MNIST_data \ train-labels-idx1-ubyte.gz
提取MNIST_data \ t10k-images-idx3-ubyte.gz
提取MNIST_data \ t10k-labels-idx1-ubyte.gz
0.098
INFO :tensorflow:从net / my_net.ckpt
0.9174 恢复参数
保存模型参数和结构
上面的方法只能保存模型的参数,不能保存模型的结构,所以下次使用必须先定义模型的结构,再加载模型参数使用。
本节介绍同时保存模型参数和结构的方法。
import tensorflow as tf
from tensorflow.examples.tutorials.mnist import input_data
mnist = input_data.read_data_sets("MNIST_data",one_hot=True)
batch_size = 100
n_batch = mnist.train.num_examples // batch_size
x = tf.placeholder(tf.float32,[None,784],name='x-input')
y = tf.placeholder(tf.float32,[None,10])
W = tf.Variable(tf.zeros([784,10]))
b = tf.Variable(tf.zeros([10]))
prediction = tf.nn.softmax(tf.matmul(x,W)+b, name='output')
loss = tf.reduce_mean(tf.nn.softmax_cross_entropy_with_logits(labels=y,logits=prediction))
train_step = tf.train.GradientDescentOptimizer(0.2).minimize(loss)
init = tf.global_variables_initializer()
correct_prediction = tf.equal(tf.argmax(y,1),tf.argmax(prediction,1))
accuracy = tf.reduce_mean(tf.cast(correct_prediction,tf.float32))
with tf.Session() as sess:
sess.run(init)
for epoch in range(11):
for batch in range(n_batch):
batch_xs,batch_ys = mnist.train.next_batch(batch_size)
sess.run(train_step,feed_dict={x:batch_xs,y:batch_ys})
acc = sess.run(accuracy,feed_dict={x:mnist.test.images,y:mnist.test.labels})
print("Iter " + str(epoch) + ",Testing Accuracy " + str(acc))
output_graph_def = tf.graph_util.convert_variables_to_constants(sess, sess.graph_def, output_node_names=['output'])
with tf.gfile.FastGFile('./models/tfmodel.pb',mode='wb') as f:
f.write(output_graph_def.SerializeToString())
- 1
- 2
- 3
- 4
- 五
- 6
- 7
- 8
- 9
- 10
- 11
- 12
- 13
- 14
- 15
- 16
- 17
- 18
- 19
- 20
- 21
- 22
- 23
- 24
- 25
- 26
- 27
- 28
- 29
- 三十
- 31
- 32
- 33
- 34
- 35
- 36
- 37
- 38
- 39
- 40
- 41
- 42
- 43
- 44
- 45
提取MNIST_data \ train-images-idx3-ubyte.gz
提取MNIST_data \ train-labels-idx1-ubyte.gz
提取MNIST_data \ t10k-images-idx3-ubyte.gz
提取MNIST_data \ t10k-labels-idx1-ubyte.gz
Iter 0 ,测试准确度0.824
Iter 1,测试准确度0.8895
Iter 2,测试准确度0.8992
Iter 3,测试准确度0.9053
Iter 4,测试准确度0.9084
Iter 5,测试准确度0.9112
Iter 6,测试准确
度0.9116
Iter 7,测试准确度0.9135 Iter 8,测试准确度0.9146
Iter 9,测试精度0.9155
Iter 10,测试精度0.918
信息:tensorflow:冻结2个变量。
将2个变量转换为常量操作。
载入模型参数和结构
import tensorflow as tf
from tensorflow.examples.tutorials.mnist import input_data
mnist = input_data.read_data_sets("MNIST_data",one_hot=True)
y = tf.placeholder(tf.float32,[None,10])
with tf.gfile.FastGFile('./models/tfmodel.pb', 'rb') as f:
graph_def = tf.GraphDef()
graph_def.ParseFromString(f.read())
tf.import_graph_def(graph_def, name='')
with tf.Session() as sess:
output = sess.graph.get_tensor_by_name('output:0')
correct_prediction = tf.equal(tf.argmax(y,1),tf.argmax(output,1))
accuracy = tf.reduce_mean(tf.cast(correct_prediction,tf.float32))
print(sess.run(accuracy,feed_dict={'x-input:0':mnist.test.images,y:mnist.test.labels}))
- 1
- 2
- 3
- 4
- 五
- 6
- 7
- 8
- 9
- 10
- 11
- 12
- 13
- 14
- 15
- 16
- 17
- 18
- 19
提取MNIST_data \ train-images-idx3-ubyte.gz
提取MNIST_data \ train-labels-idx1-ubyte.gz
提取MNIST_data \ t10k-images-idx3-ubyte.gz
提取MNIST_data \ t10k-labels-idx1-ubyte.gz
0.918
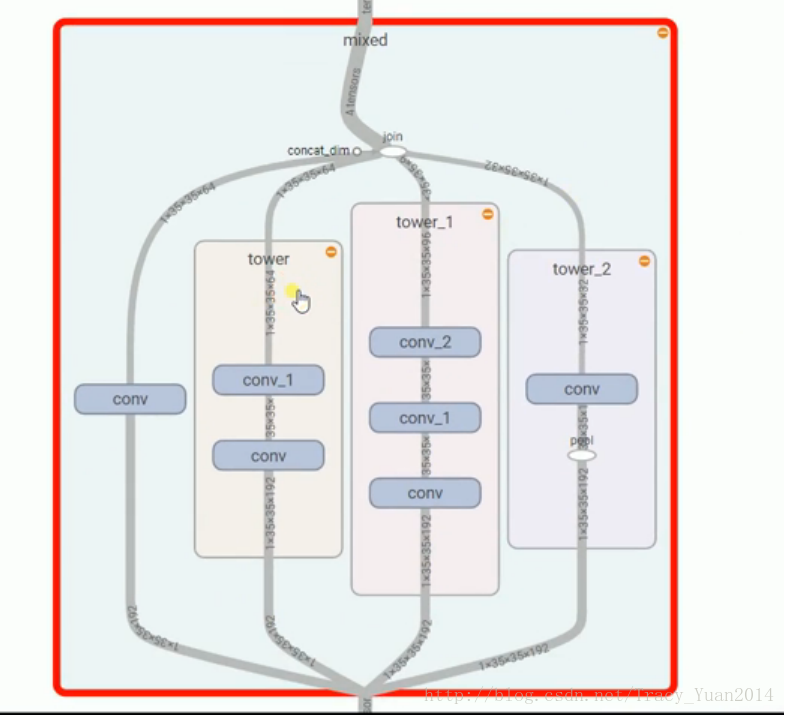
下载谷歌图像识别网络成立以来,V3并查看其结构
import tensorflow as tf
import os
import tarfile
import requests
inception_pretrain_model_url = 'http://download.tensorflow.org/models/image/imagenet/inception-2015-12-05.tgz'
inception_pretrain_model_dir = "inception_model"
if not os.path.exists(inception_pretrain_model_dir):
os.makedirs(inception_pretrain_model_dir)
filename = inception_pretrain_model_url.split('/')[-1]
filepath = os.path.join(inception_pretrain_model_dir, filename)
if not os.path.exists(filepath):
print("download: ", filename)
r = requests.get(inception_pretrain_model_url, stream=True)
with open(filepath, 'wb') as f:
for chunk in r.iter_content(chunk_size=1024):
if chunk:
f.write(chunk)
print("finish: ", filename)
tarfile.open(filepath, 'r:gz').extractall(inception_pretrain_model_dir)
log_dir = 'inception_log'
if not os.path.exists(log_dir):
os.makedirs(log_dir)
inception_graph_def_file = os.path.join(inception_pretrain_model_dir, 'classify_image_graph_def.pb')
with tf.Session() as sess:
with tf.gfile.FastGFile(inception_graph_def_file, 'rb') as f:
graph_def = tf.GraphDef()
graph_def.ParseFromString(f.read())
tf.import_graph_def(graph_def, name='')
writer = tf.summary.FileWriter(log_dir, sess.graph)
writer.close()
- 1
- 2
- 3
- 4
- 五
- 6
- 7
- 8
- 9
- 10
- 11
- 12
- 13
- 14
- 15
- 16
- 17
- 18
- 19
- 20
- 21
- 22
- 23
- 24
- 25
- 26
- 27
- 28
- 29
- 三十
- 31
- 32
- 33
- 34
- 35
- 36
- 37
- 38
- 39
- 40
成立网络结果中比较特别的MIXED的结构
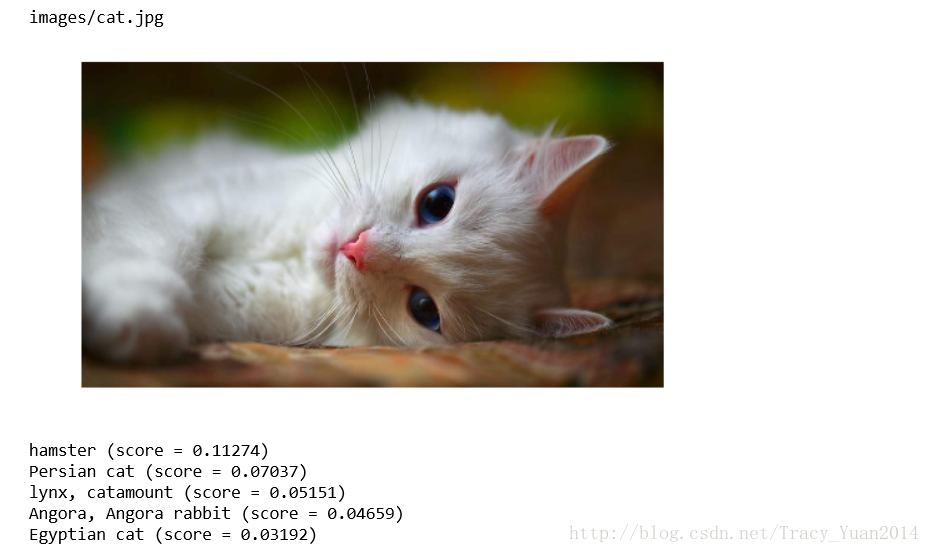
使用盗梦空间-V3做各种图像的识别
import tensorflow as tf
import os
import numpy as np
import re
from PIL import Image
import matplotlib.pyplot as plt
class NodeLookup(object):
def __init__(self):
label_lookup_path = 'inception_model/imagenet_2012_challenge_label_map_proto.pbtxt'
uid_lookup_path = 'inception_model/imagenet_synset_to_human_label_map.txt'
self.node_lookup = self.load(label_lookup_path, uid_lookup_path)
def load(self, label_lookup_path, uid_lookup_path):
proto_as_ascii_lines = tf.gfile.GFile(uid_lookup_path).readlines()
uid_to_human = {}
for line in proto_as_ascii_lines :
line=line.strip('\n')
parsed_items = line.split('\t')
uid = parsed_items[0]
human_string = parsed_items[1]
uid_to_human[uid] = human_string
proto_as_ascii = tf.gfile.GFile(label_lookup_path).readlines()
node_id_to_uid = {}
for line in proto_as_ascii:
if line.startswith(' target_class:'):
target_class = int(line.split(': ')[1])
if line.startswith(' target_class_string:'):
target_class_string = line.split(': ')[1]
node_id_to_uid[target_class] = target_class_string[1:-2]
node_id_to_name = {}
for key, val in node_id_to_uid.items():
name = uid_to_human[val]
node_id_to_name[key] = name
return node_id_to_name
def id_to_string(self, node_id):
if node_id not in self.node_lookup:
return ''
return self.node_lookup[node_id]
with tf.gfile.FastGFile('inception_model/classify_image_graph_def.pb', 'rb') as f:
graph_def = tf.GraphDef()
graph_def.ParseFromString(f.read())
tf.import_graph_def(graph_def, name='')
with tf.Session() as sess:
softmax_tensor = sess.graph.get_tensor_by_name('softmax:0')
for root,dirs,files in os.walk('images/'):
for file in files:
image_data = tf.gfile.FastGFile(os.path.join(root,file), 'rb').read()
predictions = sess.run(softmax_tensor,{'DecodeJpeg/contents:0': image_data})
predictions = np.squeeze(predictions)
image_path = os.path.join(root,file)
print(image_path)
img=Image.open(image_path)
plt.imshow(img)
plt.axis('off')
plt.show()
top_k = predictions.argsort()[-5:][::-1]
node_lookup = NodeLookup()
for node_id in top_k:
human_string = node_lookup.id_to_string(node_id)
score = predictions[node_id]
print('%s (score = %.5f)' % (human_string, score))
print()
- 1
- 2
- 3
- 4
- 五
- 6
- 7
- 8
- 9
- 10
- 11
- 12
- 13
- 14
- 15
- 16
- 17
- 18
- 19
- 20
- 21
- 22
- 23
- 24
- 25
- 26
- 27
- 28
- 29
- 三十
- 31
- 32
- 33
- 34
- 35
- 36
- 37
- 38
- 39
- 40
- 41
- 42
- 43
- 44
- 45
- 46
- 47
- 48
- 49
- 50
- 51
- 52
- 53
- 54
- 55
- 56
- 57
- 58
- 59
- 60
- 61
- 62
- 63
- 64
- 65
- 66
- 67
- 68
- 69
- 70
- 71
- 72
- 73
- 74
- 75
- 76
- 77
- 78
- 79
- 80
- 81
- 82
- 83
- 84
- 85
- 86
- 87
- 88
Tensorflow的GPU版本安装。设计自己的网络模型,并训练自己的网络模型进行图像识别
GPU版本的tensorflow安装
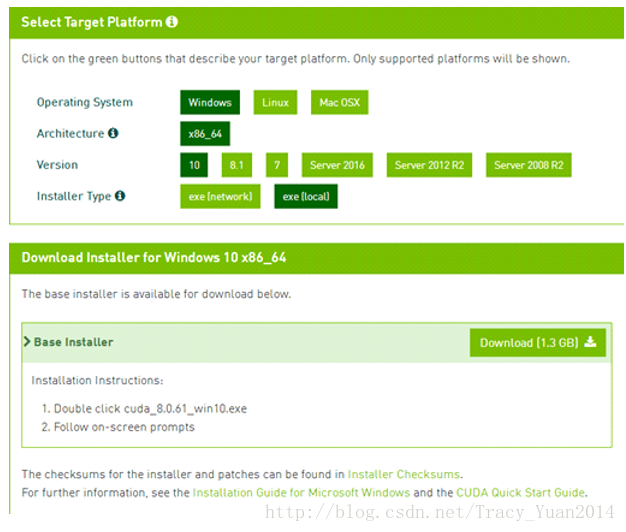
安装CUDA
- 准备好NVIDIA的显卡,下载安装CUDA https://developer.nvidia.com/cuda-downloads
- 安装好之后把CUDA安装目录下的bin和lib \ x64添加到路径环境变量中把CUDA安装目录下的extras \ CUPTI \ libx64也添加到路径环境变量中
安装cuDNN
- cuDNN下载https://developer.nvidia.com/rdp/cudnn-download
- 解压缩包,把压缩包中bin,include,lib中的文件分别拷贝到C:\ Program Files \ NVIDIA GPU Computing Toolkit \ CUDA \ v8.0目录下对应目录中
- 将C:\ Program Files \ NVIDIA GPU计算工具包\ CUDA \ v8.0 \ extras \ CUPTI \ libx64 \ cupti64_80.dll拷贝到C:\ Program Files \ NVIDIA GPU计算工具包\ CUDA \ v8.0 \ bi
安装tensorflow gpu
- 点卸载tensorflow
- pip安装tensorflow-gpu
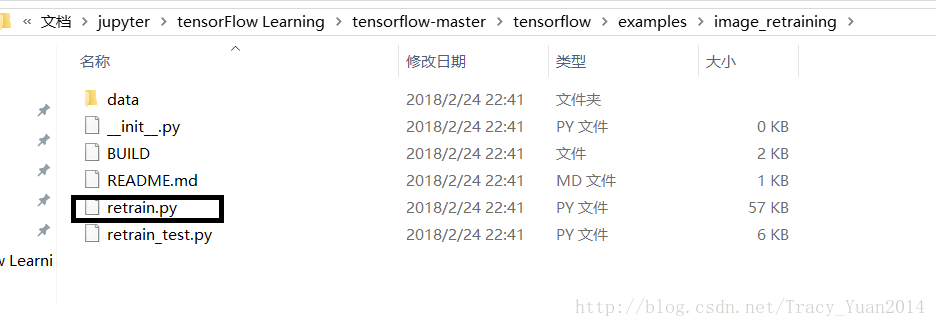
再培训,图像识别模式
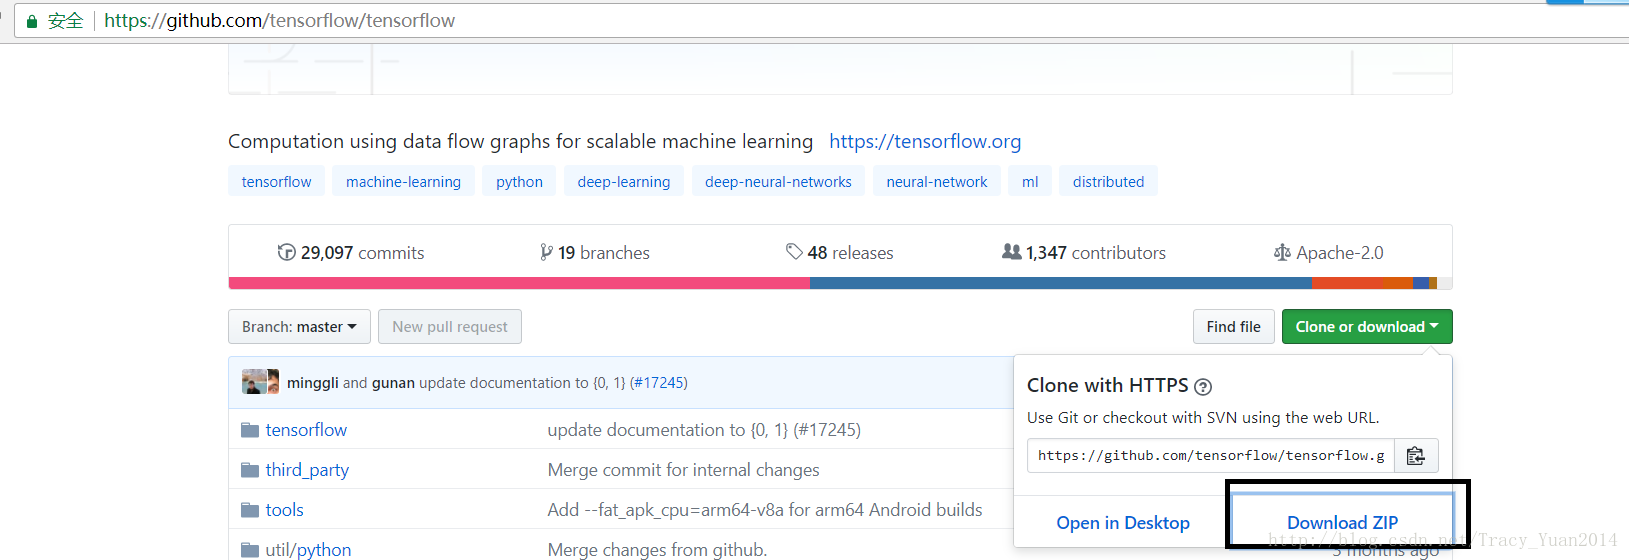
进行重训练需要使用上面压缩包解压后的这个路径下的文件
英国牛津VGG数据集
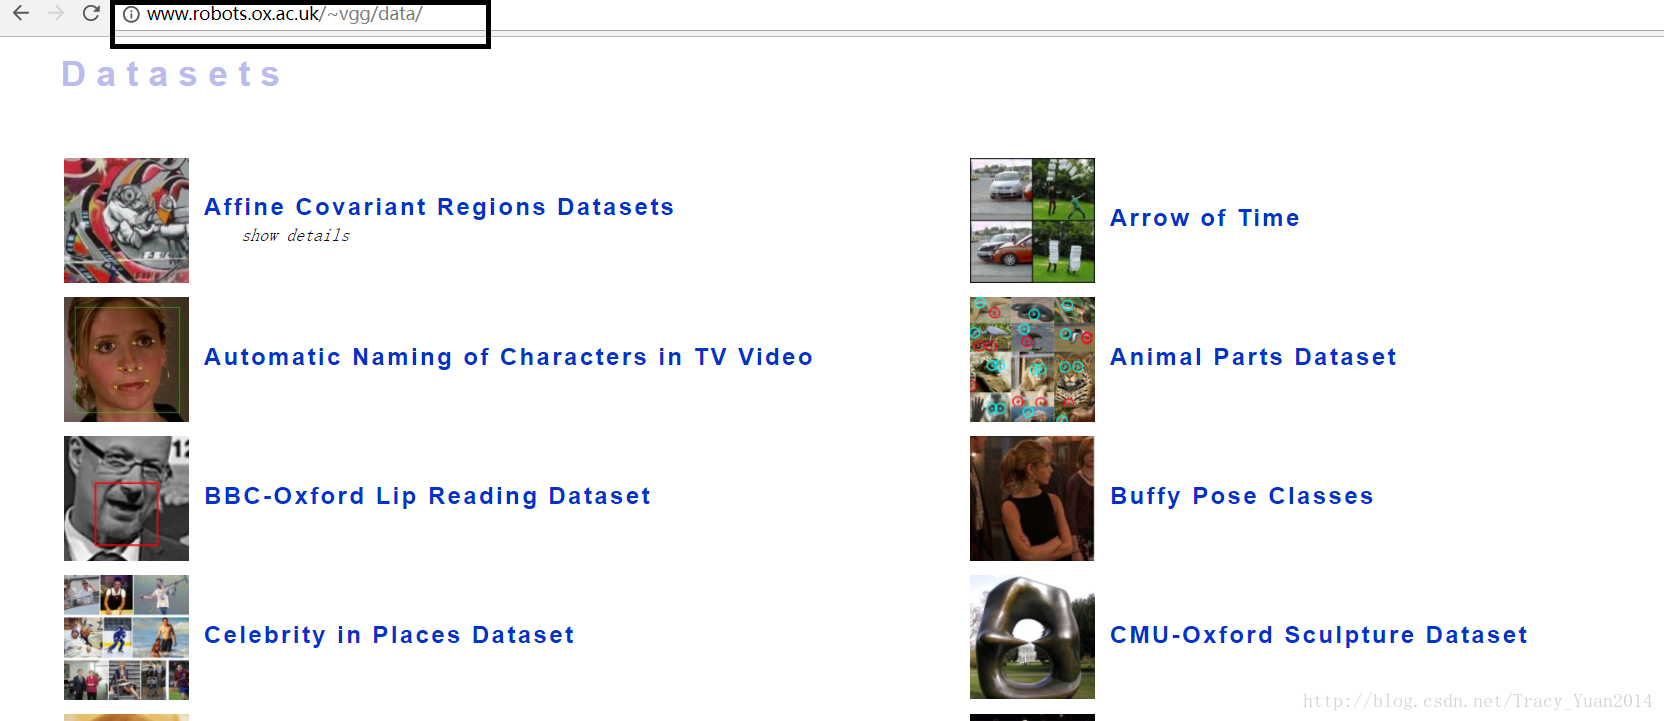
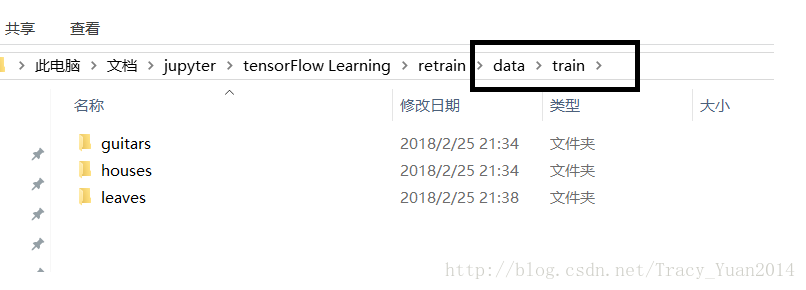
将要分类的图片从上述网址上进行下载后按此方式进行存放
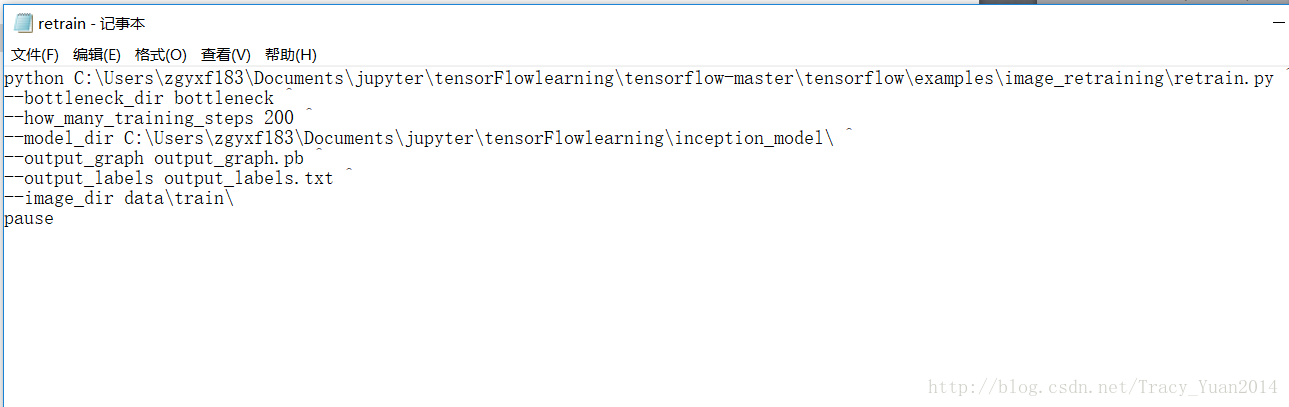
python D:/Tensorflow/tensorflow-master/tensorflow/examples/image_retraining/retrain.py ^
--bottleneck_dir bottleneck ^
--how_many_training_steps 200 ^
--model_dir D:/Tensorflow/inception_model/ ^
--output_graph output_graph.pb ^
--output_labels output_labels.txt ^
--image_dir data/train/
pause
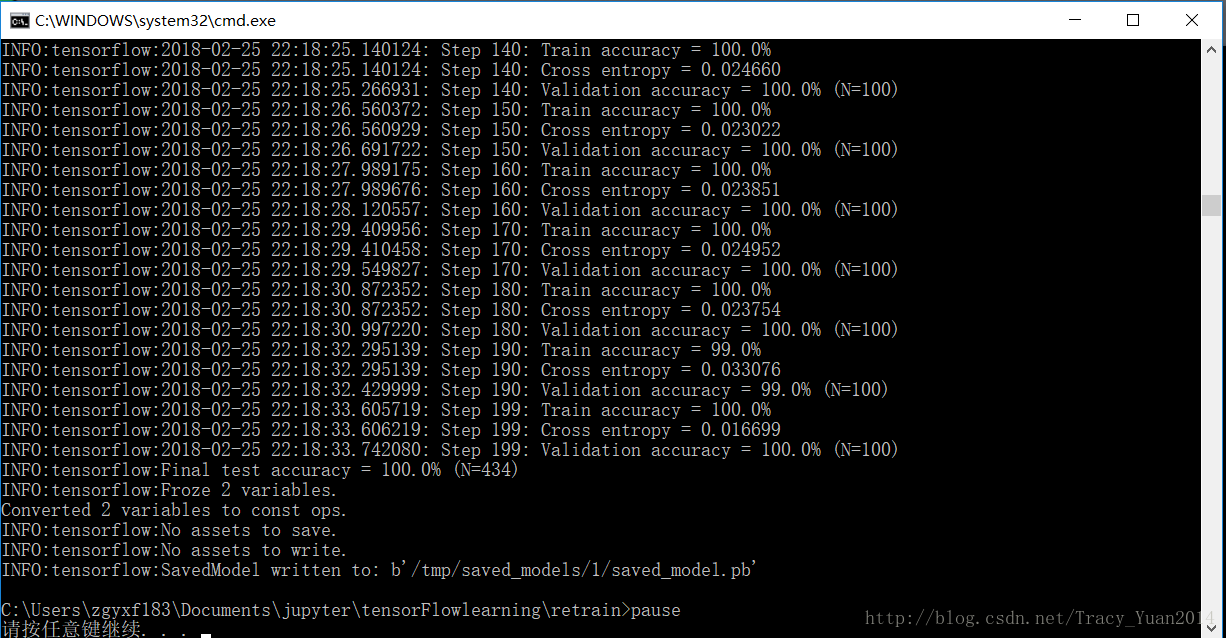
验证这个模型的识别率
import tensorflow as tf
import os
import numpy as np
import re
from PIL import Image
import matplotlib.pyplot as plt
lines = tf.gfile.GFile('retrain/output_labels.txt').readlines()
uid_to_human = {}
for uid,line in enumerate(lines) :
line=line.strip('\n')
uid_to_human[uid] = line
def id_to_string(node_id):
if node_id not in uid_to_human:
return ''
return uid_to_human[node_id]
with tf.gfile.FastGFile('retrain/output_graph.pb', 'rb') as f:
graph_def = tf.GraphDef()
graph_def.ParseFromString(f.read())
tf.import_graph_def(graph_def, name='')
with tf.Session() as sess:
softmax_tensor = sess.graph.get_tensor_by_name('final_result:0')
for root,dirs,files in os.walk('retrain/images/'):
for file in files:
image_data = tf.gfile.FastGFile(os.path.join(root,file), 'rb').read()
predictions = sess.run(softmax_tensor,{'DecodeJpeg/contents:0': image_data})
predictions = np.squeeze(predictions)
image_path = os.path.join(root,file)
print(image_path)
img=Image.open(image_path)
plt.imshow(img)
plt.axis('off')
plt.show()
top_k = predictions.argsort()[::-1]
print(top_k)
for node_id in top_k:
human_string = id_to_string(node_id)
score = predictions[node_id]
print('%s (score = %.5f)' % (human_string, score))
print()
- 1
- 2
- 3
- 4
- 五
- 6
- 7
- 8
- 9
- 10
- 11
- 12
- 13
- 14
- 15
- 16
- 17
- 18
- 19
- 20
- 21
- 22
- 23
- 24
- 25
- 26
- 27
- 28
- 29
- 三十
- 31
- 32
- 33
- 34
- 35
- 36
- 37
- 38
- 39
- 40
- 41
- 42
- 43
- 44
- 45
- 46
- 47
- 48
- 49
- 50
将验证集存放在重排序/图像下。
TF-RECORD的使用以及从头训练图像识别模型
在github上中下载tensorflow /模型压缩的文件
本。次使用超薄
import tensorflow as tf
import os
import random
import math
import sys
_NUM_TEST = 300
_RANDOM_SEED = 0
_NUM_SHARDS = 2
DATASET_DIR ="C:/Users/zgyxf183/Documents/jupyter/tensorFlowlearning/slim/images"
LABELS_FILENAME ="C:/Users/zgyxf183/Documents/jupyter/tensorFlowlearning/slim/images/labels.txt"
def _get_dataset_filename(dataset_dir, split_name, shard_id):
output_filename = 'image_%s_%05d-of-%05d.tfrecord' % (split_name, shard_id, _NUM_SHARDS)
return os.path.join(dataset_dir, output_filename)
def _dataset_exists(dataset_dir):
for split_name in ['train', 'test']:
for shard_id in range(_NUM_SHARDS):
output_filename = _get_dataset_filename(dataset_dir, split_name, shard_id)
if not tf.gfile.Exists(output_filename):
return False
return True
def _get_filenames_and_classes(dataset_dir):
directories = []
class_names = []
for filename in os.listdir(dataset_dir):
path = os.path.join(dataset_dir, filename)
if os.path.isdir(path):
directories.append(path)
class_names.append(filename)
photo_filenames = []
for directory in directories:
for filename in os.listdir(directory):
path = os.path.join(directory, filename)
photo_filenames.append(path)
return photo_filenames, class_names
def int64_feature(values):
if not isinstance(values, (tuple, list)):
values = [values]
return tf.train.Feature(int64_list=tf.train.Int64List(value=values))
def bytes_feature(values):
return tf.train.Feature(bytes_list=tf.train.BytesList(value=[values]))
def image_to_tfexample(image_data, image_format, class_id):
return tf.train.Example(features=tf.train.Features(feature={
'image/encoded': bytes_feature(image_data),
'image/format': bytes_feature(image_format),
'image/class/label': int64_feature(class_id),
}))
def write_label_file(labels_to_class_names, dataset_dir,filename=LABELS_FILENAME):
labels_filename = os.path.join(dataset_dir, filename)
with tf.gfile.Open(labels_filename, 'w') as f:
for label in labels_to_class_names:
class_name = labels_to_class_names[label]
f.write('%d:%s\n' % (label, class_name))
def _convert_dataset(split_name, filenames, class_names_to_ids, dataset_dir):
assert split_name in ['train', 'test']
num_per_shard = int(len(filenames) / _NUM_SHARDS)
with tf.Graph().as_default():
with tf.Session() as sess:
for shard_id in range(_NUM_SHARDS):
output_filename = _get_dataset_filename(dataset_dir, split_name, shard_id)
with tf.python_io.TFRecordWriter(output_filename) as tfrecord_writer:
start_ndx = shard_id * num_per_shard
end_ndx = min((shard_id+1) * num_per_shard, len(filenames))
for i in range(start_ndx, end_ndx):
try:
sys.stdout.write('\r>> Converting image %d/%d shard %d' % (i+1, len(filenames), shard_id))
sys.stdout.flush()
image_data = tf.gfile.FastGFile(filenames[i], 'rb').read()
class_name = os.path.basename(os.path.dirname(filenames[i]))
class_id = class_names_to_ids[class_name]
example = image_to_tfexample(image_data, b'jpg', class_id)
tfrecord_writer.write(example.SerializeToString())
except IOError as e:
print("Could not read:",filenames[i])
print("Error:",e)
print("Skip it\n")
sys.stdout.write('\n')
sys.stdout.flush()
if __name__ == '__main__':
if _dataset_exists(DATASET_DIR):
print('tfcecord文件已存在')
else:
photo_filenames, class_names = _get_filenames_and_classes(DATASET_DIR)
class_names_to_ids = dict(zip(class_names, range(len(class_names))))
random.seed(_RANDOM_SEED)
random.shuffle(photo_filenames)
training_filenames = photo_filenames[_NUM_TEST:]
testing_filenames = photo_filenames[:_NUM_TEST]
_convert_dataset('train', training_filenames, class_names_to_ids, DATASET_DIR)
_convert_dataset('test', testing_filenames, class_names_to_ids, DATASET_DIR)
labels_to_class_names = dict(zip(range(len(class_names)), class_names))
write_label_file(labels_to_class_names, DATASET_DIR)
- 1
- 2
- 3
- 4
- 五
- 6
- 7
- 8
- 9
- 10
- 11
- 12
- 13
- 14
- 15
- 16
- 17
- 18
- 19
- 20
- 21
- 22
- 23
- 24
- 25
- 26
- 27
- 28
- 29
- 三十
- 31
- 32
- 33
- 34
- 35
- 36
- 37
- 38
- 39
- 40
- 41
- 42
- 43
- 44
- 45
- 46
- 47
- 48
- 49
- 50
- 51
- 52
- 53
- 54
- 55
- 56
- 57
- 58
- 59
- 60
- 61
- 62
- 63
- 64
- 65
- 66
- 67
- 68
- 69
- 70
- 71
- 72
- 73
- 74
- 75
- 76
- 77
- 78
- 79
- 80
- 81
- 82
- 83
- 84
- 85
- 86
- 87
- 88
- 89
- 90
- 91
- 92
- 93
- 94
- 95
- 96
- 97
- 98
- 99
- 100
- 101
- 102
- 103
- 104
- 105
- 106
- 107
- 108
- 109
- 110
- 111
- 112
- 113
- 114
- 115
- 116
- 117
- 118
- 119
- 120
- 121
- 122
- 123
- 124
- 125
- 126
- 127
- 128
- 129
- 130
- 131
- 132
- 133
- 134
- 135
在这个程序里遇到这个问题:
UnicodeDecodeError:'utf-8'编解码器无法在位置0解码字节0xff:无效启动
出错点:
image_data = tf.gfile.FastGFile(filename,'r')。read()
改成:
image_data = tf.gfile.FastGFile(filename,'rb')。read()
上面的程序是修改后没有题题的版本。
下面将TF-记录文件读取到内存中:
进入超薄/集/
对文件dataset_factory.py进行修改
datasets_map = {
    'cifar10': cifar10,
    'flowers': flowers,
    'imagenet': imagenet,
    'mnist': mnist,
}
在上述代码段中加入自己的训练集
datasets_map = {
    'cifar10': cifar10,
    'flowers': flowers,
    'imagenet': imagenet,
    'mnist': mnist,
    'myimages':myimages,
}
在相同路径下创建myimages.py
"""Provides data for the flowers dataset.
The dataset scripts used to create the dataset can be found at:
tensorflow/models/slim/datasets/download_and_convert_flowers.py
"""
from __future__ import absolute_import
from __future__ import division
from __future__ import print_function
import os
import tensorflow as tf
from datasets import dataset_utils
slim = tf.contrib.slim
_FILE_PATTERN = 'image_%s_*.tfrecord'
SPLITS_TO_SIZES = {'train': 300, 'test': 300}
_NUM_CLASSES = 2
_ITEMS_TO_DESCRIPTIONS = {
'image': 'A color image of varying size.',
'label': 'A single integer between 0 and 4',
}
def get_split(split_name, dataset_dir, file_pattern=None, reader=None):
"""Gets a dataset tuple with instructions for reading flowers.
Args:
split_name: A train/validation split name.
dataset_dir: The base directory of the dataset sources.
file_pattern: The file pattern to use when matching the dataset sources.
It is assumed that the pattern contains a '%s' string so that the split
name can be inserted.
reader: The TensorFlow reader type.
Returns:
A `Dataset` namedtuple.
Raises:
ValueError: if `split_name` is not a valid train/validation split.
"""
if split_name not in SPLITS_TO_SIZES:
raise ValueError('split name %s was not recognized.' % split_name)
if not file_pattern:
file_pattern = _FILE_PATTERN
file_pattern = os.path.join(dataset_dir, file_pattern % split_name)
if reader is None:
reader = tf.TFRecordReader
keys_to_features = {
'image/encoded': tf.FixedLenFeature((), tf.string, default_value=''),
'image/format': tf.FixedLenFeature((), tf.string, default_value='png'),
'image/class/label': tf.FixedLenFeature(
[], tf.int64, default_value=tf.zeros([], dtype=tf.int64)),
}
items_to_handlers = {
'image': slim.tfexample_decoder.Image(),
'label': slim.tfexample_decoder.Tensor('image/class/label'),
}
decoder = slim.tfexample_decoder.TFExampleDecoder(
keys_to_features, items_to_handlers)
labels_to_names = None
if dataset_utils.has_labels(dataset_dir):
labels_to_names = dataset_utils.read_label_file(dataset_dir)
return slim.dataset.Dataset(
data_sources=file_pattern,
reader=reader,
decoder=decoder,
num_samples=SPLITS_TO_SIZES[split_name],
items_to_descriptions=_ITEMS_TO_DESCRIPTIONS,
num_classes=_NUM_CLASSES,
labels_to_names=labels_to_names)
- 1
- 2
- 3
- 4
- 五
- 6
- 7
- 8
- 9
- 10
- 11
- 12
- 13
- 14
- 15
- 16
- 17
- 18
- 19
- 20
- 21
- 22
- 23
- 24
- 25
- 26
- 27
- 28
- 29
- 三十
- 31
- 32
- 33
- 34
- 35
- 36
- 37
- 38
- 39
- 40
- 41
- 42
- 43
- 44
- 45
- 46
- 47
- 48
- 49
- 50
- 51
- 52
- 53
- 54
- 55
- 56
- 57
- 58
- 59
- 60
- 61
- 62
- 63
- 64
- 65
- 66
- 67
- 68
- 69
- 70
- 71
- 72
- 73
- 74
- 75
- 76
- 77
- 78
- 79
- 80
- 81
- 82
- 83
- 84
- 85
- 86
- 87
- 88
- 89
- 90
- 91
- 92
- 93
- 94
- 95
- 96
- 97
- 98
- 99
python xxxx\slim\train_image_classifier.py ^
--train_dir= xxxx\tensorFlowlearning\slim\model ^
--dataset_name=myimages ^
--dataset_split_name=train ^
--dataset_dir=xxxx\tensorFlowlearning\slim\images^
--batch_size=10 ^
--max_number_of_steps=10000 ^
--model_name=inception_v3 ^
pause
多任务学习以及验证码识别
验证码生成
打开cmd窗口,下载captcha
pip install captcha
如果提示请求拒绝访问,则使用管理员打开cmd
captcha是用python写的生成验证码的库,它支持图片验证码和语音验证码,我们使用的是它生成图片验证码的功能。
# 验证码生成库
from captcha.image import ImageCaptcha  # pip install captcha
import numpy as np
from PIL import Image
import random
import sys

number = ['0','1','2','3','4','5','6','7','8','9']
# alphabet = ['a','b','c','d','e','f','g','h','i','j','k','l','m','n','o','p','q','r','s','t','u','v','w','x','y','z']
# ALPHABET = ['A','B','C','D','E','F','G','H','I','J','K','L','M','N','O','P','Q','R','S','T','U','V','W','X','Y','Z']

def random_captcha_text(char_set=number, captcha_size=4):
    # 验证码列表
    captcha_text = []
    for i in range(captcha_size):
        #随机选择
        c = random.choice(char_set)
        #加入验证码列表
        captcha_text.append(c)
    return captcha_text

# 生成字符对应的验证码
def gen_captcha_text_and_image():
    image = ImageCaptcha()
    #获得随机生成的验证码
    captcha_text = random_captcha_text()
    #把验证码列表转为字符串
    captcha_text = ''.join(captcha_text)
    #生成验证码
    captcha = image.generate(captcha_text)
    image.write(captcha_text, 'captcha/images/' + captcha_text + '.jpg')  # 写到文件

#数量少于10000,因为重名
num = 10000
if __name__ == '__main__':
    for i in range(num):
        gen_captcha_text_and_image()
        sys.stdout.write('\r>> Creating image %d/%d' % (i+1, num))
        sys.stdout.flush()
    sys.stdout.write('\n')
    sys.stdout.flush()

    print("生成完毕")
- 1
- 2
- 3
- 4
- 五
- 6
- 7
- 8
- 9
- 10
- 11
- 12
- 13
- 14
- 15
- 16
- 17
- 18
- 19
- 20
- 21
- 22
- 23
- 24
- 25
- 26
- 27
- 28
- 29
- 三十
- 31
- 32
- 33
- 34
- 35
- 36
- 37
- 38
- 39
- 40
- 41
- 42
- 43
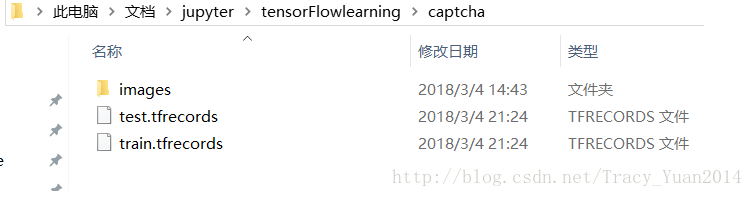
生成tf_record文件
import tensorflow as tf
import os
import random
import math
import sys
from PIL import Image
import numpy as np
_NUM_TEST = 500
_RANDOM_SEED = 0
DATASET_DIR = "XXXXX\tensorFlowlearning\captcha\images"
TFRECORD_DIR = "XXXXX\tensorFlowlearning\captcha"
def _dataset_exists(dataset_dir):
for split_name in ['train', 'test']:
output_filename = os.path.join(dataset_dir,split_name + '.tfrecords')
if not tf.gfile.Exists(output_filename):
return False
return True
def _get_filenames_and_classes(dataset_dir):
photo_filenames = []
for filename in os.listdir(dataset_dir):
path = os.path.join(dataset_dir, filename)
photo_filenames.append(path)
return photo_filenames
def int64_feature(values):
if not isinstance(values, (tuple, list)):
values = [values]
return tf.train.Feature(int64_list=tf.train.Int64List(value=values))
def bytes_feature(values):
return tf.train.Feature(bytes_list=tf.train.BytesList(value=[values]))
def image_to_tfexample(image_data, label0, label1, label2, label3):
return tf.train.Example(features=tf.train.Features(feature={
'image': bytes_feature(image_data),
'label0': int64_feature(label0),
'label1': int64_feature(label1),
'label2': int64_feature(label2),
'label3': int64_feature(label3),
}))
def _convert_dataset(split_name, filenames, dataset_dir):
assert split_name in ['train', 'test']
with tf.Session() as sess:
output_filename = os.path.join(TFRECORD_DIR,split_name + '.tfrecords')
with tf.python_io.TFRecordWriter(output_filename) as tfrecord_writer:
for i,filename in enumerate(filenames):
try:
sys.stdout.write('\r>> Converting image %d/%d' % (i+1, len(filenames)))
sys.stdout.flush()
image_data = Image.open(filename)
image_data = image_data.resize((224, 224))
image_data = np.array(image_data.convert('L'))
image_data = image_data.tobytes()
labels = filename.split('/')[-1][0:4]
num_labels = []
for j in range(4):
num_labels.append(int(labels[j]))
example = image_to_tfexample(image_data, num_labels[0], num_labels[1], num_labels[2], num_labels[3])
tfrecord_writer.write(example.SerializeToString())
except IOError as e:
print('Could not read:',filename)
print('Error:',e)
print('Skip it\n')
sys.stdout.write('\n')
sys.stdout.flush()
if _dataset_exists(TFRECORD_DIR):
print('tfcecord文件已存在')
else:
photo_filenames = _get_filenames_and_classes(DATASET_DIR)
random.seed(_RANDOM_SEED)
random.shuffle(photo_filenames)
training_filenames = photo_filenames[_NUM_TEST:]
testing_filenames = photo_filenames[:_NUM_TEST]
_convert_dataset('train', training_filenames, DATASET_DIR)
_convert_dataset('test', testing_filenames, DATASET_DIR)
print('生成tfcecord文件')
- 1
- 2
- 3
- 4
- 五
- 6
- 7
- 8
- 9
- 10
- 11
- 12
- 13
- 14
- 15
- 16
- 17
- 18
- 19
- 20
- 21
- 22
- 23
- 24
- 25
- 26
- 27
- 28
- 29
- 三十
- 31
- 32
- 33
- 34
- 35
- 36
- 37
- 38
- 39
- 40
- 41
- 42
- 43
- 44
- 45
- 46
- 47
- 48
- 49
- 50
- 51
- 52
- 53
- 54
- 55
- 56
- 57
- 58
- 59
- 60
- 61
- 62
- 63
- 64
- 65
- 66
- 67
- 68
- 69
- 70
- 71
- 72
- 73
- 74
- 75
- 76
- 77
- 78
- 79
- 80
- 81
- 82
- 83
- 84
- 85
- 86
- 87
- 88
- 89
- 90
- 91
- 92
- 93
- 94
- 95
- 96
- 97
- 98
- 99
- 100
- 101
- 102
- 103
验证码识别
其中网的包是tensorflow /模型主里面有个网的包,直接拷贝到下面代码文件的相同目录下即可
然后使用目录下的alexnet网
import os
import tensorflow as tf
from PIL import Image
from nets import nets_factory
import numpy as np
CHAR_SET_LEN = 10
IMAGE_HEIGHT = 60
IMAGE_WIDTH = 160
BATCH_SIZE = 25
TFRECORD_FILE = "xxxx/tensorFlowlearning/captcha/"
x = tf.placeholder(tf.float32, [None, 224, 224])
y0 = tf.placeholder(tf.float32, [None])
y1 = tf.placeholder(tf.float32, [None])
y2 = tf.placeholder(tf.float32, [None])
y3 = tf.placeholder(tf.float32, [None])
lr = tf.Variable(0.003, dtype=tf.float32)
def read_and_decode(filename):
filename_queue = tf.train.string_input_producer([filename])
reader = tf.TFRecordReader()
_, serialized_example = reader.read(filename_queue)
features = tf.parse_single_example(serialized_example,
features={
'image' : tf.FixedLenFeature([], tf.string),
'label0': tf.FixedLenFeature([], tf.int64),
'label1': tf.FixedLenFeature([], tf.int64),
'label2': tf.FixedLenFeature([], tf.int64),
'label3': tf.FixedLenFeature([], tf.int64),
})
image = tf.decode_raw(features['image'], tf.uint8)
image = tf.reshape(image, [224, 224])
image = tf.cast(image, tf.float32) / 255.0
image = tf.subtract(image, 0.5)
image = tf.multiply(image, 2.0)
label0 = tf.cast(features['label0'], tf.int32)
label1 = tf.cast(features['label1'], tf.int32)
label2 = tf.cast(features['label2'], tf.int32)
label3 = tf.cast(features['label3'], tf.int32)
return image, label0, label1, label2, label3
- 1
- 2
- 3
- 4
- 五
- 6
- 7
- 8
- 9
- 10
- 11
- 12
- 13
- 14
- 15
- 16
- 17
- 18
- 19
- 20
- 21
- 22
- 23
- 24
- 25
- 26
- 27
- 28
- 29
- 三十
- 31
- 32
- 33
- 34
- 35
- 36
- 37
- 38
- 39
- 40
- 41
- 42
- 43
- 44
- 45
- 46
- 47
- 48
- 49
- 50
- 51
- 52
image, label0, label1, label2, label3 = read_and_decode(TFRECORD_FILE)
image_batch, label_batch0, label_batch1, label_batch2, label_batch3 = tf.train.shuffle_batch(
[image, label0, label1, label2, label3], batch_size = BATCH_SIZE,
capacity = 50000, min_after_dequeue=10000, num_threads=1)
train_network_fn = nets_factory.get_network_fn(
'alexnet_v2',
num_classes=CHAR_SET_LEN,
weight_decay=0.0005,
is_training=True)
with tf.Session() as sess:
X = tf.reshape(x, [BATCH_SIZE, 224, 224, 1])
logits0,logits1,logits2,logits3,end_points = train_network_fn(X)
one_hot_labels0 = tf.one_hot(indices=tf.cast(y0, tf.int32), depth=CHAR_SET_LEN)
one_hot_labels1 = tf.one_hot(indices=tf.cast(y1, tf.int32), depth=CHAR_SET_LEN)
one_hot_labels2 = tf.one_hot(indices=tf.cast(y2, tf.int32), depth=CHAR_SET_LEN)
one_hot_labels3 = tf.one_hot(indices=tf.cast(y3, tf.int32), depth=CHAR_SET_LEN)
loss0 = tf.reduce_mean(tf.nn.softmax_cross_entropy_with_logits(logits=logits0,labels=one_hot_labels0))
loss1 = tf.reduce_mean(tf.nn.softmax_cross_entropy_with_logits(logits=logits1,labels=one_hot_labels1))
loss2 = tf.reduce_mean(tf.nn.softmax_cross_entropy_with_logits(logits=logits2,labels=one_hot_labels2))
loss3 = tf.reduce_mean(tf.nn.softmax_cross_entropy_with_logits(logits=logits3,labels=one_hot_labels3))
total_loss = (loss0+loss1+loss2+loss3)/4.0
optimizer = tf.train.AdamOptimizer(learning_rate=lr).minimize(total_loss)
correct_prediction0 = tf.equal(tf.argmax(one_hot_labels0,1),tf.argmax(logits0,1))
accuracy0 = tf.reduce_mean(tf.cast(correct_prediction0,tf.float32))
correct_prediction1 = tf.equal(tf.argmax(one_hot_labels1,1),tf.argmax(logits1,1))
accuracy1 = tf.reduce_mean(tf.cast(correct_prediction1,tf.float32))
correct_prediction2 = tf.equal(tf.argmax(one_hot_labels2,1),tf.argmax(logits2,1))
accuracy2 = tf.reduce_mean(tf.cast(correct_prediction2,tf.float32))
correct_prediction3 = tf.equal(tf.argmax(one_hot_labels3,1),tf.argmax(logits3,1))
accuracy3 = tf.reduce_mean(tf.cast(correct_prediction3,tf.float32))
saver = tf.train.Saver()
sess.run(tf.global_variables_initializer())
coord = tf.train.Coordinator()
threads = tf.train.start_queue_runners(sess=sess, coord=coord)
for i in range(6001):
b_image, b_label0, b_label1 ,b_label2 ,b_label3 = sess.run([image_batch, label_batch0, label_batch1, label_batch2, label_batch3])
sess.run(optimizer, feed_dict={x: b_image, y0:b_label0, y1: b_label1, y2: b_label2, y3: b_label3})
if i % 20 == 0:
if i%2000 == 0:
sess.run(tf.assign(lr, lr/3))
acc0,acc1,acc2,acc3,loss_ = sess.run([accuracy0,accuracy1,accuracy2,accuracy3,total_loss],feed_dict={x: b_image,
y0: b_label0,
y1: b_label1,
y2: b_label2,
y3: b_label3})
learning_rate = sess.run(lr)
print ("Iter:%d Loss:%.3f Accuracy:%.2f,%.2f,%.2f,%.2f Learning_rate:%.4f" % (i,loss_,acc0,acc1,acc2,acc3,learning_rate))
if i==6000:
saver.save(sess, "./captcha/models/crack_captcha.model", global_step=i)
break
coord.request_stop()
coord.join(threads)
- 1
- 2
- 3
- 4
- 五
- 6
- 7
- 8
- 9
- 10
- 11
- 12
- 13
- 14
- 15
- 16
- 17
- 18
- 19
- 20
- 21
- 22
- 23
- 24
- 25
- 26
- 27
- 28
- 29
- 三十
- 31
- 32
- 33
- 34
- 35
- 36
- 37
- 38
- 39
- 40
- 41
- 42
- 43
- 44
- 45
- 46
- 47
- 48
- 49
- 50
- 51
- 52
- 53
- 54
- 55
- 56
- 57
- 58
- 59
- 60
- 61
- 62
- 63
- 64
- 65
- 66
- 67
- 68
- 69
- 70
- 71
- 72
- 73
- 74
- 75
- 76
- 77
- 78
- 79
- 80
- 81
- 82
- 83
- 84
- 85
- 86
- 87
- 88
- 89
- 90
captcha_test
import os
import tensorflow as tf
from PIL import Image
from nets import nets_factory
import numpy as np
import matplotlib.pyplot as plt
CHAR_SET_LEN = 10
IMAGE_HEIGHT = 60
IMAGE_WIDTH = 160
BATCH_SIZE = 1
TFRECORD_FILE = "xxxx/tensorFlowlearning/captcha/"
x = tf.placeholder(tf.float32, [None, 224, 224])
def read_and_decode(filename):
filename_queue = tf.train.string_input_producer([filename])
reader = tf.TFRecordReader()
_, serialized_example = reader.read(filename_queue)
features = tf.parse_single_example(serialized_example,
features={
'image' : tf.FixedLenFeature([], tf.string),
'label0': tf.FixedLenFeature([], tf.int64),
'label1': tf.FixedLenFeature([], tf.int64),
'label2': tf.FixedLenFeature([], tf.int64),
'label3': tf.FixedLenFeature([], tf.int64),
})
image = tf.decode_raw(features['image'], tf.uint8)
image_raw = tf.reshape(image, [224, 224])
image = tf.reshape(image, [224, 224])
image = tf.cast(image, tf.float32) / 255.0
image = tf.subtract(image, 0.5)
image = tf.multiply(image, 2.0)
label0 = tf.cast(features['label0'], tf.int32)
label1 = tf.cast(features['label1'], tf.int32)
label2 = tf.cast(features['label2'], tf.int32)
label3 = tf.cast(features['label3'], tf.int32)
return image, image_raw, label0, label1, label2, label3
- 1
- 2
- 3
- 4
- 五
- 6
- 7
- 8
- 9
- 10
- 11
- 12
- 13
- 14
- 15
- 16
- 17
- 18
- 19
- 20
- 21
- 22
- 23
- 24
- 25
- 26
- 27
- 28
- 29
- 三十
- 31
- 32
- 33
- 34
- 35
- 36
- 37
- 38
- 39
- 40
- 41
- 42
- 43
- 44
- 45
- 46
image, image_raw, label0, label1, label2, label3 = read_and_decode(TFRECORD_FILE)
image_batch, image_raw_batch, label_batch0, label_batch1, label_batch2, label_batch3 = tf.train.shuffle_batch(
[image, image_raw, label0, label1, label2, label3], batch_size = BATCH_SIZE,
capacity = 50000, min_after_dequeue=10000, num_threads=1)
train_network_fn = nets_factory.get_network_fn(
'alexnet_v2',
num_classes=CHAR_SET_LEN,
weight_decay=0.0005,
is_training=False)
with tf.Session() as sess:
X = tf.reshape(x, [BATCH_SIZE, 224, 224, 1])
logits0,logits1,logits2,logits3,end_points = train_network_fn(X)
predict0 = tf.reshape(logits0, [-1, CHAR_SET_LEN])
predict0 = tf.argmax(predict0, 1)
predict1 = tf.reshape(logits1, [-1, CHAR_SET_LEN])
predict1 = tf.argmax(predict1, 1)
predict2 = tf.reshape(logits2, [-1, CHAR_SET_LEN])
predict2 = tf.argmax(predict2, 1)
predict3 = tf.reshape(logits3, [-1, CHAR_SET_LEN])
predict3 = tf.argmax(predict3, 1)
sess.run(tf.global_variables_initializer())
saver = tf.train.Saver()
saver.restore(sess,'./captcha/models/crack_captcha.model-6000')
coord = tf.train.Coordinator()
threads = tf.train.start_queue_runners(sess=sess, coord=coord)
for i in range(10):
b_image, b_image_raw, b_label0, b_label1 ,b_label2 ,b_label3 = sess.run([image_batch,
image_raw_batch,
label_batch0,
label_batch1,
label_batch2,
label_batch3])
img=Image.fromarray(b_image_raw[0],'L')
plt.imshow(img)
plt.axis('off')
plt.show()
print('label:',b_label0, b_label1 ,b_label2 ,b_label3)
label0,label1,label2,label3 = sess.run([predict0,predict1,predict2,predict3], feed_dict={x: b_image})
print('predict:',label0,label1,label2,label3)
coord.request_stop()
coord.join(threads)