一、安装步骤
-
软件版本:memcached-1.5.6、libevent-2.1.8-stable
-
安装步骤:
1、将软件包上传到服务器/opt目录下,并解压缩
tar zxvf /opt/memcached-1.5.6.tar.gz -C /opt          ## 服务端
tar zxvf /opt/libevent-2.1.8-stable.tar.gz -C /opt      ## 事件通知库
2、安装C语言编译器
yum -y install gcc gcc-c++
3、配置事件通知库
cd /opt/libevent-2.1.8-stable/
./configure --prefix=/usr/local/libevent
4、编译&安装
make && make install
5、配置memcached
cd /opt/memcached-1.5.6

./configure \
--prefix=/usr/local/memcached \
--with-libevent=/usr/local/libevent/
6、编译&安装
make && make install
7、将memcached放到bin目录中让系统所能识别
ln -s /usr/local/memcached/bin/* /usr/local/bin
8、启动memcached
memcached -d -m 32m -p 11211 -u root
9、关闭防火墙
systemctl stop firewalld && setenforce 0
二、memcached基本命令操作
- 使用telnet连接数据库
yum -y install telnet
telnet 127.0.0.1 11211    ## 从本地进行连接
- add:将 value(数据值) 存储在指定的 key(键) 中
命令格式:add key flags exptime bytes [noreply]
含义:key:键值 key-value 结构中的 key,用于查找缓存值
     exptime:缓存过期时间(以秒为单位,0 表示永远)
     bytes:在缓存中存储的字节数
例:
add username 0 0 7
1234567
- get:获取存储在 key(键) 中的 value(数据值) ,如果 key 不存在,则返回空
命令格式:get key1 key2 key3 ...
例:
get username
VALUE username 0 7
1234567
END
- gets:获取带有 CAS 令牌存 的 value(数据值) ,如果 key 不存在,则返回空
命令格式:gets key1 key2...
例:
VALUE username 0 7 1      ## 1代表更新因子(每次修改都会自增1)
1234567
END

更新数据:
set username 0 0 8
12345678
STORED

查看更新后的数据:
gets username
VALUE username 0 8 3
12345678
END
- replace(更新)要求:必须要有原本的键名以及键值
set:1、已存在的键值进行替换 2、若不存在则添加
命令格式:
replace key flags exptime bytes [noreply]
value
例:
replace username 0 0 9
123456789
STORED

gets username 0 9 4
VALUE username 0 9 4
123456789
END
- csa:用于执行一个"检查并设置"的操作它仅在当前客户端最后一次取值后,该key 对应的值没有被其他客户端修改的情况下, 才能够将值写入
命令格式:
cas key flags exptime bytes unique_cas_token [noreply]
value
例:
cas username 0 0 7 4      //检查更新,更新因子相等则更新否则返回
loding
STORED
- append:用于向已存在 key(键) 的 value(数据值) 后面追加数据
命令格式:
append key flags exptime bytes [noreply]
value
例:
append username 0 0 7    //键值后追加数据
example
- delete:用于删除已存在的 key(键)
命令格式:delete key [noreply]
例:
delete username
- 清除所有缓存数据
flush_all
- 显示状态信息
stats
三、客户端连接memcached
- 实验准备:提前在客户端上安装好LNMP架构
- 实验步骤:
1、解压客户端安装包
tar zxvf /opt/memcache-2.2.7.tgz -C /opt
2、因为默认memcache客户端没有配置脚本,所以需要使用PHP去生成
/usr/local/php5/bin/phpize
3、对客户端memcache进行相应配置
./configure \
--enable-memcache \
--with-php-config=/usr/local/php5/bin/php-config

PS:
[ 含义 ]
--enable-memcache \         ## 开启memcache
--with-php-config=/usr/local/php5/bin/php-config      ## 指向PHP中的配置
4、编译&安装
make && make install
5、修改PHP配置文件使其能识别memcache模块
vi /usr/local/php5/php.ini     ## 编辑PHP配置文件

添加以下内容:
extension_dir="/usr/local/php5/lib/php/extensions/no-debug-zts-20131226/"
extension=memcache.so
6、在客户端测试是否能连接服务器,编写一个测试页面
vi /usr/local/httpd/htdocs/index.php

写入以下内容:
<?php
$memcache = new Memcache();
$memcache->connect('192.168.50.134',11211);
$memcache->set('key','Memcache test Successfull!',0,60);
$result = $memcache->get('key');
unset($memcache);
echo $result;
?>
7、重启http服务
service httpd restart
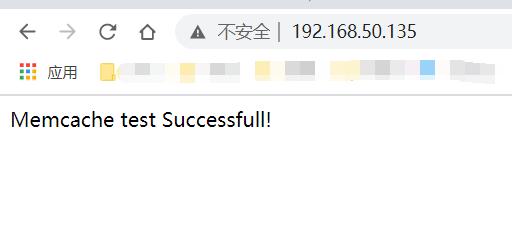
9、打开浏览器使用浏览器尝试连接menmcache
http://192.168.50.134/index.php    ## 我这里的客户机IP
如果返回 Memcache test Successfull! 说明配置成功!