2020年9月10日,华为鸿蒙系统升级至华为鸿蒙系统2.0版本.
探索之路开始
首先进入首页
https://developer.harmonyos.com/

点击快速入门

发现跳转到这个页面,页面提示我们去参考,DevEco Studio快速开始页面去完成搭建.
开启DevEco Studio之旅
1.安装DevEco Studio
当前只支持windows系统,
下载地址 : https://developer.harmonyos.com/cn/develop/deveco-studio

下载过程中需要一个华为账号,正常登上就行了.
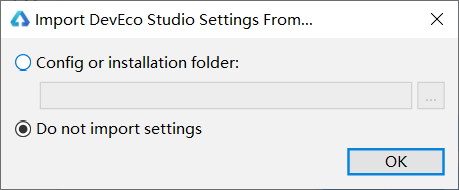
安装完成后打开,果不其然看到了Intellij IDAE的影子.
只不过需要自动安装JDK

2.创建工程
进入开始页,自然要创建一个新的工程.

选择一个可穿戴设备的项目,
输入信息

创建之后开始自动配置,配置期间弹出一些似曾相识的东西也不必奇怪。

3.尝试运行
点击运行按钮

运行试试

发现还没有设备 ,于是去Tools下面找到HVD Manager

自动下载之后,点击模拟器界面左下角的Refresh按钮,弹出一个页面,进入开发者实名认证.
4.实名认证

很快,用银行卡一下子就认证成功了
 虽然我在网站上的登陆是成功的,但是我的本地IDE始终无法登录,我重新Refresh之后页还是不行,

发现文档中字样:要取消阻止跨站跟踪和阻止所有Cookie功能。
首先关闭所有网页,然后再设置中,关掉cookie.但这种方式根本不行!!!!

后面,我关掉所有的浏览器,逐一尝试之后,回到了不阻止coooki,胡乱尝试,竟然就成功了。。。。。。。。。。。。。。
至于我如何成功的,我也不知道了。。。。。。。。。。。总之跳到这里。


回到IDE中,设备也有了。

5.再次启动
点击小蓝按钮,启动设备,这里选择的是启动穿戴设备。
 这个手表看起来还可以。。。。
这时候再启动调试程序。

哦哈哈哈,发现有设备了。

6.修改代码
既然环境没问题了,那就改改代码吧.
在这个目录下面,

修改代码
package com.yuchengtest.slice;

import ohos.aafwk.ability.AbilitySlice;
import ohos.aafwk.content.Intent;

import ohos.agp.components.DirectionalLayout;
import ohos.agp.components.DirectionalLayout.LayoutConfig;
import ohos.agp.components.Text;
import ohos.agp.colors.RgbColor;
import ohos.agp.components.element.ShapeElement;
import ohos.agp.utils.Color;
import ohos.agp.utils.TextAlignment;

public class MainAbilitySlice extends AbilitySlice {

    private DirectionalLayout myLayout = new DirectionalLayout(this);

    @Override
    public void onStart(Intent intent) {
        super.onStart(intent);
        LayoutConfig config = new LayoutConfig(LayoutConfig.MATCH_PARENT, LayoutConfig.MATCH_PARENT);
        myLayout.setLayoutConfig(config);
        ShapeElement element = new ShapeElement();
        element.setRgbColor(new RgbColor(100, 255, 255));
        myLayout.setBackground(element);

        Text text = new Text(this);
        text.setLayoutConfig(config);
        text.setText("kangyucheng");
        text.setTextColor(new Color(0xFF001028));
        text.setTextSize(60);
        text.setTextAlignment(TextAlignment.CENTER);
        myLayout.addComponent(text);
        super.setUIContent(myLayout);
    }

    @Override
    public void onActive() {
        super.onActive();
    }

    @Override
    public void onForeground(Intent intent) {
        super.onForeground(intent);
    }
}
结果。
